How to Paint Ceramic Tiles: A Step-by-Step Guide for a Lasting Finish
You can refresh ceramic tiles by thoroughly cleaning, sanding or etching for bite, then priming with a bonding primer suited to glazed or porous tile. Use a durable acrylic or epoxy paint in thin, even coats—brush edges, roll flats, and sand lightly between coats. Seal with epoxy or polyurethane for best wear, especially in wet areas. Expect touch-ups over time and follow curing windows; keep going to learn tools, timing, and troubleshooting tips.
How to Paint Ceramic Tiles: and What to Expect
You can paint ceramic tiles successfully with the right prep and products.
Expect to spend a weekend on a small room, pay $50–$300 for materials depending on size and finish, and get a durable surface that lasts several years with proper care.
I’ll walk you through the time, costs, and durability so you know what to expect.
One-sentence quick answer
Get realistic results: painting ceramic tiles can transform their look quickly, but expect to prep thoroughly, use proper primers and paints, and accept that durability won’t match new tile—recoats and touch-ups will be needed over time.
In one sentence: follow recommended steps for how to paint ceramic tiles—clean, sand, prime, use tile-specific paint, and seal—so you’ll get a cleaner, longer-lasting finish.
Summary of time, cost, and durability
Project scope and condition determine the biggest variables: expect a small backsplash or countertop refresh to take a weekend (6–12 hours of hands-on work across cleaning, sanding, priming, painting, and sealing) while a larger floor or full bathroom can stretch over 2–4 days to allow proper drying between coats.
You’ll spend $50–$300 for supplies, $300–$1,500 for pros, and get 3–7 years of wear with proper prep.
Basic Understanding What Painting Ceramic Tiles Really Means
Before you start, know which tile types and surfaces take paint well—porcelain, unglazed, and sanded tiles usually accept coatings better than slick glazed ones.
You’ll weigh painting’s lower cost and faster turnaround against replacement’s durability and permanent look.
Expect a painted finish to last several years at best, depending on prep, primer, paint quality, and how much wear the surface gets.
Types of ceramic tiles and surfaces suitable for painting
Tiles come in many formulations—glazed, unglazed, porcelain, and quarry—and each one takes paint differently, so you need to know what you’re working with before you start.
Glazed ceramic and some porcelain tiles accept etching and primers well. Unglazed and quarry tiles soak primers differently and may need sealing.
Avoid highly textured or damaged surfaces; smooth, intact tiles give the most reliable results.
Pros and cons of painting vs. replacing tiles
While painting your ceramic tiles can save time and money, it isn’t a permanent fix and demands careful prep and maintenance to look good long-term.
You can refresh color, cover stains, and avoid demolition costs, but painted surfaces may chip, need touch-ups, and won’t restore damaged tile or grout.
Replacing tiles costs more and takes longer, yet delivers durability and original material integrity.
Realistic longevity and factors that affect finish
You can expect painted ceramic tiles to last anywhere from a couple of years to a decade, depending on how you use and care for them.
Longevity hinges on prep, primer and paint quality, sealer type, traffic, moisture, and cleaning habits. High-traffic or wet areas shorten life; gentle cleaners, proper curing, and occasional touch-ups extend it.
Inspect and reseal as needed.
Tools, Materials, and Products You’ll Need
Before you start, gather the essential tools like sandpaper, a good-quality scraper, brushes or rollers, and clean rags.
Choose porcelain/ceramic-specific primers and paints, and consider optional supplies for decorative finishes—stencils, specialty paints, and an epoxy topcoat for durability.
Don’t forget safety gear (gloves, mask) and plan for proper ventilation while you work.
Essential tools
A few basic tools and the right materials will make painting ceramic tile faster, cleaner, and longer-lasting. Gather essentials before you start so prep and application go smoothly.
- Sandpaper (220–400 grit), scuff pads, and a sanding block for proper adhesion.
- High-quality tack cloths, degreaser, and painter’s tape for clean surfaces and crisp edges.
- Foam rollers, angled sash brush, and a small tray for even coverage.
Recommended paints and primers for tile (porcelain/ceramic-specific)
Choosing the right paint and primer makes the difference between a durable, professional-looking tile finish and one that chips or peels within months.
Use a high-bond primer formulated for glossy surfaces or tile/porcelain. Choose a 100% acrylic latex or water-based enamel paint labeled for tile, or a two-part epoxy paint for high-traffic areas.
Confirm compatibility and follow manufacturer cure times.
Optional supplies for decorative finishes (stencils, epoxy topcoat, etc.)
While you can get great results with just primer and paint, adding decorative supplies—stencils, textured rollers, metallic rubs, or an epoxy topcoat—lets you customize patterns, depth, and durability.
Choose stencils for repeatable designs, metallics for highlights, and epoxy for long-lasting protection. Use quality brushes and a small foam roller for crisp edges and smooth texture.
- Stencils and painter’s tape
- Metallic rubs and glazes
- Clear epoxy topcoat
Safety gear and ventilation considerations
Before you start sanding, priming, or applying coatings, make sure you’ve got the right safety gear and ventilation in place—protective gloves, a respirator rated for organic vapors and particulates, safety goggles, and good airflow will keep you safe from dust and fumes.
Open windows, use fans to direct air out, and consider a HEPA vacuum for cleanup. Replace filters and inspect gear regularly.
Step-by-Step Preparation The Foundation for a Lasting Finish
Before you paint, you’ll assess and test the tiles to make sure paint will adhere and note any chips, cracked grout, or uneven areas that need repair.
Clean and degrease thoroughly, then sand or etch using the right grit and method for your tile type.
Finally, mask and protect surrounding surfaces so your work stays neat and the finish lasts.
Assessing and testing the tile surface

Start by closely inspecting the tiles and grout to determine how well the surface will accept paint — look for cracks, loose tiles, heavy glazing, grease, or previous coatings that might prevent adhesion.
Test adhesion with a small scuff and a fingertip-tape test: sand a discreet spot, apply tape, pull sharply. If paint or glaze lifts, plan for additional prep or replacement before painting.
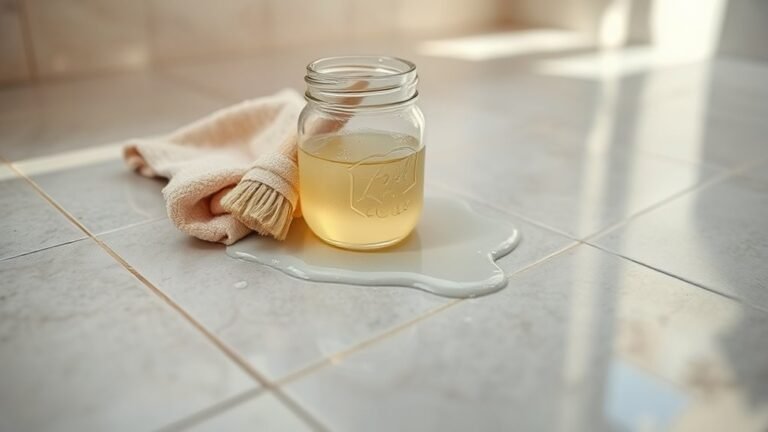
Cleaning and degreasing: step-by-step
1 essential step is thorough cleaning: grease, soap scum, and dirt will stop paint from bonding, so you need to remove them completely before moving on.
Scrub tiles and grout with a degreasing cleaner, rinse well, then dry. Use isopropyl alcohol or trisodium phosphate for stubborn residue.
Wipe again, let fully air-dry, and inspect for any remaining contaminants before priming.
Repairing chips, cracked grout, and uneven surfaces
Repairing chips, cracked grout, and uneven surfaces gives your painted tile job the smooth, durable foundation it needs.
Patch chips with a color-matched epoxy filler, press firmly, and let cure.
Replace or regrout cracked joints, tooling grout flush with tile.
Fill low spots with a thin, non-sanded grout or leveling compound, then wipe excess.
Allow full drying before painting.
Sanding and etching: methods and grit recommendations
Before you paint, you’ll need to roughen glazed or glossy tiles so primer and paint can bond; sanding or acid etching are the two reliable methods, each suited to different tile types and conditions.
Use 120–220 grit sandpaper for light scuffing, 80–100 grit for stubborn glaze, or follow manufacturer instructions for etching solution.
Wear gloves, eye protection, and rinse thoroughly after etching.
Masking and protecting surrounding areas
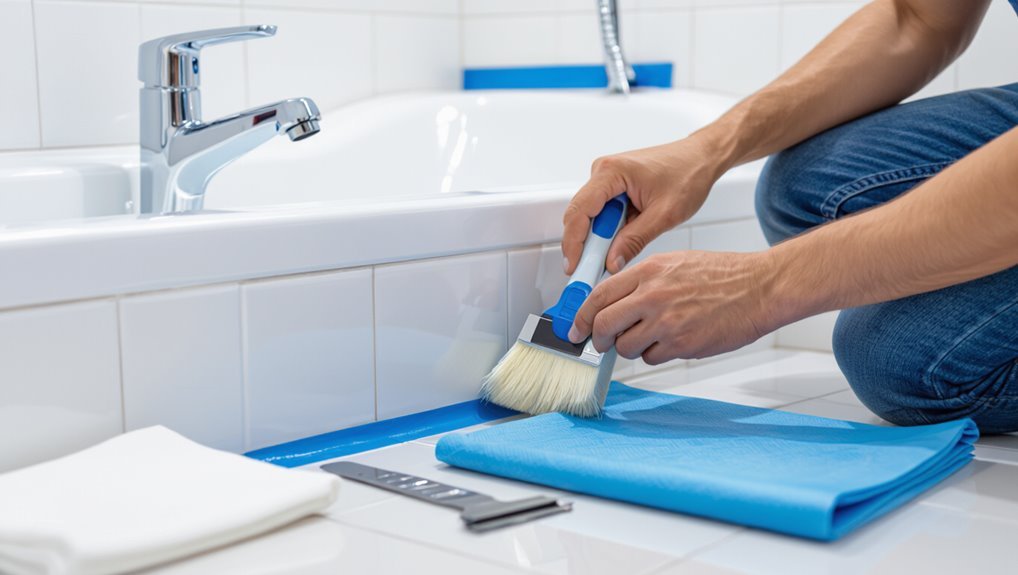
Once the tile surface is properly abraded or etched, you’ll want to protect everything around it so your neat work stays neat.
Paint splatters, drips, and primer overspray can ruin countertops, fixtures, and grout if you don’t mask them off.
Use painter’s tape to outline edges, plastic sheeting or drop cloths for broader coverage, and remove fixtures or cover hardware.
Check seals before priming.
Step-by-Step Painting Process
Now you’ll move from prep to painting, starting with choosing the right bonding or tile-specific primer and how to apply it.
I’ll cover tools, number of coats, drying times, and how to pick a durable finish and color.
Then we’ll go over brushing, rolling, spraying, layering, sanding between coats, and timing so your paint lasts.
Choosing primer: bonding primer vs. tile primer and application tips
Although both bonding primers and tile-specific primers aim to help paint stick, you’ll choose between them based on the tile material, glaze, and how much wear the surface will get. Pick bonding primer for slick glazed tiles; use tile primer for porous or high-traffic areas. Prepare by cleaning and etching per product instructions.
| Tile type | Primer choice | Durability |
|---|---|---|
| Glazed | Bonding | High |
| Porous | Tile | Moderate |
| Floor | Heavy-duty | Very high |
Applying primer: tools, coats, and dry times
Before you start priming, gather the right tools—good-quality brush or roller, a small angled brush for grout lines, a lint-free cloth, and the primer specified for your tile—and set up drop cloths and ventilation so you can work cleanly and safely.
Apply one thin coat, brush grout edges, roll flat areas, wait manufacturer dry time, sand lightly, then apply a second coat for full adhesion and even coverage.
Selecting paint finish and color for durability and look
When you pick a finish and color, think about traffic, moisture, and the look you want: semi-gloss and satin resist wear and clean easily for floors and backsplashes, while eggshell or matte hide imperfections better on less-used walls.
Choose a durable, tile-specific acrylic or epoxy paint; pick lighter tones to reflect light and hide scratches, darker hues for drama but more visible wear.
Painting techniques: brushing, rolling, and spraying when to use each

Pick the right application method—brushing, rolling, or spraying—based on tile size, texture, and the finish you chose, because each delivers different coverage, speed, and surface detail.
Use a brush for edges, grout lines, and touchups; a short-nap roller for flat field tiles and minimal texture; and a sprayer for fast, even coats on large areas or heavily textured tiles, keeping overspray controlled.
Layering, drying times, and sanding between coats
Although paint can look dry to the touch in under an hour, you’ll want to follow the manufacturer’s recommended flash and cure times and apply thin, even layers so each coat bonds properly; plan on longer waits for high-humidity or cool conditions.
Wait fully between coats, lightly sand with fine-grit paper to smooth imperfections, remove dust, and apply 2–3 coats for durability, letting final cure finish before use.
Sealing and Finishing for Long-Lasting Results
Now that the paint’s dry, you’ll pick a sealer—epoxy and polyurethane give the toughest finish while water-based options dry faster and yellow less.
Apply the sealer with even, overlapping strokes, follow manufacturer cure times, and avoid heavy coats that’ll run.
Finish by touching up grout lines, sealing exposed edges, and cleaning tools and spills before full cure.
Types of sealers and topcoats (epoxy, polyurethane, water-based)
A durable topcoat is what keeps your painted tile looking fresh and resisting chips and stains, so choosing the right sealer matters. You’ll pick epoxy for toughness, polyurethane for flexibility, or water-based for low odor and easy cleanup.
| Type | Strength | Best Use |
|---|---|---|
| Epoxy | Very high | High-traffic |
| Polyurethane | High | Kitchens |
| Water-based | Moderate | Small rooms |
How to apply sealer evenly and cure times
Those topcoat choices determine not just durability but how you’ll apply and let the sealer cure; each formula spreads, levels, and hardens differently, so follow the maker’s instructions closely.
Work in thin, even coats with a foam roller or high-density brush, overlap passes, and avoid pooling.
Observe recommended tack-free and full-cure times, keep ventilation steady, and don’t walk or grout until fully cured.
Finishing touches: grout touch-up, edge sealing, and cleanup
Finish strong by addressing grout, edges, and cleanup before the sealer fully hardens—these small steps prevent moisture intrusion, paint chipping, and messy edges.
Touch up grout with matching grout paint or thin epoxy, smooth joints, and remove excess.
Run a bead of silicone along the perimeter where tile meets fixtures.
Wipe tools and wipe stray sealer with solvent per product instructions for a crisp, durable finish.
Common Scenarios and Tailored Approaches
When you paint tiles, you’ll pick different products and prep methods depending on where they’re installed.
In bathrooms you need mold-resistant primers and waterproof topcoats, while kitchen backsplashes require heat- and grease-tolerant finishes that clean up easily.
For floors you’ll choose tougher, abrasion-resistant coatings and stricter prep than for walls because of load and wear.
Bathroom tiles (wet area considerations and mold resistance)
Because bathroom tiles get constant moisture, you’ll need products and methods that resist mold and stand up to wet conditions.
Choose mildew-resistant primer and epoxy or urethane topcoat, seal grout lines well, and guarantee surfaces are fully cured before exposure.
Ventilation and regular cleaning prevent buildup.
Test adhesion in a discreet spot, and follow manufacturer instructions for waterproofing and maintenance to guarantee longevity.
Kitchen backsplash (heat, grease, and cleaning durability)
Shifting from wet-area concerns in the bathroom, the kitchen backsplash faces a different set of challenges: heat from stovetops, oil splatter, and frequent scrubbing.
Prep thoroughly: degrease, sand lightly, and use a high-heat-tolerant primer.
Choose durable, washable paint or enamel and seal edges with heat-resistant, food-safe sealant.
Recoat as needed and clean gently to preserve the finish.
Floor tiles vs. wall tiles: load and abrasion considerations
Although wall tiles mainly handle splashes and looks, floor tiles take constant weight and foot traffic.
So you’ll need a different prep and product strategy for painted floors.
Sand thoroughly, fill grout low spots, and use a high-build primer.
Choose durable, abrasion-resistant epoxy or polyurethane paint and apply multiple thin coats.
Finish with a tough clear sealer rated for floors to prevent chipping.
Mistakes to Avoid and Troubleshooting
You’ll run into a few predictable problems—peeling, bubbling, and uneven coverage—usually from poor prep or wrong products.
I’ll show how to fix peeling edges, scratches, and discoloration with sanding, spot-priming, or targeted repainting.
You’ll also learn how to tell when a quick patch will do and when it’s time to redo the whole surface.
Common mistakes that cause peeling, bubbling, or uneven coverage
When paint peels, bubbles, or looks patchy, it’s almost always due to a few avoidable errors in prep, product choice, or technique; recognizing these will help you fix problems before they start.
- Skipping degreasing or sanding leaves slick surfaces, so paint won’t adhere.
- Using wrong primer or low-quality paint causes poor bonding and wear.
- Painting in high humidity or over-applied coats traps solvent, creating bubbles.
How to fix common problems (peeling edges, scratches, discoloration)
Start by evaluating the damage so you know whether you need a quick touch-up or a full redo: scrape loose paint, sand feathered edges, and clean the area to reveal the true extent of peeling, scratches, or discoloration.
For minor flaws, prime bare spots, fill scratches with epoxy or caulk, sand smooth, then repaint and seal.
For stains, clean with appropriate cleaners before repainting.
When to redo vs. when to patch
Although small chips and scuffs can often be fixed with targeted sanding, filler, and a fresh coat, you should choose a full redo when peeling is widespread, grout or tile integrity is compromised, or multiple repairs keep failing.
Patching saves time and money on isolated issues, but attempting quick fixes on structurally damaged or heavily contaminated tiles just delays a proper job and creates repeated frustration.
Decide by testing adhesion, inspecting grout, and weighing long-term cost versus short-term convenience.
Best Practices and Maintenance for a Lasting Finish
To keep your painted tiles looking great, follow tailored cleaning routines—gentle, pH-neutral cleaners for bathroom and kitchen tiles, and dry dusting or mild mopping for low-traffic areas.
Use preventive measures like mats in entryways, felt pads on furniture, and avoid harsh scrubs to protect the finish.
Check the surface regularly for dulling or wear and recoat or reseal as soon as you see signs of breakdown to extend the life of the paint.
Cleaning and care routines by surface type
When you tailor cleaning and care to the specific surface—glazed, matte, textured, or unglazed—you’ll keep your painted tiles looking fresh and protect the finish from premature wear.
The routines differ because each surface reacts differently to cleaners, abrasion, and moisture.
- Glazed: wipe with mild detergent, soft cloth, avoid scouring pads.
- Matte: use pH-neutral cleaner, gentle mop, blot stains.
- Textured/unglazed: brush debris first, dilute cleaners, air dry.
Preventive measures to prolong finish (mats, gentle cleaners)
A few simple precautions will keep your painted tiles looking newer longer.
Use washable mats in high-traffic or wet areas to limit dirt and abrasion.
Wipe spills promptly with a soft cloth and pH-neutral cleaner; avoid harsh scrubs, bleach, or ammonia.
Place felt pads under furniture and avoid dragging heavy items.
Regular gentle maintenance extends the finish without recoating.
When to recoat or reseal
Every 1–3 years you’ll likely need to recoat or reseal painted tiles, depending on traffic and moisture; check high-use areas more often and plan touch-ups when you see dulling, chipping, or loss of water resistance.
Clean surface, scuff lightly, and apply the same compatible sealer or topcoat. Test a small area first, allow full cure, and avoid heavy use for recommended time.
Quick Comparison: Painting Tiles vs. Alternatives
When you’re choosing between painting, reglazing, or replacing tiles, think about cost, time, and how long each option will last.
Painting is usually the cheapest and quickest fix but may not hold up as long as professional reglazing or full replacement.
Reglazing strikes a middle ground in durability and expense, while replacing gives the best longevity at the highest cost and time investment.
Painting vs. reglazing vs. replacing tiles
Considering cost, time, durability, and finish helps you choose between painting, reglazing, or replacing ceramic tiles. You’ll pick painting for quick updates, reglazing for a smoother, longer-lasting surface, or replacing for full design change. Use this simple table to weigh typical outcomes:
| Option | Finish | Suitability |
|---|---|---|
| Painting | Matte/semi-gloss | Quick refresh |
| Reglazing | Glossy/professional | Durable resurfacing |
| Replacing | Any | Complete overhaul |
Cost, time, and longevity comparison
Although the cheapest route, painting tiles costs far less and takes less time than reglazing or replacing. You’ll want to weigh that savings against shorter longevity and more frequent touch-ups.
Painting: low cost, weekend project, 3–7 years with maintenance.
Reglazing: moderate cost, pros do it in a day, 7–15 years.
Replacing: highest cost, days to weeks, decades if done well.
Project Checklist and Estimated Timetable
Before you start, check you’ve got the right primer, paint, sandpaper, masking tape, and safety gear on your pre-project checklist.
I’ll also give a sample timeline so you can see how long a small backsplash, a bathroom wall, or a floor project typically takes from prep to finish.
Use those estimates to plan your work in manageable steps and pick the best day for each stage.
Pre-project checklist
Once you’ve gathered your materials and inspected the tiles, create a concise project checklist and a realistic timetable so you know what to do and when to do it.
Prioritize safety, surface prep, and ventilation. Confirm paint type and quantities, test adhesion on a hidden tile, and schedule drying/curing windows to avoid rushing.
- Prep & clean
- Repair & sand
- Prime, paint, cure
Sample timeline for a small backsplash, bathroom wall, and floor project
Now that your checklist and timetable are set, lay out a sample schedule tailored to each project type so you know roughly how long every step will take and when you can use the space again.
Backsplash: 1 day prep, prime, paint; cure 24–48 hours.
Bathroom wall: 2 days prep/prime, 2 coats, cure 48–72 hours.
Floor: 3 days prep, durable primer, 2 coats, 72–96 hours cure.
FAQ
You’ll probably have questions about durability, maintenance, and whether painted tile works in wet areas.
I’ll cover how painted tile holds up to regular cleaning and moisture, typical lifespan, when a special primer is needed, what to do about grout lines, and whether painted tiles belong in showers or other high-moisture spots.
Read on for clear answers and practical recommendations.
Can painted tile withstand regular cleaning and moisture?
How well painted tile holds up to cleaning and moisture depends on the prep, paint, and sealer you use—when you sand, prime, use a quality tile-specific paint, and apply a durable topcoat, the finish will resist regular cleaning and dampness.
You should wait full cure time, clean with mild detergents, avoid abrasive pads, and recoat or touch up worn areas to maintain protection and appearance.
How long does painted tile typically last?
If you’ve followed proper prep, priming, and sealing, painted tile can hold up surprisingly well—but how long it lasts depends on several factors.
Expect 3–10 years for high-traffic floors or wet areas; walls and low-use surfaces often last longer.
Longevity hinges on surface prep, quality of paint and sealer, application technique, and maintenance. Touch-ups extend life.
Is special primer always necessary for ceramic tile?
Do you really need a special primer for ceramic tile? Not always, but it helps.
If tiles are glazed, smooth, or in wet areas, a high-bond or bonding primer improves adhesion and durability.
Porous or unglazed tile may accept paint with less prep.
Skip special primer only when surface profile and paint manufacturer explicitly allow it—otherwise use one.
Can I paint over grout lines or should I remove/replace grout?
Wondering whether you can simply paint over grout lines? You can paint them, but it’s usually better to repair or replace damaged, crumbling, or stained grout first.
Clean and seal intact grout, then use a small brush and suitable tile paint for neat coverage.
Regrouting guarantees adhesion and a uniform look; painted failing grout will chip and reveal imperfections.
Can painted tiles be used in showers or high-moisture areas?
Because showers get constant water and steam, painted tiles in those areas need extra prep and the right products to last, and they’ll still wear faster than glazed tile.
You can use them if you fully strip, etch, prime with a bonding primer, apply waterproof epoxy or marine-grade paint, and seal edges with silicone.
Expect periodic touch-ups and avoid heavy scrubbing.