How to Seal a Concrete Basement Floor Against Moisture and Cracks
You can stop basement moisture and seal hairline cracks by preparing the slab, fixing leaks, and applying the right products. Start by cleaning, testing for moisture, and repairing cracks with epoxy or hydraulic cement. Address exterior drainage, gutters, and grading to reduce pressure. Then use a vapor barrier or penetrating sealer, or an epoxy coating for heavy wear, following manufacturer instructions and curing times. Keep monitoring humidity and recoat as needed — continue for step-by-step methods and product choices.
How to Seal a Concrete Basement Floor Against Moisture and Cracks (Quick Answer & Hook)
Quick answer: clean and repair the slab, then apply a waterproofing sealer or epoxy to block moisture and fill hairline cracks.
This guide is for homeowners and DIYers dealing damp basements, minor cracks, or prepping for finished floors.
Follow these steps and you’ll get a drier, more durable floor that’s ready for paint, tile, or carpeting.
Quick Answer Best overall approach in one paragraph
If you want the simplest, most reliable way to keep moisture and cracks out of your basement floor, clean and repair the slab, apply a penetrating concrete sealer, and finish with an epoxy or polyurethane floor coating:
you’ll prepare the surface, fill cracks with appropriate epoxy or cementitious patch, use a silane/siloxane or silicate sealer, then topcoat for abrasion resistance—this is how to seal concrete basement floor effectively and durably.
Who this guide is for and expected results
Anyone tackling a damp, cracked, or finishing-needy basement floor will find this guide useful—you’ll get clear, step-by-step instructions and realistic outcomes whether you’re a DIY homeowner with basic tools or a pro looking for best practices.
You’ll learn to assess moisture, choose sealants, repair cracks, and apply coatings safely. Expect reduced moisture, fewer leaks, improved durability, and a ready-to-finish surface.
Basic Understanding Why Basements Leak and Crack
To seal your basement floor effectively, you need to know how moisture moves through concrete—by capillary action and as vapor—and what causes common cracks like settlement, shrinkage, freeze-thaw, or heavy loads.
Watch for signs such as damp patches, efflorescence, uneven floors, or widening fissures to tell moisture issues from structural ones.
Small cracks and minor dampness are often DIY fixes, but persistent water, large shifts, or foundation concerns mean you should call a professional.
How moisture moves through concrete (capillary action, vapor transmission)
Because concrete’s network of microscopic pores connects the ground to your basement air, moisture moves in predictable ways: capillary action pulls liquid water upward and through cracks and capillaries, while vapor transmission lets water vapor diffuse from wetter to drier zones.
You should monitor relative humidity, control external water, and use proper barriers or sealers to stop liquid migration and slow vapor flow.
Common causes of basement floor cracks (settlement, shrinkage, freeze-thaw, load)
When your basement floor develops cracks, it’s usually due to one or more predictable causes: soil settlement that lets parts of the slab drop, concrete shrinkage as it cures, freeze–thaw cycles that pry the slab apart, or excessive loads that overstress the concrete.
You should inspect for uneven settling, hairline shrinkage cracks, frost-damaged spalling, or cracks under heavy point loads to plan repairs.
Signs of moisture and structural problems to look for
Start by looking for obvious signs: damp spots, efflorescence (white mineral streaks), musty odors, or peeling paint along the walls and floor are clear indicators of moisture intrusion, while hairline cracks that widen over time, horizontal cracks in foundation walls, or floors that feel uneven suggest structural movement or settlement.
- Standing water after rain
- Darkened concrete patches
- Rusted metal or anchors
- Bulging or bowing walls
- Gaps at wall-floor joints
When to call a professional vs. DIY
Noticing damp spots or widening cracks tells you there’s a problem, but deciding whether to tackle it yourself or call a pro depends on scope and cause.
Do it yourself for hairline cracks, minor efflorescence, or simple sealing—if you’re handy and the issue is cosmetic.
Call a professional for active leaks, structural movement, pervasive water, or when fixes require excavation, waterproofing membranes, or foundation repair.
Overview of Sealing Strategies (Direct Answer + Comparison)
You’ve got three main approaches: surface sealers, penetrating sealers, and epoxy/coating systems, and each works differently for specific problems. Below is a quick comparison of interior vs. exterior fixes and how they stack up on cost, durability, and suitability to help you choose. Pick the method that matches your leak source and budget—often a combination gives the best long-term result.
| Strategy type | Quick takeaway |
|---|---|
| Surface vs. Penetrating vs. Epoxy | Surface seals block moisture on the face, penetrating chemically bonds below the surface, epoxy forms a durable coating |
| Interior vs. Exterior vs. Drainage fixes | Interior treats symptoms, exterior addresses source, drainage fixes prevent water buildup |
Surface sealers vs. penetrating sealers vs. epoxy/coating systems
Three main approaches will cover most basement floor needs: surface sealers, penetrating sealers, and epoxy/coating systems. Each works differently depending on what you want—surface protection, moisture control, or heavy-duty wear resistance.
You’ll choose surface sealers for sheen and light protection.
Penetrating sealers block water vapor without altering appearance.
Epoxy/coatings provide durable, easy-to-clean, impact-resistant surfaces.
Interior solutions vs. exterior waterproofing vs. drainage fixes
When choosing how to stop basement moisture, you’ll decide between interior solutions, exterior waterproofing, or fixing drainage — each targets different causes and gives different levels of protection.
Interior fixes like sealers and vapor barriers control incoming dampness; exterior waterproofing stops groundwater before it reaches walls; drainage fixes (gutters, grading, French drains) redirect water away.
Match strategy to source, not just symptoms.
Cost, durability, and suitability summary
Although costs vary by scope and materials, sealing a concrete basement floor generally balances upfront expense against long-term performance: you’ll pick based on budget, moisture level, and planned use. Epoxy and urethane cost more but last; sealers and crystalline treatments cost less but need reapplication. Choose drainage fixes for severe water.
| Option | Best for |
|---|---|
| Epoxy/urethane | High-traffic, durable |
| Silane/siloxane | Masonry protection |
| Crystalline | Active moisture |
| Drainage | Severe leaks |
Step-by-Step Preparation (Primary How-To Framework)
Before you seal, you’ll inspect the floor for moisture, map cracks, and note any spalled areas using basic tools and moisture tests.
Then you’ll clean thoroughly—sweep, pressure-wash, and use degreasers or efflorescence removers as needed.
Finally, you’ll repair cracks with epoxy or hydraulic cement and address water entry with a sump pump, interior drainage, or improved exterior grading.
Step 1 Inspect and diagnose the floor (tools, moisture tests, crack mapping)
Start by giving the floor a close, systematic inspection so you know exactly what you’re dealing with: look for visible cracks, spalling, efflorescence, stains, and areas of delamination.
Note unevenness or settling, and map each defect on a sketch of the room while you gather basic tools (flashlight, probe, wire brush, tape measure) and plan moisture tests to follow.
- mark crack locations
- record crack width/depth
- perform relative humidity tests
- test for cold spots
- note drainage/slope issues
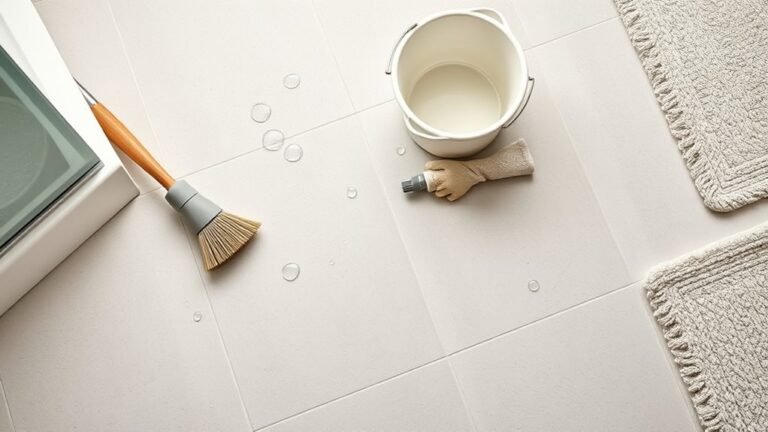
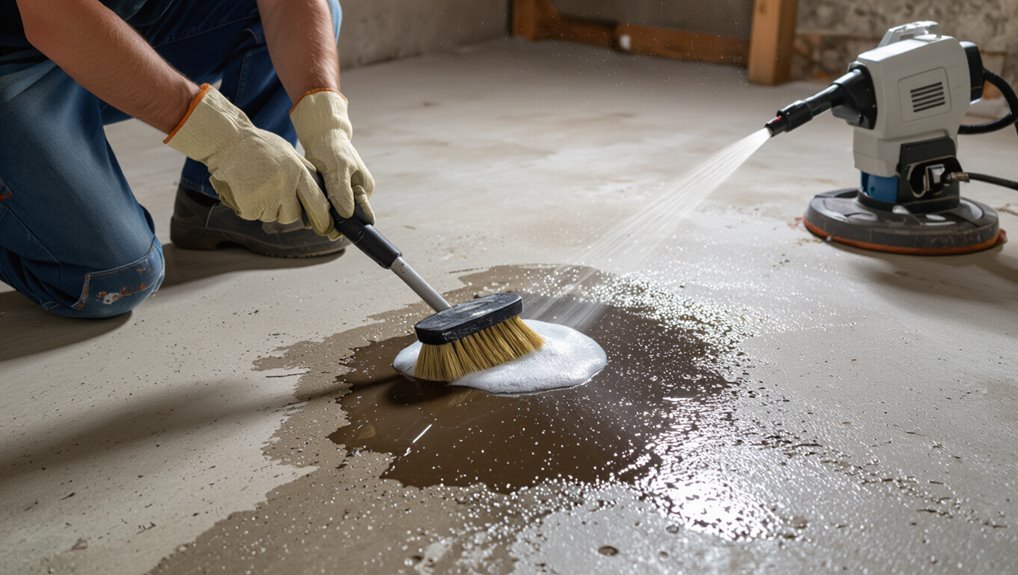
Step 2 Clean the surface (debris, oil, efflorescence; pressure washing, degreasers)
With your defects mapped and moisture checks noted, move on to cleaning so the repair materials and sealer can bond properly.
Remove debris, sweep, and vacuum thoroughly. Treat oil and grease with degreasers; rinse. Use a stiff brush or pressure washer for efflorescence and salts; let fully dry.
Follow surface prep with:
- sweep
- degrease
- pressure wash
- scrub salts
- dry completely
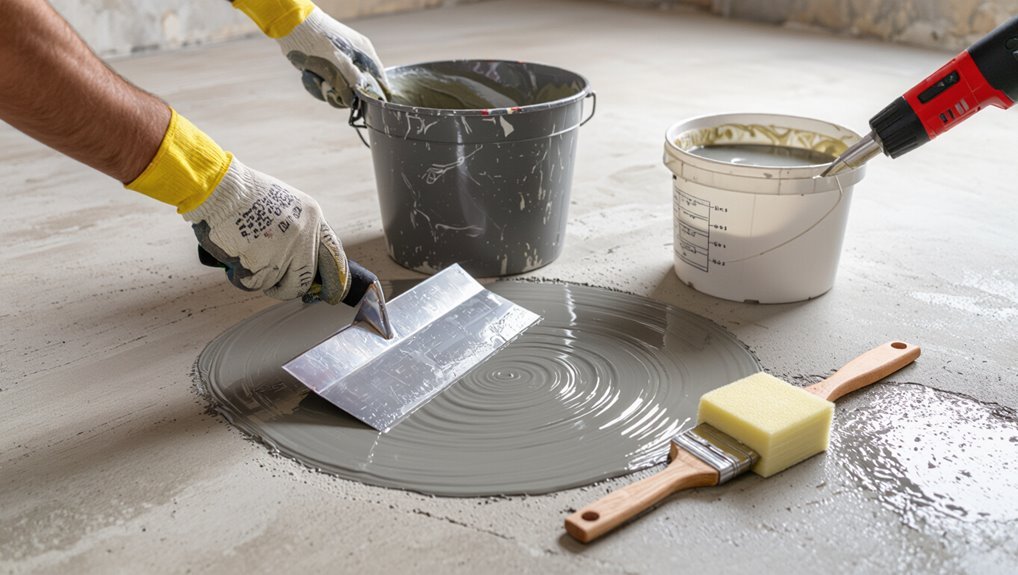
Step 3 Repair cracks and spalled areas (epoxy injection, hydraulic cement, patching compounds)
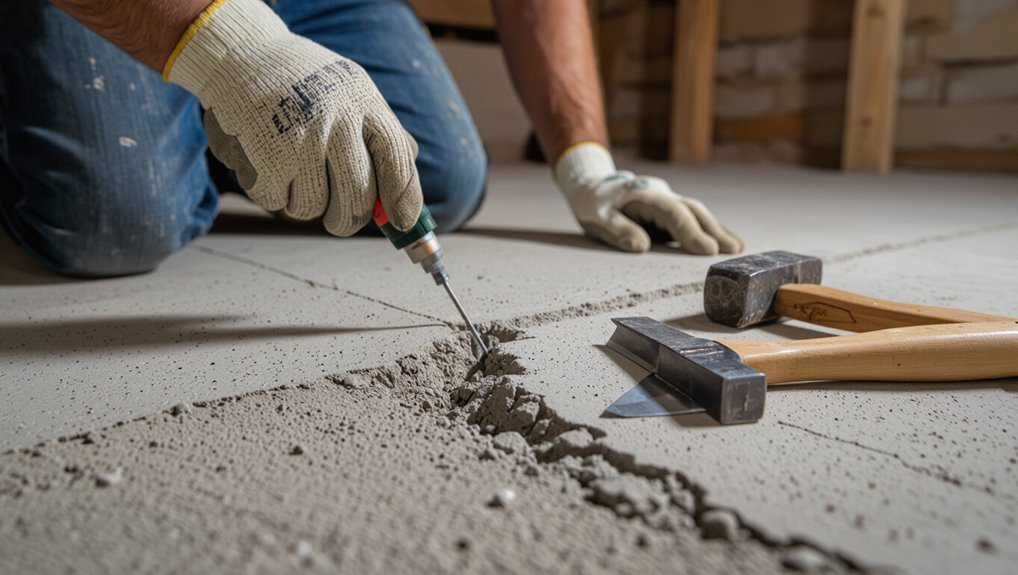
Repair visible cracks and spalled areas so the sealer can bond to a stable, even surface.
You’ll inspect, widen hairline cracks, and choose epoxy, hydraulic cement, or patching compounds. Follow cure times and remove loose debris.
- Identify active vs. dormant cracks
- Use epoxy for structural fills
- Use hydraulic cement for active leaks
- Feather edges for smoothness
- Follow manufacturer instructions
Step 4 Address underlying water entry (sump pump, interior drainage, exterior grading)
Although sealing the floor will slow moisture, you should first address how water’s getting in so the sealer isn’t fighting a bigger problem.
Fix grading, install gutters, add exterior drainage, or put in a sump and interior drain to control entry points.
Consider these actions:
- Reroute downspouts away from foundation
- Regrade soil slope
- Install French drain
- Add a sump pump
- Seal foundation cracks
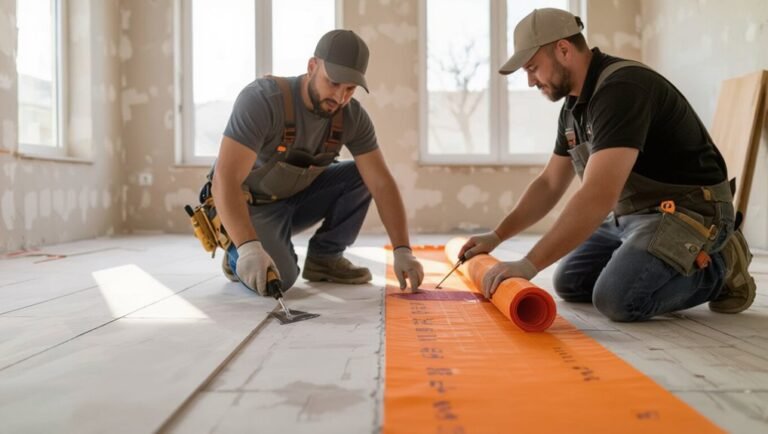
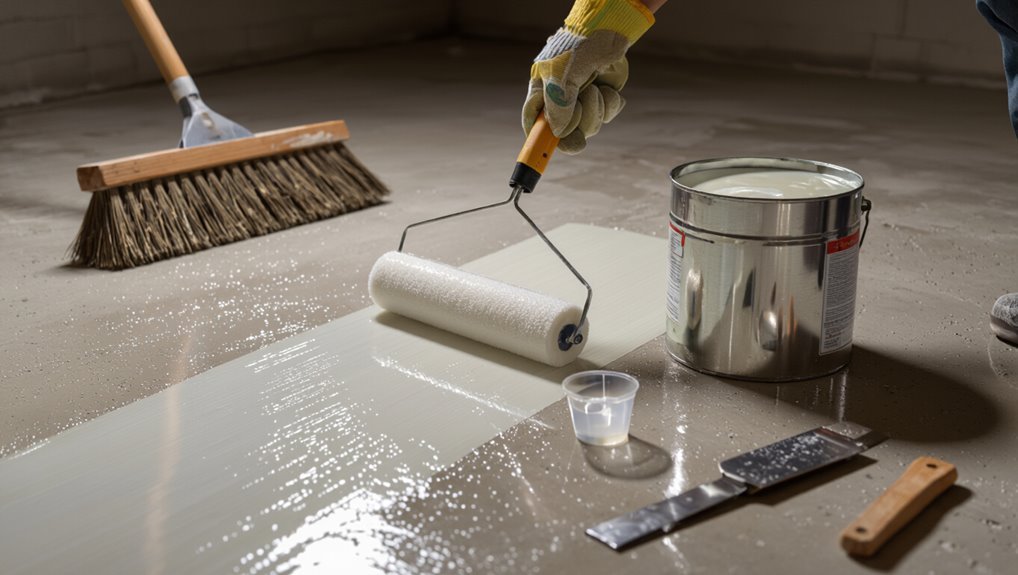
Step-by-Step Sealing and Coating Application
Now you’ll pick the right product for your situation—penetrating sealer, epoxy, or polyurethane—based on moisture levels and expected wear.
Then you’ll lay down a moisture-vapor barrier or primer with the proper tools and coverage before mixing and applying the main seal or coating, following manufacturer dry times and techniques.
Finally, consider an optional topcoat or non-slip finish, allow full cure, and perform moisture retests and a final inspection.
Step 5 Choose the right product for your problem (penetrating sealer, epoxy, polyurethane)
Once you’ve prepared the floor, pick the product that matches the problem you’re solving—water intrusion, stains, wear, or aesthetics—because the wrong coating won’t last. Choose penetrating sealers for deep moisture control, epoxy for durability and chemical resistance, and polyurethane for abrasion and UV stability. Compare quickly:
| Issue | Best option | Benefit |
|---|---|---|
| Moisture | Penetrating | Deep seal |
| Wear | Epoxy | Tough surface |
Step 6 Apply moisture-vapor barrier/primer (conditions, tools, coverage rates)
Before you coat or paint, apply a moisture‑vapor barrier or primer so the sealer bonds and moisture won’t compromise the system; choose a product rated for concrete, check temperature and humidity limits on the label, and plan tools and coverage so you don’t run out mid‑job.
- Sweep and vacuum thoroughly
- Use a low‑nap roller or sprayer
- Follow label coverage (sq ft/gal)
- Maintain recommended temp/humidity
- Allow full cure before next step
Step 7 Apply primary seal/coating (mixing, application technique, dry times)
Mix and apply the primary sealer according to the manufacturer’s mixing instructions, working in manageable sections so the coating goes down evenly and you don’t trap bubbles or lap marks.
You’ll roll or squeegee smoothly, watch pot life, and respect tack and cure times. Avoid puddles; maintain ventilation.
- Mix thoroughly
- Work in zones
- Monitor pot life
- Smooth out bubbles
- Check cure time
Step 8 Optional topcoat and finish (non-slip additives, UV exposure considerations)
If you want extra durability, a clear topcoat will protect the primary sealer and let you add a non-slip finish or UV-resistant layer where needed.
Choose a compatible topcoat (epoxy or polyurethane), broadcast anti-slip grit or aluminum oxide while wet, and roll evenly.
For sun-exposed edges use UV-stable polyurethanes to prevent ambering.
Follow manufacturer recoat windows and wear PPE.
Step 9 Cure time, testing, and re-inspection (moisture retest methods)
Once the sealer and any topcoat are applied, let them cure fully according to the manufacturer’s schedule before subjecting the floor to traffic or moisture testing.
After curing, perform a moisture retest—use a calcium chloride kit, humidity probe, or taped plastic sheet.
Record results, compare to specs, and re-inspect for pinholes, adhesion, or cracks.
Address issues before regular use and recoat if needed.
Preventive Measures and Best Practices
Before sealing, you’ll want to address exterior grading and make sure gutters and downspouts channel water well away from the foundation.
Inside, control humidity and coordinate with your HVAC to keep moisture levels stable.
Finally, set up a routine inspection and maintenance schedule to catch issues early.
Exterior grading, gutters, and downspout management
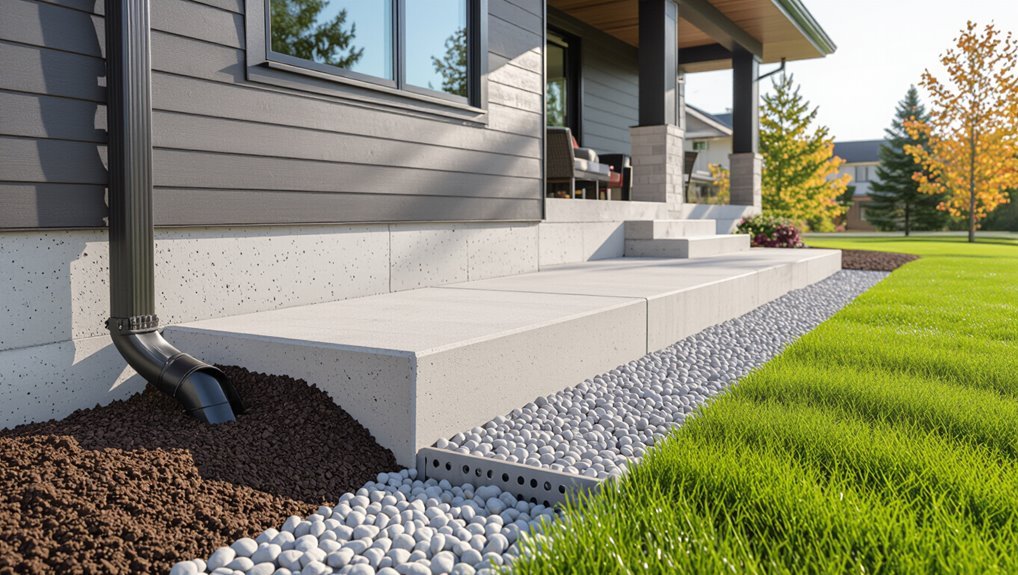
Good exterior grading and well-managed gutters and downspouts keep water away from your foundation, which is the simplest and most effective step to prevent basement moisture and protect a sealed concrete floor.
You should:
- Slope soil away from foundation 6+ inches over 10 feet.
- Clean gutters twice yearly.
- Extend downspouts 4–6 feet.
- Repair leaks and pitch.
- Install splash blocks or underground drains.
Maintaining indoor humidity and HVAC considerations
If you keep indoor humidity in the recommended range and coordinate HVAC settings with your basement’s use, you’ll prevent condensation, mold growth, and stress on a sealed concrete floor.
Balance temperature and ventilation, use dehumidification, and direct HVAC airflow appropriately.
- Set humidity to 30–50%
- Use a basement-rated dehumidifier
- Seal duct leaks
- Schedule HVAC zoning
- Monitor with a hygrometer
Routine inspections and maintenance schedule
A simple, regular inspection routine will catch small problems before they become costly repairs, so plan to check your sealed basement floor at least quarterly and after any unusual weather or plumbing events.
You’ll note wear, moisture, and cracks, then act quickly.
- Look for sealant wear
- Test for damp spots
- Check expansion joints
- Inspect nearby plumbing
- Recoat when needed
Common Mistakes and How to Avoid Them
Don’t skip moisture testing—you’ll waste coatings if the slab is still damp.
Make sure you repair cracks and clean contaminants before applying anything, and don’t pick a standard sealer when you’re dealing with hydrostatic pressure.
Also check and address exterior water sources so you’re not treating symptoms instead of the cause.
Skipping proper moisture testing before sealing
Because moisture drives most basement floor failures, skipping proper testing before you seal is a costly mistake you’ll want to avoid.
You should measure surface and in-slab moisture (plastic sheet, calcium chloride, or relative humidity probes) so you know if conditions suit sealers or require mitigation.
Testing prevents adhesion failures, bubbling, mold, and wasted materials, saving time and money on corrective work.
Applying coatings over untreated cracks or contaminants
Skipping moisture tests can leave you with a sealed surface that still hides structural problems, and those same issues spell trouble if you coat over untreated cracks or contaminants.
You should clean oil, efflorescence, and dust, then repair cracks with appropriate fillers and allow full cure.
Otherwise coatings bridge gaps, trap moisture, and fail prematurely—do the prep to guarantee lasting protection.
Choosing wrong product for hydrostatic pressure situations
When hydrostatic pressure’s at play, picking a standard surface coating can leave you with a failing floor—so choose products designed to stop water from below, not just repel surface moisture.
If you use acrylics or simple sealers, they’ll blister or delaminate.
Instead, opt for vapor barriers, crystalline waterproofers, or injection systems rated for pressure.
Test and follow manufacturer specs for prep and application.
Ignoring exterior water sources
If you ignore how rain, gutters, grading, or downspouts funnel water toward your foundation, any interior sealing you do will be fighting a losing battle.
Check roof drainage, extend downspouts, regrade soil away from the house, and fix clogged gutters.
Addressing exterior entry points stops persistent moisture, reduces hydrostatic pressure, and lets interior sealers perform as designed, preventing recurring leaks and damage.
Product Recommendations and When to Hire Pros
For simple moisture you’ll want breathable sealers or waterproofing paints.
For structural cracks use epoxy or polyurethane injections.
For finished basements consider vapor barriers plus a low-VOC floor coating.
If you’re seeing structural movement or signs of hydrostatic pressure you should call a professional contractor.
When you do, ask about experience with similar jobs, warranty details, permitting, and get a written checklist and multiple quotes to compare.
Recommended product types by problem (moisture only, structural cracks, finished basements)
Think of the problem first—moisture alone, structural cracking, or a finished basement each call for different products and approaches, and choosing the right one saves time and money.
- Moisture only: vapor barrier + acrylic or penetrating sealer
- Hairline cracks: epoxy injection
- Active structural cracks: urethane or structural epoxy
- Finished basements: low-VOC sealers, moisture mitigation systems
- When unsure: consult a pro
Signs you need a professional contractor (structural movement, persistent hydrostatic pressure)
When you notice shifting floors, widening cracks, or doors that suddenly stick, it’s time to call a professional—these are signs of structural movement that DIY sealers won’t fix.
Also hire help if water returns after repeated repairs, floor heaves, or persistent dampness from hydrostatic pressure.
A contractor will diagnose underpinning needs, exterior drainage fixes, and proper sump or interior drainage systems rather than temporary patches.
What to ask contractors and checklist for quotes
What should you ask a contractor before signing a quote? Ask about licensing, insurance, warranty length, material brands, and timeline.
Get everything written. Verify references and recent project photos.
- License and insurance proof
- Detailed scope and materials listed
- Warranty terms and exclusions
- Start/completion dates and delays policy
- References and photos of similar jobs
Cost Estimates and Timeframes
You’ll want to weigh typical DIY material costs—usually a few hundred dollars for cleaners, patching compounds, and sealers—against professional jobs, which can run from several hundred to a few thousand dollars.
Plan for time per step: prep and repairs may take a few hours to a day, sealing and curing add another day or more depending on product instructions.
Knowing these ranges helps you schedule the project and decide if you’ll tackle it yourself or hire help.
Typical DIY material costs vs. professional job ranges
Expect to spend a few hundred dollars on materials if you do the job yourself, while hiring a pro usually runs from several hundred to a few thousand dollars depending on size and finish; this paragraph compares typical DIY material costs and time versus what contractors charge and why. You’ll save money DIY but trade convenience and warranty for labor.
| Item | Typical Cost |
|---|---|
| DIY materials | $150–$600 |
| Professional job | $500–$3,500 |
Time required per step and overall project timeline
Knowing the cost differences helps set expectations for how much time you’ll invest, too.
Prep (cleaning, patching) takes 4–8 hours. Primer and sealer applications need 2–4 hours each, plus 24–48 hours curing between coats.
Epoxy or finish coats add 4–6 hours and similar cure time. Overall, plan 2–5 days for a DIY job; pros may finish in 1–2 days.
Frequently Asked Questions (FAQ)
You probably have specific questions like whether sealing will stop active leaks, how long different sealers last, or if sealing will prevent mold.
You might also wonder about applying sealers over painted or previously coated concrete and how to test that your slab is dry enough.
Below are clear answers to each of these common concerns.
Can sealing a basement floor stop active leaks?
Can sealing a concrete basement floor stop active leaks?
No—sealers can reduce moisture and slow minor seepage, but they won’t fix active leaks from cracks, hydrostatic pressure, or plumbing failures.
You should locate and repair the leak source first (inject crack sealants, apply exterior drainage fixes, or fix pipes).
Use sealers afterward to prevent residual dampness and protect the repaired floor.
How long do different sealers and coatings typically last?
Because different products bond and wear differently, the lifespan of basement floor sealers and coatings varies a lot — from a year or two for thin topical sealers to 10–20 years for high-quality epoxy or polyurea systems when applied to a properly prepared, dry floor.
You’ll get intermediate life from penetrating silanes/siloxanes (3–7 years) and acrylics (2–5 years); traffic, moisture, and prep shorten these ranges.
Will sealing prevent mold growth?
While sealing a concrete basement floor won’t guarantee you zero mold, it can greatly reduce the conditions mold needs by blocking moisture entry and making cleanup easier.
You’ll still need to control humidity, fix leaks, and ventilate to stop spores from flourishing. Use dehumidifiers, repair cracks, and remove organic debris; sealing is one effective layer, not a complete mold-proof solution.
Can I apply sealers over painted or previously coated concrete?
Often the key question is whether a new sealer will bond to the existing coating — and the short answer is: usually, but only after proper prep.
You’ll need to inspect for flaking, adhesion, and incompatible coatings (like oil-based paints). Strip loose material, clean thoroughly, and sand glossy surfaces.
Perform a small adhesion test before full application to verify proper bonding and performance.
How do I test if my concrete is dry enough to seal?
How can you tell if your concrete is dry enough to seal? Use the plastic-sheet test: tape a 2×2 ft plastic sheet to the floor, seal edges, wait 24–48 hours.
If condensation or darkening appears, it’s too wet.
Also check moisture with a concrete moisture meter or calcium chloride test.
Aim for manufacturer-recommended moisture levels before sealing.
Checklist: Ready-to-Apply Basement Floor Sealing Plan
Before you start pouring or rolling on sealer, make a concise checklist that confirms the floor, tools, and conditions are ready so you won’t interrupt the cure or miss a step.
You’ll verify moisture, repairs, ventilation, temperature, and tools before applying.
- Moisture test passed
- Cracks patched and cleaned
- Appropriate sealer chosen
- Temp and humidity acceptable
- Brushes/rollers and PPE ready