
How to Install Rubber Flooring in a Gym, Garage, or Basement
You can install rubber flooring in a gym, garage, or basement by picking the right product, prepping the subfloor, and using interlocking, loose‑lay, or fully bonded methods based on moisture and traffic. Measure carefully, allow material to acclimate, repair and clean the slab, and follow manufacturer adhesive or locking instructions. Thicker tiles or rolls suit gyms, oil‑resistant options work for garages, and moisture‑tolerant underlayment helps basements — keep going to learn exact steps, tools, and tips.
Quick Answer Can You Install Rubber Flooring in a Gym, Garage, or Basement?
Yes — you can install rubber flooring in a gym, garage, or basement, and each space just needs a slightly different approach.
For gyms, choose thicker, impact-absorbing tiles or rolls; for garages, pick oil- and chemical-resistant options and consider peel-and-stick or interlocking tiles; for basements, use moisture-tolerant underlayment and glue-down or interlocking systems.
Follow manufacturer guidelines for subfloor prep and installation to guarantee durability and proper performance.
One-paragraph summary of suitability and methods
If you need tough, cushioned, and moisture‑resistant flooring, rubber works well in gyms, garages, and basements—each space just needs a different approach: you can learn how to install rubber flooring for each by choosing interlocking tiles, rolls, or glued sheets, prepping the subfloor, and sealing edges.
- gym: shock absorption
- garage: oil resistance
- basement: moisture barrier
- install: tools, layout, adhesive
Basics What Is Rubber Flooring and Why Use It?
Rubber flooring comes in several forms — rolls, tiles, interlocking planks, and poured rubber — so you can pick the format that suits your space and skill level.
You’ll appreciate its durability, shock absorption, noise reduction, and resistance to moisture for gyms, garages, and basements.
However, it can be heavy, costly, or less attractive in some settings, so consider alternative materials if aesthetics, budget, or subfloor constraints matter more.
Types of rubber flooring (rolls, tiles, interlocking, poured)
Choosing the right type of rubber flooring comes down to matching performance and installation needs: rolls suit large, seamless areas; tiles offer design flexibility and easy replacement; interlocking tiles give a DIY-friendly, glue-free option; and poured rubber creates a permanent, seamless surface for heavy-duty use.
| Type | Best use |
|---|---|
| Rolls | Large gyms |
| Tiles | Patterned rooms |
| Interlocking | Quick DIY |
Key benefits (durability, shock absorption, noise reduction, moisture resistance)
Durability and resilience make rubber flooring a practical choice for busy spaces, because it stands up to heavy foot traffic, impacts, and equipment without showing wear quickly.
You’ll also get comfort, quieter workouts, and protection from spills.
Benefits include:
- Long-lasting wear resistance
- Excellent shock and joint protection
- Significant noise reduction
- Water and moisture resistance
Limitations and when to consider alternatives
Those benefits don’t mean rubber’s right for every situation, so you should weigh its limits before committing.
Rubber can trap odors, fade in UV light, and show gouges from sharp tools. It’s heavy, may require subfloor prep, and can be pricey for large areas.
Consider vinyl, epoxy, or interlocking tiles when you need lighter, brighter, or more repairable surfaces.
Planning Your Project Measurements, Budget, and Materials
Start by measuring your floor’s length and width, calculate the square footage, and add 5–10% for waste so you know how much material to buy.
Factor in costs for the rubber itself, tools, adhesive, and any labor or delivery fees to set a realistic budget.
Then pick the right product for the room—thicker, high‑density tiles or rolls for a gym, durable solid tiles for a garage, and moisture‑resistant options for a basement.
How to measure floor area and calculate material needs
Before you buy anything, measure the room carefully so you know exactly how much rubber flooring you’ll need and can avoid costly overbuying or last-minute shortages.
Measure length and width, note alcoves and door swings, and sketch a diagram.
Use this checklist:
- Record room dimensions in feet or meters
- Calculate total square footage
- Add 5–10% for waste and seams
- Round up to available roll/tile sizes
Cost factors: materials, tools, adhesive, labor
A few key cost factors will determine your rubber flooring budget: the type and thickness of material, the tools and adhesive you’ll need, and whether you’ll hire labor or install it yourself. Estimate material cost per sq ft, add tool/adhesive expenses, and compare DIY vs pro labor.
| Item | Typical cost range |
|---|---|
| Material | $2–$8 / sq ft |
| Installation | $0–$4 / sq ft |
Choosing the right product for location: gym vs garage vs basement
Now that you’ve scoped costs and tools, you’ll want to match the rubber product to how the space will be used.
Choose thickness, texture, and material based on activity and exposure. Consider drainage, chemical resistance, and insulation. Pick tiles or rolls accordingly.
- Gym: thick, shock-absorbing tiles
- Garage: oil-resistant rolls
- Basement: moisture-resistant underlayment
- Multiuse: durable interlocking tiles
Prep Work Subfloor Inspection and Site Preparation
Before you lay any rubber, inspect the subfloor for flatness, cracks, and moisture—test concrete for dampness, patch and level as needed.
If you’ve got wood or existing flooring, make sure it’s clean, rigid, and properly fastened or removed.
Gather the right tools and safety gear—trowels, grinders or sanders, patching compound, a moisture meter, knee pads, gloves, and eye protection—so you’re ready to work.
Inspecting and preparing concrete subfloors (leveling, patching, moisture testing)
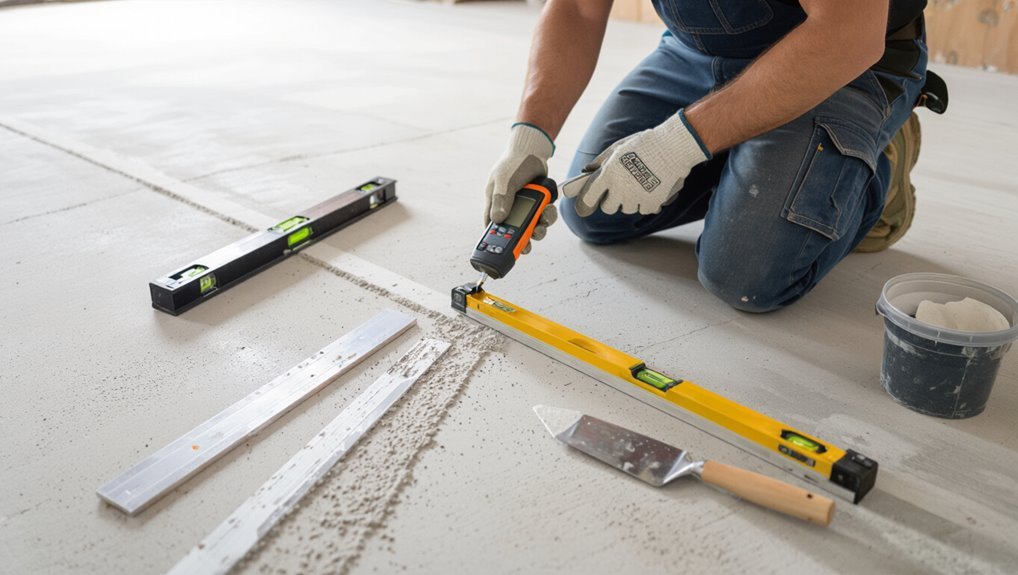
When you inspect a concrete subfloor, check for levelness, cracks, surface contamination, and moisture so you can plan any necessary leveling, patching, or testing; these steps determine whether adhesives will bond and whether the floor will accept rubber without failures.
Address issues by:
- Measuring flatness with a long straightedge
- Cleaning oils and debris thoroughly
- Patching cracks and spalls with hydraulic cement
- Performing moisture tests (RH or calcium chloride)
Preparing wooden subfloors and existing flooring
Although wooden subfloors and existing floor coverings can be easier to work with than concrete, you still need to inspect and prepare them carefully to secure the rubber flooring bonds and performs well.
Check for level, rot, and squeaks. Remove loose coverings. Sand glossy finishes. Ascertain stable, dry substrate.
- Level low spots
- Repair rotted joists
- Replace loose boards
- Clean and decontaminate
Required tools and safety gear
Because proper tools and safety gear make the job faster and protect you from common hazards, gather them before you start inspecting or prepping the subfloor.
You’ll need durable, accurate equipment and protective gear to work efficiently and safely.
- Measuring tape, chalk line, straightedge
- Utility knife, heavy-duty scraper, pry bar
- Hammer, drill, floor roller
- Safety glasses, gloves, knee pads, respirator
Installation Overview Methods Compared
Now you’ll compare the common installation methods so you can pick what fits your space and skill level.
I’ll cover loose-lay tiles and rolls, interlocking tiles, fully bonded (glued) installs, and poured seamless rubber—each with clear pros and cons.
That way you’ll know trade-offs for cost, durability, ease of repair, and finish.
Loose-lay tiles and rolls (pros and cons)
When you’re deciding between loose-lay tiles and rolls, think about how you’ll use the space and how much time you want to spend on installation:
Loose-lay tiles are easy to position, replace, and work well for irregular areas, but can shift without adhesive in high-traffic spots.
Rolls provide seamless coverage, better moisture resistance, and faster installation for large areas, yet they’re harder to cut and repair.
Interlocking rubber tiles (pros and cons)
If you want a middle ground between loose-lay tiles and full rolls, interlocking rubber tiles lock together with puzzle-like edges to give a stable, DIY-friendly floor that’s easy to install and replace.
You’ll get quick layout, decent seam stability, and easy maintenance. They suit gyms and garages, but edges can lift on uneven subfloors and thicker tiles cost more.
Fully bonded (glued) installation (pros and cons)
Because fully bonded rubber flooring is adhered to the subfloor with adhesive, you get a continuous, stable surface that resists shifting and edge lifting better than loose-lay or interlocking options.
You’ll enjoy superior durability, cleaner seams, and better load distribution, but installation is more laborious, permanent, and requires proper substrate prep and ventilation for adhesives.
Removal can be costly and damage the subfloor.
Poured rubber (seamless) option
Glued rubber gives you strong seams and predictable removal issues, but poured rubber offers a different approach: a seamless, monolithic surface that’s cast in place and cured to form a single layer. You’ll get excellent shock absorption and easy cleaning, but expect higher cost, longer cure times, and professional installation.
| Feature | Benefit | Drawback |
|---|---|---|
| Seamless | Uniform surface | Hard to repair |
| Durability | Long-lasting | Expensive |
| Maintenance | Easy cleaning | Special tools |
Step-by-Step Installation Interlocking Tiles (Common DIY Choice)
Start by letting the tiles acclimate and planning your final layout so you know your starting point and any tricky cuts.
Clean and mark the floor, then install the first row while keeping your lines straight.
Finish by cutting tiles for edges and obstacles and installing junctions and thresholds.
Step 1 Acclimate materials and final layout planning
1. Let materials sit in the installation room 24–48 hours so tiles acclimate to temperature and humidity.
Measure the space, note door swings and obstacles, and sketch a grid to center the layout.
Dry-fit tiles along your plan, adjusting for even edge widths.
Confirm you have extra tiles and necessary cuts before you begin cutting or adhering.
Step 2 Clean and mark floor, establish starting point
With your layout confirmed and tiles acclimated, clear the room of debris, vacuum thoroughly, and mop with a mild cleaner so the subfloor is dry and dust-free.
Snap chalk lines from the center toward walls using a tape measure and chalk reel to mark your starting grid.
Check for high spots or moisture and note irregularities before you begin placing tiles.
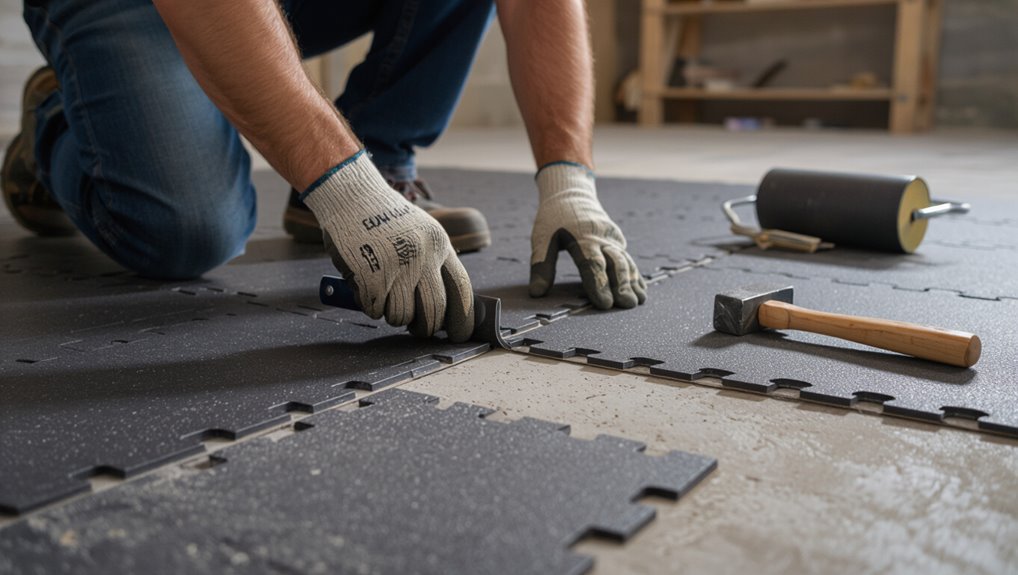
Step 3 Install first row and maintain straight lines
Lay your first row along the chalk lines, fitting the interlocking tabs together tightly so the edges stay straight, and work from the center toward the walls.
Press each tile firmly, tapping joints with a rubber mallet for snug seams.
Check alignment frequently with a straightedge, correct any drift immediately, and keep expansion gaps at walls per manufacturer recommendations.
Step 4 Cutting tiles to fit edges and around obstacles
Now you’ll cut tiles to fit edges and obstacles so the floor looks seamless and professional.
Measure twice, mark cut lines on tile backs, and use a straightedge and utility knife or jigsaw for curves.
Remove tiles as needed to cut around pipes, vents, or door jambs.
Test-fit trimmed pieces, adjust for tight seams, and keep scraps for templates or future repairs.
Step 5 Finishing edges, transitions, and thresholds
Step 5 brings the finishing touches: you’ll trim exposed edges, install connector strips, and fit thresholds so the floor looks complete and stays secure.
Use a straightedge and utility knife for clean cuts, compress edges firmly, and fasten metal or rubber junction strips where tile meets other flooring.
Check level, allow slight expansion gaps, and seal thresholds to prevent moisture and tripping hazards.
Step-by-Step Installation Loose-Lay Rolls and Tiles
Start by dry-fitting the rolls or tiles in the room so you can plan seam locations and cuts.
Trim pieces carefully and butt seams together or use tapered edges, then choose between optional adhesives or double-sided tape for extra hold.
Finish by rolling the floor with a heavy roller and making final adjustments for a smooth, secure surface.
Step 1 Dry-fit and plan seams
Lay out your loose‑lay rolls or tiles across the room to check fit and plan seam placement before you commit—this dry‑fit helps you see how pieces align, where cuts will fall, and whether seams will land in low‑traffic or visible areas.
Walk the layout, note problematic joints, and mark seam lines with chalk. Adjust orientation to minimize visible seams and waste.
Step 2 Trim rolls/tiles and handle seams
Before you cut, double‑check your dry‑fit marks and measure twice so each roll or tile aligns with the chalked seam lines; then trim pieces with a sharp utility knife or straightedge to achieve clean, snug edges that minimize gaps and visible joins.
Butt seams tightly, scribe irregular edges to fit against walls or obstacles, and remove debris so seams sit flat without lifting or puckering.
Step 3 Optional adhesives and tape methods
With your pieces trimmed and seams aligned, you can decide how to secure the loose‑lay rubber—either leave it unanchored, use seam tape, or apply adhesive for extra hold.
For temporary setups, skip glue. For moderate traffic, use double‑sided seam tape along edges and seams. For heavy use, spread an approved contact or pressure‑sensitive adhesive per manufacturer instructions, avoiding excess squeeze‑out.
Step 4 Rolling and final adjustments
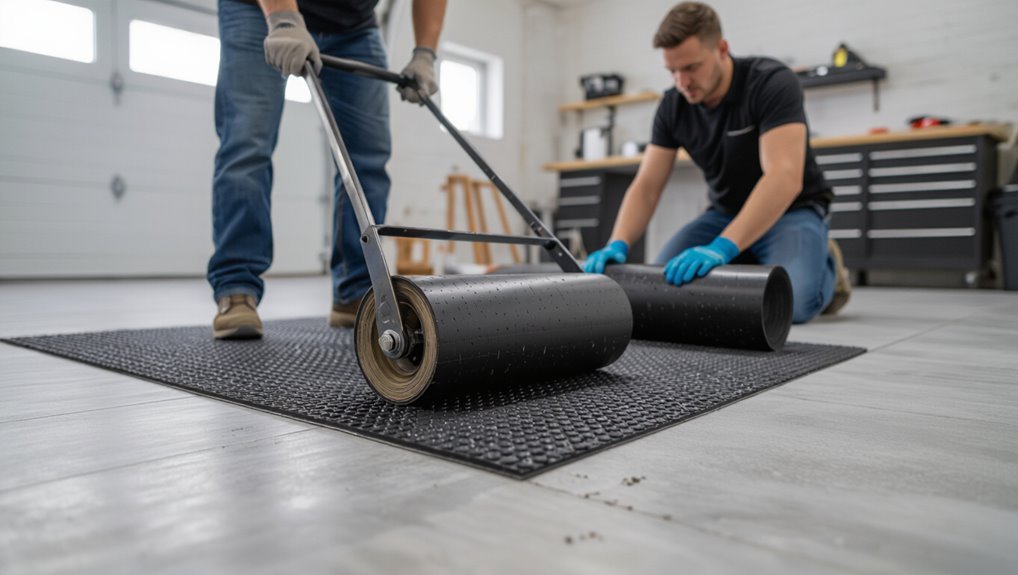
Start rolling immediately after you’ve anchored or taped the edges so the material settles flat and any trapped air is pushed toward the seams.
Use a 100–150 lb roller, moving slowly across seams and overlaps. Check alignment, press seams tight, trim gaps, and re-anchor edges.
Walk the area, feeling for lifts or bubbles; address them with targeted rolling or a small patch of adhesive.
Step-by-Step Installation Fully Bonded (Glue-Down) Method
Before you glue down rubber flooring, you’ll address moisture mitigation and apply a primer to guarantee a stable substrate.
Next, you’ll spread the adhesive in manageable sections, set the material and work it into the bond.
Finish by forming clean seams, using a heavy roller, and allowing the proper curing time before traffic.
Step 1 Moisture mitigation and primer
Step 1 focuses on controlling slab moisture and applying a primer so your adhesive bonds reliably to the concrete.
Test moisture with a meter or plastic sheet, repair cracks, and guarantee the slab is clean, dry, and free of oils.
Apply manufacturer-recommended primer evenly, allow proper flash time, and follow temperature and humidity limits so the glue will adhere when you install the rubber.
Step 2 Applying adhesive and working in sections
Trowel the adhesive onto the primed slab in manageable sections so you can lay rubber before the glue skins over; work a 6–10 foot area at a time (or whatever the adhesive’s open time specifies), holding the trowel at the recommended angle to create uniform ridges and consistent coverage.
Immediately lay sheets, aligning edges and pressing firmly.
Keep a wet edge, clean excess, and follow manufacturer temperature and curing guidelines.
Step 3 Seaming, rolling, and curing time
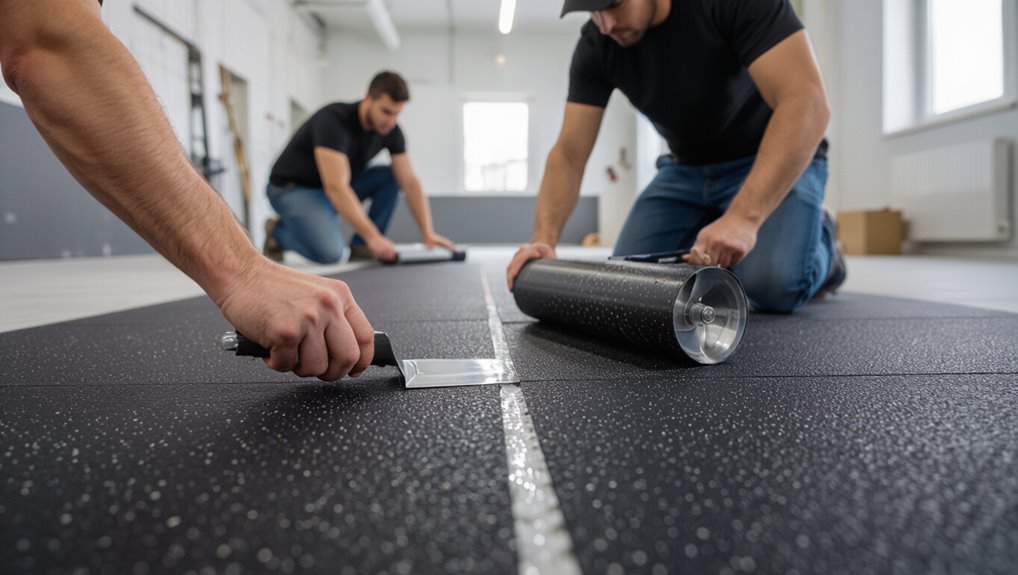
Ready to finish the floor? Align seams tightly, staggering end joints for strength.
Press edges together, use a seam roller or hand roller to eliminate gaps and trapped air.
Roll the entire surface in both directions with a heavy roller to guarantee full adhesive contact.
Let the floor cure per adhesive instructions—usually 24–48 hours—before light use, longer for heavy traffic.
Common Problems and How to Fix Them
You’ll run into a few common issues like bubbles, gaps, and uneven seams, and you’ll need to know what causes each so you can fix them quickly.
Watch for moisture problems that can lift or stain the rubber, and follow proper remediation steps before re-installing.
If adhesive fails, you’ll re-bond sections using the right cleaner, primer, and adhesive technique to restore a secure, flat surface.
Bubbles, gaps, and uneven seams causes and fixes
When bubbles, gaps, or uneven seams show up after installing rubber flooring, they usually mean something went wrong with adhesion, surface prep, or seam alignment — but you can fix most issues without tearing up the whole floor.
Pop small bubbles with a needle, inject contact adhesive, press and roll.
Fill gaps with matching seam filler, trim misaligned edges, and re-roll seams for tight contact.
Moisture-related issues and remediation
If moisture’s trapped beneath rubber flooring or keeps wicking up from the slab, you’ll see cupping, adhesive failure, or mold—and those problems demand quick action.
Test the slab with a moisture meter or plastic-sheet test.
Fix sources: improve drainage, add exterior grading, install a vapor barrier or moisture mitigation system, and allow concrete to dry fully.
Replace contaminated padding and clean mold with appropriate cleaners.
Adhesive failure and re-bonding techniques
Moisture issues often show themselves first as adhesive failure, but other factors can cause glue to let go too—old or incompatible adhesives, improper trowel coverage, contamination on the slab, or extreme temperature swings.
You’ll assess, clean, and test the slab, then re-bond using proper primer and recommended adhesive.
Tips:
- Remove loose flooring and old adhesive
- Shotblast or grind contaminated spots
- Use manufacturer-approved adhesive and trowel
- Allow correct cure and controlled temperature
Best Practices, Maintenance, and Longevity Tips
To keep your rubber floor looking and performing its best, follow a simple cleaning routine with pH-neutral cleaners and non-abrasive tools.
Protect the surface from heavy equipment and vehicles with load-distributing pads or designated pathways, and monitor seasonal humidity to prevent warping or adhesive failure.
Repair small sections when possible, but plan replacement if wear, thinning, or persistent damage compromises safety or performance.
Cleaning routines and recommended products
1 simple routine will keep your rubber flooring looking and performing its best:
sweep or vacuum daily to remove grit, mop weekly with a pH-neutral cleaner diluted per label, and spot-clean spills immediately.
Use soft-bristle tools and microfiber mops.
Avoid harsh solvents, waxes, or oil-based cleaners.
Rinse thoroughly and allow to air-dry.
Test new products in a small area first.
Preventing damage from heavy equipment and vehicles
Keeping up regular cleaning makes it easier to spot areas where heavy equipment could cause wear.
So pair your maintenance routine with preventive measures to protect the floor from vehicles and machinery.
Use heavy-duty mats or load-bearing plates under lifts and wheels, distribute weight with plywood or rubber runners, secure casters, and avoid sharp-edged metal contact.
Inspect fasteners and seams routinely for stress or compression.
Seasonal and humidity considerations
Because rubber expands and contracts with temperature and moisture, you should monitor seasonal changes and control indoor humidity to prevent buckling, gaps, or adhesive failure.
Use a hygrometer, run dehumidifiers or humidifiers as needed, and maintain consistent indoor temperatures.
Allow flooring to acclimate before installation, leave recommended expansion gaps, and inspect seams seasonally to catch movement early and reseal if necessary.
When to replace vs repair
When deciding whether to repair or replace your rubber flooring, weigh the extent of damage, age of the installation, and long-term costs—minor cuts, surface scuffs, or localized adhesive failures are usually worth repairing, while widespread cracking, severe compression, or deterioration of the backing often signals it’s time for replacement.
Inspect seams, check adhesion, and test elasticity; if repairs recur or performance drops, replace to avoid safety and warranty issues.
Cost and Time Estimates by Space and Method
You’ll want to know how long each method takes and what it’ll cost so you can plan accordingly.
Expect DIY installs to take a weekend for a 200–400 sq ft garage or basement, while pros can finish the same job in a day but at higher labor cost.
Typical ballpark costs range from $2–$5 per sq ft for basic rubber mats to $4–$12 per sq ft for bonded or poured rubber, with gyms often on the higher end due to thicker, impact-grade materials.
Typical DIY vs professional labor time
If you’re weighing whether to tackle rubber flooring yourself or hire a pro, labor time and skill level will be the biggest factors affecting cost and the project timeline.
You can install interlocking tiles in a weekend for a small room, but adhesive rolls or precise seams take days and experience.
Pros work faster, guarantee flat seams, and handle subfloor prep and complex layouts.
Ballpark cost ranges for gym, garage, basement installs
Having weighed labor time and skill, let’s look at what you can expect to pay and how long installs typically take across common spaces. You’ll pay more for thicker commercial rubber and pro labor; DIY saves money but costs time. Compare estimates below:
| Space | Cost (materials + labor) | Time |
|---|---|---|
| Garage | $500–$2,000 | 1 day |
| Basement | $800–$3,500 | 1–2 days |
| Gym | $1,500–$10,000+ | 1–4 days |
Pros and Cons Summary Choosing the Right Approach
Now that you know costs and timing, weigh the pros and cons of each option: durability, price, DIY-friendliness, and appearance.
Think about which factors matter most for your space and budget. That will help you pick the approach that fits your needs.
Quick comparison of durability, cost, DIY-friendliness, and appearance
1 clear way to choose the right rubber flooring is to weigh durability, cost, DIY-friendliness, and appearance side-by-side so you can match each option to your priorities. Use this quick table to compare and decide what fits your space.
| Type | Durability | DIY-friendliness |
|---|---|---|
| Rolled | High | Moderate |
| Tiles | High | Easy |
| Mats | Medium | Very Easy |
FAQ
You’ll find answers here to common concerns like installing over tile or vinyl, testing for and handling basement moisture, and using rubber flooring in a garage.
I’ll also cover whether it’s a DIY job or time to call a pro, plus simple fixes for damaged tiles or seams.
If you have a specific scenario, mention it and I’ll tailor the advice.
Can rubber flooring be installed over existing tile or vinyl?
Can you install rubber flooring directly over existing tile or vinyl? Yes, often you can if the surface is level, clean, and firmly bonded.
Remove loose tiles, repair grout gaps, and sand glossy finishes to improve adhesion.
Use a compatible adhesive or loose-lay tiles with interlocking edges.
Consult manufacturer instructions and test a small area first to verify proper adhesion and flatness.
How do I test and handle moisture in a basement before installation?
Before installing rubber flooring in a basement, check for moisture because it’s the most common cause of failures; a few simple tests will tell you if you need to take action.
Tape a plastic sheet to the slab for 24–72 hours; if condensation forms, moisture’s present. Use a hygrometer or calcium chloride test for rates.
Fix leaks, improve drainage, install a vapor barrier or dehumidifier before laying flooring.
Is rubber flooring safe for vehicles in a garage?
Wondering whether rubber flooring can handle your car, truck, or SUV in a garage? Yes—quality commercial-grade rubber tiles or rolls resist oil, grease, and vehicle weight, offering impact protection and slip resistance.
Use thicker, dense products (8–12 mm or more) and durable interlocks or adhesive installation. Avoid thin gym mats; inspect periodically for punctures, chemical damage, or tire imprinting to maintain performance.
Can I install rubber flooring myself or should I hire a pro?
Thinking of a DIY install or hiring a pro? You can install many rubber flooring types yourself if you’re comfortable measuring, cutting, and prepping a flat, clean subfloor.
Interlocking tiles and rolls are DIY-friendly; glued seams or complex layouts benefit from a pro’s tools and experience.
Hire a contractor if you want faster results, warranty-backed work, or lack time and confidence.
How do I repair a damaged rubber tile or seam?
Fix small rips or loose seams quickly to keep damage from spreading and to maintain a safe, attractive floor.
For loose seams, clean, dry, and apply a rubber flooring seam adhesive or seam tape, pressing firmly and rolling to remove bubbles.
For torn tiles, trim ragged edges, glue down edges, or replace the tile.
Always follow manufacturer instructions and let adhesive cure fully before use.