How to Install Backer Board on a Floor Before Tiling
You’ll prep and inspect the subfloor, cut panels to fit, and dry-fit them with 1⁄8″ gaps at seams. Fasten backer board with corrosion-resistant screws in a consistent pattern, then tape joints with alkali-resistant fiberglass and thinset, embedding the tape flush. Seal junctions and allow proper cure time before tiling. Follow spacing and moisture guidelines for your substrate and tile type to prevent movement and damage, and keep going to get full step-by-step guidance.
How to Install Backer Board on a Floor Before Tiling Quick Answer
You’ll follow a clear 23-step workflow to prep the subfloor, cut and fit the backer board, tape and screw the seams, and set the stage for tile.
I’ll walk you through each concise step so you can work methodically and avoid common mistakes.
Get your tools ready and we’ll start with measuring and marking the layout.
Direct step-by-step summary (23 sentence quick workflow)
Start by gathering your tools and materials—backer board, thin-set mortar, screws, tape, a trowel, a drill, and a utility knife—so you can work without interruption.
Follow this concise how to install backer board floor workflow:
- Clean and level substrate.
- Cut and dry-fit panels.
- Spread thin-set and set panels.
- Screw, tape seams, and finish for tiling.
Basic Understanding What Is Backer Board and Why You Need It
Backer board is a thin, rigid underlayment—like cement board, fiber cement, or uncoupling membranes—that gives tile a stable, water-resistant base.
You’ll use it to prevent movement and moisture from ruining grout and tiles, which boosts the floor’s longevity.
Whether it’s required depends on your subfloor, local code, and the tile type, so check conditions before you start.
Definition and common types (cement board, fiber cement, uncoupling membranes)
Think of backer board as the stable, moisture-resistant base that keeps your tile flat and secure; it’s a thin substrate you install over framing or subflooring to prevent movement, mold, and tile failure. You’ll choose cement board, fiber cement, or uncoupling membranes depending on moisture and movement.
| Type | Material | Typical Use |
|---|---|---|
| Cement board | Cement + mesh | Showers, floors |
| Fiber cement | Cement + cellulose | Wet areas |
| Uncoupling membrane | Plastic mat | Movement control |
Benefits of using backer board under tile (water resistance, stability, longevity)
Because tile performs best on a firm, dry foundation, you’ll want backer board under any tiled surface that sees moisture or movement.
It protects and supports your tile job by offering:
- Water resistance to prevent rot and mold.
- Stable, rigid backing that reduces cracking.
- Even load distribution for durable grout and tiles.
- Longer overall lifespan for your floor investment.
When backer board is required vs. optional (subfloor conditions, local code, tile type)
1 key question before you buy materials is whether backer board is required or just optional for your project, since that decision depends on the subfloor type, local building codes, and the tile you’ll install.
Use backer board on plywood, damaged or uneven subfloors, or for large-format and natural stone tiles.
Check local code and manufacturer specs; some grout or thinset warranties require it.
Tools, Materials, and Safety Preparations
Before you start, gather a complete materials checklist—backer board sheets (quantity by square footage), thin-set or mortar, screws, tape, and underlayment—so you won’t be interrupting work to hunt for supplies.
You’ll also need required tools (trowel, drill/driver, saw) and optional ones for efficiency (mixers, straight edge, wet saw).
Put on safety gear, set up ventilation, and plan dust control to protect yourself and keep the workspace clean.
Complete materials checklist (by item and typical quantity)
Gathering the right tools, materials, and safety gear makes installing backer board far smoother, so here’s a concise checklist of what you’ll need and typical quantities for an average bathroom or small kitchen project.
- Cement backer board: 3–6 sheets (1/4″–1/2″)
- Thinset mortar: 1–2 50 lb bags
- Backer board screws: 1 box (200–300)
- Alkali-resistant mesh tape: 1 roll
Required tools and optional tools for efficiency
Tools make the job go faster and safer, so set up a toolkit that covers the essentials and a few efficiency extras you’ll appreciate.
You’ll need basic tools and a couple optional picks to speed work and improve accuracy.
- Tape measure, pencil, straightedge
- Carbide blade or scoring knife
- Drill, screws, screw bits
- Floor saw or circular saw (optional)
Safety gear and workspace preparation (ventilation, dust control)
Because cutting and fastening backer board kicks up a lot of dust and can expose you to silica and other irritants, you’ll want proper safety gear and a well-planned workspace before you start.
Wear an N95 or P100 respirator, eye protection, hearing protection, and gloves.
Seal off the room, run a box fan in a window for exhaust, and use a wet-cutting method or vacuum with HEPA filtration.
Pre-Installation Assessment and Subfloor Preparation
Before you lay backer board, inspect the subfloor for level, strength, and any signs of rot or movement.
Repair or replace damaged sections so the base is solid and flat.
Measure and plan your layout to minimize seams and waste before you start cutting.
Inspecting the subfloor for level, strength, and suitability
If your subfloor isn’t flat, strong, and dry, your backer board and tile won’t perform well, so start by checking levelness, structural soundness, and moisture conditions.
Walk the area, tap for hollow spots, and use a straightedge and level to find high or low points.
Measure deflection between joists, confirm fastening is solid, and use a moisture meter to guarantee acceptable readings.
Repairing or replacing damaged subfloor sections
Start by isolating any soft, sagging, or water-damaged areas so you can decide whether to repair or replace them; cut out compromised plywood back to solid joists and remove all loose fasteners and debris.
Patch small sections with new plywood screwed to joists, sister weakened joists, and replace extensive damaged panels.
Verify repairs are level, rigid, and dry before fastening backer board.
Measuring and planning layout to minimize seams and waste
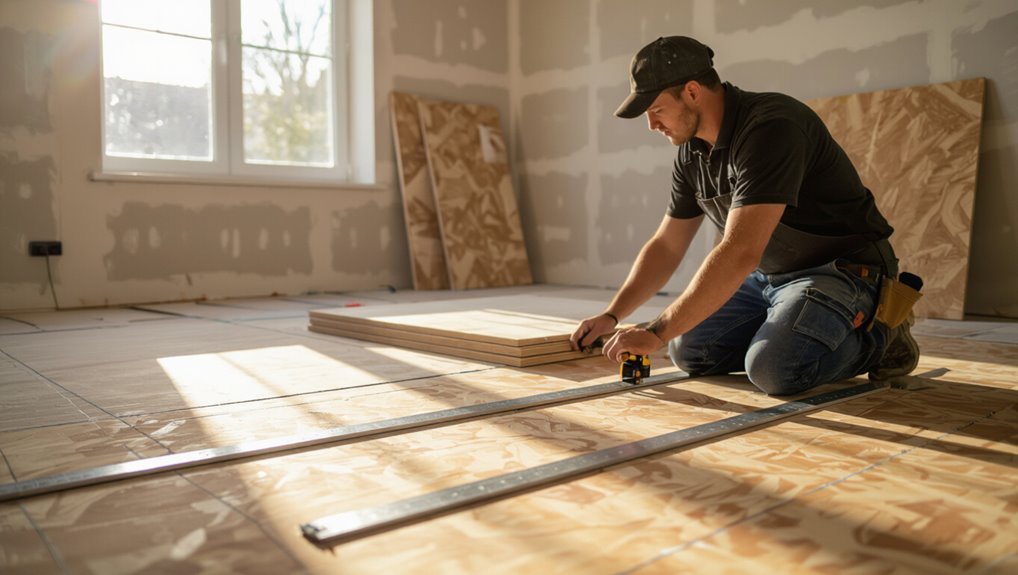
Measure the room carefully and sketch a simple layout so you can place seams where they’ll be least visible and waste will be minimized.
Determine backer board panel sizes, stagger seams off subfloor joints, and center full panels in prominent areas.
Plan cuts to use offcuts for narrow runs.
Mark fastening points and changes, verify layout with a dry fit, and adjust to avoid tiny leftover strips.
Step-by-Step Installation Process
Now you’ll work through a clear sequence: acclimate and cut the backer board to fit, dry-fit panels and mark fastener locations, then apply thinset if required or prepare for screws.
Use the correct screws and spacing, countersink as needed, and follow a consistent fastening pattern.
Finish by taping seams with alkali-resistant tape and embedding the tape in thinset for a smooth, stable surface.
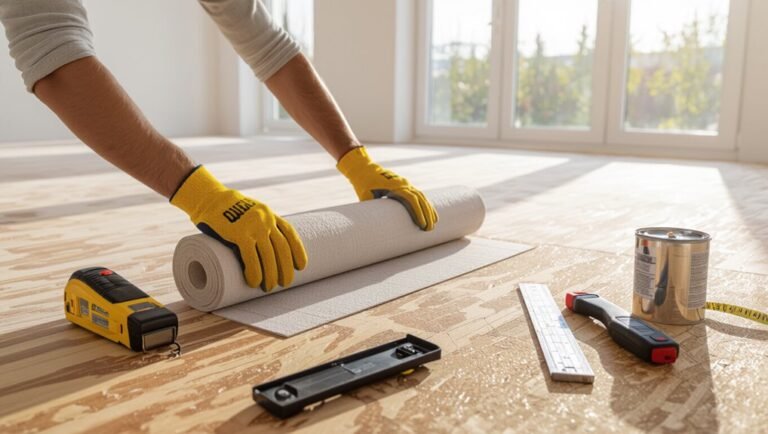
Step 1 Acclimate and cut backer board to fit
Before you install anything, let the backer board acclimate to the room for 24–48 hours so it matches the temperature and humidity; this prevents warping or gaps after installation.
Measure your floor, transfer lines to panels, and score or cut boards with a carbide blade or scoring knife.
Deburr edges, test fit pieces, and label each panel for quick placement during installation.
Step 2 Dry-fit panels and mark fastener locations
1. Dry-fit each backer board in place, checking alignment, gaps, and edges.
You’ll shim where needed to keep boards flat and maintain 1/8″ joints between panels and 1/4″ clearance at walls.
Mark screw locations every 6–8″ along edges and 8–10″ in field, avoiding joist centers.
Label panels so reinstalling is fast and accurate.
Step 3 Apply thinset (if required) or use screws with appropriate pattern
Spread a thin, even bed of modified thinset if your backer board manufacturer requires it; otherwise set the panel in place and drive screws in the pattern you marked during the dry-fit.
Press firmly to seat the board, tapping with a rubber mallet if needed. Confirm panels sit flush and seams align.
Wipe excess thinset and check that boards don’t rock before proceeding.
Step 4 Fastening technique: screw type, spacing, and countersinking
When you’re ready to fasten the backer board, use corrosion-resistant, backer-board–rated screws and place them at the manufacturer’s recommended spacing—typically 6″ along seams and 8″ in the field—to guarantee a secure, even hold; drive each screw until the head is just below the surface without tearing the paper face.
Space screws evenly, stagger joints, and countersink slightly so heads sit flush without overdriving.
Step 5 Taping seams with alkali-resistant tape and embedding with thinset
Flip on a light and get your tools ready: you’ll use alkali-resistant fiberglass tape and thinset mortar to bridge seams and create a waterproof, stable surface for your tile.
Mix thinset to a peanut-butter consistency. Butter a thin layer over seams, embed tape centered over the joint, then coat over the tape smoothing flush.
Let cure per manufacturer before tiling.
Step 6 Sealing joints and transitions (around walls, drains, fixtures)
Step 6 focuses on sealing joints and shifts—around walls, drains, and fixtures—to prevent moisture intrusion and secure a solid tile substrate.
You’ll apply a continuous bead of waterproof sealant where backer board meets walls, pipes, and drains, tooling it smooth.
Use flexible membrane or flashing at changes, press into corners, and guarantee full adhesion and overlap to channel water away from the substrate.
Step 7 Final inspection and cure time before tiling

Although you’ve finished sealing and fastening the backer board, do a thorough final inspection and allow proper cure time before you start tiling; check screw heads, seams, sealant coverage, and membrane adhesion.
Remove any debris, and follow the manufacturer’s recommended drying period so the substrate’s fully set and ready for tile.
Verify flatness, confirm no movement, and wait the full cure time before proceeding.
Common Variations and Special Cases
You’ll sometimes work over plywood, OSB, or concrete, and each substrate needs different prep and fastening.
You can also choose uncoupling membranes instead of cement backer board for better crack resistance and easier changes.
If you have radiant heat or must blend into other floor types, you’ll need specific methods for thinset, movement joints, and height matching.
Installing over plywood vs. OSB vs. concrete subfloors
When you’re choosing backer board, the type of subfloor—plywood, OSB, or concrete—affects your prep, fastening, and moisture strategies, so plan accordingly to get a durable tile installation.
On plywood, screw every 6–8 inches and leave 1/8″ gap; OSB may need stiffer support and moisture precautions; concrete requires a vapor barrier or thinset-bonding and concrete screws or anchors.
Using uncoupling membranes instead of traditional cement board
If your subfloor conditions—movement, moisture, or irregularities—make cement board seem risky, consider using an uncoupling membrane instead.
You’ll bond the membrane to a clean, flat substrate, then float thinset and tile over it. Uncoupling membranes relieve shear, accommodate minor deflection, and simplify moisture management.
Follow manufacturer instructions for adhesive, seam treatment, and tile type to guarantee warranty and performance.
Handling radiant heat floors and transitions to other floor types
Although radiant-heat systems can improve comfort, they alter how you prep and install backer board and tile: you’ll need to confirm compatibility with the heating system, follow manufacturer limits for thinset and board over warm surfaces, and plan changes where the heated floor meets other floor types or unheated areas.
Use flexible adhesives, allow thermal movement with joints or connecting strips, and avoid insulating layers that trap heat.
Typical Mistakes and How to Avoid Them
Watch for cutting and fitting errors that leave hollow spots under the board, because they’ll lead to cracked tiles.
Use the correct screws at the proper spacing so the backer stays flat and secure.
Treat seams and waterproofing thoroughly to prevent leaks and substrate damage.
Cutting and fitting errors that cause hollow spots
When you cut backer board poorly or leave gaps where pieces meet, you’ll create voids under the tile that lead to hollow spots, cracked grout, and premature tile failure.
Measure carefully, mark cuts, and use a straightedge to score or cut with the appropriate blade. Fit edges tightly, back-butter joints with thinset where needed, and shim low spots before fastening to guarantee full support.
Incorrect fastener spacing or wrong screws
After you’ve cut and fitted the backer board so tiles sit on solid substrate, fastening it correctly is the next step—misplaced screws or the wrong type can negate all that careful fitting.
Use corrosion-resistant, backer-board-rated screws at manufacturer-recommended spacing, countersink slightly, and avoid overdriving.
Space fasteners evenly, stagger joints, and follow layout guidelines so boards remain flat and stable for tile adhesion.
Poor seam treatment and waterproofing failures
Because seams and waterproofing are the last line of defense, you must treat joints and changes with care to prevent leaks and tile failure.
Seal seams, corners, and connections with proper tape and membrane. Don’t rush curing. Inspect for pinholes and gaps. Follow manufacturer directions.
- Use waterproof tape over seams
- Apply continuous membrane
- Overlap and feather edges
- Test for voids before tiling
Best Practices and Pro Tips
Plan your tile layout to cut down on awkward cuts and seams, and check the floor or wall meets L/360 (tiles) or L/720 (stone) deflection limits before you install backer board.
Keep your workflow tidy—cut where dust can be contained, reuse off-cuts when sensible, and mix only what you’ll use to limit waste.
Before you tile, run flatness checks and a quick adhesion test so you don’t uncover problems after the mortar’s down.
Layout tips to minimize tile cuts and seams
When you lay out tiles, thinking ahead about focal points and edges will save time and reduce awkward, small cuts; start by dry-laying a few rows to see how tiles fall against walls and fixtures.
Align main sightlines with full tiles, center patterns on focal walls, stagger joints for balance, and plan cut locations near cabinets or doorways to hide small pieces.
Ensuring a level, deflection-free substrate (L/360/L/720 guidance)
If you want ceramic or stone tile to stay crack-free and feel solid underfoot, you’ve got to start with a stiff, level substrate that meets L/360 for ceramic and L/720 for natural stone (or manufacturer specs) to control deflection; check joist span, spacing, and support, stiffen with blocking or sistering, use proper subfloor thickness, and secure backer board with recommended fasteners and screws to prevent movement.
Efficient workflow to reduce dust and material waste
Having a stiff, level substrate makes installation faster and reduces rework, but keeping dust and scrap to a minimum takes deliberate workflow choices.
Plan cuts to nest pieces, use score-and-snap for boards, and cut outside or with a vacuum-equipped saw.
Wear PPE, sweep frequently, and bag scraps for reuse or recycling.
Stage adhesive and fasteners to avoid over-ordering.
Verification checks before laying tile (flatness, adhesion test)
Before you lay a single tile, verify the substrate is flat and will bond—use a 6-foot straightedge to check for more than 1/8″ deviation in any 3-foot span, and mark low or high spots for correction.
Perform an adhesion test: apply a small dab of thinset, press a tile, let set, then pull. If it grips well, proceed; if not, prep surface.
Estimated Time, Cost, and Labor Considerations
You can expect a DIY backer board installation to take a day or two for a small bathroom, while a pro crew can finish the same job in a few hours.
Materials typically cost $50–$200 depending on board type and size, and pros usually charge $200–$600+ in labor for a small room.
Factor in your skill level and any prep or cleanup time when comparing DIY vs. hiring out.
Typical time required for DIY vs. professional install
While a small bathroom backer-board install can feel doable on a weekend, the actual time you’ll spend varies a lot with room size, prep work, and your skill level.
For DIY, plan 1–3 days: removing old floors, leveling, cutting, fastening, and seams.
Pros typically finish in 4–8 hours for similar rooms, thanks to tools and experience, plus cleanup.
Estimated material and labor cost ranges
Costs for backer board installations vary a lot, but you can expect materials for a small bathroom to run roughly $100–$300 (boards, screws, thin-set, tape) while labor adds $200–$600 for a pro; larger rooms or waterproofing systems push material costs to $400–$1,200 and labor to $800–$2,000.
| Room | Materials | Labor |
|---|---|---|
| Small bath | $100–$300 | $200–$600 |
| Medium | $250–$600 | $400–$1,000 |
| Large/wet | $400–$1,200 | $800–$2,000 |
Post-Installation Care Before and After Tiling
After you fasten and seal the backer board, wait the manufacturer’s recommended cure time and keep the area dry and out of heavy traffic before applying thinset and tile.
You should also check that seams and fasteners are properly set and clean any dust or debris so the thinset bonds well.
For ongoing maintenance, wipe spills promptly and avoid soaking the joints to preserve the backer board under your tile.
Cure times and conditions to wait before applying thinset and tile
Because backer board joint compounds, thinset, and any setting materials need time to reach their specified strength, you should wait the manufacturer-recommended cure times before applying thinset or installing tile.
Also keep the area dry, temperature-controlled (typically 50–80°F/10–27°C), and ventilated.
Check compound labels for hours or days; don’t rush—premature loading risks weak bonds, cracking, or tile failure.
Cleaning and maintenance recommendations for backer board
While the backer board is still exposed, wipe down the surface with a damp cloth to remove dust, loose compound, and any grout residue so you’ll get a clean bond when you apply thinset.
Once tile’s installed, keep joints clear of debris and wipe spills promptly to prevent staining or mold.
Regularly inspect seams and fasteners, reapply sealant where recommended, and avoid harsh cleaners that degrade panels.
FAQ
You probably have specific questions like whether you can install backer board over existing tile and how wide the gaps should be at walls.
You’ll also want to know if thinset is needed under the board, which screw types and lengths to use, and whether backer board is required for every tiled floor.
Read on for clear answers and quick recommendations.
Can I install backer board over existing tile?
Can you install backer board over existing tile? You can, but only if the old tile is sound, well bonded, and flat.
Clean thoroughly, remove loose grout, and shim or thin-set low spots.
Use a decoupling membrane or pressure-treated furring strips as needed to secure the backer board.
Follow manufacturer fastening and joint-taping instructions for a durable tile substrate.
How much gap should I leave between panels and walls?
Because backer board expands and walls can settle, leave a small gap between panels and fixed vertical surfaces to prevent buckling and cracking.
Aim for a 1/8-inch gap at each edge against walls and pipes, and a 1/4-inch gap around door frames or where movement is likely.
Fill gaps with flexible caulk or grout-compatible sealant after tiling.
Do I need to apply thinset under the backer board?
Should you spread a layer of thinset under the backer board? Yes—use a thin, even mortar bed to fill minor floor irregularities and prevent hollow spots.
Butter the panel edges or apply a thin coat with a notched trowel where panels meet joists.
Don’t overdo thickness; the goal is full contact for stability and to reduce potential tile cracking.
What screw types and lengths are best for cement board?
When you fasten cement board, pick corrosion-resistant screws made specifically for backer board or exterior-grade cement board screws—they have coarse threads and a bugle or wafer head to pull the panel tight without cracking it.
Use 1-1/4″ to 1-5/8″ screws for single-layer installation over a subfloor; choose 2″ when screwing through plywood plus underlayment.
Space screws per manufacturer specs.
Is backer board necessary for every tiled floor?
Do you always need backer board under tile? Not always.
You need backer board when substrates are uneven, prone to movement, or absorbent—like plywood, OSB, or existing damaged floors.
If you’re tiling over a stable, nonporous surface such as properly prepared concrete or existing ceramic tile, you can often skip it.
Evaluate substrate condition, movement risk, and tile type before deciding.