How to Install a Heated Floor Under Tile or Hardwood
You can install radiant heated floors under tile or compatible hardwood by choosing electric mats for small rooms or hydronic tubing for larger areas, preparing and insulating a clean, level subfloor, and following manufacturer wiring or plumbing and thermostat connections. Tile handles higher temps and thermal mass; engineered hardwood needs strict temp and moisture controls. Test moisture, secure the heating system, then set tile or approved hardwood with proper adhesive. Keep going to learn step-by-step instructions and tips.
Can You Install a Heated Floor Under Tile or Hardwood?
You can confidently install heated floors under tile—it’s the easiest and most compatible surface.
Hardwood works too, but you’ll need to pick engineered wood and follow temperature and moisture guidelines to protect the floor.
Choose electric mats for smaller or retrofit jobs and hydronic systems for larger new builds; expect electric installs to take a day or two at lower cost, while hydronic systems run higher in price and time but offer greater efficiency for big spaces.
Short verdict for tile installations
Yes — installing electric or hydronic radiant heat beneath tile isn’t only possible but one of the best applications, since tile’s thermal conductivity lets it transfer warmth efficiently to the room.
You can follow concise how to install a heated floor steps: choose mats or tubing, prepare substrate, secure heating, connect thermostat, grout and test.
Expect durable, even warmth with proper installation.
Short verdict for hardwood installations
Installing radiant heat beneath hardwood is doable, but you’ll need to choose materials and methods carefully to protect the wood from moisture and excessive temperature.
You should prefer engineered hardwood, use a vetted installation method, and follow manufacturer temperature limits.
Insulate beneath the system, monitor surface temperatures, and allow for seasonal expansion.
Hire pros if you’re unsure to avoid warping or warranty voids.
When to choose electric vs. hydronic systems
Wondering whether to go electric or hydronic for your tile or hardwood floor?
Electric suits small rooms, thin installations, and DIY projects—it’s simple, quick, and heats surfaces directly.
Choose hydronic for whole-house systems, large areas, or when you want lower operating costs and integration with existing boilers.
Consider floor type, subfloor access, and long-term maintenance before deciding.
Estimated cost and timeline overview
Costs and timelines for heated floors vary widely depending on system type, room size, and floorcovering—expect electric systems to run $8–$20 per square foot installed and hydronic systems $10–$25 per square foot, with tile installations typically on the lower end and hardwood often costing more due to additional underlayment and careful temperature control.
| Item | Typical |
|---|---|
| Small room | 1–2 days |
| Large room | 2–5 days |
| Cost note | Permit/contractor fees vary |
Basic Understanding What Is a Heated Floor and Why Install One?
A heated floor uses radiant heat—either electric mats or hydronic tubing—to warm the room from the floor up. You’ll feel more even, quieter warmth than with forced air.
You’ll gain comfort, better energy efficiency, zoning control, and potential resale value, though you should weigh trade-offs like added floor buildup, retrofit complexity, and what flooring materials will work.
Before you start, check how your chosen system matches your subfloor, tile or hardwood, and installation constraints.
How radiant floor heating works (electric and hydronic)
When you step onto a warm floor, radiant heating is quietly doing its job by transferring heat directly to the room—either through electric cables or mats embedded in the floor, or by circulating warm water through tubing (hydronic systems).
You control electric systems via thermostats powering resistive elements; hydronic systems use a boiler or water heater, pump, and manifolds to distribute tempered water through tubing beneath the floor.
Benefits: comfort, efficiency, resale value, zoning
Understanding how radiant systems work helps you see why homeowners choose heated floors: they deliver unmatched comfort, run efficiently, boost resale value, and let you zone heat precisely.
You’ll enjoy even warmth underfoot, lower operating costs compared with baseboard or space heaters, and attractive selling points for buyers.
Zoning lets you heat only occupied areas, saving energy and increasing daily convenience.
Limitations and considerations: floor buildup, retrofit challenges, floor material compatibility
Because radiant floors add layers and require specific substrates, you’ll need to weigh floor buildup, retrofit difficulty, and material compatibility before committing.
You may raise thresholds, door clearances, or step heights. Retrofitting over existing floors can need thin-set or self-leveler and may limit insulation.
Tile conducts heat best; solid hardwood can warp unless engineered planks and strict moisture control are used.
Pre-Installation Planning and Preparation
Before you start, you’ll assess if your subfloor, joists, and room use meet code and inspection requirements and whether permits are needed.
Then pick the right system—electric mat, loose-wire, or hydronic—and list the tools, materials, and safety gear you’ll need.
Finally, set a clear budget and decide which tasks you can DIY and when to hire a pro.
Assessing suitability: subfloor type, joist structure, room usage
Start by checking three key factors—your subfloor material, joist layout, and how you’ll use the room—to make sure a heated floor will work safely and efficiently.
Verify subfloor type (concrete, plywood, OSB) for compatibility with your chosen system.
Inspect joist spacing and depth for routing or insulation needs.
Consider room use: moisture, heavy fixtures, and clearances affect system choice and placement.
Codes, permits, and required inspections
When you plan a heated floor, check local building codes and get any required permits so your installation meets safety and inspection standards.
Contact your building department to learn permit types, required documentation, and inspector timelines.
Arrange inspections at rough-in and final stages, keep installation records, and guarantee electricians or plumbers are licensed if their work is needed.
Noncompliance can delay occupancy or force costly corrections.
Choosing the system: electric mat, loose-wire electric, hydronic tubing
Choosing the right heated-floor system—electric mats, loose-wire electric, or hydronic tubing—depends on your floor type, budget, renovation scope, and heat demands; evaluate each option’s installation complexity, operating cost, and suitability for tile, stone, or wood so you pick the most practical solution for your space.
| System | Best for |
|---|---|
| Electric mat | Tile, quick install |
| Loose-wire | Irregular areas |
| Hydronic | Large spaces, low operating cost |
Tools, materials, and safety gear checklist
After you’ve decided on electric mat, loose-wire, or hydronic tubing, gather the right tools, materials, and safety gear so the install goes smoothly and meets code.
You’ll need precise tools, quality materials, and personal protection. Check local code and manufacturer lists.
- Tile trowels, multimeter, wire strippers, drill, tubing cutter
- Thinset, membrane, insulation, thermostat, sensors
- Gloves, eye protection, knee pads, respirator
Budgeting and when to hire a pro vs. DIY
If you’re on a tight budget, decide early whether you’ll DIY or hire a pro—labor, materials, and hidden costs can change the math quickly.
Compare quotes, factor permits, electrical upgrades, and possible subfloor repairs.
DIY saves labor but needs skills, time, and tools; hiring a licensed installer raises costs but reduces risk and guarantees warranty compliance.
Prioritize safety and long-term value.
Step-by-Step Installation for Tile Over Heated Floors
Now you’ll walk through the practical steps for installing tile over a heated floor, starting with prepping the subfloor—clean, level, and test for moisture.
Next you’ll add insulation or a thermal break if needed, lay and secure the electric mats or hydronic tubing, and make the proper thermostat and electrical or plumbing connections.
Finally, you’ll embed the system in thinset or the recommended screed and perform continuity and pressure testing to confirm everything’s safe and working.
Step 1 Prepare the subfloor: cleaning, leveling, and moisture testing
Start by clearing the room of loose debris and old adhesives so you can fully inspect the subfloor for damage, high spots, and low areas that will affect the heated system and tile.
You’ll clean, level, and test moisture before proceeding.
- Sweep and vacuum; remove residues.
- Grind or patch uneven spots to ±1/8″.
- Use a moisture meter; meet manufacturer limits.
Step 2 Install insulation and thermal break (if applicable)
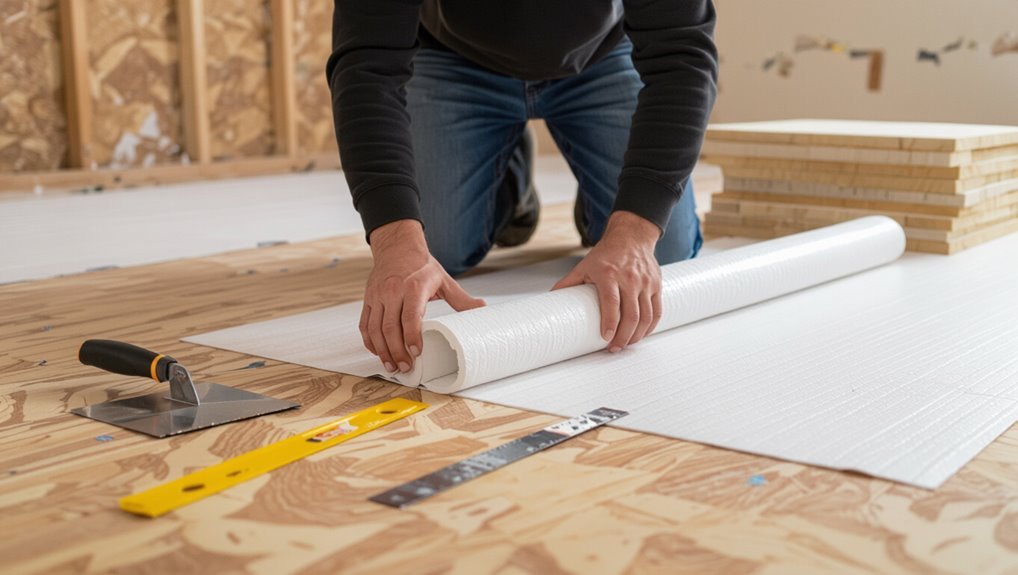
Because heat conducts down as well as up, you’ll want to add insulation—or a thermal break—beneath the heating system to force warmth into the tile and speed response times.
Choose rigid foam or foil-backed underlayment rated for floor heating, cut to fit, and tape seams. Guarantee adhesive or mechanical fasteners won’t compress insulation.
Maintain manufacturer’s recommended thickness and keep heating elements isolated from direct contact with subfloor gaps.
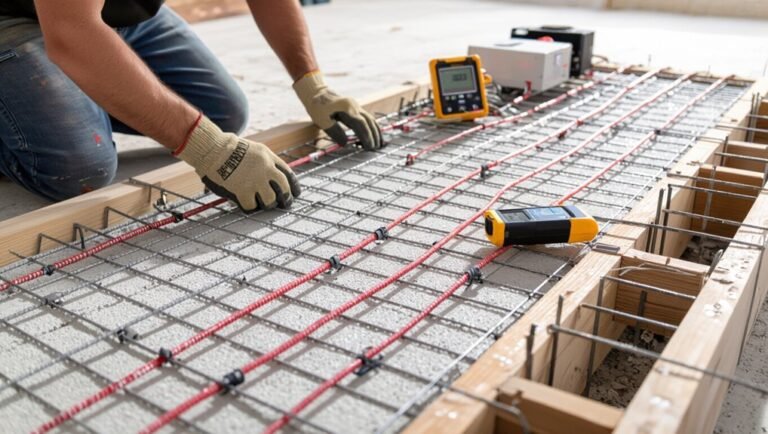
Step 3 Lay out and secure electric heating mats or hydronic tubing
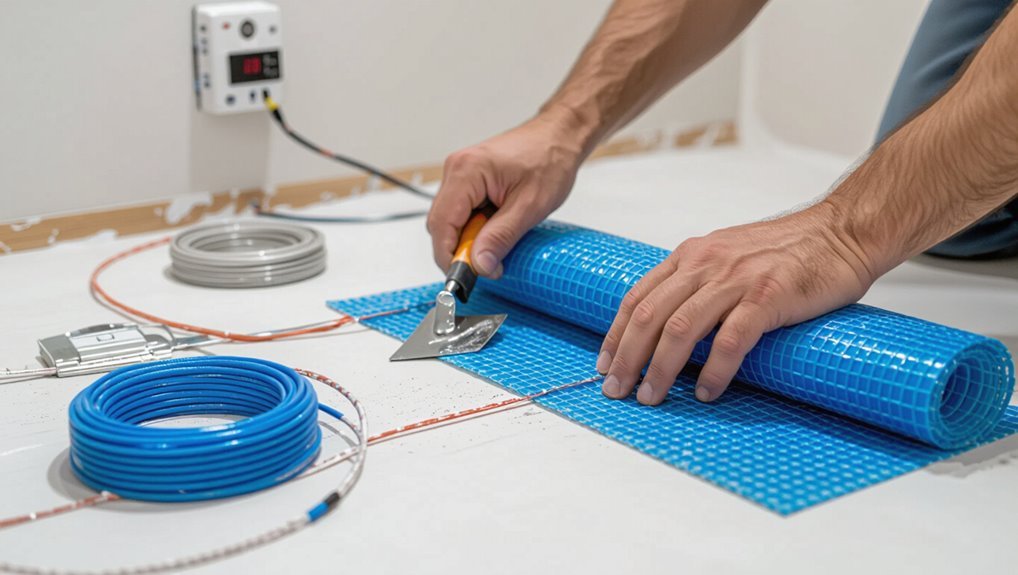
Lay out the heating mats or hydronic tubing according to your floor plan, keeping runs straight and spaced per the manufacturer’s recommendations so you get even warmth and no cold spots.
Secure mats with manufacturer-approved tape or adhesive and fasten tubing with clips or staples at recommended intervals.
Keep connections accessible, avoid kinks, and maintain required clearances from walls and fixtures for a reliable, durable installation.
Step 4 Connect thermostat and electrical/hydronic hookup (requirements and safety)
Once your mats or tubing are secured and the floor surface is ready, you’ll connect the thermostat and make the electrical or hydronic hookups following local code and the manufacturer’s wiring diagrams.
You should:
- Hire or consult a licensed electrician/plumber for mains, GFCI, and relay requirements.
- Verify grounding, conduit, and pressure tests where applicable.
- Label circuits and program thermostat per manufacturer before covering.
Step 5 Embed system in thinset or appropriate screed and perform continuity testing

With the thermostat wired and your electrical or hydronic connections verified, you’re ready to embed the heating mats or tubing in the mortar bed or appropriate screed.
Spread compatible thinset or screed evenly, press mats/tubing flush, and avoid air pockets.
Once set but before finishing, perform manufacturer-recommended continuity and insulation resistance tests with a multimeter or megohmmeter to confirm wiring integrity.
Step 6 Install tile and grout over the embedded heating system
Begin setting your tiles by applying a compatible thinset mortar over the cured screed. Then press each tile firmly into place following your planned layout and grout joint spacing.
Use spacers for uniform joints, check alignment frequently, and cut tiles as needed. Allow the thinset to cure per manufacturer instructions, then grout with a suitable, flexible grout.
Clean residue and protect the surface until fully set.
Step 7 Final testing, drying cure times, and thermostat programming
After your grout has set and the surface is clean, perform final electrical and system checks before you put the floor into regular use.
Verify continuity, insulation resistance, and thermostat wiring.
Follow manufacturer cure times—wait adhesive and grout full cure before heating.
Gradually ramp temperatures over 48–72 hours to avoid thermal shock.
Program the thermostat for comfort, energy savings, and correct floor-sensor placement.
Step-by-Step Installation for Hardwood Over Heated Floors
Before you start, confirm your hardwood is compatible with underfloor heating and follow the manufacturer’s acclimation requirements.
Prepare the subfloor with a proper moisture barrier, leveling, and insulation, then install the heating system (electric or hydronic) to the recommended spacing and mounting.
Choose engineered over solid hardwood for better stability, and decide whether a floating, glue-down, or nail-down installation best suits your chosen flooring and heating method.
Step 1 Confirm hardwood compatibility and acclimation requirements
Because not all hardwood species and installation methods handle radiant heat the same way, you need to confirm compatibility before you buy or install anything.
Check manufacturer guidelines for species, grade, and maximum surface temperature limits.
Verify recommended installation methods (floating, glue-down, or nail-down) and acclimation times/conditions for your climate.
Get written approval from both flooring and heating manufacturers before proceeding.
Step 2 Subfloor preparation: moisture barrier, leveling, and insulation
When you’re ready to work on the subfloor, start by confirming a continuous moisture barrier, a level surface, and appropriate insulation beneath the heating system; these three elements protect your hardwood from warping, guarantee even heat distribution, and improve energy efficiency.
- Test and seal for moisture, using recommended vapor retarders.
- Level low spots with thinset or self-leveler.
- Add insulation under the heating layer to reduce heat loss and speed response.
Step 3 Install heating system (electric or hydronic) with recommended spacing and mounting
Step 3 installs the heating system—either electric mats/cables or a hydronic tubing network—following the manufacturer’s spacing and mounting specs to guarantee even warmth and prevent floor damage.
You’ll secure mats or staple/clip tubing to the subfloor, keeping recommended distances from walls and fixtures.
Maintain specified loop lengths and circuits, and route sensors and wiring per code before embedding in thinset or a suitable thermal screed.
Step 4 Use engineered hardwood vs. solid hardwood: pros and installation differences
1 choice you’ll face is whether to install engineered hardwood or solid hardwood over your heated floor, and that decision affects performance, installation, and long‑term stability. You’ll prefer engineered for dimensional stability and thinner profiles; solid offers longevity but needs careful moisture control. Choose based on subfloor type and temperature limits.
| Engineered | Solid |
|---|---|
| Stable | Traditional |
| Thinner | Thicker |
| Better with heat | Sensitive to heat |
| Easier acclimation | Longer lifespan |
Step 5 Floating vs. glue-down vs. nail-down methods over heating systems
Although each fastening method can work over a heated floor, you’ll choose differently depending on your heating type, wood construction, and long‑term goals;
floating floors sit above the system and allow movement,
glue‑down gives better heat transfer and stability for engineered boards,
while nail‑down suits thicker solid planks on subfloors but risks heat stress.
Match method to manufacturer and local conditions.
Step 6 Gradual heat-up process and humidity control after installation
When the floor’s in and the finish has cured, start the heat slowly so you don’t shock the wood—raise the system by only 5–10°F (3–6°C) per day until you reach normal operating temperature.
Monitor both surface and ambient readings, and keep relative humidity between about 35–55% to prevent shrinking or swelling.
Use a hygrometer, run the thermostat gradually, avoid rapid temperature swings, and adjust humidification as needed.
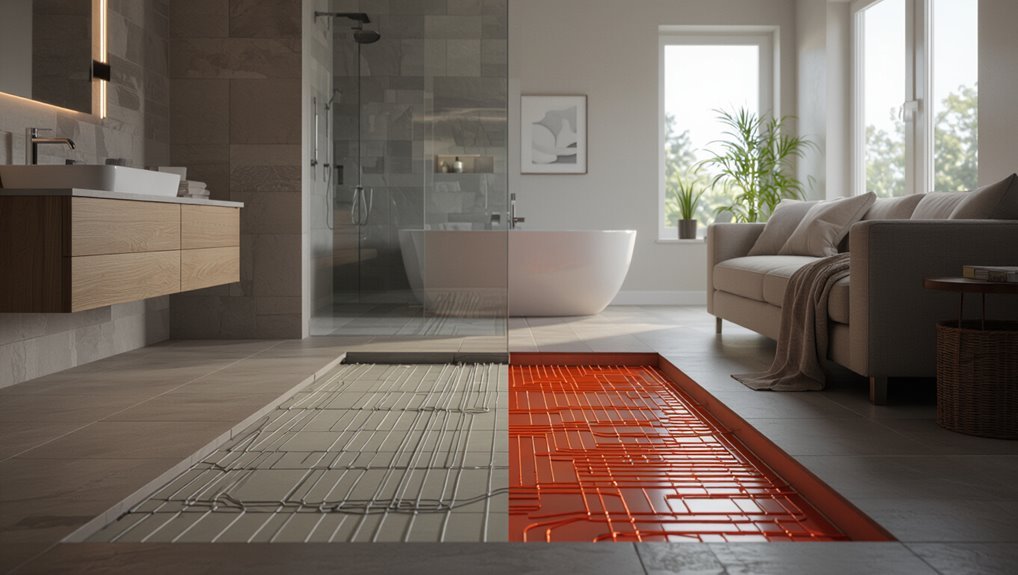
Comparison Tile vs. Hardwood for Radiant Heat Performance
When choosing between tile and hardwood for radiant heat, you’ll want to compare heat transfer efficiency and how quickly each floor responds to temperature changes.
Check maximum recommended operating temperatures and material limits so you don’t void warranties or damage the floor.
Also weigh long-term durability, maintenance needs, and upfront versus lifecycle costs to judge return on investment.
Heat transfer efficiency and response time
Because different floor materials move heat and react at different rates, you’ll notice tile and hardwood perform quite differently with radiant systems. Tile transfers heat quickly and responds fast; hardwood warms slower and holds heat longer. Choose based on desired responsiveness and comfort.
| Material | Transfer speed | Thermal mass |
|---|---|---|
| Tile | Fast | High |
| Hardwood | Slow | Moderate |
| Underlayment | Variable | Low |
Maximum recommended operating temperatures and material limits
Although both tile and hardwood can work with radiant heat, they’ve different maximum operating temperatures you should respect to avoid damage:
Tile tolerates higher surface temps—typically up to 85°F–95°F (29°C–35°C)—while solid hardwood usually limits to 80°F (27°C) and engineered wood to about 85°F (29°C).
You should follow manufacturer specs, use thermostats and sensors, and avoid sustained hot spots.
Long-term durability and maintenance differences
If you want a floor that’s low-maintenance and long-lasting over radiant heat, tile usually outperforms hardwood: it resists moisture, won’t warp from temperature cycles, and takes heavy foot traffic without needing frequent refinishing.
In contrast, hardwood—especially solid planks—needs tighter temperature control, periodic refinishing, and careful moisture management to avoid gaps, cupping, or finish failure.
You’ll inspect seams, monitor humidity, and refinish or replace softer boards sooner.
Cost comparison and return on investment
Estimating costs and payback for radiant-heated tile versus hardwood comes down to materials, installation complexity, energy use, and resale value.
So you’ll want to compare upfront and lifetime expenses rather than just the sticker price.
Tile typically costs less to operate and transfers heat efficiently, boosting ROI sooner.
Hardwood raises initial cost and may slow heat, but can add higher resale value in some markets.
Common Problems and Mistakes to Avoid
Watch for a few common pitfalls that can wreck your heated floor: overheating hardwood (which causes gaps or cupping), poor insulation that wastes heat, and bad electrical connections or thermostat placement.
Don’t install heat under incompatible adhesives or flooring, and always perform moisture testing first to avoid adhesive or floor failure.
Catching these issues early will save time, money, and a lot of frustration.
Overheating hardwood causing gaps or cupping
When you run a heated floor too hot or leave it on for long stretches, hardwood can dry out and shrink, causing gaps between boards or cupping where edges rise above the center.
Monitor and set controls to moderate temperatures and timed cycles, maintain proper humidity (35–55%), acclimate flooring before installation, and follow manufacturer max-temperature limits to prevent permanent distortion and costly repairs.
Insufficient insulation leading to heat loss and inefficiency
Overheating hardwood and humidity issues get a lot of attention, but poor insulation can undo all your careful temperature controls by letting heat escape downward instead of warming the room.
You’ll waste energy and get uneven warmth if you skip proper underlayment or insulation board.
Install appropriate thermal barriers, seal gaps, and follow manufacturer R-value recommendations so more heat goes upward where it’s needed.
Poor electrical connections and thermostat placement errors
Because electrical issues can turn an efficient heated-floor system into a safety hazard or a pricey repair, you need to get connections and thermostat placement right from the start.
Have a licensed electrician install and inspect all wiring, junctions, and ground fault protection.
Mount the thermostat away from direct sun, drafts, and heat sources, and place the floor sensor correctly to guarantee accurate temperature control.
Installing heating under incompatible adhesive or flooring materials
If you install a heating mat or cable over an adhesive or flooring material that isn’t rated for radiant heat, you’ll risk adhesive breakdown, floor warping, or even loose tiles and peeling finishes — problems that show up months after installation.
Check manufacturer ratings, use heat-compatible mortars and urethanes, and confirm flooring specs. Don’t assume compatibility; get documentation and approved products to avoid costly repairs.
Skipping moisture testing and causing adhesive/floor failure
When you skip moisture testing before laying heating mats or cables, you’re gambling with the bond between adhesive and substrate—and that gamble often loses.
Test concrete, plywood, or backerboard for moisture content and vapor emission. If levels exceed manufacturer limits, don’t proceed.
Excess moisture breaks down adhesives, warps hardwood, and causes tile delamination.
Fix moisture issues or choose appropriate membranes before installing heat.
Best Practices and Tips for Reliable Performance
You’ll get the best results by setting sensible temperature limits and using programmable controls or thermostats with floor sensors.
Insulate beneath the system and prepare the subfloor to cut heat loss and speed warm-up times.
Keep a simple maintenance and troubleshooting checklist plus clear labels and documentation so future repairs are quick and accurate.
Recommended temperature and control strategies
Because consistent temperatures protect both comfort and system longevity, set your heated floor to a steady base (typically 70–75°F for living spaces, 80–85°F for bathrooms) and use a programmable thermostat or smart controller to avoid wide swings.
Use floor sensors for accurate feedback, enable setback schedules when rooms are empty, and limit maximum surface temperature to manufacturer recommendations to prevent damage.
Insulation and subfloor recommendations for maximum efficiency
Although proper insulation and a solid subfloor mightn’t be the most glamorous parts of a heated-floor install, they’re the most important for efficiency and longevity; install at least R-10 insulation under ground-level or slab systems, use an appropriate vapor barrier where required, and choose a rigid, level subfloor (plywood or cement board per your system’s specs) to guarantee even heat distribution and prevent heat loss or flooring damage.
Use perimeter insulation, seal gaps, and follow manufacturer thickness limits to avoid overheating or telegraphing seams.
Routine maintenance and troubleshooting checklist
When you keep a simple routine and address minor issues early, your heated floor will perform reliably and last longer.
Inspect thermostats, sensors, and visible wiring monthly. Run system self-tests before season. Clean floor surfaces and avoid moisture pooling.
- Check for uneven heating zones.
- Note error codes and reset per manual.
- Verify thermostat calibration and battery backup.
Documentation and labeling for future repairs
If you want quick, accurate repairs down the line, document every step of the installation and label components clearly now: note thermostat models, sensor locations, cable routes, circuit breakers, and any splice points.
Then store that information with photos, wiring diagrams, and the installation manual.
Also attach durable labels at the breaker box and under the floor access, keep digital and printed copies, and note warranty details.
Cost, Warranty, and Lifespan Considerations
You’ll want to review the typical cost breakdown—materials, labor, and any electrical or plumbing work—so you can budget accurately.
Check warranty differences carefully, since manufacturers, system makers, and installers each cover different parts and timeframes.
Also consider expected lifespan and when key components (controls, mats, tubing) usually need replacement to avoid surprises.
Typical cost breakdown: materials, labor, electrical/plumbing work
Although costs vary widely by system and scope, breaking down expenses into materials, labor, and electrical/plumbing work helps you set a realistic budget. Materials (mats, thermostats) often run $5–$20/ft². Labor varies by floor type; expect higher for tile. Electrical or plumbing upgrades add flat fees. Compare quotes and factor contingency.
| Item | Typical cost | Notes |
|---|---|---|
| Materials | $5–$20/ft² | Mats, wiring, thermostat |
| Labor | $3–$15/ft² | Tile higher than hardwood |
| Electrical/Plumbing | $200–$1,500 | Panel upgrades, permits |
Warranty differences: systems, installers, and flooring manufacturers
Because warranties come from three different sources—your heated-floor system, the installer, and the flooring manufacturer—you’ll want to compare what each covers and for how long before you buy.
Check scope: parts, labor, and damage to finishes.
Confirm transferability, registration requirements, and exclusions for improper installation or moisture.
Keep documentation and insist on written warranty terms from both installer and product suppliers.
Expected lifespan and when to replace components
Warranties tell you what’s covered today, but you’ll also want to know how long the system and its parts will actually last and when you’ll likely face replacements.
Expect electric mats to last 25–40 years, hydronic systems 30–50 years with proper maintenance.
Controls and sensors often need replacement every 10–15 years.
Plan inspections every 5 years and budget for controller or sensor swaps sooner if performance drops.
FAQs
You probably have a few quick questions about retrofit options, hardwood safety, warm-up times, operating costs, and upkeep—let’s answer them.
I’ll explain whether you can install radiant heat under existing tile or wood, what it means for hardwood, and how long a system takes to warm a room.
Then we’ll cover energy impacts and routine maintenance so you know what to expect.
Can I install radiant heat under existing tile or hardwood?
Wondering whether you can add radiant heat without ripping out your existing tile or hardwood? You can in many cases: electric mats can be installed over subfloor or thinset above existing tile if height allows; low-profile hydronic systems sometimes fit under hardwood with engineered planks.
Check floor type, adhesive, joist depth, and manufacturer approvals. Consult a pro to confirm feasibility and warranty impacts.
Will radiant heat damage my hardwood floors?
If your existing hardwood is a candidate for radiant heat, the next question is whether the system will harm the wood.
Properly installed low-temperature radiant systems won’t damage hardwood if you control surface temperature (usually below 80°F), allow appropriate acclimation, maintain humidity, and follow manufacturer guidelines.
Engineered hardwood tolerates heat better than solid; consult flooring specs and a pro for best results.
How long does it take for a heated floor to warm a room?
How quickly will a heated floor warm your room? It depends on system type, floor material, insulation, and thermostat settings.
Electric mats heat faster—often 20–60 minutes to feel noticeably warm; hydronic systems may take 1–3 hours to fully distribute heat.
Thicker subfloors and poor insulation slow response. For best results, preheat on a schedule and use a programmable thermostat for steady, predictable warmth.
Do radiant floors increase energy bills?
Curious whether radiant floors will drive up your energy bills? They often lower overall costs by heating rooms more efficiently and reducing thermostat cycling.
Electric systems can be pricier to run than hydronic in large spaces, but targeted zone control, programmable thermostats, and good insulation keep usage—and bills—manageable.
Consider system type, fuel prices, and insulation to estimate your actual cost impact.
What maintenance does a radiant floor system require?
Now that you’ve weighed energy impacts, you’ll want to know what’s involved in keeping a radiant floor system reliable over time.
Maintenance is minimal: check thermostats, inspect for leaks (hydronic), monitor pressure and boiler service annually, and make sure sensors and controls work.
Electric systems rarely need service but verify wiring and connections during renovations.
Promptly address unusual cold spots or sounds.