
How to Clean a Shower Floor and Get Rid of Soap Scum for Good
You can remove soap scum and keep it away by wetting the floor, sprinkling baking soda, and spraying a 1:1 white vinegar-and-water mix; let it fizz for 5–10 minutes, scrub with a stiff nylon brush, then rinse and squeegee dry. For grout use baking soda with hydrogen peroxide; avoid acidic cleaners on natural stone. Rinse after each use, ventilate, and consider a water softener or syndet soaps to reduce buildup — continue for surface-specific tips and maintenance schedules.
Clean a Shower Floor and Remove Soap Scum Fast
Start by wetting the floor, sprinkling baking soda, and spraying white vinegar for an immediate bubbly lift to break up soap scum.
For most tile, fiberglass, and porcelain floors you’ll get the best DIY results with this baking soda–vinegar combo or a diluted dish soap solution applied with a scrub brush.
Do this spot-clean weekly and do a thorough scrub monthly to keep scum from building up.
One-paragraph quick protocol for immediate results
When you need immediate results, spray the floor with a 1:1 mix of white vinegar and water.
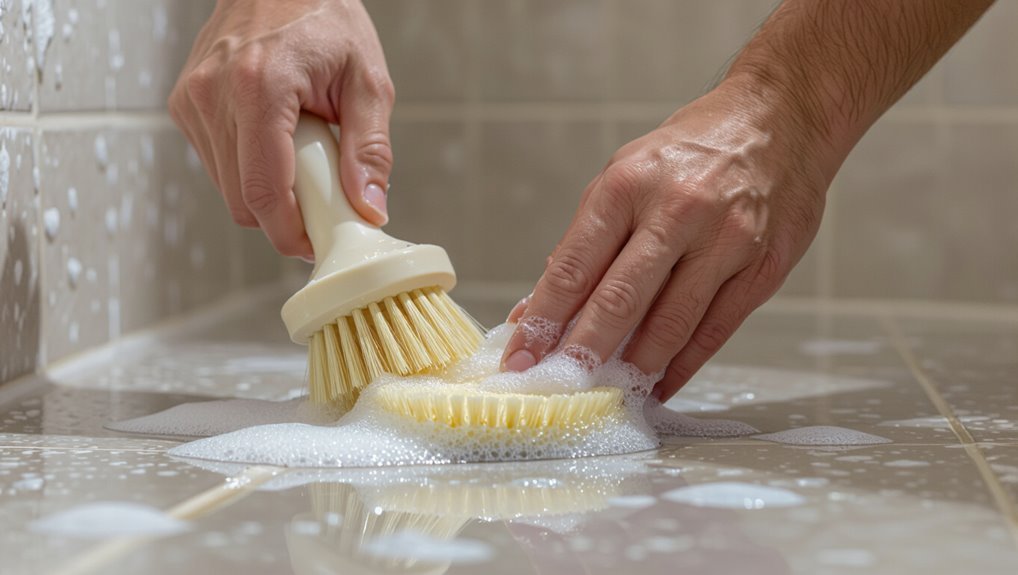
Let it sit 5–10 minutes to loosen soap scum, then scrub with a stiff nylon brush or non-scratch pad in small circular motions and rinse with hot water.
For stubborn buildup, sprinkle baking soda over the wet surface before scrubbing to create a mild abrasive that speeds removal.
You’ll quickly see how to clean floor of shower efficiently.
Best DIY cleaner for most surfaces
If you want a single, inexpensive DIY cleaner that works on tile, fiberglass, acrylic, and most grout, mix equal parts white vinegar and warm water in a spray bottle and add a teaspoon of liquid dish soap to help cut oils and loosen grime; spray generously, let it sit 5–10 minutes, then scrub with a nylon brush and rinse.
- Ventilate the space
- Test a small area
- Avoid mixing with bleach
Time and frequency recommendations
For most households, cleaning the shower floor once a week prevents soap scum and mildew from building up, while a quick rinse and squeegee after each use keeps grime from setting and cuts down the heavy scrubs.
Deep-clean tiled or textured floors monthly. Spot-treat visible buildup immediately.
If you have hard water or heavy use, clean twice weekly and descale monthly to stay ahead of residue.
Basic Understanding What Is Soap Scum and Why It Builds Up
Soap scum forms when soap molecules react with minerals in hard water and leave behind a filmy residue that clings to surfaces.
You’ll see it on tile, grout, acrylic, fiberglass, and natural stone, where its texture and porosity make removal harder.
Hard water, bar soaps high in fats, and poor ventilation all speed up buildup.
What soap scum is (chemical and physical explanation)
Grime that won’t rinse away, soap scum forms when soap molecules react with minerals in your water—mainly calcium and magnesium—creating a chalky, insoluble residue that clings to tiles, glass, and fixtures.
You’ll also get oily buildup from body oils and synthetic surfactants; these mix with mineral salts, dry into a filmy layer, and trap dirt, making scrubbing and rinsing less effective.
Common surfaces affected (tile, grout, acrylic, fiberglass, stone)
Most shower surfaces—tile, grout, acrylic, fiberglass, and natural stone—attract soap scum, but each holds it differently because of texture and porosity.
You’ll find smooth acrylic and fiberglass resist visible buildup but still slick; glazed tile hides deposits on shiny surfaces while grout’s pores trap grime and stain; porous stone soaks residues, requiring gentler, specific cleaners to avoid damage.
Factors that accelerate buildup (water hardness, soap type, ventilation)
Because hard water, bar soap, and poor ventilation each change how residue forms, they speed up soap scum buildup and make it harder to remove.
You’ll notice mineral-rich water reacts with fatty soap to create stubborn films. Hard soaps and oils cling to porous grout and textured tile.
Without proper airflow, moisture lingers, letting residue harden and mold grow.
Adjust water, soap, and ventilation.
Tools and Materials You’ll Need
Before you start scrubbing, gather a checklist of tools—scrub brushes, a grout brush, microfiber cloths, a squeegee, and a bucket—so you won’t interrupt the job.
Pick cleaners suited to your shower surface, whether store-bought solutions or simple DIY mixes like vinegar and baking soda for tile or a non-acidic cleaner for natural stone.
Wear gloves and eye protection, and run a fan or open a window to keep the area well-ventilated while you work.
Cleaning tools checklist
You’ll want a compact kit of reliable tools and cleaners so you can tackle soap scum, mildew, and grime efficiently—think a scrub brush with stiff bristles, a nonabrasive sponge, a microfiber cloth, a grout brush or old toothbrush, a squeegee, rubber gloves, and an all-purpose shower cleaner plus a mildew-fighting spray or diluted bleach for tough spots.
- scrub brush
- grout/toothbrush
- squeegee and cloths
Recommended cleaners by surface (store-bought and DIY)
Match the cleaner to your shower’s surface so you get effective results without damage. Use these store-bought and DIY options: gentle pH-neutral cleaner for stone, vinegar solutions for tile/grout, and diluted bleach for stubborn mold on non-porous floors. Test first.
| Surface | Recommended cleaner |
|---|---|
| Natural stone | pH-neutral cleaner |
| Tile/grout | Vinegar + water |
Safety gear and ventilation tips
Start with the right safety gear and ventilation to protect your lungs, eyes, and skin while you clean:
wear chemical-resistant gloves, goggles, and a mask (N95 for dust or a respirator for strong fumes), open windows and run an exhaust fan, and keep the bathroom door ajar to promote airflow.
Also keep a towel handy for drips, avoid mixing cleaners, and rinse skin immediately if contact occurs.
Step-by-Step Cleaning Process
Start by clearing the area and protecting fixtures so you won’t damage anything.
Choose the right cleaner, scrub with the proper tool and technique, then rinse thoroughly and check for any remaining scum.
Finish by drying and applying sealers or a mild polish as needed.
Step 1 Prepare the area and protect fixtures

Before you scrub, clear the shower of bottles, mats, and loose items and open a window or turn on the exhaust fan for ventilation.
Protect fixtures and glass with painter’s tape or plastic wrap, remove soap scum deposits from corners, and sweep hair from the drain.
Follow these quick prep tasks:
- Cover faucets and hardware
- Remove rugs and bottles
- Ventilate the space
Step 2 Apply appropriate cleaner (chemical vs. natural)
With the area prepped and fixtures protected, choose the cleaner that matches your shower’s surface and the type of grime you’re tackling.
Pick a pH-safe product for stone, a stronger detergent for tile, or a gentle natural mix for regular maintenance.
Apply evenly, let dwell per instructions, then rinse thoroughly.
- Stone: pH-neutral
- Tile: alkaline cleaner
- Regular: vinegar or baking soda
Step 3 Agitate and scrub effectively (technique and tool choice)
Scrub using the right motion and tool for the surface so you remove soap scum and grime without damaging the finish.
Use a soft-bristled brush or nonabrasive pad on tile and grout; a sponge or microfiber for acrylic.
Work in small sections with circular and back-and-forth strokes, applying firm, even pressure.
Rinse tools frequently and reapply cleaner to stubborn areas.
Step 4 Rinse thoroughly and inspect for remaining scum
Turn on the shower or use a bucket to flush the floor, making sure all cleaner and loosened grime gets washed away.
Move water systematically from one corner to the drain. Check for streaks, residue, or dull spots; repeat targeted scrubbing if needed.
- Inspect grout lines closely.
- Rinse until water runs clear.
- Spot-treat persistent scum.
Step 5 Dry and finish (sealers, polishers, or mild buffing)
1. After rinsing, dry the floor with a microfiber cloth or squeegee to prevent water spots and mildew.
Apply a grout sealer if recommended for your tile type, following product instructions.
For stone floors, use a stone polish or mild buffing pad to restore shine—test a small area first.
Let any treatments cure fully before regular use.
Surface-Specific Instructions and Precautions
Different shower materials need different cleaners and care, so you’ll want to match your method to the surface.
Pay special attention to grout and deep-set buildup, avoid acidic or abrasive products on natural stone, and use gentler cleaners for acrylic or fiberglass pans.
Also remember to clean glass doors and enclosures with a streak-free solution to prevent soap scum and hard-water spots.
Ceramic and porcelain tile
Ceramic and porcelain tile are durable but need gentle, tile-appropriate care to avoid dulling the glaze or loosening grout; use a pH-neutral cleaner or diluted dish soap, a soft-bristle brush or microfiber mop, and warm water.
Rinse thoroughly to remove residue, dry to prevent water spots, and avoid abrasive powders, steel wool, or acidic cleaners that can etch or discolor the surface.
Grout lines and deep-set buildup
While tile surfaces can look clean, grout lines often trap soap scum, mildew, and mineral deposits that need targeted treatment; you’ll get the best results by loosening buildup before scrubbing so you don’t grind contaminants deeper into pores.
Apply a poultice of baking soda and hydrogen peroxide, let sit 10–15 minutes, agitate with a stiff nylon brush, rinse, and repeat stubborn areas.
Acrylic and fiberglass shower pans
After you’ve tackled grout lines, turn your attention to the shower pan itself—many showers use acrylic or fiberglass, and these materials demand gentler care to avoid scratching or dulling the finish.
Use a mild, nonabrasive cleaner or diluted dish soap, a soft cloth or sponge, and warm water. Rinse thoroughly and dry to prevent water spots; avoid harsh scrubbers and strong acids.
Natural stone (marble, travertine, slate) what to avoid
Because natural stone is porous and softer than tile, you need to treat marble, travertine, and slate differently than acrylic or ceramic—avoid acidic cleaners (vinegar, lemon) and bleach, abrasive pads, and alkaline heavy-duty degreasers that can etch, stain, or strip sealers.
Instead, use pH-neutral stone cleaners, soft microfiber cloths or non-scratch sponges, rinse thoroughly, blot dry, and reseal periodically to protect the surface.
Glass shower doors and enclosures
Glass shower doors and enclosures need different care than tile or stone: use a gentle, non-abrasive glass cleaner or a 50/50 water-and-rubbing-alcohol solution, a soft microfiber cloth or a non-scratch squeegee, and rinse or wipe dry after cleaning to prevent streaks and mineral buildup.
You should avoid abrasive pads, acidic cleaners, and harsh scrubbing that can etch glass or damage seals, and dry tracks to prevent mold.
Alternative Methods and Product Comparisons
You can try DIY cleaners like vinegar, baking soda, hydrogen peroxide, or borax for mild soap scum and mildew.
Compare commercial options—acidic for mineral deposits, alkaline for grease, and enzymatic for organic grime—to pick the right chemistry.
For stubborn buildup consider steam cleaners or ultrasonic tools, especially on grout and textured surfaces.
DIY cleaners (vinegar, baking soda, hydrogen peroxide, borax)
Mixing a few pantry staples can tackle most shower-floor grime without harsh chemicals.
You can scrub with baking soda paste, spray vinegar for mineral buildup, or use hydrogen peroxide to lift stains.
Borax adds disinfecting power on tough spots. Choose based on surface and rinse thoroughly.
- Baking soda paste
- Vinegar spray
- Hydrogen peroxide (or borax)
Commercial cleaners compared (acidic, alkaline, enzymatic)
After trying pantry staples, you might prefer store-bought options for faster or tougher cleaning tasks. Acidic cleaners dissolve mineral soap scum; alkaline ones cut grease; enzymatic formulas break organic residue gently. Pick based on stain type, surface material, and safety. Test first, ventilate, and wear gloves.
| Type | Best for |
|---|---|
| Acidic | Hard-water mineral deposits |
| Alkaline | Greasy soap scum |
| Enzymatic | Organic buildup |
When to use steam cleaners or ultrasonic tools
When stains resist scrubbing or you want a chemical-free option, consider steam cleaners or ultrasonic tools for their different strengths: steam loosens grime and kills bacteria with high-temperature vapor, while ultrasonic devices dislodge deposits through rapid vibrations and cavitation.
Use steam on sealed tile, grout, and mildew-prone areas; choose ultrasonic for removable fixtures, delicate finishes, or small crevices to avoid heat damage.
Common Mistakes and How to Avoid Them
Watch out for common mistakes that can scratch tiles, eat grout, or strip protective finishes when you use abrasive tools or the wrong chemicals.
Don’t mix cleaners—especially bleach and ammonia—or ignore corners and grout lines where mold hides, and avoid overusing vinegar or strong acids on sensitive surfaces.
Follow product labels and test small areas so you clean effectively without causing damage.
Damage from abrasive tools or harsh chemicals
Although it might seem faster to scrub with steel wool or pour strong cleaners down the drain, those abrasive tools and harsh chemicals can etch tiles, strip finishes, and corrode metal fixtures.
Use nonabrasive brushes, microfiber, and pH-neutral cleaners instead. Test any product on a hidden spot, rinse thoroughly, wear gloves, and replace damaged seals or grout promptly to prevent long-term harm.
Mixing cleaners that cause dangerous fumes
If you think combining cleaners will boost cleaning power, don’t—mixing products like bleach and ammonia, or bleach and acids, can create toxic gases that can cause breathing trouble, eye injury, or worse.
Always read labels, use one product at a time, ventilate thoroughly, and wear gloves and eye protection.
When in doubt, choose a mild cleaner or soap and water instead.
Skipping grout or corners spots most people miss
Because grout lines and corners trap soap scum, mildew, and grime, skipping them leaves your shower looking clean while still harboring stains and bacteria.
Don’t rush those tight areas: scrub grout with a stiff brush, get into corners with a toothbrush or grout tool, and rinse thoroughly.
Inspect with good light so you don’t miss buildup that invites mold.
Overusing vinegar or acids on sensitive surfaces
When you reach for vinegar or other acidic cleaners, remember that their strength can damage stone, grout sealers, and some tile glazes; using them too often or at full concentration will etch surfaces, strip protective coatings, and worsen stains over time.
Test a hidden spot first, dilute acids, limit use to safe materials, and switch to pH-neutral cleaners for delicate surfaces to prevent long-term harm.
Prevention and Best Practices to Keep Soap Scum Away
To keep soap scum from building up, set simple daily and weekly routines like squeegeeing after each shower and wiping dry once a week.
Consider switching to syndet bars or liquid soap and, if you have hard water, try a water softener or a chelating shower filter to cut residue.
Improve ventilation, and protect tile with sealants or durable coatings for longer-term prevention.
Daily and weekly maintenance routines
If you keep up with small, regular habits, you’ll prevent most soap scum from ever building up on your shower floor.
Wipe down walls and floor with a squeegee after each use, rinse thoroughly, and let air circulate.
Once a week, scrub grout and corners and rinse.
Focus on:
- Daily squeegee
- Weekly scrub
- Ventilate well
Water-softening and soap alternatives (syndet bars, liquid soap)
Because hard water reacts with traditional soap to form stubborn scum, soften your water and switch to soap alternatives like syndet bars or liquid cleansers to cut buildup at the source.
Install a water softener or use a showerhead filter, choose pH-neutral syndet or sulfate-free liquid soap, and monitor residue.
These steps reduce mineral-soap reaction and make cleaning far easier.
Ventilation, squeegeeing, and drying habits
Softening your water and switching soaps cuts down on residue, but how you manage moisture after each shower makes a big difference too.
Open a window or run the exhaust fan during and after showering to reduce humidity.
Squeegee walls and floor after every use, then towel-dry corners and grout.
Leave the door or curtain ajar to speed drying and prevent soap scum buildup.
Protective coatings, sealants, and long-term solutions
When you apply a protective coating or sealant, you’re putting a durable barrier between water, soap, and your shower surface so grime can’t cling and build up as quickly.
Choose a product matched to your tile or stone, follow manufacturer curing times, and recoat as recommended.
Combine with regular squeegeeing, mild cleaners, and good ventilation to keep soap scum away long term.
Cost, Time, and Environmental Considerations
Plan for about 15–30 minutes and minimal cost for a single cleaning session if you stick to basic supplies.
Choose biodegradable cleaners or homemade mixes and rinse or dispose of residues following local guidelines to protect plumbing and waterways.
Call a pro for stubborn stains, damaged grout, or if you don’t have the time or tools to do the job safely.
Estimated time and cost for one cleaning session
A single thorough shower-floor cleaning usually takes about 20–45 minutes, depending on how dirty the surface is and which tools you use. You’ll spend roughly $0–$10 per session using common cleaners and tools; deep stain removal may cost more. Plan short drying time afterward.
| Task | Time | Cost |
|---|---|---|
| Light cleaning | 20 min | $0–$5 |
| Deep clean | 45 min | $5–$10 |
Eco-friendly cleaner options and disposal tips
Because eco-friendly cleaners use simple, non-toxic ingredients, you’ll protect both your health and the environment while keeping costs low—many effective options cost under $5 per cleaning and take no extra time compared with commercial products.
Use baking soda paste, vinegar spray, or castile soap; dilute concentrates to save money. Rinse thoroughly, pour leftover diluted solutions down the drain, and compost solid residues when possible.
When to hire a professional vs. DIY
Wondering whether to tackle shower-floor cleaning yourself or call a pro? Weigh cost, time, and environmental impact: DIY saves money and lets you choose green products, but demands effort and proper disposal.
Hire a pro for severe stains, mold, or delicate surfaces to avoid damage and chemical overuse. If time’s tight or results matter, professional service can be worth the investment.
Troubleshooting Stubborn Stains and When to Escalate
Start by spotting whether the mark is mineral buildup (hard, white or crusty), soap scum (filmy and cloudy), or mold (dark, fuzzy or musty), since each needs a different approach.
Try targeted tactics—acidic cleaners or vinegar for minerals, alkaline or detergent scrubs for soap scum, and hydrogen peroxide or a mildew cleaner for mold—and repeat treatment on tough spots until you see improvement.
If stains won’t lift, tiles are pitted, grout is crumbling, or water damage is present, it’s time to contemplate professional repair or replacement.
Identifying mineral vs. soap scum vs. mold
When you’re trying to restore a dingy shower floor, the first step is recognizing whether the problem is mineral deposits, soap scum, or mold—each looks different and needs a different approach.
Mineral deposits are chalky, white, and hard; soap scum feels filmy and gray; mold appears fuzzy, dark, or greenish.
Test with vinegar and bleach cautiously to confirm.
Tough-spot strategies and repeat treatments
If a stubborn patch won’t budge after your first pass, don’t assume it’s hopeless—try focused, stepwise tactics instead.
Reapply cleaner, let it dwell, then agitate with a nylon brush or pumice stone for tile/grout only. Rinse and repeat up to three times.
For persistent mineral buildup, use a vinegar soak; for mold, use a mildew-specific cleaner and follow safety precautions.
Repair or replacement indicators (when floor is permanently damaged)
Although many stains respond to repeated cleaning, you’ll know the floor needs repair or replacement when damage goes beyond surface grime—think permanent discoloration, deep pitting, tiles that crumble or flex, grout that’s eroded away, or porous finishes that no longer shed water.
If stains persist after professional remediation, smells linger, or structural instability appears, plan targeted repairs or full replacement to prevent mold and leaks.
FAQ
You probably have specific questions like how often to deep-clean, whether bleach will remove soap scum and mold, or which cleaner’s safest for natural stone.
You’ll also want to know if vinegar harms grout or tile over time and how to remove yellowing or rust stains.
Read on for clear, practical answers to each of these concerns.
How often should I deep-clean the shower floor?
How often you should deep-clean the shower floor depends on use and water hardness: aim for a thorough deep clean every 1–2 months for regular households.
More often (every 2–4 weeks) if you have heavy traffic, hard water, or mold-prone conditions, and less often (every 3 months) for single-person or infrequently used bathrooms.
Between deep cleans, do light weekly maintenance to prevent buildup.
Can I use bleach to get rid of soap scum and mold?
Wondering if bleach will tackle soap scum and mold? You can use bleach to kill mold and whiten grout, but it doesn’t dissolve mineral-rich soap scum well.
Ventilate, wear gloves and eye protection, and never mix bleach with ammonia or vinegar. Test a small area first.
For heavy soap scum, combine mechanical scrubbing or a detergent-based cleaner with targeted bleach use for mold.
What’s the safest cleaner for natural stone showers?
Which cleaner’s safest for natural stone showers depends on the stone type and sealant.
You should use pH-neutral, stone-safe cleaners labeled for marble, travertine, or limestone; avoid acidic or abrasive products.
Test any cleaner in an inconspicuous spot first. Rinse thoroughly and dry to prevent mineral buildup.
Re-seal according to manufacturer recommendations to maintain protection and ease future cleaning.
Will vinegar damage grout or tile over time?
Can vinegar harm grout or tile over time?
You can safely use diluted white vinegar on ceramic, porcelain, and glazed tile occasionally, but avoid acid on natural stone, unglazed tile, or colored grout—it can etch or weaken surfaces and strip sealers.
Always test a small area, rinse thoroughly, and reseal grout periodically.
For regular cleaning, consider milder, pH-neutral cleaners.
How do I remove yellowing or rust stains from a shower floor?
If vinegar can harm certain grout or stone, you’ll want different tactics for yellowing or rust stains—what works on glazed tile may wreck natural stone or unsealed grout.
For rust, use a commercial rust remover labeled safe for your surface or a paste of baking soda and lemon applied briefly, then rinse.
For yellowing, try oxygen bleach solutions; test first on an inconspicuous spot.