How to Install Floor Molding for a Polished, Custom Finish
You’ll get a polished, custom finish by measuring walls, choosing the right molding, and prepping surfaces before cutting precise joints. Mark studs, snap a chalk line, then cope inside corners and miter outside corners for tight seams. Use construction adhesive plus finish nails, countersink and fill holes, then caulk and paint or stain for a seamless look. Maintain expansion gaps and match material to room conditions. Keep going to learn detailed techniques, tools, and troubleshooting.
How to Install Floor Molding for a Polished, Custom Finish
Here’s a quick answer: this guide shows you how to measure, cut, and install floor molding for a polished, custom finish.
You’ll get step-by-step techniques, the right tools, and finishing tips to match your style.
Replace molding when it’s warped, damaged, or when you’re remodeling to update the look.
Quick Answer What this guide delivers
While this guide walks you step-by-step through measuring, cutting, fitting, and fastening baseboards and quarter-round, it also shows how to choose profiles and finishes that give your room a polished, custom look.
You’ll get concise instructions on tools, materials, and techniques for how to install floor molding, plus troubleshooting tips, finish options, and a checklist so you can complete the job confidently and efficiently.
When to replace or install new floor molding
When should you replace or install new floor molding?
You should act when molding is warped, cracked, water-damaged, or detached, or when flooring or trim style changes.
Also replace during renovations for consistent height and gap coverage.
Choose durable materials and match profiles to room design.
Timely replacement prevents drafts, pest entry, and uneven shifts, improving appearance and longevity.
Basic Understanding: Types and Purposes of Floor Molding
Before you start installing, you’ll want to know the common molding types—baseboard, shoe, quarter round, and casing—and which material (wood, MDF, PVC, or polyurethane) suits your budget and environment.
Pick a profile that matches your style—modern, traditional, or contemporary—and gather the right tools and supplies so you don’t stop mid-project.
With those choices made, installation will be faster and your finish will look intentional.
Common molding types (baseboard, shoe, quarter round, casing)
A simple strip of trim can change the look of a room and protect its edges, so it’s helpful to know the common molding types you’ll encounter: baseboard, shoe, quarter-round, and casing.
You’ll choose profiles for style and function: baseboards cover gaps, shoe and quarter-round hide floor seams, and casing frames doors and windows.
- Function
- Profile
- Placement
Materials overview: wood, MDF, PVC, polyurethane
Materials matter because they determine how your molding looks, performs, and how much you’ll spend; wood, MDF, PVC, and polyurethane each bring distinct strengths and trade-offs.
Choose solid wood for authenticity and sanding, MDF for smooth painted runs and affordability, PVC for moisture-prone areas, and polyurethane for intricate, durable profiles.
Match material to room conditions and finish expectations.
Design and profile choices for different styles (modern, traditional, transitional)

Now that you’ve matched material to room conditions and finish expectations, pick profiles that reinforce your home’s style.
For modern spaces, choose slim, flat baseboards with minimal bevels.
Traditional rooms suit taller, detailed moldings with rosettes and chair rails.
For contemporary interiors, blend simple lines with modest ornamentation to balance contemporary and classic elements while maintaining proportion and scale.
Tools and materials checklist before you start
Before you start, gather the essential tools and materials so you won’t interrupt the job hunting for supplies mid-project.
You’ll need measuring, cutting, fastening, and finishing gear plus the molding itself. Plan quantities and finishes.
- Tape measure, miter saw, coping saw, nail gun, level
- Baseboard/quarter round, caulk, wood filler, paint/stain
- Safety gear, adhesive, spare trim pieces
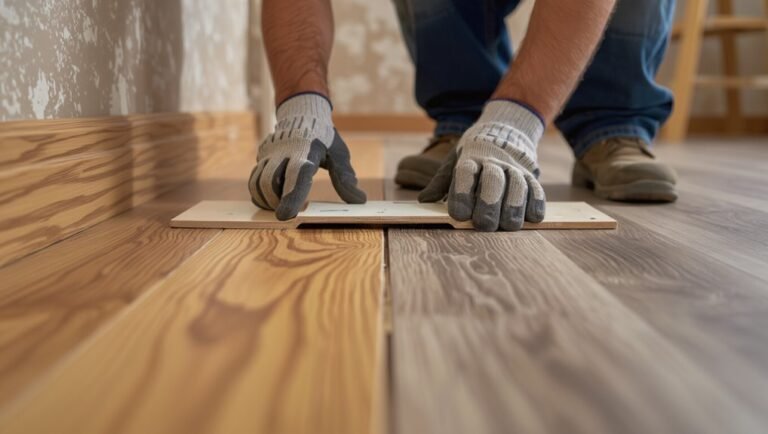
Preparation: Measuring, Planning, and Surface Prep
Before you cut or buy trim, measure the linear footage of each wall and calculate extra material for waste and corners.
Check walls, floors, and the subfloor for damage or uneven spots, remove any old molding carefully, and note repairs you’ll need.
Finally, clean, fill, and prime the wall and floor base where the molding will sit so adhesives and finishes bond properly.
Measuring linear footage and calculating material needs
Start by measuring each wall you’ll be molding, because accurate linear footage is the foundation for buying the right amount of material and avoiding waste.
Measure wall-to-wall, note lengths, and add for closets and alcoves.
Sum totals, divide by molding length per piece, and round up to account for cuts and mistakes (usually 10–15%).
Include extra for matching grain or pattern.
Assessing walls, floors, and subfloor conditions
Once you’ve measured and planned your layout, inspect the walls, floors, and subfloor closely for issues that could affect molding installation.
Check for gaps, unevenness, rot, moisture, loose boards, and cracked drywall. Note out-of-plumb walls and high or low spots on the floor.
Mark trouble areas, measure junctions, and decide whether repairs, shimming, or leveling are required before installing molding.
Removing old molding safely
With your inspections complete and problem areas marked, remove the old molding carefully to protect the walls and floor.
Score paint seams, loosen nails with a pry bar and block to spread force, and pull trim away steadily.
Label pieces if reusing, collect nails and debris, patch small holes, and vacuum.
Wear gloves and eye protection to avoid injury.
Preparing and priming walls and base of floor for adhesion/finish
Measure and map the room before you touch primer so you know where molding will sit and how panels meet corners or junctions.
Clean surfaces, fill gaps, sand glossy paint, and vacuum dust.
Mask adjacent flooring and trim.
Apply a high-quality primer to walls and baseboards for adhesion, let it dry fully, then lightly sand for a smooth, paint-ready surface before installing molding.
Step-by-Step Installation Process
Now you’ll walk through the installation step by step, starting with when to cope vs. miter and how to lay out your run by marking studs and start points.
You’ll learn how to attach molding with a nail gun, adhesive, or by hand, plus how to handle inside/outside corners with coping or back‑cut miters.
Finally, you’ll see techniques for fitting neatly around door casings, vents, and cabinets.
Step 1 Cutting and coping vs. mitering: when to use each
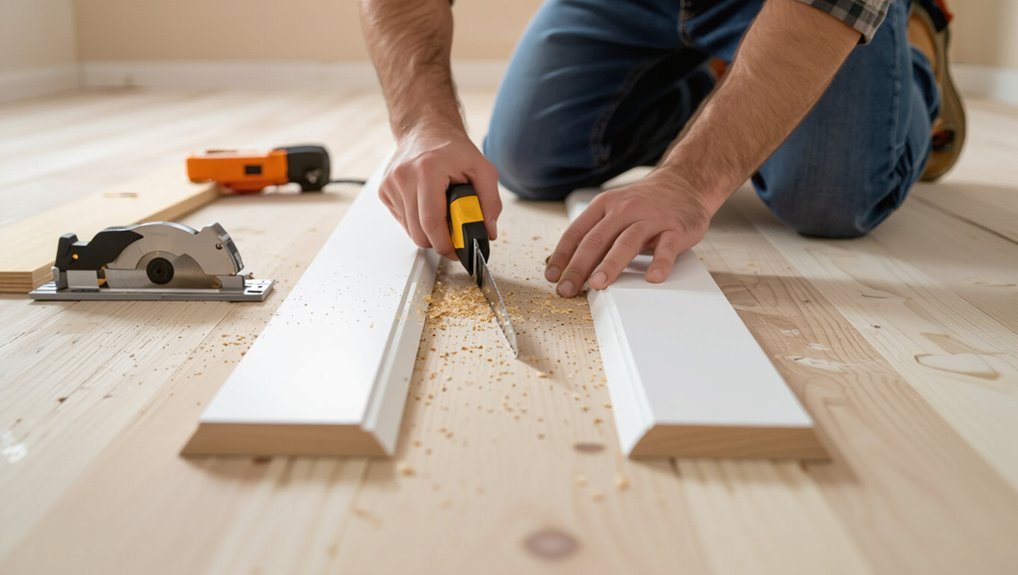
Wondering whether to cope or miter your trim? You’ll miter outside corners and long runs for speed and neat angles.
Cope inside corners to get tight fits when walls aren’t square — cut profile with a coping saw for one piece to match the face of the adjoining board.
Choose coping for precision, mitering for efficiency; use both where appropriate.
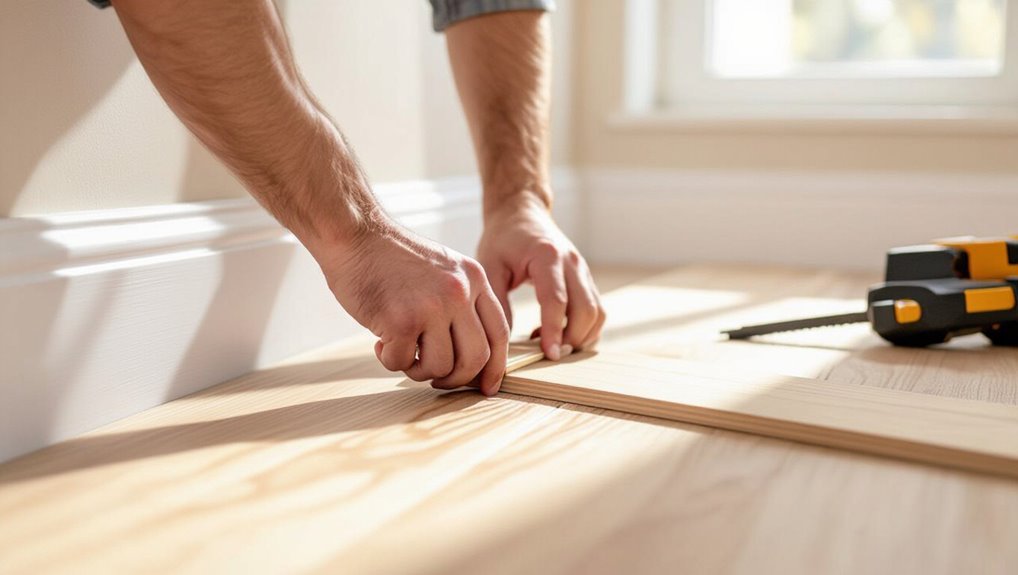
Step 2 Layout: marking stud locations, spacing, and starting points
After you’ve decided when to cope and when to miter, lay out the wall so installation goes quickly and the molding stays straight.
Measure and mark stud locations every 16 inches (or existing spacing). Snap a chalk line at baseboard height for alignment.
Choose a starting corner—work toward long runs—note tight spots and doorways, and pre-mark cut angles to save time during installation.
Step 3 Attaching molding: nail guns, adhesive, and hand nailing techniques
Start by choosing your fastening method—nail gun, construction adhesive, or hand nails—based on molding size, wall material, and your comfort level.
Position molding, apply adhesive where gaps are likely, then fasten every 12–16 inches into studs or solid backing. Countersink nails and fill holes.
- Use brad nailer for small trim.
- Heavy molding needs finish nails.
- Adhesive for hollow back pieces.
Step 4 Handling inside and outside corners (coping technique, back-cut miter)
Inside and outside corners demand different cuts: cope inside joints for tight fits against the profile and use back‑cut miters on outside corners to keep the face seams aligned.
For coping, cut the profile with a coping saw, test-fit, and pare for a snug match.
For outside corners, miter, back‑cut slightly, dry‑fit, then finish nail and fill seams for a seamless look.
Step 5 Fitting around obstacles (door casings, vents, cabinets)
When you run molding into door casings, vents, or cabinets, measure and mark each obstruction precisely before cutting so pieces fit tight and sit flush; scribe or trim the molding at a slight angle where it meets uneven surfaces, test-fit, then adjust with a rasp or chisel until the joint closes cleanly.
Use coping for profiles, cut reliefs for vents, and route thin reveals behind cabinet toes for a snug, professional fit.
Step 6 Filling gaps, nail holes, and seams with caulk and wood filler
After you’ve test-fit and trimmed molding around obstacles, seal the visible imperfections so the finish looks professional.
Run a bead of paintable latex caulk along seams and where molding meets walls; smooth with a damp finger or tool.
For nail holes or deeper defects, push wood filler in, let it cure, then scrape flush.
Wipe dust away before finishing.
Step 7 Sanding, priming, and painting or staining for a custom finish
Start by sanding the molding smooth so paint or stain will adhere evenly; use a fine-grit sanding block to blend caulk and filler into the wood and remove any tool marks.
Wipe dust, apply primer if needed, then paint or stain in thin, even coats. Let dry fully and sand lightly between coats for a flawless, custom finish.
- Clean
- Prime
- Finish
Advanced Techniques for a Polished, Custom Finish
To get a truly polished, custom finish you’ll want to focus on seamless shifts between rooms and differing floor heights so your molding sits flush and looks intentional.
Consider whether to stain for matched wood tones or paint for high-contrast accents, and learn how backbanding, rosettes, and custom profiles can lift the design.
Also plan how trim will integrate with baseboard heaters and outlets to avoid awkward gaps or cutting.
Seamless transitions between rooms and different flooring heights
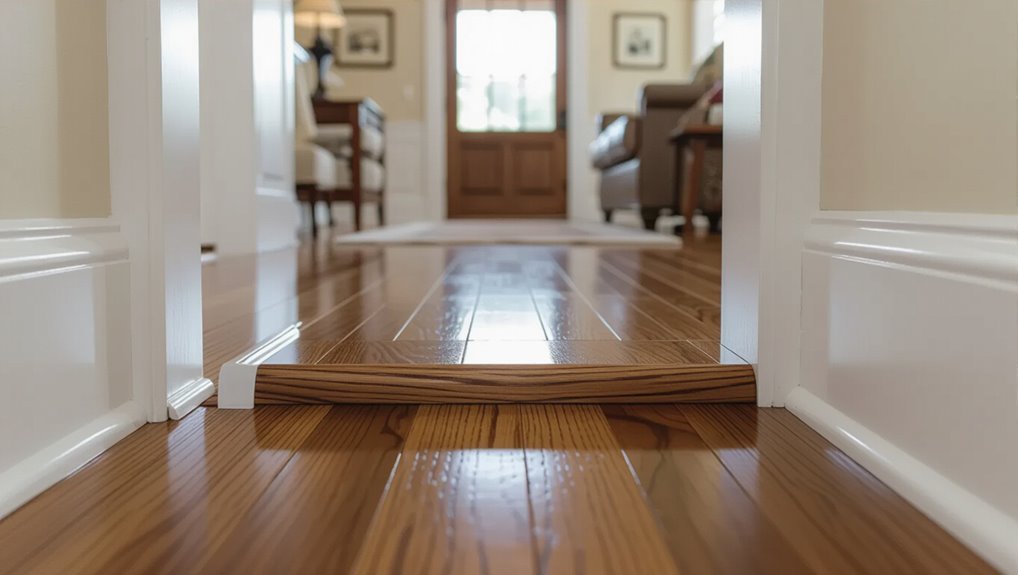
When rooms and flooring types meet at different heights, you’ll want connection solutions that look intentional and feel smooth underfoot. Choosing the right profile and installation method keeps the flow from one space to the next and prevents tripping hazards.
Use reducers for small drops, thresholds for larger shifts, and tapered connecting strips where widths vary.
Secure, level installations and consistent gap allowances guarantee durability and a clean visual connection.
Staining tips for matched wood tones vs. painted high-contrast finishes
Although matching wood tones demands careful sampling and painted high-contrast finishes let you be bold, both approaches require planning for grain, undertone, and edge treatment; pick your stain or paint base to complement the species, test on scrap in the actual light, and decide whether you’ll blend or deliberately contrast moulding with the floor before you cut or prime.
Then seal matched stains with thin coats; for paint, sand, prime, and use satin or semi-gloss for durability.
Using backbanding, rosettes, and custom profiles for a designer look

If you want a truly custom, high-end look, add backbanding, rosettes, or a tailored profile to your trim work—these elements raise simple moldings into architectural details without a full renovation.
You’ll mix profiles for depth, use rosettes at door and window corners for instant flair, and apply backbanding to create shadow lines.
Cut precisely, test fits, and finish consistently for a cohesive designer result.
Integrating trim with baseboard heaters and electrical outlets
Several simple adjustments let you integrate trim cleanly around baseboard heaters and outlets without compromising function or style.
Measure and scribe trim to follow heater curves, leaving air gaps for circulation.
Cut precise notches for outlet plates, or use extension rings so trim sits flush.
Secure trim with adhesive and finish nails, then caulk and touch up paint for a seamless, safe result.
Common Mistakes and How to Avoid Them
You’ll run into trouble if your measurements or layout are off, since small errors lead to gaps and misalignment.
Don’t make sloppy cuts or cope poorly, avoid relying solely on adhesive or the wrong fasteners, and check joins and caulk so seams stay invisible.
Finish carefully—match paint, hide nail holes, and smooth caulk to keep the trim looking professional.
Measuring and layout errors that cause gaps or misalignment
When measurements or layout lines are off by even a tiny amount, gaps and misalignment show up quickly along the entire run of molding.
So you’ll want to measure deliberately, mark clearly, and check twice before cutting. Use a reliable tape and square, account for wall irregularities, transfer marks to the molding, and dry-fit pieces.
Re-measure joints before final fastening.
Improper cutting and coping mistakes
Cutting or coping mistakes are the most common reason trim doesn’t sit flush, so take your time and use the right tools.
Match angles precisely, mark cuts clearly, and keep your saw blade square.
When coping inside corners, trim back painted edges and test-fit before finalizing.
Clean up rough copes with a file or sandpaper so joints close tightly and sit flat.
Over-reliance on adhesive or incorrect fastener use
Although adhesive can be tempting for a quick fix, relying on glue alone or using the wrong fasteners will leave your molding loose, misaligned, or damaged over time.
Use adhesive as a supplement, not the main anchor. Choose nails or screws sized for trim and substrate, predrill near ends, and space fasteners properly.
Check tight fit and adjust before adhesive cures.
Poor finishing: mismatched paint, visible seams, uneven caulk
If your trim ends up with mismatched paint, visible seams, or uneven caulk, the whole room will look unfinished no matter how well it’s installed.
You should sand and prime before painting, match sheen and color, and paint after installation for seamless coverage.
Use painter’s tape, a good-quality caulk gun, and smooth joints with a wet finger or tool. Wipe excess immediately.
Best Practices and Maintenance Tips
You’ll want to leave seasonal expansion gaps and monitor humidity so your molding doesn’t warp or split.
Clean and touch up paint on a regular schedule, and protect trim when other renovations are happening to avoid chips and stains.
If repairs get complex or the gaps and damage are extensive, call a pro instead of struggling with a DIY fix.
Seasonal expansion gaps and humidity considerations
Because wood and many laminates expand and contract with humidity, you need to plan and maintain proper seasonal gaps when installing molding.
Measure gap recommendations from flooring manufacturer, typically 1/8″–3/8″.
Allow ventilation under molding, avoid pinning molding tightly to floors, and use flexible caulk at wall seams.
Check gaps each season and adjust or replace fasteners if molding binds or buckles.
Cleaning, touch-ups, and repainting schedules
Seasonal gaps and humidity can also affect finish longevity, so plan regular cleaning and touch-ups alongside your gap checks.
Wipe molding monthly with a damp microfiber, avoid harsh chemicals, and spot-sand small nicks before applying touch-up paint or stain.
Refinish high-traffic areas every 3–5 years, or sooner if wear appears.
Keep touch-up kits handy for quick fixes.
Protecting molding during other renovations
Anyone undertaking renovations should protect floor molding before dust, paint, or heavy foot traffic can cause damage.
Cover trim with painter’s tape and breathable drop cloths, avoid adhesive directly on finished surfaces, and pad corners with foam. Temporarily remove fragile pieces if feasible.
Keep pathways clear, monitor for scuffs daily, and address any nicks immediately to prevent long-term repair needs.
When to call a professional vs. DIY
While many molding jobs are well within your DIY reach, know when a pro will save you time, money, and headaches: call one for complex cuts (like scarf joints or crown molding), structural issues behind the trim, custom millwork, or when tools and experience are lacking.
For simpler runs, tight budgets, or learning, tackle baseboards yourself but stop and hire help if gaps, warped walls, or finish quality become problems.
Tools and Material Comparison
Now you’ll compare nail gun types, recommended adhesives, and filler options so you can pick the right tools for your installation.
Consider how nailers and glue perform on different molding materials and which fillers hide gaps best.
Balance cost against durability when choosing between PVC, MDF, and solid wood to get the longest-lasting result for your budget.
Nail gun types, adhesives, and filler options
Before you start fastening trim, choose the right nail gun, adhesive, and filler so your molding looks professional and lasts. Use a finish nailer for hardwoods, a brad nailer for delicate trim, and construction adhesive for extra hold. Fill gaps with wood filler or paintable caulk, then sand smooth.
| Tool | Best for | Notes |
|---|---|---|
| Finish nailer | Hardwood | Strong, visible |
| Brad nailer | Soft trim | Less splitting |
| Adhesive/filler | Gaps | Use paintable types |
Cost vs. durability of molding materials
If you want molding that holds up over time without blowing your budget, compare upfront costs against expected durability and maintenance needs. You’ll weigh wood, MDF, and PVC for looks, longevity, and repairs. Choose based on traffic, moisture, and finish expectations to minimize lifetime expense.
| Material | Cost | Durability |
|---|---|---|
| Wood | High | High |
| MDF | Low | Medium |
| PVC | Medium | High |
Project Checklist and Time Estimates
For an 8×10 room, you’ll get a clear step-by-step time breakdown—measuring, cutting, fitting, and fastening—so you can plan a single afternoon or a full day depending on experience.
For medium or large rooms and multi-room projects, you’ll need scaled-up material lists and realistic time estimates that account for trim changes, doorway work, and breaks.
Use the checklist to tally supplies and block out consecutive work sessions so you don’t run out of time or materials mid-project.
Small room (8×10) step-by-step time breakdown
Because an 8×10 room is compact, you’ll move quickly through each step if you plan and keep tools organized.
Measure and mark baseboard runs: 15 minutes.
Cut and cope/mitre pieces: 45–60 minutes.
Dry-fit and adjust: 15 minutes.
Nail and glue molding: 30–45 minutes.
Fill gaps and caulk: 20–30 minutes.
Paint or touch up: 30–45 minutes.
Total: ~2.5–4 hours.
Medium/large room and multi-room projects time and material estimates
Tackle a medium or large room—or several rooms—in one project by breaking the work into clear tasks and realistic time blocks so you can schedule helpers, materials, and breaks.
Estimate 1–3 days per room, plus setup and finish time; list materials per room and buy 10% extra.
Coordinate helpers for cutting, nailing, and caulking to speed work.
- Measurement and ordering
- Installation
- Finishing and cleanup
FAQ
You’ll likely have a few practical questions before you start, like choosing between quarter round and shoe molding and whether you can install molding over existing baseboards.
You’ll also want tips for handling uneven floors, matching new trim to what’s already there, and how much gap to leave for seasonal wood movement.
Ask away and we’ll cover the best options and simple fixes for each.
How do I choose between quarter round and shoe molding?
Which one should you pick: quarter round or shoe molding? You’ll choose based on profile, gap size, and style.
Quarter round’s curved profile covers larger gaps and reads more traditional. Shoe molding’s slimmer, flatter curve suits tighter gaps and modern looks.
Both install similarly; pick the one that complements your baseboard height and room’s aesthetic while matching flooring connections and trim proportions.
Can I install molding over existing baseboards?
Can you install molding over your existing baseboards? Yes, in many cases you can—if the current baseboards are secure, flat, and not too tall.
Measure clearance for doors and trim, test-fit pieces, and use construction adhesive plus finishing nails.
Paint or caulk seams for a seamless look.
Remove only if baseboards are damaged, uneven, or interfere with desired molding profile.
How do I deal with uneven floors when installing molding?
If your floors aren’t perfectly level, don’t try to force molding to follow every dip—plan to gap, shim, and caulk so the trim looks straight.
Use thin shims behind the molding where gaps appear, trim shims flush, and secure with finishing nails.
Fill small voids with paintable caulk; for larger gaps, use backer rod then caulk.
Sand and touch up for a seamless finish.
What’s the best way to match new molding to existing trim?
Wondering how to make new molding blend with what’s already in your home? Measure profiles and pick matching species or primed MDF.
Bring a sample to the store or take photos for millwork. Match paint sheen and stain tone—test on scrap pieces.
Adjust dimensions with a router or sander for a seamless fit, then caulk and touch up paint for a unified appearance.
How much gap should I leave for seasonal wood movement?
Leave a 1/8″ to 1/4″ gap at the ends of baseboards and casings where they meet door jambs, around windows, and at inside corners to allow for seasonal expansion and contraction.
Seal gaps at floors with flexible caulk or paintable backer rod so trim can move.
For wide boards over 4″, increase gap slightly and stagger joints to minimize visible movement.