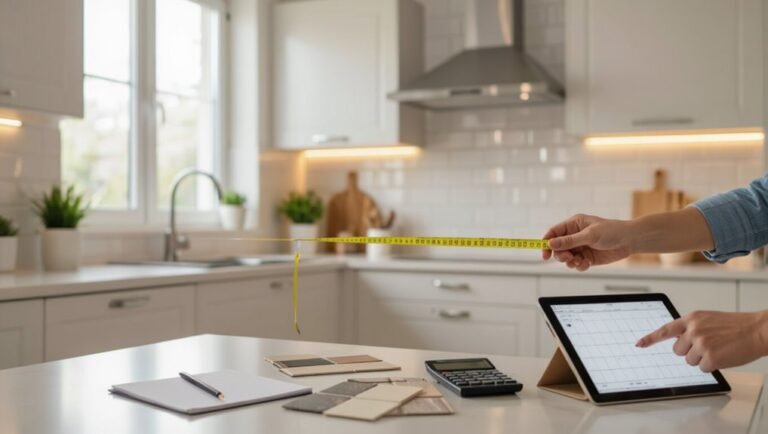
How to Remove Carpet Glue From a Concrete Floor Effectively
You can remove carpet glue from concrete effectively by choosing the right approach for the adhesive, then softening and scraping in small sections while wearing PPE. Start by identifying whether it’s water- or solvent-based, heat or apply a suitable chemical remover, let it penetrate, then scrape with a heavy-duty scraper or use a grinder for stubborn spots. Control dust, neutralize residues, and rinse. Keep at it systematically, and the following guide explains methods, tools, and safety in more detail.
Quick Answer Best Way to Remove Carpet Glue from Concrete
The fastest, safest way to remove carpet glue from concrete is to use a combination of a commercial adhesive remover, a stiff brush or scraper, and heat from a heat gun while wearing gloves and eye protection.
You can usually handle small areas yourself, but stop and call a professional if the glue covers a large area, the concrete is damaged, or strong solvents are required.
A pro can protect the slab, dispose of hazardous waste, and guarantee the job’s done safely and completely.
One-sentence summary of the fastest, safest method
If you want the fastest, safest way to remove carpet glue from concrete, heat a solvent-rated adhesive remover, apply it in small sections, let it soften the glue, then scrape with a stiff floor scraper while wearing gloves, eye protection, and a respirator.
For a quick guide on how do I remove carpet glue from concrete floor, work methodically, ventilate well, and repeat until clean.
When to call a professional
When should you call a pro?
Call a professional if the glue covers large areas, bonds deeply, or resists DIY solvents and scraping.
Hire help when you lack proper tools, face ventilation or chemical concerns, or worry about damaging concrete.
Pros save time, handle hazardous materials, and guarantee a smooth, prep-ready surface—worth it for big, stubborn, or risky jobs.
How Carpet Glue Bonds to Concrete Basic Understanding
You’ll want to know what carpet adhesive is made of—typically synthetic polymers, resins, and tackifiers—that determine how it sets and reacts to solvents.
Because concrete is porous, the glue soaks in and forms mechanical bonds as well as surface adhesion, which makes it hard to peel away.
Different formulations (water-based, solvent-based, epoxy) vary in hardness and chemical resistance, and that difference directly affects how difficult removal will be.
What carpet adhesive is made of
Think of carpet adhesive as a sticky sandwich: a polymer-based binder mixed with solvents, tackifiers, and fillers that forms a flexible film and grips both the carpet backing and the porous concrete surface.
You’ll find latex or acrylic polymers, resins for durability, plasticizers for flexibility, and mineral fillers for bulk.
Additives control drying, mildew resistance, and heat stability so the bond remains functional.
Why glue adheres strongly to porous concrete
Because concrete soaks up liquid and gives the adhesive lots of microscopic anchor points, carpet glue doesn’t just sit on the surface—it locks into a network of pores and rough mineral grains.
You’ll find the adhesive wicks into capillaries, hardens inside voids, and forms mechanical interlocks. That deep bonding resists peeling and scraping, so removal usually requires breaking those connections.
Types of glue and how they affect removal difficulty
When you’re sizing up a removal job, identify the adhesive type first—water‑based latex, solvent‑based contact cement, pressure‑sensitive adhesive (PSA), or older coal‑tar/bitumen formulations—because each soaks into concrete and cures differently, changing how stubborn it’ll be to strip out. Water-based is easiest; solvent and PSA need stronger chemicals; coal‑tar is toughest, often requiring heat and mechanical grinding.
| Type | Penetration | Typical Removal |
|---|---|---|
| Water‑based | Shallow | Scrape/solvent |
| Solvent | Moderate | Chemical/heat |
| Coal‑tar/PSA | Deep | Grind/heat/chemicals |
Safety Precautions and Required Tools
Before you start, make a PPE checklist—gloves, goggles, a respirator, and knee protection—so you’re covered against chemical and dust hazards.
Gather the right tools and materials, from scrapers and grinders to chemical removers or eco-friendly alternatives, depending on the method you choose.
Also plan for ventilation and proper disposal to protect yourself and the environment.
Personal protective equipment (PPE) checklist
At a minimum, you’ll need gloves, eye protection, and a respirator rated for organic vapors and particulates—plus knee pads and sturdy work boots for comfort and stability.
Use this PPE checklist before you start:
- Chemical-resistant gloves (nitrile or neoprene)
- Safety goggles or face shield
- NIOSH-rated respirator (organic vapor + P100)
- Knee pads and steel-toe or reinforced work boots
Tools and materials manual, chemical, and mechanical options
If you’re tackling carpet glue removal, gather the right tools and materials so the job stays safe, efficient, and controlled.
You’ll choose between manual, chemical, and mechanical approaches; pick products rated for concrete and follow instructions.
Have these essentials on hand:
- Scraper, floor knife, or razor blade
- Adhesive remover or solvent approved for concrete
- Grinder or rotary scrubber with diamond cup
- Stiff brush and rags
Environmental and ventilation considerations
When you’re working with solvents, grinders, or heat to remove carpet glue, control ventilation and contain contaminants to protect yourself and the surrounding area; open windows, run fans to push fumes outdoors, and seal off adjoining rooms with plastic sheeting and tape.
Wear an N95 or respirator, goggles, and gloves. Dispose of contaminated rags and residue per local hazardous-waste rules.
Step-by-Step Removal Methods
You’ll tackle carpet glue with one of four approaches depending on the size and stubbornness of the residue.
For small spots you can scrape and use heat or try a solvent soak and poultice, while tougher patches often need chemical adhesive removers.
For large or deeply embedded adhesive, prepare to use mechanical grinding or a scarifier.
Method 1 Manual scraping and heat (best for small areas)
Start by clearing the area and putting on gloves, eye protection, and a respirator so you’re safe before you begin.
Use a heat gun to soften the adhesive and scrape it away with a sturdy putty knife, working in small sections.
When most glue is removed, wipe the surface with a suitable cleaner and inspect for any stubborn residue.
Step 1: Prepare the surface and PPE
Before you begin, clear the area of furniture and loose debris. Sweep or vacuum the floor, and mark any cracks or seams so you don’t miss them while working.
Put on safety goggles, a respirator rated for dust and fumes, heavy-duty gloves, and knee pads. Confirm good ventilation and lay down drop cloths to collect removed adhesive for easier cleanup.
Step 2: Soften with heat gun and scrape with putty knife
Heat the adhesive in small sections with a heat gun set to 300–400°F (150–205°C), keeping the nozzle about 2–4 inches from the concrete and moving continuously to avoid scorching.
Once softened, use a sturdy putty knife or floor scraper at a low angle to lift glue.
Work systematically, reheating stubborn spots, and dispose of removed adhesive safely as you proceed.
Step 3: Clean residuals and inspect
Once you’ve removed the bulk of the adhesive, clean the remaining residues with a stiff brush and a mild solvent or adhesive remover to loosen any thin films.
Then wipe the area with a damp rag to remove residue and solvent traces.
Let the concrete dry, then inspect for stubborn spots.
Repeat targeted solvent application and gentle scraping until the surface is clean and ready for priming.
Method 2 Chemical adhesive removers (best for stubborn glue)
When glue won’t budge, you’ll use a chemical adhesive remover suited to the glue type, like citrus solvents for water-based adhesives or stronger methylene chloride alternatives for tough resins.
Apply the remover, let it sit per the label, then scrub or agitate the softened glue until it breaks up.
Finish by neutralizing any residue and thoroughly rinsing the concrete to remove solvent and loosened adhesive.
Step 1: Choose the right chemical for the adhesive type
Before you reach for a solvent, identify the adhesive type so you pick a remover that actually breaks it down—water-based, rubber, or epoxy adhesives each respond to different chemistries.
Check labels, test a small patch, and match water-soluble solvents to water-based glue, citrus or solvent-based removers for rubber adhesives, and strong epoxy-specific removers or methylene chloride alternatives for cured epoxies.
Step 2: Apply remover, wait, and agitate
Apply the chemical remover evenly over the glued area, let it soak according to the product instructions, and then agitate the adhesive to break its bond with the concrete.
Use a stiff nylon brush or floor scraper to loosen softened residue, working in small sections.
Reapply product on stubborn spots and keep agitation consistent until the glue lifts and becomes pliable for removal.
Step 3: Neutralize and rinse
Neutralize the chemical remover promptly to stop it from continuing to break down the concrete or leaving residue.
Mix the manufacturer’s recommended neutralizer or a dilute baking soda solution, apply evenly, and scrub with a stiff brush.
Rinse thoroughly with clean water, using a wet vacuum or mop to remove runoff.
Repeat neutralizing and rinsing until pH tests neutral.
Method 3 Mechanical grinding and scarifying (best for large or embedded adhesive)
For large or deeply embedded carpet adhesive, you’ll want to use a grinder, diamond cup wheel, or heavy-duty floor scraper.
Before you start, set up dust control and follow power tool safety—respirator, eye protection, and proper ventilation are a must.
Work in controlled passes, vacuum the dust between passes, and finish by smoothing the surface.
Step 1: Select grinder, diamond cup wheel, or floor scraper
Start by matching the tool to the job: pick a handheld angle grinder with a diamond cup wheel for spot work and edges, a walk-behind floor grinder for large areas, or a heavy-duty floor scraper when adhesive is thick and stubborn.
Choose based on area size, adhesive hardness, and access.
Prefer grinders for embedded glue, scrapers for layered, high-build adhesive removal.
Step 2: Set up dust control and power tool safety
Now that you’ve chosen the right grinder, wheel, or scraper, set up dust control and power tool safety before you run the machine.
Attach a HEPA vacuum to the grinder, seal doorways with plastic, and wear an N95 or P100 respirator, eye protection, ear protection, and gloves.
Check guards, cords, and emergency shutoff; guarantee proper ventilation and a clear escape path.
Step 3: Grind in passes, remove dust, and smooth surface
Begin grinding in controlled passes, overlapping each pass by about 10–20% so you remove adhesive evenly without gouging the concrete.
Work methodically, checking progress frequently. Vacuum residue between passes to expose remaining glue.
Switch to finer grit or a smoothing pad for a uniform finish. Inspect the surface for high spots, rework if needed, then wipe and vacuum thoroughly before any sealing or coating.
Method 4 Solvent soak and poultice for small stubborn spots
For small, stubborn glue spots you’ll use a solvent-soaked poultice that loosens adhesive without heavy equipment.
First mix the poultice, apply it over the glue, then cover and wait for the solvent to work before scraping away.
If residue remains, repeat the process and finish with a thorough cleaning.
Step 1: Prepare poultice mix and apply
Mix a poultice that’ll draw out the glue: combine an appropriate solvent (like citrus-based adhesive remover or acetone) with an absorbent carrier such as powdered clay, talc, or baking soda until you get a thick, spreadable paste.
Test a small hidden area, wear gloves and eye protection, then spread paste over the glued spot, working edges to seal so solvent won’t evaporate.
Step 2: Cover, wait, and remove
1. Cover the poultice with plastic sheeting and tape the edges to seal moisture.
Let it sit for the solvent’s recommended time—usually several hours to overnight—so the solvent breaks down the adhesive.
After waiting, peel back the plastic and scoop or scrape the softened poultice with a putty knife.
Dispose of waste safely and ventilate the area before proceeding.
Step 3: Repeat if necessary and clean residue
Check the treated spot and, if any adhesive remains, repeat the poultice application until the glue lifts—usually one or two cycles for small stubborn areas.
After removal, wipe residue with mineral spirits or a manufacturer-recommended solvent, then rinse with warm water and a mild detergent.
Dry thoroughly, inspect for remaining tackiness, and repeat cleaning only where necessary to avoid excessive solvent exposure.
Choosing the Right Method Decision Guide
To choose the right removal method, you’ll weigh factors like the glue type, the size of the area, the concrete’s condition, and your budget.
Start with quick decision steps—identify the glue, assess the substrate, then match gentle to aggressive techniques based on those findings.
This simple flowchart-style approach helps you pick the most effective, time- and cost-efficient option.
Factors to consider: glue type, area size, substrate condition, budget
When choosing a removal method, weigh four key factors—glue type, area size, substrate condition, and your budget—since they determine what’ll work, how long it’ll take, and how much prep or repair you’ll need afterward. Assess adhesive (water-based vs. epoxy), measure area, inspect concrete for damage, and set a realistic budget to pick chemical, mechanical, or hybrid approaches.
| Factor | Impact | Tip |
|---|---|---|
| Glue type | Dictates solvent or grinder | Test small spot |
| Area size | Affects time/cost | Rent equipment for large |
| Substrate | Limits aggressiveness | Repair before finish |
| Budget | Guides method choice | Prioritize safety |
| Time | Influences method | Estimate labor hours |
Quick flowchart-style decision steps
Start by answering a few quick questions to steer you to the right removal method: what kind of glue is it (water-based, solvent-soluble, or epoxy), how big is the area, how sound is the concrete, and how much time and money do you have?
Then follow these decision steps to pick tools and techniques:
- Small, water-based: heat and scraping
- Solvent-soluble: chemical softener + scraper
- Epoxy or large: mechanical grinding
- Fragile slab: test patch first
Preparing the Concrete Before and After Removal
Before you start removing glue, clear the room of furniture and test your chosen method in an inconspicuous spot to avoid surprises.
After removal, repair any pits or gouges and level the surface so it’s ready for new flooring.
Finally, thoroughly clean and neutralize any chemicals left behind to guarantee proper adhesion and a safe installation.
Pre-removal: moving furniture, testing in an inconspicuous spot
Because you’ll be working directly on the floor, clear the room of furniture and valuables so you have full access and nothing gets damaged.
Move items aside or cover large pieces with plastic.
Test your chosen adhesive remover or method in an inconspicuous spot, wait for full cure and inspect for staining or surface damage.
Proceed only if results are acceptable.
Post-removal: repairing pits, filling gouges, and prepping for new floor
Once you’ve cleared the room and confirmed your remover didn’t harm the concrete, it’s time to inspect the slab closely for pits, gouges, and residue that could affect the new floor.
You’ll repair and level as needed, then prime or patch.
Consider:
- Chip out loose concrete and clean debris
- Fill gouges with cement patch
- Smooth with a trowel
- Lightly sand high spots
Cleaning and neutralizing chemicals before installation
Start by rinsing the slab thoroughly to remove dust, loose residue, and any lingering chemical traces from adhesives and removers.
Then neutralize cleaners per manufacturer instructions—usually a water rinse or mild vinegar solution—so pH’s balanced.
Test with pH paper; repeat until readings are neutral.
Allow full drying, then vacuum and wipe.
You’ll prevent bonding failures and guarantee a stable surface for new flooring.
Common Problems and How to Solve Them
You’ll run into a few common problems when removing carpet glue from concrete, like stubborn discoloration and deep-set adhesive that won’t budge.
If you use overly aggressive methods you can damage the slab, and strong solvents or heat can create hazardous fumes, so ventilation and PPE are essential.
We’ll cover practical fixes for each issue so you can choose the safest, most effective approach.
Residual discoloration on concrete
Although concrete is durable, carpet glue often leaves stubborn stains and color changes that don’t come off with simple scraping.
You can treat discoloration by cleaning with a concrete-safe degreaser, using diluted muriatic acid or oxalic acid for rust-like stains, and rinsing thoroughly.
Test a small area first, then consider light sanding or a poultice for persistent spots before resealing the surface.
Deep-set adhesive that resists all methods
When degreasers, acids, and sanding haven’t budged the residue, you’re likely dealing with deep-set adhesive that’s penetrated concrete pores and cured into a near-permanent film.
You’ll need a targeted approach: test a small area, apply a professional-strength solvent or epoxy stripper per instructions, use a rotary scrubbing tool with a stiff brush, and repeat cycles.
Finish with thorough rinsing and neutralizing.
Damage to concrete surface from aggressive removal
If you push too hard with chemical strippers, grinders, or chisels, you can easily chip, etch, or pock the concrete surface—leaving rough patches, gouges, or a weakened top layer that soaks up stains and complicates finishing.
Work gently: use low-speed tools, lighter grits, and thin chemical applications.
Patch gouges with a polymer-modified concrete repair, then grind lightly and seal to restore uniformity and durability.
Handling odor and ventilation issues
Damaged or overly aggressive removal methods can leave concrete more porous and prone to holding odors from solvents and old adhesives.
So you’ll want to manage fumes and airflow before and during cleanup. Open windows and doors, run fans, and use a box or exhaust fan to push air outdoors.
Wear a respirator rated for organic vapors, and consider odor-neutralizing cleaners or activated charcoal after residue removal.
Prevention and Best Practices
To avoid future headaches, choose removable adhesives and schedule installations so you can pull carpet before the glue fully bonds.
You’ll also want to remove glue while it’s fresh and perform regular maintenance to prevent heavy build-up.
These simple steps save time and make any eventual cleanup much easier.
Choosing removable adhesives for future installations
When you plan future floor installations, pick adhesives designed for clean removal so you don’t trade today’s convenience for tomorrow’s headache.
Choose pressure-sensitive or peelable tapes and low-VOC, releasable adhesives labeled for temporary use.
Test small areas, verify compatibility with your concrete and flooring, and keep manufacturer removal instructions.
That way you’ll simplify future replacements and reduce glue-residue cleanup.
Proper installation and removal timing to minimize bonding
Choosing peelable adhesives is a great start, but timing your installation and removal will determine how firmly those glues bond to concrete.
Install when concrete is dry and at recommended temperature to reduce absorption.
Remove flooring before adhesives fully cure—follow manufacturer cure windows. If you wait too long, bonds deepen and removal gets harder.
Plan projects to match adhesive working times.
Routine maintenance tips to avoid heavy build-up
If you keep up with simple, regular care, you’ll prevent heavy adhesive buildup and make eventual removal much easier.
Wipe spills immediately, sweep and vacuum debris, and avoid prolonged exposure to moisture.
Inspect seams and edges monthly, remove loose adhesive bits with a plastic scraper, and apply appropriate sealers or primers before reinstalling flooring.
Consistent attention saves time and effort later.
Cost, Time, and When to Hire a Pro
You’ll want to balance time and cost when choosing a removal method, since small DIY jobs can take a few hours and a few dollars while large areas or mechanical methods cost more and take longer.
If the glue is stubborn, the concrete’s damaged, or the job feels overwhelming, that’s a sign to call a pro.
Expect a professional to give a clear estimate, use specialized equipment, and leave the slab ready for whatever finish you plan next.
Estimated time and costs by method and area size
Removing carpet glue from concrete can take anywhere from a couple of hours to several days depending on the method, area size, and how stubborn the adhesive is, so plan accordingly. You’ll pay more for power tools or professional help; small rooms cost less. Choose based on time, budget, and effort.
| Method | Time (per 100 sq ft) | Estimated Cost |
|---|---|---|
| Chemical | 2–8 hrs | $10–$40 |
| Scraping | 4–12 hrs | $0–$30 |
| Grinder | 1–4 hrs | $50–$200 |
Signs you should hire a professional
After weighing time and costs for each method, you’ll want to know when hiring a pro makes more sense than DIY.
Hire help if the glue covers a large area, hardened for years, or resists chemical and mechanical removal.
Also consider a pro if you lack tools, face tight deadlines, or worry about damaging concrete.
Compare quotes and timelines before deciding.
What to expect from a professional service
When you hire a professional to remove carpet glue from concrete, expect clear estimates for cost and timeline along with an explanation of the methods they’ll use—chemical softeners, mechanical grinders, or heat—and why they chose them.
You’ll get a schedule, safety precautions, cleanup plans, and a warranty or guarantee.
Hire a pro for large areas, stubborn adhesive, uneven slabs, or limited time and tools.
Tools and Product Recommendations
Before you start scraping, you’ll want the right tools: sturdy floor scrapers, cup grinders or planetary grinders with diamond pads, and a heat gun or infrared heater for stubborn spots.
For chemistry, choose commercial adhesive removers or citrus/soy-based solvents and always follow label instructions and ventilation recommendations.
Don’t forget dust-control options and PPE—shop vacs with HEPA filters, respirators, goggles, and disposable coveralls—from reputable suppliers.
Recommended scrapers, grinders, and heat tools
You’ll want a few reliable tools on hand: a heavy-duty floor scraper, a 20–30 lb demolition scraper or push scraper for large areas, a 4–1/2″ angle grinder with a diamond cup or carbide-tipped wheel for stubborn adhesive, and a heat gun or floor heat stripper for softening old glue.
- Long-handled push scraper for posture and reach
- Demolition scraper for speed
- Grinder with dust shroud for control
- Heat gun with temperature settings
Recommended chemical removers and solvents (with safety notes)
Although chemical remover choice depends on adhesive age and type, you’ll usually pick between solvent-based strippers, citrus or soy-based gel cleaners, and caustic (alkaline) formulations.
Choose per residue, ventilation, and surface. Wear gloves, eye protection, and a respirator if solvents are strong.
- Solvent-based (fast, fumes)
- Citrus/soy gels (milder, biodegradable)
- Caustic cleaners (powerful, corrosive)
- Adhesive softeners (for old glue)
Dust control and protective equipment suppliers
Chemical removers can loosen adhesive, but scraping and grinding still kick up a lot of dust and vapors.
So you’ll want to pair chemicals with proper dust-control tools and personal protective equipment (PPE). Choose suppliers that offer HEPA vacuums, dust shrouds, and respirators certified for organic vapors.
Look for durable gloves and disposable coveralls.
- HEPA-rated shop vacuums
- Grinder dust shrouds
- P100 or N95 respirators (organic vapor cartridges)
- Chemical-resistant gloves and coveralls
FAQ
You’ll want quick answers to common concerns like how long removal takes for a typical room and whether paint stripper or acetone will work.
I’ll also cover whether grinding affects re-covering, safety tips for using a heat gun around old synthetic adhesives, and how to test what type of adhesive you’re dealing with.
Read on for concise, practical answers to each question.
How long does carpet glue removal take for a typical room?
How long will it take to remove carpet glue from a typical room?
Expect 4–10 hours for a 10×12 room depending on glue age, thickness, and method.
Mechanical scraping or grinding speeds things up; hand scraping and solvent-assisted removal take longer.
Allow extra time for cleaning, neutralizing chemicals, and drying if you plan to refinish or install new flooring.
Can I use paint stripper or acetone to remove carpet glue?
If you’ve budgeted time for scraping, you might be tempted to reach for paint stripper or acetone to speed things up — and in many cases they’ll help soften adhesive.
They can loosen residue, but choose a product labeled for construction adhesives, test a small patch, ventilate well, and wear gloves and a respirator.
Reapply and scrape; stubborn spots may need mechanical help.
Will grinding concrete affect my ability to re-cover it with new flooring?
Because grinding removes high spots, thin residue, and old adhesives, it usually improves your chances of installing new flooring—but you need to match the final profile and finish to the new material’s requirements.
You should confirm flatness, porosity, and cleanliness after grinding. Some coverings need smoother or flatter surfaces, primers, or patching.
Test adhesion and follow manufacturer specs before laying vinyl, tile, or wood.
Is it safe to use a heat gun around old synthetic adhesives?
Wondering whether you can safely use a heat gun on old synthetic adhesives? You can, but you must be cautious.
Heat releases toxic fumes and can scorch concrete or nearby materials. Work in a well-ventilated area, wear an appropriate respirator, eye protection, and heat-resistant gloves.
Keep the gun moving, use lower temperatures first, and have a fire extinguisher nearby.
How do I test what type of adhesive is on my floor?
How can you tell what adhesive’s on your concrete?
Inspect appearance and smell: rubbery, black residue often means cutback; clear, amber tacky film suggests acrylic or PSA.
Do a solvent spot test: apply denatured alcohol, acetone, or mineral spirits to a small area—if it softens, note which solvent works.
When unsure, send a sample to a lab for identification.