
How to Use a Ceramic Tile Cutter for Clean, Precise Cuts Every Time
You can make clean, precise ceramic tile cuts every time by choosing the right cutter, measuring and marking carefully, and using steady, even pressure when scoring. Secure the tile against the guides, score once with a sharp wheel, then snap it cleanly with the breaker foot and smooth any rough edges with a rubbing stone or nippers. Wear eye, lung, and hand protection, replace dull wheels promptly, and practice on scrap tiles—keep going to learn techniques for curves, wet saw use, and troubleshooting.
How to Use a Ceramic Tile Cutter for Clean, Precise Cuts Every Time
For clean, precise cuts you’ll want to match the right tool to the job and follow a steady cutting technique.
The bottom line: a manual tile cutter gives fast, accurate straight cuts on most ceramic tiles, while wet saws or tile nippers are better for thick, glazed, or irregular cuts.
Know the limits of your cutter and choose the alternative when you need curves, deep cuts, or tough materials.
The Bottom Line
Mastering a ceramic tile cutter means you’ll get clean, precise cuts every time by combining the right tool, steady technique, and careful prep.
Practice how to use a ceramic tile cutter on scraps, mark and score confidently, and support tiles properly.
Wear safety gear, change blades when dull, and double-check measurements.
With patience and consistency, your cuts will be accurate and professional.
When to Use a Manual Tile Cutter vs. Other Cutting Tools
When you’re deciding between a manual tile cutter and other cutting tools, consider the tile type, cut complexity, and job scale; a manual cutter shines on straight cuts with standard ceramic and porcelain tiles, is quieter and dust-free, and gives fast, repeatable results for small to medium jobs.
| Tool | Best Use | Notes |
|---|---|---|
| Manual | Straight cuts | Fast, low dust |
| Wet saw | Complex cuts | Precise, for hard tiles |
| Nipper | Irregular | Small adjustments |
| Angle grinder | Curves | Versatile, dusty |
| Score-only | Thin tiles | Simple, low cost |
Basic Understanding of Ceramic Tile Cutting
Before you start cutting, you should know what a ceramic tile cutter is and how the scoring wheel or wet saw blade actually removes material.
Different tile types—porcelain, glazed, or soft ceramic—cut differently and may require varied blades, speeds, or techniques.
Also be aware of safety risks like flying shards and dust, and always wear eye protection, gloves, and a dust mask.
What a Ceramic Tile Cutter Is and How It Works
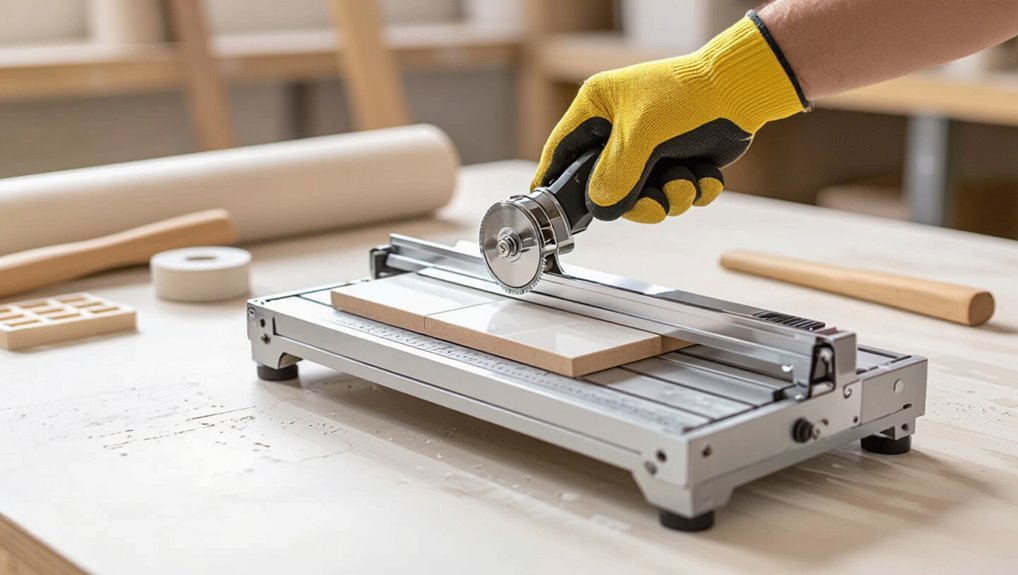
A ceramic tile cutter is a handheld or bench-mounted tool that scores and snaps tiles so you can make clean, straight cuts without a wet saw.
You position the tile, run the wheeled scoring blade along the surface to create a controlled fracture line, then apply steady pressure with the breaker bar to snap the tile along that line for precise, chip-free results.
Types of Ceramic Tiles and How They Affect Cutting
Since different ceramic tiles vary in hardness, thickness, and glaze, you’ll need to adjust your cutting approach accordingly.
Porcelain is dense and chips more, so score deeper and use a wet or diamond blade.
Standard ceramic is softer—lighter scoring works.
Glazed tiles need gentle, steady pressure to avoid cracking the finish.
Mosaic and thin tiles require delicate handling and smaller blades for accuracy.
Safety Risks and Required Personal Protective Equipment
When you cut ceramic tile, you face sharp edges, flying shards, and dust that can damage eyes, lungs, and skin.
So you should wear proper PPE and follow safe procedures. Protect yourself with the right gear, work slowly, and keep your workspace clean to minimize hazards.
- Safety glasses or face shield
- N95 respirator or dust mask
- Cut-resistant gloves
Preparation Before Cutting
Before you cut, gather your tools and materials—cutter, straightedge, pencil, safety gear, and any templates you’ll need.
Set up a stable, well-lit workspace so you can see marks and hold tiles steady.
Measure and mark each tile precisely, using templates or guides to guarantee consistent, accurate cuts.
Tools and Materials Checklist
Gathering the right tools and materials will make your cutting accurate, faster, and safer. You’ll want reliable equipment, quality consumables, and personal protection so every cut goes smoothly.
Check each item before you start, keep spares, and plan for tile layout to avoid waste.
- Tile cutter (scoring wheel & breaker)
- Safety glasses, gloves, dust mask
- Measuring tools, pencil, straightedge
Workspace Setup and Lighting
Now that you’ve checked tools and safety gear, set up a stable, level work area with plenty of room to lay out tiles and run your cutter.
Position a sturdy workbench or sawhorses, use non-slip mats, and clear debris.
Install bright, shadow-free lighting—overhead plus adjustable task lights—so cut lines and scoring wheels remain visible.
Keep waste bins and clamps within reach.
Measuring and Marking Tiles Accurately (Templates and Techniques)
1 simple, accurate measurement can save you hours of rework and dozens of ruined tiles. You’ll measure twice, mark once, and use templates for repeats. Use a pencil lightly, score lines confidently, and transfer measurements from floor plans or fixtures.
- Create cardboard templates for odd cuts
- Use a square and tape measure for straight lines
- Mark cut direction and edge orientation
Step-by-Step Guide to Using a Manual Ceramic Tile Cutter
Start by measuring and marking your cut line, then score it steadily with the cutter’s wheel.
Position the tile against the guides, apply consistent pressure as you score, and snap the tile along the line.
Finish any rough edges with nippers, a file, or a rubbing stone for a clean result.
Step 1 Measure, Mark, and Score the Cut Line
Measure carefully and mark the cut line clearly before you touch the cutter, since precise layout determines whether the tile will fit and the edge will be clean.
Use a straightedge and pencil or grease marker to draw the line. Score once firmly, following the line steadily to create a shallow, continuous groove.
Don’t retrace; one confident pass reduces chipping and improves break accuracy.
Step 2 Positioning the Tile and Aligning Guides
Next, place the tile on the cutter bed so the scored line sits exactly under the scoring wheel and the tile’s face rests flat against the fence or guide.
Align edges with measurement marks, clamp or hold the tile firmly, and guarantee the guide bar is snug without twisting the tile.
Confirm gaps are even for straight, supported cuts.
Step 3 Applying Consistent Pressure to Score
Place the cutter handle over the tile and pull the scoring wheel toward you in a steady, single pass, keeping even pressure so the wheel etches a clear, continuous line—don’t press so hard that the wheel hops, and don’t go so light that the score is faint.
Maintain the same pressure throughout, breathe evenly, and finish the cut in one motion to guarantee a straight, predictable break.
Step 4 Snapping the Tile Cleanly
With a clean score line in place, you’re ready to snap the tile along that groove.
Position the breaker foot centered over the score, press down firmly and evenly, then lift with a controlled motion to separate the pieces.
Support both sides to prevent unintended fractures.
Inspect the break; if it’s uneven, small touch-ups will be needed before installation.
Step 5 Smoothing and Finishing Edges (Nippers, Files, Rubbing Stone)
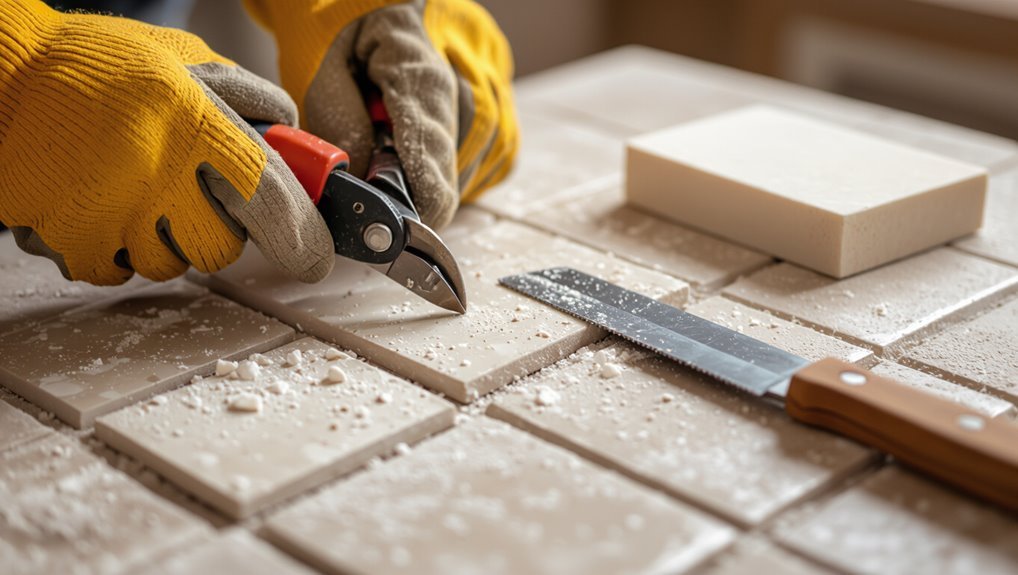
After snapping, you’ll want to smooth the cut edges to remove burrs and shape any irregularities; small handheld tools like tile nippers, a coarse file, and a rubbing stone let you refine the edge for a clean fit and safer handling.
Use nippers for small notches, break jagged points, then file to even the profile. Finish with a rubbing stone for a smooth, safe edge.
Step 6 Cutting Repeated or Long Straight Runs Efficiently
Cutting long or repeated straight runs efficiently comes down to consistency, setup, and technique. You’ll save time by preparing the cutter and tiles for repeatable strokes.
Mark all tiles with a template or spacer, align each against the fence, and score with steady pressure. Use the same depth and speed, check blade alignment periodically, and batch cuts to minimize repositioning and reduce errors.
Cutting More Complex Shapes and Situations
When you need L-shaped cuts, notches, or corner shapes you’ll often combine your cutter with a wet saw or tile nippers for clean results.
Take extra care when cutting small pieces or plugs—score lightly, support the tile, and finish with nippers or a diamond bit to avoid chipping.
Also adjust technique for glazed versus unglazed edges, using finer blades and slower feeds on glazed tiles to prevent crazing.
Making L-shaped, Notches, and Corner Cuts (Combining Tools)
Tackle L-shaped, notch, and corner cuts by combining the snap cutter with a wet saw or angle grinder so you get clean, precise results without overworking the tile.
Score straight reliefs with the snap cutter, then finish interior corners and tight notches with a wet saw or diamond blade grinder.
Support the tile, cut slowly, and deburr edges with a stone for a snug fit.
Cutting Small Pieces and Plugs Without Breakage
Start by planning each small cut carefully so you avoid chipping or snapping the piece during the process. Mark precisely, score shallowly, then deepen gradually.
Use a wet saw or tile nippers for plugs, supporting the tile close to the cut. Clamp tiny pieces on sacrificial backing and cut slowly.
File and sand edges gently to fit without forcing or cracking.
Handling Glazed vs. Unglazed Tile Edges
Different tile surfaces demand different handling: glazed edges chip more easily, while unglazed edges are more forgiving but show any roughness.
For glazed tile, score lightly, use fine diamond blade, and support the glaze to prevent fracturing.
For unglazed, sand edges gently with a rasp or stone to smooth burrs.
Wet-cutting reduces dust and improves edge quality for both.
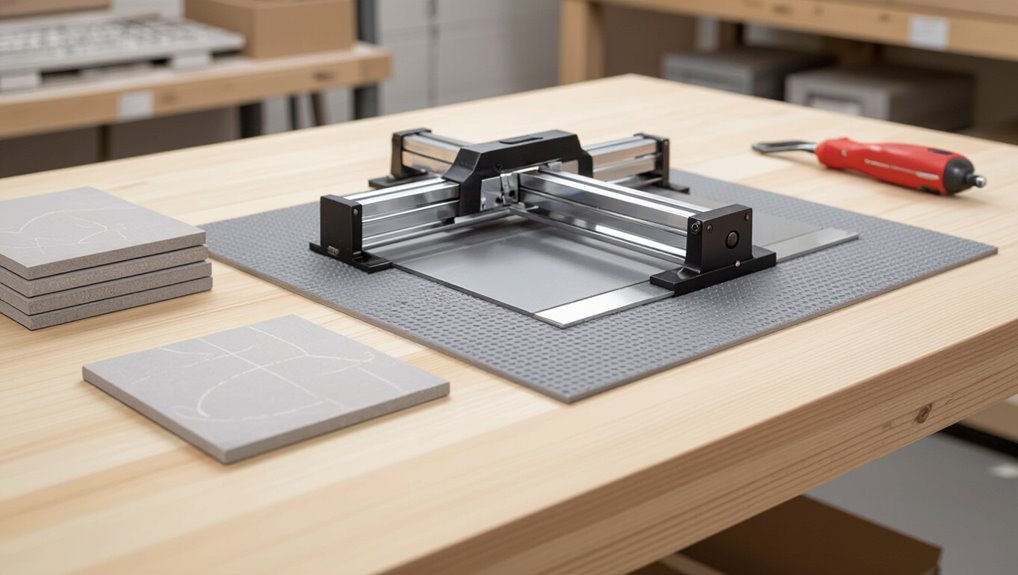
Alternatives & When to Use Them
When you’re choosing a tool, compare a wet saw, a manual cutter, and tile nippers to match the job to the tile.
Consider pros and cons: wet saws handle large jobs, porcelain, and thick tile best, while manual cutters are faster for straight cuts and nippers work for small notches and irregular edges.
Pick the tool that fits the material, job size, and the precision you need.
Wet Saw vs. Manual Cutter vs. Tile Nippers
Choosing the right cutting method—wet saw, manual cutter, or tile nippers—depends on the tile material, the cut shape you need, and how precise you want the finish to be. You’ll pick a wet saw for straight, smooth cuts, a manual cutter for quick scores, and nippers for irregular notches.
| Tool | Best for | Precision |
|---|---|---|
| Wet saw | Straight cuts | High |
| Manual cutter | Small jobs | Medium |
| Nippers | Irregular shapes | Low |
Pros and Cons for Large Jobs, Porcelain, and Thick Tile
Because large jobs and dense materials raise both time and accuracy demands, you’ll want to match the cutter to the tile and the scale: for porcelain and thick tile, use a wet saw for clean, straight cuts and faster throughput;
manual cutters suit small ceramic runs;
tile nippers handle odd shapes and chips but slow you down and risk uneven edges—factor dust, water, and mobility into your choice.
Common Mistakes and How to Avoid Them
When using a tile cutter you’ll want to watch for a few common mistakes that ruin cuts and waste tiles.
Score too lightly or too deep, let the tile slip or sit misaligned, or use the wrong cutter for your tile, and you’ll get poor results.
Also don’t ignore safety and proper workspace prep—those prevent injury and keep cuts clean.
Scoring Too Lightly or Too Deeply
Strike the score firmly and evenly—too light, and the tile won’t snap cleanly; too deep, and you’ll risk chipping or cracking beyond the cut line.
You should score once with steady pressure, following the guide. If the cutter slips or feels inconsistent, check the wheel for wear and adjust pressure.
Practice on scrap tile to find the right, repeatable stroke.
Poor Alignment and Slippage
If you don’t line the tile up correctly or let it slip while scoring, your cuts will be off and you’ll waste material. Secure the tile with clamps or hold it firmly against the fence, align the guide with your mark, and score in one steady pass.
Check alignment before snapping; small shifts ruin edges. Practice steady pressure and quick releases to prevent slippage.
Using the Wrong Cutter for Tile Type
Although a score-and-snap cutter works great for most ceramic floor and wall tiles, it won’t handle porcelain, large-format, or very hard tiles without chipping or breaking them.
You should match cutter type to tile: use a wet saw for porcelain and large formats, a diamond blade for dense materials, and a tile nipper for small irregular cuts.
Choose properly to avoid damage.
Ignoring Safety and Workspace Preparation
Picking the right cutter won’t protect you or your workspace if you skip basic safety and prep. Wear goggles, gloves, and a mask, secure tiles on a stable surface, and clear debris.
Check lighting and ventilation, keep a first-aid kit nearby, and unplug power tools when adjusting. These steps reduce cuts, dust inhalation, and breakage, letting you work confidently and efficiently.
Tips, Best Practices, and Professional Shortcuts
To get the most from your tile cutter, you’ll learn simple maintenance to extend the wheel’s life and keep cuts consistent.
I’ll show tricks for scoring perfectly straight lines and clean snaps so you waste less material.
You’ll also know when a rental or pro-grade machine—or a pro’s help—is the smarter, safer choice.
How to Extend Cutter Wheel Life and Maintenance
Protect your cutter wheel and you’ll save time and money down the line: regular cleaning, correct pressure, and timely replacement are the core habits that keep wheels cutting smoothly.
Clean debris after each use, inspect for nicks, and store dry. Replace at first dullness.
- Wipe with a soft brush and alcohol
- Use light, consistent pressure
- Swap wheels when cuts drag
Tricks for Perfect Straight Lines and Clean Snaps
Keeping your cutter wheel in top shape helps, but getting flawless straight lines and clean snaps takes a few technique tweaks you can apply every cut.
Score once with steady pressure, follow a marked guideline, and keep the wheel aligned.
Use a slow, confident snap from the edge inward, support the tile close to the score, and remove small chips with a rubbing stone.
When to Rent or Hire Professional Equipment
When a project grows beyond a few cuts or you need specialty blades and straight-edge power, rent or hire pros so you don’t waste time or risk costly mistakes.
You’ll save by accessing wet saws, diamond blades, and accurate guides for large-format or porcelain tiles.
Hire when cuts are complex, installation deadlines loom, or safety and warranty considerations outweigh DIY savings.
Troubleshooting: Problems and Quick Fixes
If your cuts come out cracked or jagged, check your scoring wheel, pressure, and support to pinpoint the cause and fix it quickly.
If a tile won’t snap, make sure your score line is deep and even and that the breaker bar is aligned and applied with steady pressure.
For chipped glaze, you can smooth small nicks with fine sandpaper and conceal damage with matching epoxy or touch-up glaze.
Cracked or Jagged Cuts Causes and Remedies
Though it’s frustrating to see a tile split or tear at the edge, you can usually trace cracked or jagged cuts to a few common causes and fix them quickly.
Check for dull scoring wheels, uneven pressure, incorrect blade angle, or moving the tile during scoring.
Replace worn wheels, apply steady even pressure, keep the cutter aligned, and support the tile fully to prevent tearing.
Tile Won’t Snap What to Check
Because a tile that won’t snap usually signals a few simple issues, start by checking how you’re scoring, supporting, and applying pressure.
Ascertain the score is continuous and deep enough, the tile rests on both breaker bars, and your hands press evenly.
Confirm the cutter’s wheel is sharp and aligned.
If thin or uneven tile, use a wet saw or nippers for controlled breaks.
Chipped Glaze Repair and Concealment Techniques
Once you’ve ruled out scoring or support problems, address any chipped glaze before laying or sealing the tile so small defects don’t catch grout or water.
Clean the chip, apply matching epoxy or porcelain repair compound, shape with a toothpick, and let cure.
Sand lightly with fine grit, polish to blend, and touch up with colorant or permanent marker for seamless concealment.
FAQs
You’ll find answers to common questions like whether a manual cutter can handle porcelain and how thick a tile it can score.
We’ll cover when to replace the scoring wheel and whether a wet saw is necessary for kitchen or bathroom jobs.
Plus, you’ll get a quick rundown of essential safety gear for cutting tiles.
Can I cut porcelain tile with a manual ceramic tile cutter?
If you’re working with standard glazed porcelain tiles, a manual ceramic tile cutter can handle straight cuts and some light scoring.
However, dense, full-body porcelain often resists and may chip or break instead of snapping cleanly.
You should test a scrap, guarantee firm support, score decisively, and expect to switch to a wet saw or diamond blade for reliable, neat cuts on tougher porcelain.
How thick a tile can a manual cutter handle?
How thick can a manual tile cutter handle?
You’ll typically cut ceramic and glazed porcelain up to about 10–12 mm (3/8–1/2″) cleanly with a quality manual cutter.
Thicker tiles or dense porcelain may not score deeply enough and can chip or refuse to snap.
For slabs over 12 mm, use a wet saw or specialized cutter to guarantee accurate, safe cuts.
How often should I replace the scoring wheel?
After cutting a batch of 10–20 typical ceramic tiles or a handful of thicker glazed porcelain pieces, check the scoring wheel for wear—it’s the easiest way to know when replacement’s due.
If cuts start chipping, feel roughness, or the wheel’s visibly rounded, replace it.
For regular DIY use that’s roughly every few months; heavy use may need monthly swaps to keep scores clean and consistent.
Is a wet saw necessary for bathroom/kitchen projects?
Wondering whether you really need a wet saw for a bathroom or kitchen job? You don’t always.
For small ceramic or straight cuts, a manual cutter or snap cutter often suffices.
But for porcelain, large tiles, angled cuts, or lots of cuts, a wet saw saves time and gives cleaner edges.
Rent one for bigger jobs instead of buying outright.
What safety gear is essential for tile cutting?
Because cutting tile creates sharp edges, flying chips, and a lot of dust, you should gear up before you start—wear safety glasses, a dust mask or respirator, ear protection for power saws, sturdy gloves, and closed-toe shoes to protect against shards and heavy tiles.
Add knee pads for prolonged work, use a face shield for grinding, and keep a first-aid kit nearby for cuts.