How to Paint a Concrete Basement Floor for a Clean, Durable Finish
You can give your concrete basement floor a clean, durable finish by inspecting for moisture and cracks, then cleaning, degreasing, and repairing damage. Profile the surface by etching or grinding so primer and paint will bond, apply a compatible primer, then coat with epoxy or masonry paint for better wear and moisture resistance. Allow proper cure times and maintain with gentle cleaning. Keep going to learn full prep steps, product choices, and pro tips.
How to Paint a Concrete Basement Floor for a Clean, Durable Finish
Want a quick, durable result? You’ll prep, patch, etch, prime, and use a quality epoxy or masonry paint for a long-lasting, easy-to-clean finish.
This guide’s for homeowners and DIYers who want clear steps, estimated time, and realistic expectations.
Quick Answer Best Approach in Brief
If you want a clean, durable finish, start by cleaning and repairing the floor, then etch or grind the surface, apply a concrete primer, and finish with a high-quality epoxy or latex concrete paint plus a clear sealer for extra abrasion resistance.
To answer how do you paint a concrete basement floor: prep thoroughly, use primer, apply paint in thin coats, allow proper cure time, and add sealer.
Who this guide is for and what to expect
Because painting a basement floor takes prep and patience, this guide is for homeowners, renters with landlord approval, and DIYers who want a clean, durable finish without hiring a pro.
You’ll get clear steps, tool and material lists, safety tips, and time estimates. Expect surface prep, patching, etching, primer, paint, and curing times.
Results depend on prep and product choice.
Basic Understanding What and Why
Painting a concrete basement floor means prepping the surface, choosing a proper concrete paint, and applying coats for protection and appearance.
You’ll get an affordable, easy-to-maintain finish that brightens the space and resists stains better than bare concrete, though it’s not as thick or chemical-resistant as epoxy.
If you need heavy-duty wear, waterproofing, or a seamless surface, you should consider epoxy or specialized sealers instead of paint.
What painting a concrete basement floor involves
Although a concrete basement floor might seem like a simple slab, painting it changes both its look and performance: you’ll clean, repair cracks, etch or degrease for adhesion, apply primer, then paint with a floor-specific product and optional topcoat.
You’ll work in sections, follow drying times, and guarantee ventilation. Proper prep and technique prevent peeling and extend the finish’s lifespan.
Benefits of painting vs. sealing or epoxy coatings
When you’re deciding between painting, sealing, or using an epoxy coating, think about cost, durability, and maintenance needs: paint is the most budget-friendly and easiest to apply and touch up.
Sealers offer good moisture resistance with minimal change to appearance, and epoxy delivers the toughest, longest-lasting surface but demands more prep and expense.
- Paint: affordable, simple upkeep
- Sealer: moisture control, subtle look
- Epoxy: heavy-duty, high wear resistance
Choose based on budget, traffic, and maintenance expectations.
Limitations and when to choose other finishes
If your priorities shift from cost and ease toward extreme durability, moisture management, or chemical resistance, you’ll want to evaluate other finishes.
Painting suits light traffic and dry basements, but it can chip, peel, or trap moisture.
Choose epoxy, polyurethane, or professional moisture mitigation for heavy use, stains, or high humidity.
Match finish to use, prep, and budget.
Prepare: Assessing Your Basement Floor
Before you paint, inspect the floor for cracks, moisture stains, and powdery efflorescence that signal water issues.
Do a plastic sheet test or use a moisture meter to check for hidden dampness.
Also test porosity and look for old coatings so you can choose the right prep and primer.
Inspecting for cracks, moisture, and efflorescence
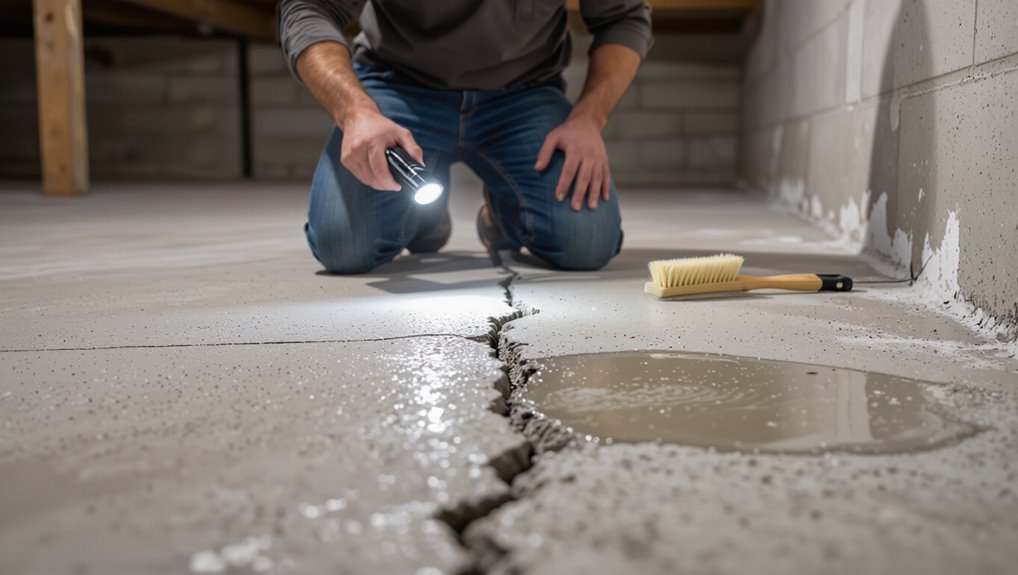
Because your paint will only last as long as the concrete underneath, walk the entire floor and walls looking for cracks, damp spots, and white powdery efflorescence; note their size, location, and whether moisture is active so you can prioritize repairs and choose the right prep and sealers.
- Mark hairline vs. structural cracks
- Flag active damp areas
- Scrape and record efflorescence
- Photograph for repair planning
Moisture tests: plastic sheet test and moisture meter
Start by checking how much moisture the concrete is actually holding, since that determines whether painting will stick and how to prep.
Tape a 2-foot plastic sheet to the slab edges, wait 24–48 hours, then look for condensation or darkening.
Also use a moisture meter for spot readings across the floor.
If results show elevated moisture, address seepage before painting.
Determining floor porosity and previous coatings
Once you know the moisture level, check how porous the slab is and whether any coatings remain, since both affect adhesion and product choice.
Tap concrete—hollow sounds mean loose topping; rough, sandy texture indicates high porosity.
Scrape spots and use acetone to test for paint or sealer residue.
If coatings exist, strip or profile; if porous, choose penetrating primer or thicker epoxy.
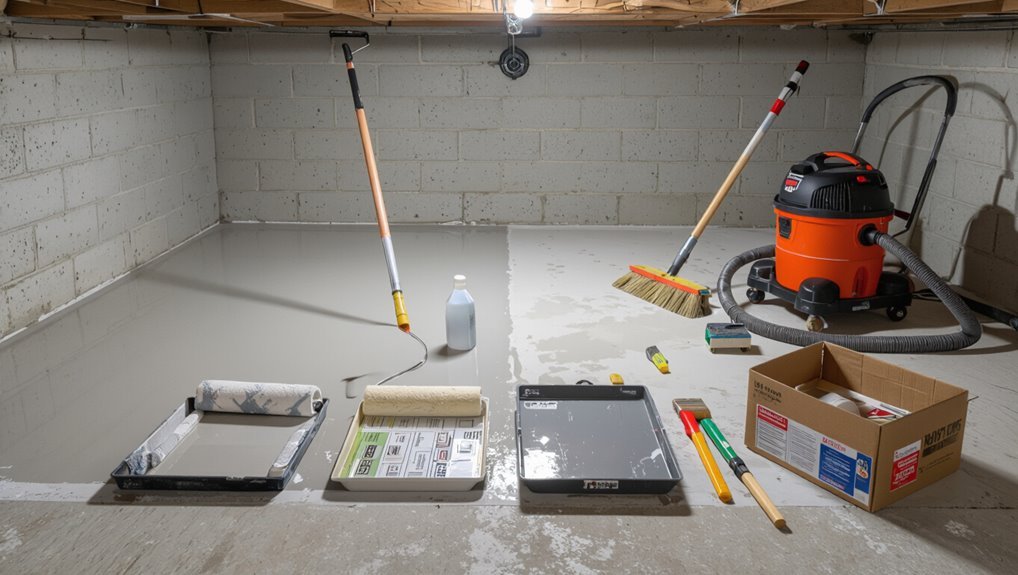
Materials, Tools, and Products Needed
Before you start, gather the right paints and prep products: concrete floor paint, epoxy or acrylic-latex options, plus primers, sealers, and concrete patch compounds.
You’ll also need tools like grinders, etchers, rollers, squeegees and PPE including respirators and gloves.
Having everything on hand will make the job faster and safer.
Recommended paint types: concrete floor paint, epoxy, acrylic latex
You’ll choose from three common options for basement concrete—concrete floor paint, epoxy, and acrylic-latex—each with different durability, prep needs, and cost; pick concrete paint for light protection and easy touch-ups, epoxy for heavy-duty wear and chemical resistance, or acrylic-latex for a budget-friendly, breathable finish in less demanding areas.
| Type | Durability | Best Use |
|---|---|---|
| Concrete paint | Low–moderate | Light traffic |
| Epoxy | High | Garages, workshops |
| Acrylic-latex | Moderate | Basements, storage areas |
Primers, sealers, and concrete patch products
Choosing between concrete paint, epoxy, or acrylic-latex is only part of the job; proper primers, sealers, and patch products make the finish stick and last.
Use a concrete primer to promote adhesion, a breathable sealer for moisture control, and a polymer-modified patch for cracks and spalling.
Match products to floor conditions and follow manufacturer cure times for durable, long-lasting results.
Tools and PPE: grinders, etchers, rollers, squeegees, respirators
One set of the right tools and protective gear makes the difference between a durable basement floor and a wasted weekend; you’ll need grinders or etchers to prep the surface, rollers and squeegees to apply coatings evenly, and a proper respirator and gloves to protect against dust and fumes.
- Angle grinder with diamond cup
- Acid etcher or shot blaster
- 9″ roller, extension pole, squeegee
- NIOSH respirator, nitrile gloves, eye protection
Step-by-Step Process (Surface Prep to Finish)
Start by clearing the room and protecting walls and anything you want to keep clean.
You’ll then repair cracks, strip away oil or efflorescence, and profile the slab by etching or grinding before choosing the right primer or sealer.
Follow each step in order so the paint bonds well and lasts.
Step 1 Clear and protect the space
Before you do anything to the floor, clear the room and protect everything you want to keep clean—move furniture, tools, and storage out or to the center and cover with drop cloths or plastic sheeting.
You’ll also:
- Seal vents and doorways with plastic to limit dust.
- Remove wall hangings and electronics.
- Lay down walk-off mats for tracking.
- Keep a trash bin and broom handy for debris.
Step 2 Repair cracks and spalled areas (products and techniques)

With the room cleared and surfaces protected, inspect the floor for cracks, chips, and spalled areas so you can address problems that would telegraph through paint.
Use a masonry chisel or wire brush to remove loose concrete, then vacuum debris.
Fill hairline cracks with epoxy or polyurethane crack filler; for larger voids, use a cement-based patch or resurfacer.
Smooth, cure, and sand before priming.
Step 3 Remove contaminants: oil, grease, and efflorescence (cleaning solutions)
Scrub the floor to remove oil, grease, and efflorescence so paint will adhere properly and won’t blister or flake later.
- Sweep and vacuum loose debris first.
- Apply a degreaser to oil stains; scrub with a stiff brush.
- Treat efflorescence with a mild acid cleaner or efflorescence remover.
- Rinse thoroughly and let the concrete dry completely before proceeding.
Step 4 Profile the concrete: etching versus mechanical grinding
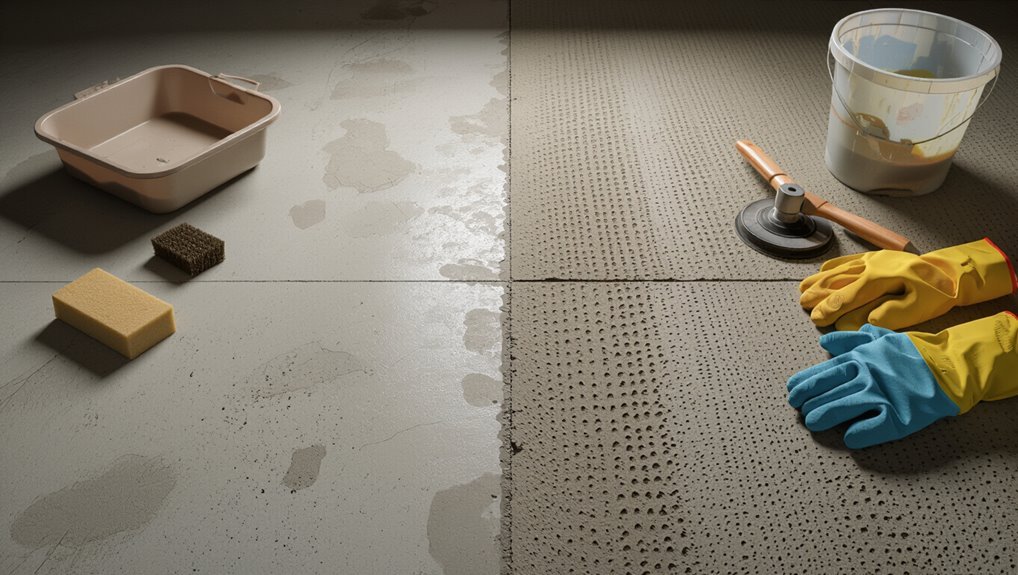
After the floor is clean and fully dry, you’ll need to create a profile so paint can bond to the concrete rather than sit on the surface.
Choose etching with muriatic or phosphoric acid for light, uniform roughening—cheap but less control—or use mechanical grinding for deeper, consistent texture and better adhesion.
Wear PPE, remove dust, and inspect for even profile before coating.
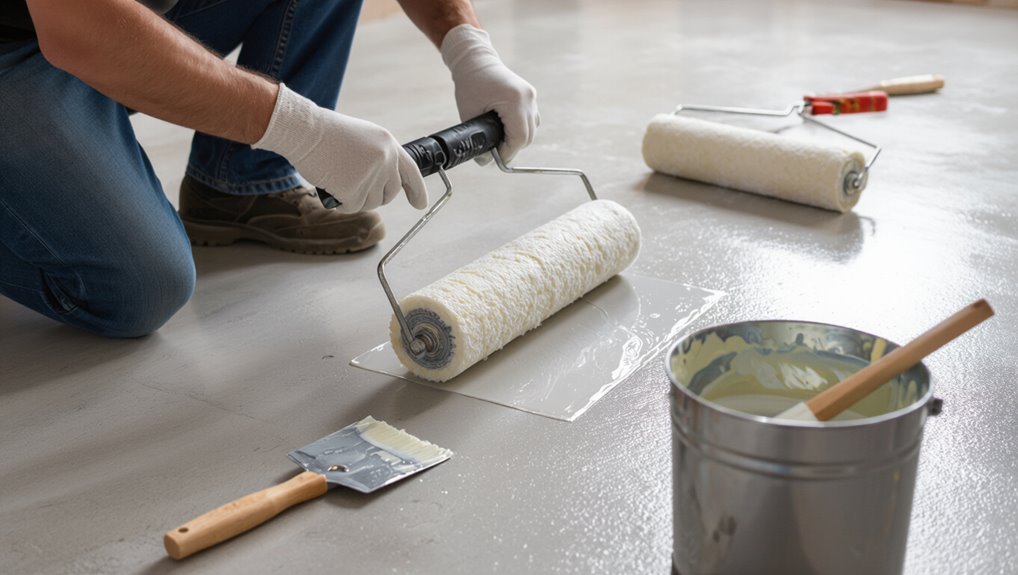
Step 5 Apply primer/sealer: when and how
Once you’ve confirmed the concrete is clean, dry, and has an even profile, it’s time to apply a primer or sealer that will lock in adhesion and block moisture; choose a product formulated for concrete floors and compatible with your finish paint.
Apply evenly with a roller, watch pot life, and allow full cure before topcoating.
- Mix per label
- Roll thin coats
- Seal edges first
- Check tack-free time
Step 6 Choosing and applying the paint or epoxy topcoat (mixing, application tips)
6. Choose a durable acrylic or epoxy topcoat suited for concrete.
For epoxies, mix components exactly per instructions, stirring slowly to avoid bubbles. Work in small sections, rolling with a 3/8–1/2″ nap roller for even coverage.
Maintain manufacturer’s pot life and recoat times. Avoid puddles, overlap wet edges, and ventilate well until fully cured before heavy use.
Step 7 Adding slip resistance and decorative options (flakes, stencils)
Enhance safety and style by adding slip-resistant additives or decorative finishes like vinyl flakes or stencils while your topcoat is still tacky or within the manufacturer’s recoat window.
Apply evenly, broadcast flakes, or press stencils gently. Seal with a clear topcoat to lock texture and pattern.
- Broadcast flakes for coverage and grip
- Use silica or polymer grit sparingly
- Lay stencils for borders or logos
- Clear topcoat locks finish
Step 8 Curing time, ventilation, and re-entry timeline
After you’ve added any texture or decorative elements and sealed the surface, let the coating cure according to the manufacturer’s directions—this determines when you can ventilate and re-enter the space.
Open windows and run fans to speed solvent dissipation once initial tackless time passes.
Avoid heavy traffic until full cure—usually 24–72 hours for light use, 7 days for full chemical and abrasion resistance.
Common Problems and How to Fix Them
You’ll probably run into issues like peeling, blistering, bubbling, pinholes, persistent moisture or efflorescence, and uneven coverage or sheen.
We’ll cover what causes each problem and the specific repairs or touch-up methods that work.
Follow those fixes so your floor holds up and looks consistent.
Peeling or flaking paint causes and remedies
If paint is peeling or flaking off your basement floor, it’s usually a sign of poor surface preparation, moisture intrusion, or incompatible products—each with a different fix.
First, remove loose paint, clean thoroughly, and etch or grind to profile the concrete.
Test for moisture, repair leaks, use a vapor-tolerant primer, and apply a compatible concrete paint per manufacturer instructions for lasting adhesion.
Blistering, bubbling, or pinholes diagnosis and repair
Blisters, bubbles, and pinholes show where air, moisture, or gases tried to escape through the paint film, and they keep the coating from bonding properly to the concrete.
Scrape loose areas, grind or sand to sound concrete, vacuum debris, and wipe with a solvent if needed.
Repair with a concrete patch, let it cure fully, then prime and repaint using recommended breathable products.
Persistent moisture or efflorescence after painting solutions
When persistent moisture or efflorescence appears after you paint a concrete basement floor, it means water is still moving through the slab or walls and bringing salts to the surface that will lift or stain the coating.
You need to find and stop the moisture source before repainting.
Dry, remove salts with a stiff brush and mild acid wash, fix drainage or vapor barriers, then use a breathable masonry primer and monitor for recurrence.
Uneven coverage or sheen fixes and touch-up methods
Uneven coverage or mismatched sheen usually shows up because the surface wasn’t cleaned, primed, or rolled consistently.
You can fix most issues without stripping the whole floor. Spot-sand rough or raised paint, clean dust, then feather in primer to blend edges.
Use the same paint batch and roller nap, work wet‑edge to wet‑edge, and apply a thin uniform topcoat for consistent sheen.
Best Practices, Maintenance, and Longevity Tips
Keep the floor clean with regular sweeping and occasional mopping using a pH-neutral cleaner to avoid dulling the paint.
Use entry mats, furniture pads, and felt glides to prevent scratches and trap grit before it reaches the floor.
Recoat or reseal when wear appears—clean and scuff the surface, then follow the product instructions for proper adhesion.
Routine cleaning and recommended cleaners
Routine cleaning keeps a painted concrete basement floor looking good and prevents wear, so plan to sweep or vacuum high-traffic areas weekly and mop monthly with the right products.
Use mild cleaners, avoid harsh acids, and spot-treat stains promptly.
- Mild pH-neutral floor cleaner
- Diluted dish soap for grease
- Enzyme cleaner for organic stains
Rinse with clean water and dry promptly.
Preventive measures to protect the finish (mats, furniture pads)
After regular cleaning, take steps to prevent damage before it happens by adding protective mats and furniture pads to your painted basement floor.
Place entry mats to trap grit, use non-slip, breathable pads under heavy items, and add felt glides to chairs and tables.
Move furniture carefully; lift instead of dragging.
Replace worn pads promptly to maintain the finish and avoid scratches or gouges.
When to recoating or resealing and how to prepare
When your painted basement floor starts showing dull spots, light scratches, or the coating peels at high-traffic areas, it’s time to recoat or reseal to restore protection and appearance.
You’ll typically need to do this every 2–5 years depending on traffic, moisture, and the product used.
Clean thoroughly, repair cracks, etch or sand gloss, remove dust, and guarantee the surface is fully dry before applying primer and new coating.
Cost, Time, and DIY vs. Professional Decision Factors
You can expect a DIY paint job to cost a few hundred dollars and take a weekend, while a professional can charge considerably more but finish faster and handle prep.
Hire a pro if you’ve got moisture issues, major repairs, or a very large area that needs consistent results.
We’ll compare typical costs, timeframes, and the signs that mean calling a contractor is the smarter choice.
Estimated costs and timeframes for DIY and pro jobs
If you’re tackling a concrete basement floor paint job, expect a wide cost and time range depending on prep needs, materials, and whether you DIY or hire pros. DIY often costs $100–$600 and takes a weekend to several days; pros run $800–$3,000 and several days. Use this quick comparison:
| Option | Cost | Time |
|---|---|---|
| DIY | $100–$600 | 1–3 days |
| Pro | $800–$3,000 | 2–5 days |
When to hire a professional: moisture, major repairs, large areas
Because basement floors can hide moisture, cracks, and unevenness, call a pro whenever you suspect serious water intrusion, need structural repairs, or are dealing with a large area that would take days of prep and specialized equipment.
A professional saves time, guarantees proper diagnostics, uses commercial-grade sealers and moisture mitigation, and typically costs more but prevents costly failures you’d face repairing DIY mistakes.
FAQ Frequently Asked Questions
You probably have specific questions like whether you can paint a damp basement floor, how long a painted floor will last, or whether epoxy is always the best choice.
You’ll also want to know if exterior concrete paint is safe indoors and how to strip old paint or coatings before repainting.
Below are clear answers to those common concerns.
Can I paint a concrete basement floor if it’s damp?
Wondering whether you can paint a damp concrete basement floor? You shouldn’t paint over active moisture — coatings won’t adhere and may blister or peel.
Test for moisture with a plastic sheet or moisture meter. If dampness is present, fix leaks, improve drainage, or install a vapor barrier and allow the slab to dry fully before priming and painting for a durable finish.
How long will painted concrete floors last in a basement?
How long will a painted concrete basement floor last?
It depends on prep, paint quality, traffic, moisture, and maintenance.
With proper surface prep, a breathable masonry primer, and a quality acrylic or specialized concrete coating, expect 3–10 years before touch-ups.
High traffic or moisture can shorten that.
Regular cleaning and recoat every few years extends life and keeps the finish durable.
Is epoxy always better than concrete paint?
Although epoxy often outperforms standard concrete paint in durability and chemical resistance, it isn’t always the best choice for every basement—factors like moisture, budget, surface condition, and desired appearance matter.
You should weigh epoxy’s longevity and resistance against cost, prep needs, and moisture risks.
For light-use areas, high-quality concrete paint can be quicker, cheaper, and perfectly adequate.
Can I use exterior concrete paint inside the basement?
If you’re thinking about saving money by using exterior concrete paint in your basement, know that exterior formulas are designed for different conditions and may not perform the same indoors.
You can use some exterior paints, but check for low-VOC, moisture-tolerant and breathable labels.
Exterior paint may trap moisture, peel, or emit stronger odors—choose products rated for interior concrete or basement environments.
How do I remove old paint or coatings before repainting?
Before you repaint, strip loose or flaking paint and any previous coatings down to a sound surface so the new finish will adhere properly.
Scrape with a putty knife or floor scraper, use a wire brush for stubborn spots, and employ a chemical stripper or floor grinder for heavy coatings.
Clean thoroughly, rinse, and let dry.
Patch and etch concrete before priming and painting.
Visual Guide and Checklist
Grab the printable step-by-step checklist to knock out your basement floor painting over a weekend, with clear times and tools for each stage.
Keep the troubleshooting quick chart nearby so you can spot and fix common issues like peeling, uneven coverage, or bubbling.
Use both as you work to stay on schedule and avoid rework.
Step-by-step checklist for a weekend DIY project
When you set aside a weekend, this visual checklist will guide you through each compact, practical step so you can finish a durable, attractive concrete basement floor without interruptions.
You’ll work steadily, avoid delays, and finish clean.
- Clear, sweep, and vacuum the floor.
- Etch or grind to open the surface.
- Prime, then apply two coats of paint.
- Seal and cure before returning items.
Troubleshooting quick chart for common failures
1 quick reference chart helps you diagnose and fix the most common problems—peeling, bubbling, uneven coverage, or slow curing—so you can get back to work fast. Use this visual checklist to identify causes and corrective actions quickly, then follow the short remedies to restore the finish and prevent recurrence.
| Problem | Likely Cause | Fix |
|---|---|---|
| Peeling | Poor prep | Re-etch and recoat |
| Bubbling | Moisture | Dry and use moisture barrier |
| Thin spots | Low coverage | Apply another coat |
| Slow cure | Cold/humid | Warm area and wait |