How to Remove Adhesive From a Concrete Floor Completely
You can remove adhesive from concrete completely by matching the method to the adhesive: identify the type, put on PPE, and try a small test area first. Start with scraping and heat to soften the glue, then use a solvent made for that adhesive and agitate with a stiff brush. For stubborn or cured epoxy, grind with a diamond cup or hire a pro. Rinse and neutralize after chemicals, repair any etching, and keep going for full removal if you want detailed steps.
How to Remove Adhesive From a Concrete Floor Completely
For the fastest, most effective removal on a concrete floor, you’ll usually grind or chemically soften the adhesive and then scrape or vacuum it away.
Try DIY methods on small areas first, but call a professional if the adhesive covers large areas, the concrete is delicate, or you’re dealing with hazardous residues.
A pro can save time, protect the slab, and handle disposal safely.
One-sentence summary of the fastest effective method
Start by scraping or softening the adhesive, then apply a concrete-safe solvent or adhesive remover and use a stiff brush or floor grinder to fully lift the residue.
Finish with a degreasing wash to leave the concrete clean.
For a quick, effective result, follow safety steps, test a small area, and work methodically so you’ll know how to remove adhesive from concrete floor without damaging the slab.
When to call a professional
If stubborn adhesive covers large areas, has soaked deep into the slab, or won’t budge after DIY methods, call a pro—especially when you’re dealing with chemical removers, heavy equipment, or finishes you can’t risk damaging.
You should hire help when you face:
- A job that’s physically overwhelming.
- Hazardous chemicals or fumes.
- Historic or sealed concrete that must be preserved.
Understanding Adhesive on Concrete
You’ll encounter many adhesives on concrete—construction adhesive, carpet glue, epoxy, mastic, and tape residue—and each sticks differently.
Some are harder to remove because of their chemical makeup, how fully they’ve cured, and how porous your concrete is.
Identifying the adhesive type first helps you pick the right solvent or mechanical method for safe, effective removal.
What types of adhesives bond to concrete (construction adhesive, carpet glue, epoxy, mastic, tape residue)
Adhesives come in many forms, and each one sticks to concrete differently, so knowing what you’re up against helps you choose the right removal method.
You’ll encounter construction adhesive, carpet glue, epoxy, mastic, and tape residue.
Picture common examples:
- Thick yellow construction beads.
- Flat, gummy carpet adhesive patches.
- Shiny, hard epoxy spills.
Identify the type before removing.
Why some adhesives are harder to remove (chemical composition, curing, porosity of concrete)
Because different glues are made from different chemistries and cure in different ways, some bonds sink into concrete and resist solvents or scrapers much more than others.
You’ll find cured epoxy and polyurethane penetrate pores and crosslink, making mechanical or chemical removal tough. Softer adhesives may stay surface-level and respond to heat or solvent.
Concrete porosity and age change how deep adhesives grip, too.
How adhesive type affects removal method
Knowing what made the adhesive behave that way helps you choose the right removal method. You’ll match solvent, heat, or mechanical action to adhesive chemistry and curing: water‑based peels with scrapers, epoxies need solvents or grinders, and rubbery mastics respond to heat. Pick tools that protect concrete while removing residue efficiently.
| Adhesive type | Best approach |
|---|---|
| Water‑based | Scrape, warm water |
| Epoxy | Solvent, grinder |
| Mastic | Heat, scraper |
Safety, Preparation, and Tools
Before you start, put on PPE, guarantee good ventilation, and control dust to protect yourself and others.
Clean the area, test a small spot, and consider temperature so adhesives and solvents behave predictably.
Gather scrapers, grinders or heat guns, solvents and protective gear, and rent specialty equipment like a floor grinder or shot blaster if the job is large or stubborn.
Safety precautions (PPE, ventilation, dust control)
When you tackle adhesive removal from concrete, prioritize safety: wear appropriate PPE, guarantee good ventilation, and control dust to protect your lungs, eyes, and skin.
Use respirators, goggles, gloves, and coveralls. Seal off the area and run exhaust fans.
Limit dust with wet methods or HEPA vacuums.
- Masked face
- Gloved hands
- Ventilated space
Surface preparation (cleaning, testing a small area, temperature considerations)
Now that you’ve secured the area and put on PPE, prepare the concrete so adhesive removal will work more effectively: sweep and mop away loose dirt, oil, and debris, then let the surface dry.
Test a small, inconspicuous patch with your chosen method to confirm adhesion and finish compatibility.
Work within recommended temperature ranges to guarantee solvents and tools perform safely and effectively.
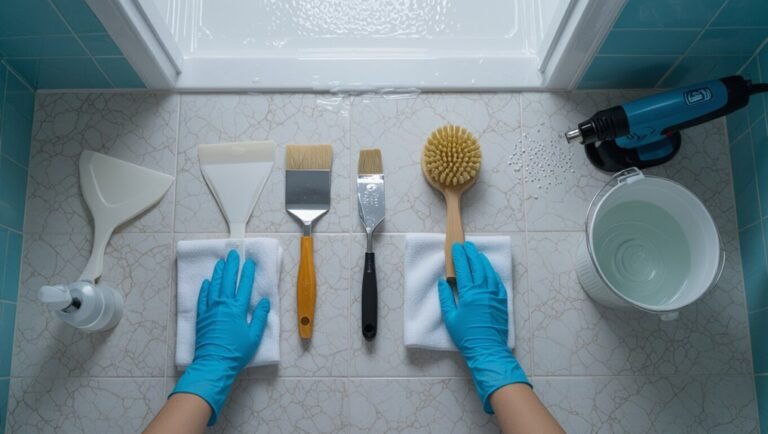
Essential tools and supplies (scrapers, grinders, heat guns, solvents, adhesive removers, protective gear)
Tools matter: get the right scrapers, grinders, heat guns, solvents, and PPE so you can remove adhesive efficiently and safely.
You’ll need sturdy floor scrapers, a variable heat gun, and low-odor solvent.
Wear respirator, gloves, eye protection, and knee pads.
Visualize the process:
- Broad scraper shaving layers
- Heat gun softening glue
- Solvent wiping residues
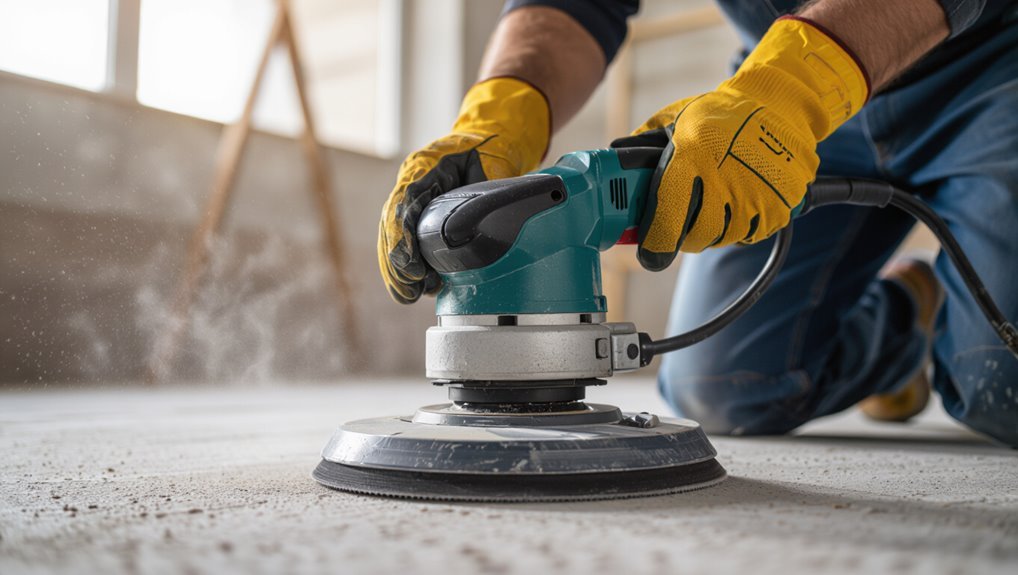
When to rent specialty equipment (floor grinder, shot blaster)
If your scraper, heat gun, and solvent aren’t making progress or the adhesive covers large areas, consider renting specialty equipment like a floor grinder or shot blaster.
You’ll save time and get a flatter, cleaner finish, but plan for dust control, PPE, and noise.
Visualize the work:
- roaring grinder dust plume
- steel shot pelting concrete
- smooth, exposed slab revealed
Step-by-Step Removal Methods
You’ll choose from four main approaches to remove adhesive from concrete: mechanical scraping and sanding, heat-assisted softening with a heat gun or infrared, chemical solvents and removers, or a combination of these.
Each method has specific steps, tools, and safety measures you’ll need to follow.
Below we’ll walk you through step-by-step instructions so you can pick the safest and most effective option for your situation.
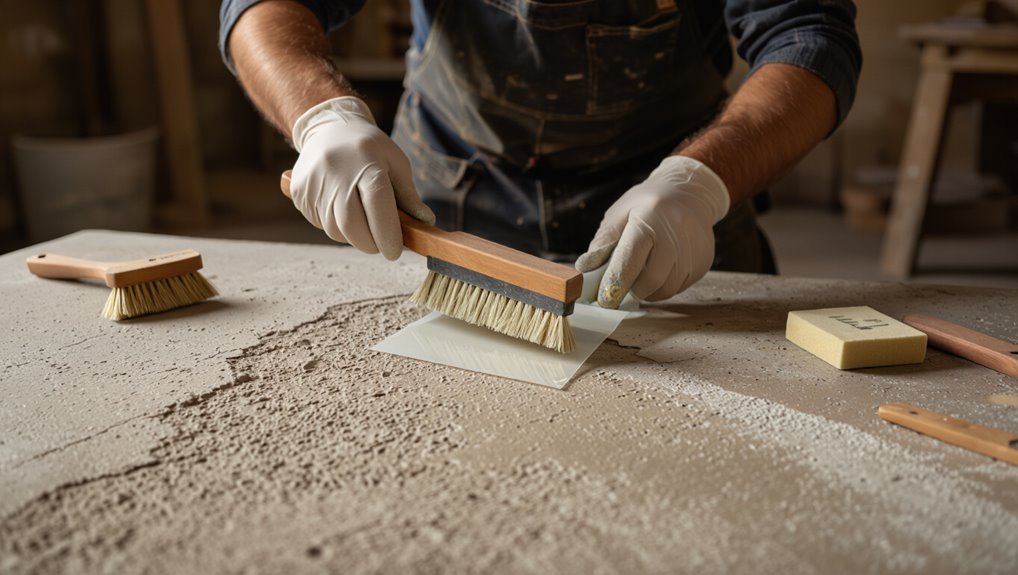
Method 1 Mechanical removal (scraping and sanding)
Start by scraping with the right tools—use a stiff putty knife or a razor-edged floor scraper and carbide or tungsten blades for stubborn spots.
If scraping won’t finish the job, switch to an orbital sander or a floor grinder with appropriate grit and dust control, and always wear PPE and follow safe operating practices.
You’ll often find mechanical methods alone are enough for thin, cured adhesives, but thicker or chemically bonded residues may need heat or solvents.
Step 1: Manual scraping techniques and best blades
Grab a sturdy putty knife or floor scraper and work in short, controlled strokes to lift as much adhesive as you can before resorting to power tools.
Choose 4–6 inch rigid blades for thin residue, wider 10–12 inch scrapers for large areas. Keep blades sharp and angled low, replace nicked edges, and use a flat metal chisel for stubborn spots.
Take breaks to inspect progress.
Step 2: Using an orbital sander or floor grinder safely
After you’ve removed as much adhesive as possible with a scraper, bring in an orbital sander or floor grinder to tackle the remaining residue and smooth the surface.
Wear PPE—respirator, eye and ear protection, gloves—and guarantee dust collection is attached.
Work in overlapping passes with appropriate-grit diamond or carbide pads, keep the tool moving to avoid gouges, and check progress frequently.
When mechanical alone is sufficient
When the adhesive layer is thin, non-epoxy, and not chemically bonded to the concrete, mechanical methods alone will usually do the job — you can scrape, sand, or grind it away without solvents or heat.
Start with a stiff scraper, progress to an orbital sander or floor grinder with coarse grit, and finish with finer abrasives.
Wear PPE, control dust, and inspect frequently for adhesion remnants.
Method 2 Heat-assisted removal (heat gun, infrared)
Start by gently heating the adhesive with a heat gun or infrared tool until it softens, moving the heat steadily to avoid hot spots.
Once the adhesive is pliable, scrape it away with a stiff scraper and wipe the residue with a solvent or warm soapy water.
Take safety precautions—keep the nozzle moving, use heat-resistant gloves and eye protection, and avoid overheating to prevent concrete damage.
Step 1: Heating adhesive to soften
Warm the adhesive slowly so it softens and becomes easier to scrape away.
Hold a heat gun or infrared panel 6–8 inches from the surface, moving continuously to prevent scorching. Use moderate heat settings, testing a small area first.
Watch for bubbling or gloss change as signs it’s pliable.
Wear gloves and a respirator, and ventilate the space while heating.
Step 2: Scraping and cleanup
Hold a stiff scraper at a low angle and work in short, controlled strokes to lift softened adhesive without gouging the concrete.
Continue heating small areas as needed, scrape residue into a pile, and collect debris with a dustpan.
Wipe remaining tackiness with a solvent-soaked rag, then rinse the area with warm water and a stiff-bristled brush to finish cleanup.
Safety tips to avoid concrete damage
Because heat can weaken or discolor concrete, you’ll want to control temperature and exposure carefully when using a heat gun or infrared tool.
Keep the nozzle moving, maintain at least 6–8 inches distance, and use lower settings. Test a small area first.
Wear heat-resistant gloves, eye protection, and a respirator for fumes. Stop if the surface darkens or cracks.
Method 3 Chemical removal (solvents and adhesive removers)
For chemical removal you’ll start by matching a solvent to the adhesive type—solvent-based for tar and construction adhesives, citrus or water-based removers for lighter glues.
Apply the product according to label instructions, let it dwell, agitate with a stiff brush or scraper, then repeat as needed.
Finish by neutralizing and rinsing the area, and follow local guidelines for disposal and ventilation to protect yourself and the environment.
Step 1: Choosing the right solvent for the adhesive type
When you’re selecting a solvent, match it to the adhesive type—water-based, rubber-based, epoxy, or construction adhesive—so you’ll get the best results with the least risk to the concrete. Identify the adhesive, check manufacturer recommendations, and choose a solvent (water, citrus, ketone, or methylene chloride alternatives) that dissolves it without etching.
| Adhesive | Solvent | Note |
|---|---|---|
| Water-based | Hot water/soap | Safe |
| Rubber-based | Citrus | Moderate |
| Epoxy | Ketone | Strong |
Step 2: Application, dwell time, and agitation
Apply the solvent evenly, let it work, and agitate the residue to speed removal:
Wear gloves and eye protection, then saturate a manageable area.
Let the solvent dwell per label instructions—usually minutes—to soften adhesive.
Use a stiff brush, putty knife, or scraper to break and lift softened material.
Reapply to stubborn spots and repeat agitation until most adhesive releases.
Step 3: Neutralizing and rinsing residue
After the solvent has loosened the adhesive, neutralize any chemical residues and rinse thoroughly to prevent surface damage and guarantee proper cleanup.
Wear gloves, then apply a manufacturer‑recommended neutralizer or a mild detergent solution. Agitate with a stiff brush, rinse repeatedly with clean water, and blot liquid into a wet vacuum or absorbent towels.
Allow the concrete to air dry before inspecting for remaining residue.
Environmental and disposal considerations
Because many solvent-based removers contain volatile or hazardous ingredients, you’ll want to plan for safe handling, containment, and proper disposal before you start the job.
Wear PPE, use spill trays, and work in ventilated areas.
Collect solvent waste in labeled, sealed containers.
Check local hazardous-waste rules and take materials to an approved disposal facility.
Don’t pour solvents down drains or into soil.
Method 4 Combination approaches (chemical + mechanical + heat)
You’ll get the best results by following a clear sequence: soften the adhesive with heat, apply a suitable solvent, then scrape or grind the residue away.
For stubborn, aged adhesives you might repeat the cycle or switch to stronger solvents and heavier mechanical action like a floor buffer with a grinding disk.
Below are case examples showing which combinations worked on common problem adhesives.
Typical sequences for best results
When you’re combining chemical, mechanical, and heat techniques, follow a clear sequence to protect the concrete and speed removal:
test solvent on a small area, apply chemical stripper and dwell per instructions, soften with controlled heat, scrape gently with a floor scraper or rotary tool, vacuum debris, repeat as needed, then neutralize and rinse.
Finish with light grinding for stubborn residue and final cleanup.
Case examples for stubborn residues
1 clear example helps you see how to combine chemical, mechanical, and heat methods safely and efficiently: you apply a solvent gel to soften old adhesive, warm the area with a heat gun to activate the solvent, then scrape with a stiff scraper.
Finish with a rotary buffer and a coarse pad to remove residue.
Ventilate, wear PPE, and test a small area first.
Specialized Scenarios and Materials
Now you’ll handle specialized scenarios like stubborn carpet glue or tack strip adhesive that often need mechanical scraping or heat.
For tougher compounds such as epoxy or urethane, you’ll use stronger solvents, grinders, or chemical strippers while taking safety precautions.
If you’re dealing with tape residue, thin-film adhesives, or historic and delicate concrete finishes, you’ll choose gentler methods and conservation-minded tactics to avoid damage.
Removing carpet glue or tack strip adhesive
Carpet glue and tack strip adhesive can cling stubbornly to concrete, but you can remove them with the right tools and techniques.
Scrape remaining tack with a pry bar, then heat stubborn glue with a heat gun or apply a commercial adhesive remover.
Scrub with a stiff brush and citrus or solvent-based cleaner, rinse, and repeat until the surface is clean and residue-free.
Removing epoxy or urethane adhesives
Tackle epoxy and urethane adhesives with care: these chemically cured products bond tightly to concrete and won’t soften with heat like common glues, so you’ll rely on mechanical removal, specialty chemical strippers, or both.
Start by testing a small area with an appropriate stripper and follow manufacturer instructions. Grind or shot-blast stubborn residue, wear respiratory protection, and repair surface profile before resealing or finishing.
Removing tape residue and thin-film adhesives
Epoxy and urethane often demand heavy-duty methods, but tape residue and other thin-film adhesives usually respond to lighter, more targeted approaches.
You’ll scrape gently with a plastic scraper, soften residues with warm soapy water or a citrus solvent, then wipe with clean rags.
For stubborn spots use a low‑speed orbital sander with fine grit or a mild commercial adhesive remover, rinsing thoroughly.
Historic floors or delicate concrete finishes preservation tactics
When you’re working on historic floors or delicate concrete finishes, take a conservative, reversible approach that prioritizes preservation over speed.
Test solvents and methods on inconspicuous spots, use gentle poultices, low-strength cleaners, and soft tools.
Avoid aggressive grinding or heat. Document treatments, consult a conservator for significant adhesive or finishes, and retain original patina by removing only what’s necessary.
Troubleshooting Common Problems
If the adhesive won’t soften or scrape off, try a stronger solvent, more heat, or mechanical methods while protecting the concrete.
If you see etching, gouges, or discoloration afterward, you’ll need patching compounds, color-matching stains, or resurfacing options to restore the surface.
If strong fumes or a chemical reaction occur, ventilate the area, leave immediately if you feel unwell, and call poison control or emergency services.
Adhesive won’t soften or scrape off
Although you’ve tried heat, solvents, and scraping, some adhesives stay stubbornly bonded to concrete; in these cases you’ll need a systematic approach that combines stronger solvents, mechanical methods, and safety precautions to avoid damage.
Start with manufacturer-recommended adhesive removers, test a small patch, then progress to grinder or floor stripper with diamond or carbide tooling.
Work in ventilated area, wear PPE, and dispose residues per local rules.
Concrete surface damage (etching, gouges) repair options
Assess the damage quickly so you can choose the right repair: light etching and surface discoloration often need cleaning and densifier/sealer.
Shallow gouges can be filled with a cementitious patch or epoxy, and deeper cracks or spalls require routed-and-filled repairs with polymer-modified mortar or resin injections.
Match materials to depth, feather edges, follow manufacturer cure times, and grind or polish repaired areas for a consistent finish.
Residual stain or discoloration after removal
When adhesive comes off but a ghost stain or discoloration remains, don’t assume the job’s done—you’ll need to identify whether the mark is a surface residue, a dye migration, or a chemical reaction with the concrete so you can pick the right follow-up treatment.
Test with solvent, mild acid (vinegar), and water; if staining persists, try poultices, light sanding, or a concrete-safe stain remover before sealing or resealing the area.
Strong fumes or chemical reactions emergency measures
If a cleaning step leaves strong fumes, causes burning sensations, or you spot unexpected bubbling or discoloration after applying a solvent or acid, act quickly to protect yourself and the area.
Ventilate immediately, leave the space, and call emergency services for serious reactions.
Rinse affected concrete with copious water if safe, neutralize acids with baking soda solution, and seek professional hazardous-material help if fumes persist.
Prevention and Best Practices
To avoid future adhesive headaches, choose the right adhesive systems, use primers or barrier layers where recommended, and test a small area first.
When applying or removing adhesives, follow manufacturer instructions, use proper tools, and work methodically to prevent damage.
After removal, maintain concrete by sealing or resurfacing vulnerable areas to protect against stains and make future cleanups easier.
How to avoid future adhesive problems (proper adhesives, primers, barrier layers)
Because proper materials and application make the difference, you can prevent most adhesive failures by choosing the right glue, preparing the concrete, and using primers or barrier coats where needed.
Select adhesives rated for concrete and your flooring type, confirm moisture tolerance, and use an appropriate primer to improve bond.
Install vapor or barrier membranes where moisture or contaminants could compromise adhesion.
Maintain recommended cure times.
Best practices for applying and removing adhesives on concrete
Having the right materials and surface prep in place makes the rest of the job far easier, so now focus on practical steps for applying and removing adhesives on concrete.
Test adhesives on a small area, follow manufacturer cure times, apply evenly with recommended trowels, and use barrier films when needed.
For removal, soften with appropriate solvents or heat, then scrape and clean residues promptly.
Maintenance tips after removal (sealing, resurfacing)
Once the adhesive’s gone, protect the concrete by sealing or resurfacing promptly to prevent stains, moisture intrusion, and premature wear.
Choose a penetrating sealer for preserved texture or a film-forming acrylic/epoxy for high-traffic areas.
Clean and dry thoroughly, repair cracks, then apply per manufacturer instructions.
Reapply sealant as recommended, and inspect annually to catch wear before it becomes damage.
Costs, Time Estimates, and When to Hire a Pro
You’ll want to weigh estimated costs for different methods—from a $20 roll of solvent for small spots to several hundred dollars for rental grinders or thousands for pro remediation on large jobs.
Expect DIY work to take a few hours to a few days depending on adhesive type and area, while pros can usually finish large or complex jobs much faster.
Hire a contractor if the adhesive covers a large area, the concrete’s integrity is at risk, or you don’t have the tools or time to get a safe, thorough result.
Estimated costs by method and project size
Costs depend on the removal method, the size of the area, and how stubborn the adhesive is, so expect small DIY jobs (a few square feet) to run $10–$50 for solvent and basic tools, medium jobs (hundreds of square feet) to cost a few hundred dollars in rentals and materials, and large or commercial projects to climb into the thousands when you factor in professional labor, equipment, and disposal.
| Method | Typical cost |
|---|---|
| Solvent + hand tools | $10–$100 |
| Heat or grinder rental | $50–$400 |
| Chemical strippers | $50–$300 |
| Pro service | $500–$5000+ |
Time expectations for DIY vs. professional jobs
Besides money and materials, time is the other big factor to weigh when choosing a removal method.
DIY removes can take a weekend to several days depending on adhesive thickness, cure, and tools you rent.
Professionals often finish in a day with grinders or hot-solvent extraction.
Factor prep, drying, and cleanup; pick pro help if your schedule’s tight or project scale exceeds your available time.
Signs you should hire a contractor
If your adhesive job looks bigger than a single weekend—thick layers, widespread coverage, or multiple rooms—hire a contractor; they’ll give firm cost and time estimates, handle hazardous materials, and finish far faster than most DIY attempts.
You should also call a pro if equipment rental costs spike, your schedule’s tight, the adhesive’s chemically bonded, or you lack confidence in safe removal—professionals limit risk and unpredictable delays.
Tools, Products, and Comparison
You’ll need the right hand tools and power tools for each job—scrapers and wire brushes for thin residue, grinders or heat guns for stubborn patches.
Compare solvents and commercial removers by effectiveness, surface safety, and required dwell time so you pick one that works without damaging the concrete.
If you’re sensitive to fumes or prefer greener options, I’ll highlight low‑VOC and eco‑friendly products that still get the job done.
Recommended hand tools and power tools with use-cases
Choosing the right tools makes adhesive removal faster, safer, and less likely to damage your concrete, so you’ll want a mix of hand tools for detail work and power tools for larger jobs.
Use:
- Putty knife and wire brush — scrape edges and grooves.
- Floor scraper or oscillating tool — remove thick layers.
- Angle grinder with diamond cup or floor buffer — grind or abrade stubborn residue.
Comparison of common solvents and commercial adhesive removers
When you need to dissolve old adhesive without damaging concrete, pick a solvent based on the adhesive type, drying time, and toxicity—common choices include mineral spirits, acetone, citrus-based solvents, and specialized commercial removers. Test small areas, work ventilated, and use proper PPE. Compare effectiveness, smell, and surface impact in this quick table:
| Solvent | Quick notes |
|---|---|
| Mineral spirits | Good for asphalt-based glue |
| Acetone | Fast, aggressive; avoid porous damage |
| Commercial remover | Potent, engineered for concrete |
Eco-friendly and low-VOC product options
If strong chemical solvents feel too harsh or you’re working indoors, consider eco-friendly and low-VOC options that still remove adhesive without excessive fumes or environmental impact.
You can use citrus-based cleaners, soy gel removers, and biodegradable adhesive loosening sprays.
Test a small area first, apply per instructions, agitate with a plastic scraper or stiff brush, then rinse.
They’re safer for you and the planet.
Common Mistakes to Avoid
Don’t use the wrong solvent or blast the area with excessive heat, because that can damage the concrete surface.
Don’t over-grind or you’ll weaken the slab, and don’t skip basic safety precautions like gloves and a respirator.
Always test methods on a small, inconspicuous area first to confirm results.
Using the wrong solvent or excessive heat
Although it might seem faster to grab any solvent or crank up a heat gun, choosing the wrong chemical or applying too much heat can permanently damage concrete and make adhesive removal harder.
You should test solvents on a hidden spot, follow manufacturer guidelines, wear protection, and use moderate heat settings.
When in doubt, consult a professional to avoid staining, weakening, or creating hard-to-remove residue.
Over-grinding and weakening the concrete
Using too much heat or the wrong chemical can leave the surface softer or etched, but aggressive mechanical removal creates another big risk: over-grinding and weakening the concrete.
You might strip paste and reduce slab thickness, exposing aggregate or creating low spots that crack under load.
Grind in controlled passes, check depth frequently, and stop once adhesive is gone to preserve structural integrity.
Skipping safety precautions
When you skip safety precautions, you’re risking serious injury and property damage—chemical burns, inhalation of toxic fumes, and flying debris are all common hazards when removing adhesive from concrete.
Always wear respirators, chemical-resistant gloves, eye protection, and sturdy footwear.
Ventilate the area, isolate bystanders, and follow product labels.
Don’t improvise with inadequate gear—proper protection prevents accidents and costly delays.
Not testing on a small area first
After you’ve put on the right protective gear, don’t skip a spot test before full-scale adhesive removal.
You’ll confirm the cleaner’s effectiveness and guarantee it won’t damage or discolor the concrete. Test in an inconspicuous corner, follow product instructions, and wait the recommended dwell time.
If results are unsatisfactory, try a milder solvent or a different method before committing to the entire floor.
FAQ
You probably have a few specific questions about adhesive removal—like whether you can do it without chemicals, if it’ll harm the concrete, or how to tackle old epoxy.
You’ll also want to know which solvents are safest around pets and kids and how to prep the surface for new floor coverings.
I’ll answer each of these clearly so you can choose the safest, most effective method for your situation.
Can I remove adhesive from concrete without chemicals?
Wondering if you can get adhesive off concrete without chemicals? Yes — you can.
Use scraping, heat (heat gun or hair dryer), mechanical abrasion (orbital sander or grinder with a diamond or abrasive pad), and boiling water or steam to soften residue.
Work gradually, keep the surface cool, and vacuum debris. These methods often remove most adhesive, though stubborn spots may need repeated effort.
Will adhesive removal damage my concrete?
How likely is adhesive removal to harm your concrete? It’s unlikely if you choose appropriate methods and work carefully.
Scraping, heat, or mild solvents usually won’t damage well-cured concrete, but aggressive grinding, harsh chemicals, or excessive force can etch or weaken the surface.
Test a small area first, use protective gear, and proceed gradually.
Repair minor damage promptly to prevent long-term issues.
How do I remove old epoxy from a concrete floor?
Removing old epoxy from a concrete floor takes patience and the right tools, but you can do it without wrecking the slab.
Start by sanding or grinding to break the film, then use a heat gun to soften stubborn areas.
Scrape with a metal scraper, vacuum dust, and repeat.
Finish with a concrete cleaner and etch if you’ll refinish the surface.
What is the safest solvent to use around pets and children?
Which solvent is safest depends on exposure time and ventilation, but for homes with pets and children you’ll usually want to choose water-based, low-VOC cleaners like simple citrus or soap-and-water solutions first.
You should test a small area, keep pets and kids away until surfaces dry, ventilate well, and store products locked up.
When in doubt, consult product labels or a professional.
How do I prepare concrete for a new floor covering after adhesive removal?
Start by ensuring the concrete is clean, flat, and fully dry before you install any new floor covering.
Patch cracks and pits with a suitable concrete repair compound, sand high spots, and grind rough areas.
Test moisture with a meter, apply a primer or moisture barrier if needed, and vacuum thoroughly.
Follow manufacturer guidelines for adhesives or underlayments before laying the new flooring.