How to Make Vinyl Floors Shine Again With Simple Household Methods
You can make vinyl floors shine again using simple household items and a little elbow grease. Start by sweeping or vacuuming to remove grit, then mop with warm water and a teaspoon of mild dish soap per quart. For extra gloss, wipe with a solution of 1 cup white vinegar per gallon of water, rinse, and buff dry with a microfiber cloth. Use baking soda for scuffs and olive oil sparingly for shine; keep going and you’ll find more tips ahead.
How to Make Vinyl Floors Shine Again With Simple Household Methods
You can get a noticeable shine on vinyl in as little as 5–15 minutes using everyday items like vinegar, olive oil, or a mild soap solution.
This quick guide is for busy homeowners and renters who want fast, safe results without specialty products.
Expect simple steps, common supplies, and tips to avoid streaks or buildup.
Fast Shine in 515 Minutes
If your vinyl floors look dull but you don’t want to buy specialty products, simple household items can restore a fast, lasting shine in about 5–15 minutes per room.
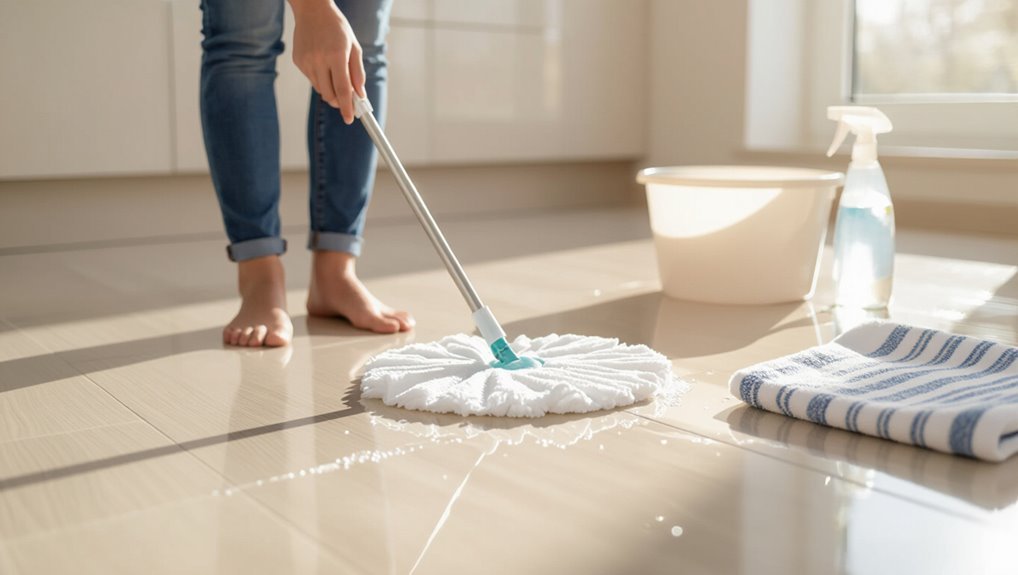
Start by sweeping, mop with warm water and a few drops of dish soap, then buff dry with a microfiber cloth.
For extra gloss, mix equal parts vinegar and water, rinse, and buff to finish.
Who this guide is for and what to expect
After a quick sweep, soap-and-water mop, and a vinegar rinse, you’ve seen how simple steps can revive vinyl in minutes.
This guide is for busy homeowners, renters, and DIYers who want safe, affordable shine without specialty products.
You’ll get clear, step-by-step methods, timing, and cautions for common issues so you can restore luster quickly and avoid damage.
Understanding Vinyl Flooring and Shine
You’ll want to know the basics of vinyl — sheet, luxury vinyl plank/tile (LVP/LVT), and vinyl composition tile (VCT) — because each type responds differently to cleaning and shine treatments.
Vinyl loses shine from wear, dirt buildup, and gradual dulling or abrasion of its finish.
If the wear layer is damaged, seams are peeling, or tiles are lifting, don’t try household fixes — those need professional repair or replacement.
What is vinyl flooring (types: sheet, luxury vinyl plank/tile, vinyl composition tile)
Vinyl flooring is a durable, water-resistant surface made from layers of PVC and a printed design. It comes in three main types you’ll commonly see: flexible sheet vinyl, rigid luxury vinyl plank or tile (LVP/LVT), and vinyl composition tile (VCT).
Sheet vinyl offers seamless coverage. LVP/LVT mimics wood or stone with click or glue installation, and VCT is resilient, often used in commercial settings.
Why vinyl loses shine (wear, dirt buildup, dulling of finish)
Because manufacturers coat vinyl with a thin protective finish, that layer can wear away over time, leaving the surface looking flat and tired.
You’ll also notice grime and oils build up in tiny scratches and seams, scattering light and dulling appearance.
Frequent foot traffic, abrasive cleaning, and pet claws accelerate wear, while neglected maintenance lets dirt embed, reducing shine progressively.
When to avoid DIY shining (damaged wear layer, peeling, glued seams)
If the wear layer is cracked, peeling, or the seams are lifting, don’t try to restore shine yourself—doing so can trap moisture, worsen damage, or ruin the backing.
Instead, inspect for bubbling, exposed core, or adhesive failure. Stop cleaning treatments, cover traffic, and contact a professional.
Temporary fixes can mask problems; proper repair or replacement prevents more costly structural damage.
Tools and Household Supplies You’ll Need
You’ll want a few basic tools and household supplies to get your vinyl shining again, plus a couple of optional products for tougher spots and some simple safety precautions.
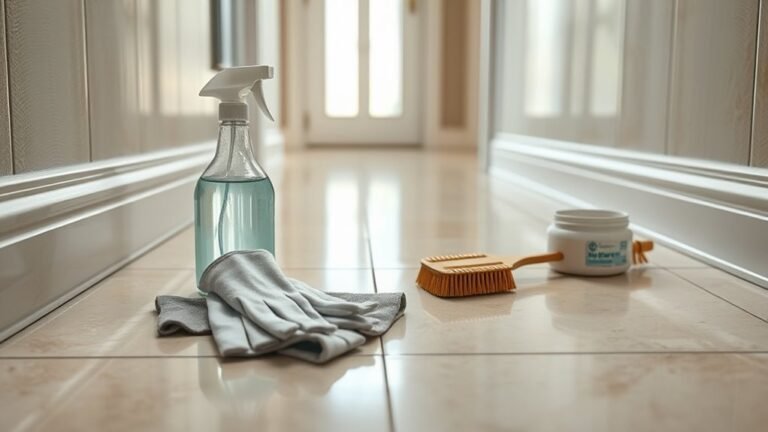
Here are the essentials to gather before you start:
- Everyday items: bucket, microfiber mop, soft cloths, vinegar, dish soap, olive oil, baking soda
- Optional stronger products: rubbing alcohol, hydrogen peroxide, commercial vinyl cleaner, floor polish
- Safety gear: gloves, eye protection, and good ventilation
- Floor protection tips: use mats in high-traffic areas and felt pads under furniture legs
Everyday items (buckets, microfiber mop, soft cloths, vinegar, dish soap, olive oil, baking soda)
A few simple household items will get your vinyl floors shining again without specialty cleaners: grab a bucket, a microfiber mop or soft cloths, mild dish soap, white vinegar, baking soda for scuffs, and a little olive oil for buffing.
Use the bucket for warm water, dilute a few drops of dish soap or vinegar, spot-treat scuffs with baking soda paste, then buff sparingly with olive oil.
Optional products for stronger results (rubbing alcohol, hydrogen peroxide, commercial vinyl cleaner, floor polish)
When DIY methods aren’t cutting it, reach for a few stronger, still-easy-to-find products: rubbing alcohol and hydrogen peroxide for stubborn stains, a commercial vinyl cleaner for deep cleaning, and a floor polish to restore long-lasting shine.
Use alcohol sparingly on scuffs, hydrogen peroxide for organic marks, a pH-neutral vinyl cleaner per label, and a quality polish applied thinly for even, durable gloss.
Safety gear and floor protection tips
Before you start, gather basic safety gear and floor protection so you don’t damage the vinyl or injure yourself: nitrile gloves, safety glasses, knee pads or a cushioned mat, and a mask if you’re using solvents.
Then lay down clean microfiber cloths, felt furniture pads, and a breathable drop cloth or rosin paper to catch drips and prevent scratches.
Work in well-ventilated areas, test cleaners in a hidden spot, and keep pets and kids away.
Quick Pre-Shine Prep Steps (Assessment and Cleaning)
Before you start shining, inspect the floor for damage and do spot tests to make sure cleaners won’t harm the vinyl.
Next, remove loose debris by sweeping or vacuuming thoroughly.
Finally, tackle stained or greasy areas with a targeted deep clean so the finish will go on smoothly.
Step 1 Inspect for damage and perform spot tests
Start by scanning the entire floor for damage and pick a few small, inconspicuous spots to test cleaners and techniques.
Check for cracks, peeling, lifting seams, deep scratches, or color fading.
Use mild cleaner and a soft cloth on each test spot, wait and inspect for discoloration or finish loss.
Note problem areas and avoid harsh products on compromised vinyl.
Step 2 Remove loose debris and vacuum/sweep
With the problem spots noted, clear away loose debris so your cleaning steps work on the floor itself, not grit that can scratch the surface.
Sweep with a soft-bristle broom, then vacuum using the hard-floor setting or a bare-floor attachment. Pay attention to corners, under furniture edges, and along baseboards.
Empty the vacuum canister so dust doesn’t return to the floor.
Step 3 Deep-clean stained or greasy areas
Tackle stained or greasy spots now so your finish will shine evenly: apply a mild degreaser or a paste of baking soda and water to the affected area, let it sit a few minutes to loosen grime, then scrub gently with a soft cloth or nonabrasive pad and rinse thoroughly.
For stubborn marks, repeat or use a diluted vinegar solution, test in a hidden spot, then dry completely before shining.
Step-by-Step Household Methods to Restore Shine
Now you’ll go through simple, effective household methods to bring your vinyl back to life.
Start with warm water and mild dish soap for everyday shine, then try a vinegar rinse to cut residue and brighten dull areas.
For tougher spots, use a baking soda paste for scuffs, an isopropyl mix for grease, and a light buff with olive or baby oil for temporary shine.
Method A Warm Water + Mild Dish Soap (gentle, everyday shine)
You’ll need just warm water, a few drops of mild dish soap, and a mop or microfiber cloth, mixed roughly at a teaspoon of soap per gallon.
Start by mopping in small sections with the diluted solution, rinsing the mop and changing the water as it gets dirty.
Finish by letting the floor air-dry briefly, then buffing with a clean, dry microfiber cloth for extra shine.
Materials and dilution
When you’re aiming for a quick, gentle refresh, gather only warm water, a few drops of mild dish soap, a bucket, a soft mop or microfiber cloth, and a clean towel for drying.
Use about one teaspoon of soap per quart (liter) of water—enough to cut grime without leaving residue.
Keep solutions mild; change water when it looks dirty.
Step-by-step application
Start by sweeping or vacuuming the floor to remove loose dirt.
Then mix about one teaspoon of mild dish soap per liter of warm water in a bucket.
Dip a mop or soft cloth, wring until damp, and work in small sections with overlapping strokes.
Rinse the mop frequently, replace soiled water, and repeat until the surface looks clean and free of soap residue.
Drying and buffing technique
Pat the floor dry with a clean microfiber mop or towel, working in short sections so water doesn’t sit on the vinyl.
Once dry, use a dry microfiber cloth or mop to buff each section with moderate pressure in circular motions.
Keep strokes even, overlap edges, and change cloths when they pick up dirt.
Finish by inspecting for streaks and re-buffing as needed.
Method B Vinegar Rinse for Dull Floors (cuts residue, brightens)
If your vinyl looks dull from soap residue, you’ll want a mild vinegar rinse to cut buildup and brighten the surface.
Mix one cup of white vinegar with a gallon of warm water, wear gloves, and avoid strong concentrations or prolonged exposure to seams and edges.
After mopping, neutralize by rinsing with clean water and skip this method on unsealed or waxed vinyl and natural stone.
Vinegar dilution and safety notes
Anyone can make an effective vinegar rinse with just the right dilution: mix one cup of white distilled vinegar with a gallon of warm water to cut residue and gently brighten vinyl without harming the finish.
Wear gloves if you have sensitive skin, guarantee good ventilation to avoid fumes, test a small hidden area first, and never mix vinegar with bleach or ammonia to prevent toxic gases.
Application and neutralization steps
Start by sweeping or vacuuming the floor thoroughly so the vinegar solution can reach the surface residue.
Then pour or mop the diluted vinegar mixture across a manageable section, working in straight lines and rinsing your mop frequently to avoid spreading grime.
Afterward, wipe with clean water to neutralize acidity, change rinse water often, and dry with microfiber cloths to prevent streaks and restore shine.
When not to use vinegar
Although vinegar works well on many vinyl floors, don’t use it if your flooring has a factory-finish coating, recent wax or polish buildup, or visible damage—acid can dull or strip those surfaces and worsen cracks or lifted seams.
Instead, test a hidden spot first; avoid vinegar on porous, unsealed, or aged vinyl.
Choose pH-neutral cleaners or consult manufacturer care instructions for safe alternatives.
Method C Baking Soda Paste for Stains and Scuffs
Make a thick paste by mixing baking soda with a little water until it holds its shape. Then spread it over stains and scuffs.
Use a soft-bristled brush or cloth to scrub gently in circular motions so you lift marks without scratching the vinyl. Rinse thoroughly with clean water and dry with a microfiber cloth to reveal the shine.
How to make and apply the paste
One simple paste made from baking soda and water can lift scuffs and stains without harsh chemicals; you’ll mix until you get a toothpaste-like consistency.
Apply it gently with a soft cloth or sponge, let it sit briefly, then wipe and buff.
Use about one tablespoon baking soda to a teaspoon of water, adjust as needed, and test a hidden spot first.
Scrubbing technique and rinse
Work the baking soda paste into scuffs with a soft cloth or nonabrasive sponge, using gentle circular motions so you lift grime without scratching the vinyl.
Wipe away residue with a damp microfiber cloth, then rinse the area with clean water to remove baking soda traces.
Dry thoroughly with a clean towel to prevent water spots, then inspect and repeat on stubborn marks if needed.
Method D Rubbing Alcohol or Isopropyl Mix for Grease and Sticky Residue
For greasy spots and sticky residue, you’ll mix isopropyl alcohol with water—typically a 1:1 ratio for tough grime or 1:3 for milder buildup—and apply it sparingly with a microfiber cloth.
Work in small sections, rubbing gently and rinsing with clean water to avoid harming the vinyl.
Make sure you have good ventilation and wear gloves, since alcohol fumes can be strong and skin-drying.
Mixture ratios and application
When dealing with grease or sticky residue, mix 1 part rubbing alcohol (isopropyl 70%–90%) with 3 parts warm water and add a few drops of dish soap; this ratio cuts grime without harming most vinyl finishes.
Dampen a microfiber cloth or mop, wring well, and wipe in short sections. Rinse with plain water and buff dry with a clean cloth to restore shine.
Ventilation and safety
Because rubbing alcohol is flammable and gives off strong vapors, make sure you’ve got good airflow and keep any flames, sparks, or hot surfaces well away while you clean.
Open windows, run fans, and ventilate adjacent rooms.
Wear gloves and eye protection, avoid prolonged skin contact, and store alcohol in its original container away from heat.
Keep kids and pets out until surfaces fully dry.
Method E Natural Buffing Agents (olive oil or baby oil) for temporary shine
You can use a few drops of olive oil or baby oil to buff small sections for a quick, temporary shine, but use it sparingly to avoid a greasy film.
Work in circular motions with a soft cloth until the shine looks even, then wipe away any excess to prevent buildup.
If oil starts to accumulate, remove it with a mild degreaser or a warm vinegar-and-water rinse and dry thoroughly.
How to use sparingly and buffing tips
One quick coat of a natural oil can revive vinyl’s look, but use it sparingly and buff it well to avoid buildup and a slippery finish.
Apply a few drops to a soft cloth, spread in thin, even strokes, then immediately buff with a clean microfiber in circular motions.
Work small sections, check sheen, and stop when gloss looks uniform.
Risks of oily buildup and removal
While a light coat of olive or baby oil can quickly boost vinyl’s gloss, using too much or skipping regular removal causes oily buildup that attracts dirt, dulls the finish, and creates a slippery surface.
You should remove oil residues weekly with a gentle degreasing cleaner, dry thoroughly, and limit oil use to spot treatments.
Test a small area first to avoid staining.
Method F Homemade Floor Polish (cornstarch or baking soda-based) for longer-lasting sheen
You can make a simple polish from cornstarch or baking soda mixed with water and a little mild soap.
Then apply it in thin, even coats with a microfiber mop. Let each coat cure for at least 24 hours before walking on it and buff lightly for extra shine.
To keep the sheen, sweep regularly and reapply a fresh thin coat every few months or after heavy traffic.
Recipe and application steps
Try this simple cornstarch- or baking soda–based polish to give your vinyl a longer-lasting sheen without harsh chemicals.
Mix 1 cup warm water, 1 tablespoon cornstarch or baking soda, and 1 teaspoon mild liquid soap until smooth.
Damp-mop the floor, apply polish with a soft mop in thin, even coats, let dry fully, and buff gently with a microfiber cloth.
Curing time and maintenance
After you’ve applied a thin, even coat of the cornstarch- or baking soda–based polish, let it cure undisturbed for at least 24 hours so the binder can set and the surface can harden.
In dry, warm rooms the film may be touch-dry in 6–8 hours, but full adhesion and durability take longer.
After curing, avoid heavy traffic 48 hours, clean gently with pH-neutral cleaner, and reapply every 3–6 months.
Comparison of Methods When to Use Which
When choosing a restoration method you’ll want a quick reference for speed, effectiveness, and safety across different vinyl types. Use the table below to compare common approaches at a glance and decide which fits your situation. Refer back to this when you’re picking a method so you don’t waste time or risk damage.
| Method | Speed | Safety for Vinyl Types |
|---|---|---|
| Soap & water | Fast | Safe for most |
| Vinegar solution | Moderate | Safe for most, avoid unsealed |
| Commercial polish | Slow | Check labels for luxury vinyl |
Quick reference: speed, effectiveness, safety for vinyl types
Choosing the right method depends on how quickly you need results, how glossy you want the finish, and what type of vinyl you’re working with.
Quick mop with vinegar: fast, gentle, low gloss, safe for most vinyl.
Baking soda scrub: medium speed, removes scuffs, test first.
Olive oil buff: instant shine, short-lived, avoid textured or peel-prone floors.
Commercial polish: slower, highest gloss, follow label.
Common Problems and Mistakes to Avoid
Watch out for common mistakes that can ruin your vinyl finish: waxes or harsh polishes can strip the wear layer and oils or heavy polishes can leave dangerously slippery residue.
Don’t let excess water sit on the floor, since moisture can warp or lift seams.
Also avoid abrasive scrubbers or tools that scratch the surface and dull the shine.
Using wax or harsh polishes that damage the wear layer
Although a glossy finish can be tempting, slapping on wax or aggressive polishes can quickly ruin the vinyl’s thin wear layer and leave you with dull, cracked, or discolored flooring.
Don’t use solvent-based or abrasive products; they strip protective coatings and cause buildup.
Instead, choose cleaners and restorers made for vinyl, follow manufacturer advice, and test any product in an inconspicuous spot first.
Excess water and moisture-related damage
If vinyl gets soaked or sits in damp conditions, you’ll quickly see warping, bubbling, and adhesive failure that ruins both look and performance.
Don’t flood floors when cleaning; use a damp mop, not a sopping one. Wipe spills immediately, dry seams and edges, and fix leaks or humidity sources.
Prolonged moisture invites mold under planks and permanent damage, so act fast.
Abrasive scrubbers and tools that scratch vinyl
After you’ve dried up spills and fixed leaks, protect the surface from another common threat: abrasive scrubbers and harsh tools.
You should avoid steel wool, rough scouring pads, and stiff-bristled brushes that scratch vinyl’s finish. Use soft microfiber cloths, nonabrasive sponges, and gentle nylon brushes instead.
Test any tool on an inconspicuous spot before widespread use to prevent permanent damage.
Overusing oils or polishes that create slippery surfaces
When you slick vinyl with too much oil or polish, it can look glossy at first but quickly becomes dangerously slippery and attracts more dirt; stick to products labeled safe for vinyl and follow the manufacturer’s directions so you don’t overapply.
Test any product in an inconspicuous spot, use recommended amounts, buff lightly, and reapply sparingly to maintain shine without creating hazards or buildup.
Maintenance and Prevention Keep Vinyl Shiny Longer
Keep a simple cleaning routine—sweeping daily and mopping weekly with a manufacturer-safe cleaner—to stop dirt from dulling your vinyl.
Use felt pads under furniture, entry mats, and control humidity to prevent scratches and warping.
Reapply polish when the shine fades in spots, but call a pro for deep scratches, seam separation, or persistent wear.
Regular cleaning schedule and best practices
Although vinyl’s surface resists dirt, a simple, consistent cleaning routine will prevent grime buildup and preserve its shine.
Sweep or vacuum daily to remove grit. Mop weekly with a pH-neutral cleaner, and spot-clean spills immediately. Rinse with clean water to avoid residue.
Dry thoroughly to prevent water marks. Inspect monthly for wear and address issues promptly to maintain long-term luster.
Protective measures (felt pads, mats, humidity control)
Since prevention beats repair, take simple protective steps that cut down on scratches, dents, and moisture before they dull your vinyl’s shine.
Put felt pads under furniture legs, use wide mats at entrances to trap grit, and choose non-rubber backed rugs to avoid staining.
Maintain consistent indoor humidity (35–55%) to prevent warping, and lift heavy items instead of dragging them.
When to reapply polish vs. when to call a pro
Decide whether you can handle a polish touch-up yourself by checking the wear: if the finish shows light scuffs, dull spots, or minor scratches across a small area, reapply a quality vinyl polish and buff it in;
call a pro when damage is widespread, the surface peels, or the floor has deep gouges, staining from rubber or oils, or uneven sheen that home products won’t fix.
You should also plan routine cleaning and spot-testing products.
Troubleshooting: Fixing Specific Issues
If scuff marks won’t come off with a sponge, we’ll cover stronger removal methods that won’t damage your vinyl.
You’ll also get quick fixes for yellowing or discoloration and simple repairs for small gouges and lifting seams.
Follow these tips and you’ll be able to tackle most common vinyl problems yourself.
Removing persistent scuff marks
Scuff marks can be stubborn, but you don’t have to replace the floor to get them out; with the right little tricks you can lift even deep black marks without damaging the vinyl.
Start with a soft cloth, warm soapy water, then try a magic eraser gently.
For tougher marks, use isopropyl alcohol or a paste of baking soda and water; rinse and dry thoroughly.
Treating yellowing or discoloration
When vinyl starts to yellow or lose its original color, you can often restore its appearance without harsh stripping—start by identifying the cause, since sun exposure, chemical reactions, and old finishes each need different fixes.
Test mild bleach solution for oxidation, apply diluted hydrogen peroxide gel for deeper yellowing, and strip/recoat only if finish failure’s confirmed.
Rinse thoroughly and protect from sunlight.
Repair tips for small gouges and seam lifting
Patch small gouges and lift seams quickly to prevent dirt buildup and further damage.
Clean area, dry thoroughly. For gouges, use vinyl repair filler or color-matched epoxy; smooth with a putty knife, let cure, then buff lightly.
For lifted seams, apply a thin bead of vinyl adhesive, press edges together, wipe excess, and weight until set.
Refinish if needed for uniform shine.
FAQ Quick Answers to Common Questions
Got questions about caring for your vinyl? You’ll get quick answers on using vinegar safely, whether oils can add shine, how often to polish or buff, if steam mops are harmful, and the best way to remove wax buildup.
Read on for simple, practical tips you can use right away.
Can I use vinegar on all vinyl floors?
Curious if vinegar is safe for every vinyl floor? You can use a diluted vinegar solution on most resilient vinyl, but avoid unsealed or specialty vinyl (like embossed, click-lock, or some luxury vinyl planks) without checking manufacturer care instructions.
Test a small hidden area first. Rinse well and don’t overuse vinegar—frequent acidic cleaning can dull protective finishes over time.
Is it safe to use olive oil or baby oil to shine vinyl?
Wondering whether olive oil or baby oil will make your vinyl floors shine? You can use a tiny amount for a quick, temporary shine, but oils attract dirt, leave greasy residue, and can darken or damage finish over time.
For safety and longevity, choose cleaners or polishes made for vinyl; they clean, condition, and protect without buildup or slippery hazards.
How often should I polish or buff vinyl floors?
If you used olive or baby oil only for a quick shine, don’t plan on that holding up — oils attract grime and leave residue that forces more frequent maintenance.
Generally, polish vinyl every 3–6 months depending on foot traffic. Buff lightly monthly in high-traffic areas to restore sheen.
Always follow manufacturer recommendations and spot-clean spills promptly to avoid premature dulling.
Will steam mops ruin vinyl floors?
Can you use a steam mop on vinyl floors? You can, but use caution. High heat and excess moisture can loosen seams, warp sheets, or damage the wear layer.
Check manufacturer guidelines first. Use the lowest steam setting, keep the mop moving, avoid standing steam, and dry thoroughly.
For older or glued vinyl, skip steam and stick to gentle cleaners and microfiber mopping.
How do I remove wax buildup from vinyl?
Steam cleaning concerns naturally lead many people to check for other surface problems like wax buildup, which can make vinyl look dull and sticky.
To remove wax, scrape gently with a plastic scraper, then mop with warm water and a few drops of dish soap.
For stubborn spots, use mineral spirits sparingly on a cloth, rinse thoroughly, and dry to prevent damage.
Final Checklist Before Finishing
Before you finish, check safety and ventilation so fumes and slips are prevented.
Make sure you’ve got all the tools and supplies on hand—cleaner, mop, polish, and protective gear.
Finally, plan post-care monitoring and follow-up actions so you can spot issues early and keep the shine lasting.
Safety and ventilation checklist
Because proper ventilation and basic safety steps protect both you and your finish, run through this final checklist before you start sealing or buffing the floor.
Open windows and doors for cross-ventilation, run fans toward an exit, wear gloves and a mask rated for fumes, remove pets and children, clear tripping hazards, and keep a fire extinguisher handy and product labels within reach.
Tools and supplies checklist
Gather the exact tools and supplies you’ll need so you don’t interrupt the finishing process: a quality vinyl floor cleaner, tack cloths, applicator pads or a microfiber mop, a low-VOC sealer or finish recommended for vinyl, foam or microfiber buffing pads, a floor buffer or polisher (rent one if you don’t own it), extension cords rated for the equipment, a bucket, clean microfiber towels, knee pads, and protective gear like gloves and a respirator.
Check stock, test pads, and organize.
Post-care monitoring and follow-up actions
Once you’ve confirmed the floor is clean, dry, and free of dust, do a final walk-through to spot any missed streaks, adhesive residue, or scuffs that could show through the new finish.
- Inspect under different light angles.
- Touch-test for tackiness.
- Re-clean tiny flaws immediately.
- Note areas needing extra coats and set a 24–48 hour recheck.