How to Clean Vinyl Plank Floors Without Leaving Streaks
You can get streak-free vinyl plank floors by using a mild, pH-neutral cleaner or diluted vinegar, a microfiber mop, and warm water; don’t overdo the cleaner or let water sit. Sweep or vacuum first, mop small sections, rinse with clear water, and dry each area with a soft towel to remove residue. Avoid ammonia, wax products, and steam unless the manufacturer allows it, and follow a regular quick-clean routine to keep them looking their best and learn more ways to maintain them.
Best Way to Clean Vinyl Plank Floors Without Streaks
You can keep vinyl plank floors streak-free by using the right technique and products.
Start with a one-sentence summary of the method, then gather a quick tools-and-solutions checklist (microfiber mop, pH-neutral cleaner, bucket, and clean water).
Follow the checklist so you’ll clean efficiently and avoid streaks.
One-sentence summary
If you want streak-free vinyl plank floors, mix a few drops of mild dish soap with warm water, mop with a microfiber pad, then rinse with clean water and dry with a soft towel to prevent streaks and residue.
For how to clean vinyl floor planks effectively, follow that simple rinse-and-dry routine, avoid overwetting, and tackle spills promptly so you’ll keep floors clear and streak-free.
Quick tools and solutions checklist
After rinsing and drying to avoid streaks, get the right tools and solutions so cleaning stays quick and effective.
You’ll want gentle cleaners, microfiber tools, and a simple routine to prevent residue and speed up touch-ups. Choose non-abrasive solutions and low-moisture methods to protect planks and finish.
- Microfiber mop and pads
- pH-neutral cleaner or diluted vinegar solution
- Squeegee or dry microfiber for final pass
How Vinyl Plank Floors Work and Why Streaks Happen
Vinyl plank floors are made of layered synthetic materials — usually a wear layer, printed design, rigid core, and backing — and that construction affects how they respond to moisture and cleaners.
You’ll see streaks when residue from soaps, hard water, or cleaning agents aren’t rinsed, when water spots dry unevenly, or when improper drying leaves mineral films.
The type and condition of the finish (thicker wear layers or worn surfaces) also change how easily streaks form and how visible they are.
What vinyl plank floors are made of
Think of vinyl plank floors as layered composites: a clear wear layer on top protects a printed décor layer, which sits over a resilient core and stabilizing backing.
You’ll find luxury vinyl uses rigid or flexible cores—WPC, SPC, or PVC—plus adhesives or click systems for installation.
Each layer affects durability, moisture resistance, and how cleaning products interact with the surface.
Common causes of streaking (residue, water spots, cleaning agents, improper drying)
Because each plank’s finish and core react differently to moisture and cleaners, streaking usually comes from outside sources you can control.
You leave residues from soap, wax, or polish; hard-water minerals create spots; strong cleaners dull or strip finishes; and letting floors air-dry or using too much water forms streaks.
Rinse with clean water, dilute cleaners, and dry promptly to avoid marks.
How finish type and wear affect streaking
When your floor’s wear layer thins or its factory finish differs in gloss and texture, streaks show up more easily after cleaning. That finish type and its condition determine how water, cleaners, and residues sit on the surface and reflect light.
You should tailor cleaner strength, dilution, and drying speed to finish type, and replace or refinish heavily worn planks to reduce visible streaking.
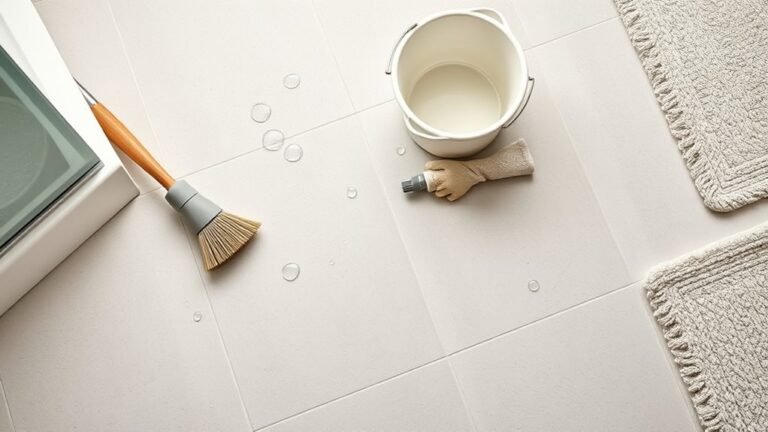
Tools, Supplies, and Cleaners That Prevent Streaks
You’ll want the right tools—microfiber mops or cloths, a soft broom or vacuum/sweeper designed for hard floors—to lift dirt without scratching.
Use pH-neutral cleaners, a properly diluted vinegar solution, or a commercial vinyl cleaner, and steer clear of ammonia, waxes, steam cleaners, and oil-based products that leave residues or damage the finish.
Before treating the whole floor, always spot-test a cleaner in an inconspicuous area, wait for it to dry, and check for color change, residue, or dulling.
Recommended tools (mop types, microfiber cloths, vacuum/sweeper)
A few well-chosen tools make streak-free vinyl plank cleaning quick and reliable: a microfiber mop (flat or with a removable pad) lifts dirt without scratching, a soft-bristle vacuum or stick sweeper removes grit that causes scuffs, and microfiber cloths handle spot-cleaning and drying to prevent streaks.
- Microfiber flat mop with removable pads
- Soft-bristle vacuum or stick sweeper
- Lint-free microfiber cloths for spots and drying
Safe cleaning solutions (pH-neutral cleaners, diluted vinegar guidelines, commercial vinyl cleaners)
Choose cleaners that protect your vinyl’s finish and cut streaks—pH-neutral solutions are best, while diluted white vinegar works for occasional deep cleans, and purpose-made vinyl cleaners offer extra shine and residue control. Use diluted mixes, test a hidden spot, and rinse if needed.
| Cleaner type | Dilution | When to use |
|---|---|---|
| pH-neutral | Ready | Routine |
| Vinegar | 1:10 | Occasional |
| Commercial | Follow label | Shine/control |
What to avoid (ammonia, wax, steam cleaners, oil-based products)
While some cleaners promise quick shine, avoid ammonia, wax-based products, steam cleaners, and oil-based formulas because they can dull, warp, or leave greasy residue on vinyl planks.
Choose gentle, manufacturer-approved options and dry quickly to prevent streaks. Don’t mix chemicals or over-wet floors.
- Avoid ammonia
- Skip wax/oil products
- Never use steam cleaners
How to test a cleaner on your floor (spot test steps)
After avoiding harsh chemicals, you’ll want to make sure any cleaner you do use won’t harm or streak your vinyl — start with a simple spot test.
Choose an inconspicuous area, apply a small amount, wait 10–15 minutes, blot with a soft cloth, then rinse and dry.
Inspect for discoloration, dulling, or residue before treating the whole floor.
Step-by-Step Cleaning Routine to Avoid Streaks (Daily, Weekly, Deep Clean)
Start by clearing the room and removing dust and loose debris so you won’t smear dirt while you clean.
Next, dry-clean with a vacuum or broom, then mop using a streak-free technique and finish by rinsing and drying each section.
For tougher grime, follow the deep-clean steps to lift buildup without harming the finish.
Step 1: Preparation: declutter and dust-removal
1. Clear the area: pick up toys, rugs, and furniture items so you can access the entire floor.
Remove grit and pet hair with a soft broom or microfiber dust mop—don’t scrub yet.
Check for sticky spots and spot-treat with a damp microfiber cloth.
Keep cleaning solutions and tools handy so you won’t track dirt back onto the floor.
Step 2: Dry-cleaning: vacuuming and sweeping
Now that the room’s clear and sticky spots are handled, dry-cleaning is your next move to remove loose dirt before any wet cleaning.
Use a soft-bristle broom for corners and edges, then vacuum with a hard-floor setting or brush attachment to avoid scratches.
Work toward one exit, overlap strokes, empty the vacuum or dustpan promptly, and inspect for remaining debris.
Step 3: Mopping technique for streak-free results
For streak-free vinyl plank floors, follow a simple mopping rhythm: choose the right cleaner (diluted, pH-neutral), use a microfiber mop, and work in small sections so you rinse or change the solution often; mop with the grain of the planks and finish by buffing each section with a dry microfiber pad to remove excess moisture.
Move steadily, overlap strokes slightly, avoid soaking, and replace dirty pads promptly.
Step 4: Rinsing and drying methods
Step 4 focuses on rinsing and drying so your vinyl planks stay streak-free and undamaged. After mopping, you’ll remove residue with a clean, damp microfiber mop or cloth and then dry each area promptly with a dry microfiber pad or towel to prevent water spotting and warping.
Work in small sections, follow grain direction, change rinse water often, and air-dry thoroughly before replacing rugs.
Step 5: Deep-clean process for stubborn grime and buildup
Tackle stubborn grime by scheduling a focused deep-clean session every 1–3 months (or sooner in high-traffic areas); this goes beyond daily and weekly care and uses stronger, safe methods to lift buildup without harming the planks.
Use these steps:
- Vacuum and sweep, then mop with a manufacturer-safe concentrated cleaner.
- Spot-treat with a soft brush and diluted cleaner for sticky areas.
- Rinse thoroughly and dry immediately to prevent residue.
Step 6: Post-clean maintenance and buffing for shine
1. After deep cleaning, let the floor fully dry, then inspect for missed spots.
Keep traffic low for a few hours.
Use a microfiber cloth or pad to buff small areas in circular motions for even shine.
For whole-room sheen, use a low-speed buffer with a clean pad.
Reapply a manufacturer-approved polish sparingly if needed, then allow proper curing time.
DIY and Commercial Cleaning Recipes That Minimize Streaks
You can tackle streaks with simple DIY mixes like warm water with a few drops of mild detergent or a heavily diluted vinegar solution, taking care not to overwet the floor.
If you prefer store-bought options, choose cleaners labeled safe for vinyl plank that leave little-to-no residue.
Later, you’ll compare how well DIY solutions stack up against commercial products regarding cleaning power and streak risk so you can pick the best fit for your routine.
Simple DIY solutions (water + mild detergent, diluted vinegar mix)
Mixing just a few common ingredients gives you effective, streak-free cleaning for vinyl plank floors.
You’ll dilute mild dish soap in warm water for routine cleaning and use a diluted vinegar mix for deeper spots—never full-strength.
Test a corner first, wring the mop well, and dry quickly to avoid residue.
- Warm water + few drops mild detergent
- 1 cup vinegar + 1 gallon water
- Spot-test and dry immediately
Best commercial products for vinyl plank floors
If you prefer store-bought solutions or want something specially formulated to cut grease and minimize streaking, several commercial cleaners outperform basic DIY mixes on vinyl plank floors. You’ll want pH-neutral, residue-free formulas and microfiber mops. Test first in a hidden spot.
| Brand | Type | Notes |
|---|---|---|
| Bona | Spray | pH-neutral, low residue |
| Zep | Liquid | Degreaser option |
| Armstrong | Cleaner | Vinyl-safe formula |
| Method | Spray | Eco-friendly, streak-resistant |
Comparing effectiveness and streak risk (DIY vs commercial)
While DIY solutions can save money and work well for light soil, commercial cleaners usually offer more consistent cleaning power and lower streak risk because they’re formulated for vinyl’s finish.
You’ll get the best results by matching cleaner strength to the job and wiping with a damp microfiber mop to remove residue.
Use mild DIY mixes sparingly; stronger messes deserve a pH-balanced commercial product.
Common Mistakes That Cause Streaks and How to Fix Them
If your vinyl looks streaky, it’s usually from a few fixable mistakes like using too much cleaner or water—thin, cloudy residue and soggy seams are common signs and you should mop again with a damp, clean cloth to remove excess.
Use the right mop and keep it clean—microfiber flat mops work best, and replace or wash dirty pads to avoid rubbing grime back onto the floor.
If streaks persist, rinse with plain water, dry with a clean towel, and stop any incompatible cleaners or treatments, switching to a manufacturer-approved product.
Using too much cleaner or water symptoms and corrections
One common mistake that causes streaks is using too much cleaner or water—you’ll see cloudy residue, sticky spots, or pooling that dries unevenly.
Rinse the floor with a damp, not soaking, microfiber mop and clear water. Wring the mop often, dilute cleaners to label directions, and spot-test.
Dry remaining dampness with a clean microfiber cloth to prevent residue and streak lines.
Wrong mop type or dirty mop prevention and remedy
Wrong or dirty mops cause more streaks than the cleaner itself—using a string mop, abrasive scrubber, or a grimy pad just spreads soil and residue instead of lifting it.
Use a microfiber flat mop, change or rinse pads often, and launder pads without fabric softener.
For stubborn grime, pre-treat spots and replace worn mop heads to prevent redepositing dirt.
Not rinsing or drying properly how to recover a streaked floor
A dirty mop isn’t the only thing that leaves streaks—failing to rinse away cleaner and letting floors air-dry with residue can do just as much damage.
To recover, mop with clear water to lift remaining cleaner, then buff with a microfiber cloth while damp to remove streaks.
Dry thoroughly with clean towels and avoid walking on the floor until it’s completely dry.
Using incompatible cleaners or floor treatments troubleshooting
If you use cleaners or treatments meant for other floors—like waxes, oil-based polishes, or harsh degreasers—you’ll often end up with cloudy streaks, sticky residue, or a film that attracts dirt.
Stop using incompatible products, strip residue with manufacturer-approved vinyl cleaner or diluted white vinegar, rinse thoroughly, and dry.
Test new products in a hidden spot before full use.
Preventive Care and Best Practices to Keep Floors Streak-Free
Keep a simple routine—quick daily sweeps and spot mopping—and you’ll prevent grit and spills from causing streaks.
Use mats at entries, felt pads on furniture, and control humidity to protect the finish.
Know when cleaning’s not enough: reseal or replace damaged planks instead of repeatedly treating worn areas.
Routine cleaning schedule and quick daily tips
1 simple routine makes vinyl plank care effortless: sweep or dry-mop daily to remove grit and dust that can scratch and dull the finish.
- Spot-clean spills immediately with a damp microfiber cloth and mild cleaner.
- Damp-mop weekly using manufacturer-approved solution; avoid excess water.
- Inspect for grit, crumbs, and scuffs; address them promptly to prevent buildup and preserve sheen.
Protective measures (mats, furniture pads, humidity control)
A few simple protective measures will keep your vinyl plank floors looking streak-free and prevent premature wear: place low-profile mats at entries to trap grit, use felt pads under furniture legs, and avoid rubber or colored-backed mats that can stain.
Maintain indoor humidity between 35–55% to prevent warping or gaps. Wipe spills promptly and rotate rugs to distribute wear evenly.
When to reseal or replace planks vs. regular cleaning
Because vinyl plank floors are low-maintenance but not indestructible, you’ll want to know when routine cleaning is enough and when more intensive action—resealing or replacing planks—is needed.
Inspect for deep scratches, worn wear layers, lifting seams, or persistent staining.
Reseal when finish dulls but planks remain intact; replace when structural damage, delamination, or moisture warping occurs. Act promptly to prevent spread.
Quick Troubleshooting Guide (Problem → Cause → Fix)
When a vinyl plank problem pops up, this quick troubleshooting guide helps you identify the likely cause and apply the correct fix fast—no guesswork required. You’ll spot common issues and act quickly to prevent damage.
| Problem | Fix |
|---|---|
| Streaks after mopping | Rinse with clean water, dry immediately |
| Dull finish | Use manufacturer-approved polish |
| Sticky residue | Clean with vinegar solution, rinse |
| Scratches | Buff lightly or replace plank |
FAQ Vinyl Plank Cleaning and Streaks
You’ll find common questions about vinegar, steam mops, cleaning frequency, stubborn streaks, and no-rinse products when you care for vinyl plank floors.
I’ll explain whether vinegar or steam can harm your floor, how often to deep-clean to prevent streaks, and what to try if streaks won’t come out.
You’ll also get clear guidance on safe no-rinse cleaners and how to use them for streak-free results.
Will vinegar damage vinyl plank floors?
Wondering if vinegar will harm your vinyl plank floors? You can use diluted white vinegar (about 1 cup per gallon of water) occasionally to remove grime without damaging the wear layer.
Don’t use full-strength vinegar, abrasive scrubbers, or prolonged soaking. Test a small, inconspicuous area first.
Rinse with clean water and dry to prevent dulling or residue buildup.
Can I use a steam mop on vinyl plank flooring?
If you’ve used diluted vinegar sparingly, you might be tempted to try a steam mop for deeper cleaning.
However, steam can be risky on vinyl plank floors. High heat and moisture can warp, lift seams, or damage the wear layer.
Check your manufacturer’s guidelines; if they forbid steam, don’t. If allowed, use low settings, brief passes, and dry immediately to minimize risk.
How often should I deep-clean to avoid streaks?
How often should you deep-clean to keep vinyl planks streak-free? Aim for a thorough deep clean every 1–3 months depending on traffic.
High-traffic areas need monthly attention; moderate traffic can wait 6–8 weeks; low-traffic rooms do fine quarterly.
Between deep cleans, sweep or vacuum daily and do light mopping weekly with a manufacturer-approved solution to prevent buildup that causes streaks.
What do I do if streaks won’t come out after cleaning?
Still seeing streaks after you’ve cleaned? Rinse the floor with plain water and a microfiber mop to remove residue, then dry with a clean, lint-free cloth.
Check your cleaning solution concentration and switch to a milder product if needed. Test a small area for product buildup; if present, repeat rinsing or use a manufacturer-recommended vinyl cleaner to restore finish.
Are “no-rinse” cleaners safe and streak-free for vinyl?
Wondering whether “no-rinse” cleaners are safe and streak-free for your vinyl planks? They can be, but test first in an inconspicuous spot.
Choose pH-neutral, vinyl-safe formulas and follow instructions—using too much product or a dirty mop causes residue and streaks. Wipe any excess with a microfiber cloth and let floors air-dry.
Avoid wax-based or abrasive cleaners to prevent buildup.