What Do You Need to Lay Laminate Flooring? The Complete Materials List
You’ll need laminate planks, underlayment (or pre‑attached boards) and a vapor barrier for moisture control, plus spacers, a tapping block, pull bar and rubber mallet to lock boards safely. Bring a saw (miter, circular or jigsaw), tape measure, square and utility knife for cuts, and safety gear like gloves, goggles and knee pads. Allow 5–10% extra for waste and test/prepare the subfloor first; keep going to find step‑by‑step tips and troubleshooting.
Quick Answer What You Need to Lay Laminate Flooring
You’ll need a short checklist of essentials: laminate planks, underlayment, spacers, connector strips, trim, a tapping block, pull bar, saw, and measuring tools.
Plan quantities by measuring room square footage (add 5–10% waste) and count trim/thresholds, with typical costs ranging from budget ($1–2/sq ft for basic planks) to mid-range ($3–5/sq ft) plus about $0.50–$1/sq ft for underlayment and $50–$150 for tools you don’t already own.
Use this quick overview to estimate materials and total budget before you start.
Short checklist of essential materials and tools
Before you start, gather the essentials so the job goes smoothly: laminate planks, underlayment (or pre-attached underlayment boards), spacers, a tapping block and pull bar, a rubber mallet, a saw (miter, circular, or jigsaw), a tape measure, a carpenter’s square, utility knife, pencil, and safety gear (gloves, goggles, knee pads).
Know what do i need to lay laminate flooring? Gather basics:
- Measuring and cutting tools
- Installation accessories (spacers, tapping block)
- Safety gear and cleanup supplies
Estimated quantities and basic cost range
For a quick estimate, plan on buying about 5–10% more laminate than your room’s measured square footage to cover waste from cuts and mistakes; larger or irregular rooms may need 10–15% extra. Expect mid-range laminate, underlayment, and supplies to cost $2–$5 per sq ft installed DIY; premium runs higher.
| Item | Qty | Typical Cost |
|---|---|---|
| Laminate | area+5–15% | $1–$4/ft² |
| Underlayment | 1 per area | $0.10–$0.50/ft² |
Basic Understanding What Is Laminate Flooring and Why Proper Materials Matter
Laminate flooring is a multi-layer product—typically a wear layer, printed decor layer, core (HDF/MDF), and backing—available in click-lock, glue-down, and pre-glued types.
Using the right underlayment, adhesive and joining pieces affects how long the floor lasts, how it looks, and whether your warranty stays valid.
You’ll also need to match materials to your subfloor—plywood, concrete, or existing vinyl each require different underlayments and moisture barriers.
What laminate flooring is (components and common types)
Think of laminate flooring as a layered system that mimics wood or stone while offering durability and ease of installation.
You’ll find four main layers: wear layer (protective), decorative print, high-density fiberboard core, and backing.
Common types include traditional AC-rated planks, water-resistant or waterproof variants, and textured or embossed styles that replicate grain, hand-scraped, or stone visuals.
Why using the right materials affects durability, appearance, and warranty
Because the layers, underlayment, and installation materials all work together, choosing the right products directly determines how long your floor holds up, how authentic it looks, and whether you keep the manufacturer’s warranty.
Use compatible core boards, wear layers, and moisture barriers so joints stay tight, surfaces resist abrasion, and warranties remain valid.
Skimping risks cupping, premature wear, visible seams, and voided coverage.
Common subfloor types and how they influence material choices
When you’re picking materials, the subfloor underneath determines what you can use and how well the finished floor will perform.
You’ll encounter plywood/OSB, concrete, and existing vinyl; each needs specific prep. Plywood/OSB is ideal with standard underlayment.
Concrete requires moisture barrier and leveling. Vinyl may need removal or a quality membrane.
Choose underlayment, adhesives, and fasteners to match the substrate.
Full Materials and Tools List (Room-by-Room Categorized)
You’ll get a clear, room-by-room checklist covering the laminate planks, appropriate underlayment and moisture barriers, and any subfloor repair or leveling materials you’ll need.
We’ll list the hand and power tools for cutting and fitting, plus the fasteners, adhesives, and connector pieces required for each space.
Follow this guide to prepare precisely for kitchens, bathrooms, bedrooms, and living areas so you don’t miss anything on install day.
Flooring materials
You’ll want to pick laminate planks by size, AC rating, and edge type to match traffic, appearance, and installation needs.
Don’t forget connection strips, reducers, and thresholds to create smooth, code-compliant joins between rooms and floor heights.
I’ll list the specific sizes, ratings, edge profiles, and trim pieces room-by-room so you can order exactly what you need.
Laminate planks sizes, AC ratings, and edge types
Laminate planks come in a range of lengths, widths, and thicknesses, and choosing the right size, AC rating, and edge profile will determine how the floor looks, performs, and wears over time. You’ll pick widths for style, thickness for stability, AC rating for traffic, and edge types for the seam appearance.
| Feature | Purpose |
|---|---|
| Width/Length | Aesthetics |
| Thickness/AC | Durability |
| Edge | Seam look and feel |
Transition strips, reducers, and thresholds
After you pick plank size, thickness, and edge style, you’ll need fittings that bridge differences between rooms and cover exposed edges.
Choose threshold strips for level changes, reducers for lower adjacent flooring, and door sills for doorways.
Match color and profile to your laminate.
Consider material (aluminum, wood, or vinyl) and installation type (snap-in or screw-down).
Underlayment and moisture protection
Before you lay planks, pick the right underlayment—foam for basic cushioning, cork for sound reduction and eco-friendliness, and felt for extra warmth and stability.
Choose a vapor barrier when installing over concrete or in high-moisture areas, or a moisture-resistant underlayment if you need some protection but not a full barrier.
I’ll walk you through which option fits each room and subfloor.
Types of underlayment (foam, cork, felt) and when to use each
Choosing the right underlayment—foam, cork, or felt—depends on your room’s moisture levels, subfloor type, and whether you need extra sound or thermal insulation.
Use foam for budget-friendly, basic cushioning on level subfloors.
Choose cork for superior sound dampening and warmth in living areas.
Pick felt for durability and minor leveling on uneven or older wooden subfloors.
Vapor barrier vs. moisture-resistant underlayment
When your subfloor faces moisture risk—like on slab foundations or ground-level basements—you’ll want to decide between a true vapor barrier and a moisture-resistant underlayment based on the source and amount of moisture, not just convenience. Choose vapor barriers for persistent ground moisture; use moisture-resistant underlayment for occasional humidity. Visualize options:
| Barrier | Use | Benefit |
|---|---|---|
| Sheet | High | Seals |
| Foam | Moderate | Cushions |
| Film | Variable | Lightweight |
Subfloor preparation materials
Before you lay any planks, you’ll need the right subfloor prep materials: leveling compound and floor patch for low spots, plywood sheets for replacing damaged areas, and primers to bond repairs.
Bring a moisture meter to check for dampness so you can choose the proper primer or moisture mitigation.
Gather these items room-by-room to match the specific repairs each area requires.
Leveling compound, floor patch, plywood sheets
Although small, uneven spots can ruin the look and performance of your laminate, you can fix most issues quickly with the right leveling compound, floor patch, and plywood sheets.
These materials let you smooth dips, fill gouges, and reinforce weak areas so the subfloor stays flat and stable.
Mix and apply compound per instructions, trowel patches into low spots, and sister or replace damaged sections with plywood for a solid, even base.
Moisture meters and primers
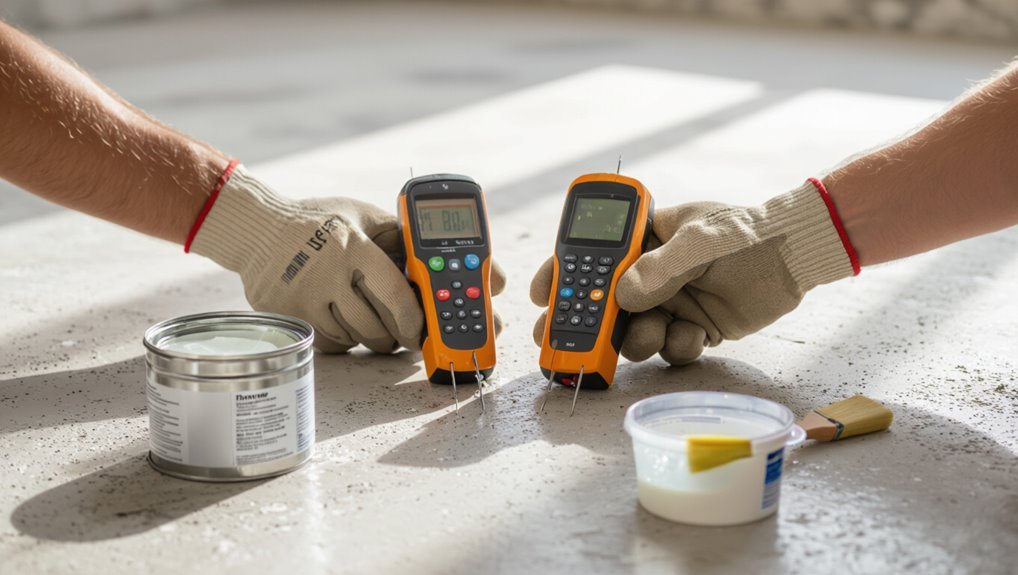
Once you’ve smoothed and reinforced the subfloor, check moisture levels with a reliable meter and seal where needed with a compatible primer.
Use a pin or non‑invasive meter suited to subfloor type to confirm moisture is within laminate manufacturer limits.
Apply a primer or moisture barrier where readings are high, let it cure per instructions, then recheck before installing underlayment and boards.
Installation tools (hand and power tools)
Before you start laying boards, make sure you’ve got the essential hand tools: tape measure, spacers, tapping block, pull bar, and a utility knife.
For faster, cleaner cuts and fastening, you’ll want power tools like a miter saw, jigsaw, circular saw, and a pneumatic nailer.
We’ll go room-by-room through a full materials and tools list so you don’t miss anything.
Essential hand tools: tape measure, spacers, tapping block, pull bar, utility knife
You’ll need just a handful of hand tools to get laminate flooring installed cleanly and efficiently: measure, fit, protect edges, and trim with these basics.
Keep them nearby to work faster and avoid damage.
- Tape measure for accurate cuts
- Spacers and tapping block to maintain gaps and seat planks
- Pull bar and utility knife for finishing tight rows and cutting underlayment
Recommended power tools: miter saw, jigsaw, circular saw, pneumatic nailer
Grab a few key power tools and you’ll speed through cuts and installations that are slow or awkward by hand.
Use a miter saw for straight, repeatable rip and crosscuts; a jigsaw for curves, notches, and door jamb cuts; a circular saw for long rips when a miter isn’t practical.
A pneumatic nailer secures changes and thresholds quickly and cleanly.
Fasteners and adhesives
You’ll need the right adhesives and seam sealers when a glue-down installation is required, so choose products rated for laminate and your subfloor type.
Use nails, screws, or flooring cleats only where specified—cleats for floating connections or nail-down underlayments, screws for securing uneven subfloors, and nails for trim and thresholds.
I’ll outline when each fastener is appropriate and list recommended adhesives and sealers by room.
Adhesives (when glue-down is required) and seam sealers
When a glue-down installation is required, pick adhesives rated for your laminate type and the subfloor—some adhesives work only with wood, others with concrete or radiant heat systems—so you won’t compromise the flooring or void warranties.
Use manufacturer-recommended urethane or MS polymer adhesives for strong bonds, apply with the correct trowel notch, and finish seams with compatible seam sealers to prevent moisture infiltration and promote long-term stability.
Nails, screws, and flooring cleats when to use
If your subfloor is wood or engineered panels and the laminate isn’t a floating type, use nails, screws, or flooring cleats to secure boards and prevent movement; each fastener type suits different assemblies—finish nails or brad nails work for trim, ring-shank nails or cleats are best for hardwood underlayment, and coated screws give extra hold where density or long-term stability matters.
| Fastener | Use | Benefit |
|---|---|---|
| Finish nails | Trim | Discreet |
| Cleats | Underlayment | Grip |
| Screws | Dense panels | Durable |
Finishing and protection supplies
Once your laminate is down, you’ll add baseboards and quarter round to seal gaps and finish the look.
Keep cleaning supplies, felt pads, and protective film on hand so you can clean up properly and protect surfaces when moving furniture.
These finishing and protection items prevent damage and keep your new floor looking great.
Baseboards and quarter round
1 essential finishing touch for a professional-looking laminate floor is properly installed baseboards and quarter round, which cover expansion gaps and protect edges from knocks and moisture.
You’ll choose profiles and materials to match trim and room style, cut miters for corners, and use adhesive or nails to secure pieces without pinching the floor.
Caulk and paint for a seamless finish.
Cleaning supplies, felt pads, and protective film for moving furniture
When you’re ready to move furniture back in, have cleaning supplies, felt pads, and protective film on hand to prevent scratches, scuffs, and trapped dirt that’ll shorten the life of your laminate.
Wipe floors with a pH-neutral cleaner, dry thoroughly, stick felt pads under legs, and apply protective film when sliding appliances or during heavy work.
Replace pads periodically.
Step-by-Step Preparation and Installation Overview (High-Level Steps)
Start by measuring the room and calculating how many planks and underlayment you’ll need.
Then inspect and prepare the subfloor—clean, level, and test for moisture—before rolling out underlayment and any required vapor barrier.
Finally, plan your layout (staggering, expansion gaps, direction) and cut and fit planks beginning with the starting row and end pieces.
Step 1 Measure the room and calculate materials needed
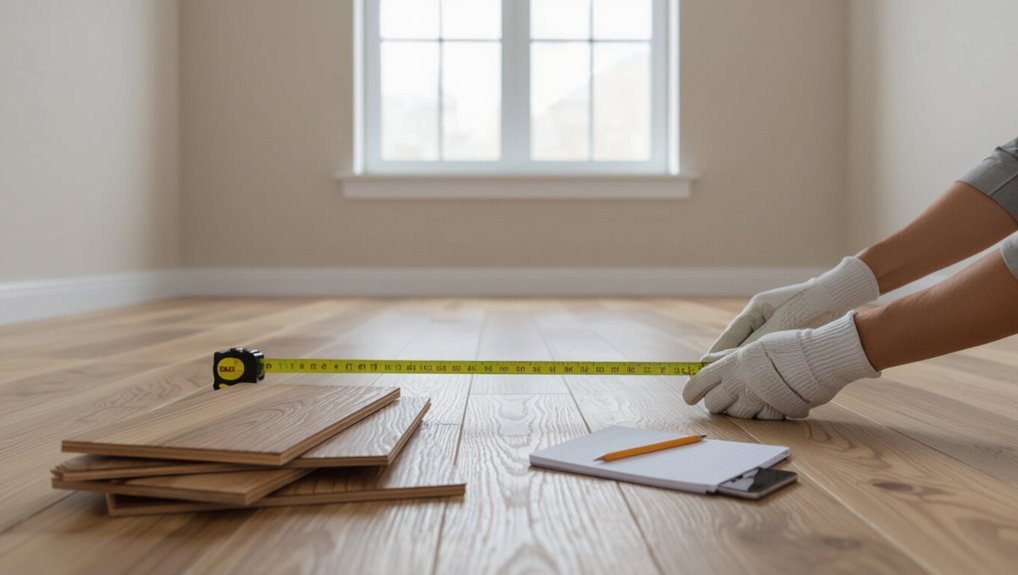
Grab a tape measure and sketch the room’s outline, then record length and width of each area, including closets, alcoves, and any irregular sections.
Calculate total square footage, add 5–10% for waste and pattern matching, and determine plank count from package coverage.
Note doorway thresholds and changes.
List underlayment, trim, and adhesive needs based on measurements before purchasing.
Step 2 Inspect and prepare the subfloor (cleaning, leveling, moisture testing)
Before you lay any planks, inspect and prep the subfloor so your laminate lays flat and lasts—clean off debris, check for level with a straightedge and tape measure, and test for moisture with a meter or vapor test.
Remove protruding nails, fill low spots with floor patch, sand high spots, and guarantee subfloor is dry and stable.
Address squeaks and loose boards before proceeding.
Step 3 Install underlayment and vapor barrier
With the subfloor clean, level, and dry, you’ll lay the underlayment and any required vapor barrier next to create a smooth, stable base and block moisture.
Roll out foam or cork underlayment, butt edges or tape seams per manufacturer instructions, and overlap/poly film for damp basements.
Trim to fit, secure perimeter, and leave recommended expansion gap at walls before installing boards.
Step 4 Layout planning (staggering, expansion gaps, direction)
When you plan the layout, think about board direction, stagger pattern, and the expansion gap so the floor looks balanced and performs well. These choices determine cutting, waste, and how the room’s shape and light affect the finished appearance.
You’ll run boards along longest light source, stagger end joints at least 8–12 inches, maintain recommended expansion gap at walls and around fixtures, and mark layout lines before starting.
Step 5 Cutting and fitting planks (starting row, end pieces)
Start by locking in your first row against the spacer-set expansion gap, because a straight, well-fitted starter line makes all subsequent cuts and joins much easier.
Measure carefully for end pieces, allowing the expansion gap. Use a pull bar and tapping block to snug joints.
Cut planks with a recommended saw, check orientation, dry-fit before final click, and trim door jambs as needed.
Step 6 Installing transitions, trims, and finishing touches
Now you’ll finish the job by installing connectors, trims, and final touches that protect edges, cover gaps, and give the floor a polished look.
Fit junction strips at doorways and level changes, attach quarter-round or base shoe against baseboards, and install reducer strips where laminate meets lower flooring.
Caulk small gaps, fasten trims securely, and check alignment for a seamless, professional appearance.
Step 7 Post-installation care and curing time
After you’ve fit trims and sealed gaps, give the floor time and care to settle properly before heavy use.
Wait 24–48 hours before moving furniture; avoid rolling loads for a week.
Maintain stable temperature and humidity per manufacturer guidelines.
Clean gently with recommended products, avoid excessive water, and check for loose boards or gaps.
Address issues promptly to preserve warranty and longevity.
Common Installation Scenarios and Specific Material Needs
When you plan your laminate project, you’ll choose different materials depending on whether you’re floating over concrete or plywood.
Make sure to pick laminates and underlayments rated for radiant heating, and add moisture barriers for kitchens or basements.
For commercial or high-traffic areas, you’ll need heavy-duty boards, tougher underlay, and stronger adhesives.
Floating installation over concrete vs. plywood
If you’re installing floating laminate, the subfloor — concrete or plywood — determines different prep steps and materials you’ll need.
Concrete usually requires a moisture barrier and possibly an underlayment with vapor control, while plywood calls for a simpler underlayment and attention to fasteners and seams.
For concrete, add a polyethylene sheet or peel-and-stick membrane and leveling compound.
For plywood, check for squeaks, secure loose boards, and use underlay.
Radiant-heated floors compatible laminates and special underlayments
Having handled subfloor prep for concrete or plywood, you’ll next consider whether your laminate can sit over radiant heat and what underlayment that system needs.
Choose laminates rated for radiant systems, check manufacturer max surface temperatures, and use low-R-value, heat-conductive underlayment designed for heating.
Confirm proper expansion gaps, follow adhesive or floating guidelines, and verify warranty compatibility with radiant installations.
Installing in moisture-prone areas (kitchen, basement) extra materials required
Because moisture can undermine laminate quickly, you’ll need extra materials and precautions for kitchens, basements, and other damp spots.
Use moisture-resistant underlayment with a built-in vapor barrier, seam tape, and a perimeter sealant.
Install a raised subfloor or sleepers where flooding risk exists, and choose water-resistant or waterproof-rated laminate.
Keep expansion gaps and use junction strips at doorways.
Commercial/high-traffic spaces heavy-duty materials and adhesives
When you’re outfitting a commercial or other high-traffic space, you’ll need materials and adhesives rated for far tougher wear than a residential room; choose heavy-duty underlayment, thicker wear-layer laminates or commercial-grade vinyl plank, and adhesives specified for continuous foot traffic and institutional use.
Specify slip-resistant surfaces, high-density HDF or solid-core boards, metallic connector strips, welded seams where applicable, and rapid-curing, high-strength adhesives.
Comparison Buying vs. Renting Tools and Materials
Before you start, compare buying, renting, or hiring pros with a clear cost-benefit table so you know which option fits your budget and project size.
Rent specialty tools when you only need them briefly or to avoid storage and maintenance costs.
Hire a professional if the job is large, time-sensitive, or beyond your skill level.
Cost-benefit table: buy, rent, or hire pros
If you’re weighing whether to buy tools, rent them, or hire pros for laying laminate, start by matching the project scope and your skill level to the true costs and benefits of each option. Decide based on frequency, budget, and time.
| Option | Cost | Benefit |
|---|---|---|
| Buy | High upfront | Long-term |
| Rent | Low short-term | Occasional use |
| Hire | Labor cost | Fast, guaranteed |
When renting tools makes sense
Because you’re tackling a single, small to medium laminate project and don’t plan to lay floors regularly, renting specialized tools lets you access pro-grade equipment without the big upfront cost—so you get accuracy and speed when you need them, then return the gear and avoid storage, maintenance, and long-term depreciation.
Rent if you need a specialty saw, floor puller, or tap block for one job; buy basics you’ll reuse.
When to hire a professional installer
Wondering whether to hire a pro or handle the job yourself?
If your room has complex layouts, uneven subfloors, or you lack time or confidence, hire a licensed installer.
Pros guarantee proper underlayment, moisture barriers, precise cuts, and lasting connections.
Renting tools helps DIYers, but when mistakes cost more than labor, paying a professional is the smarter choice.
Common Mistakes and Problems with Materials Selection
Watch for errors like choosing the wrong underlayment, skipping a moisture barrier, or failing to acclimate planks and leave proper expansion gaps.
Don’t use improper adhesives or fasteners that can damage the click system or void the warranty.
These mistakes shorten floor life, cause buckling or warping, and can leave you on the hook for denied warranty claims.
Choosing wrong underlayment or skipping moisture barrier
If you pick the wrong underlayment or skip a moisture barrier, you’ll soon see buckling, warping, or squeaks that could’ve been prevented.
Choose underlayment rated for laminate and subfloor type—foam for leveling, cork for sound, or 2-in-1 vapor barriers for basements.
Don’t assume existing flooring protects against moisture; install the correct barrier to protect joints, adhesives, and warranty coverage.
Incorrect plank acclimation or insufficient expansion gaps
Because laminate expands and contracts with temperature and humidity, failing to let planks acclimate or leaving too-small expansion gaps will quickly cause buckling, peaking, or swollen seams.
You should store planks in the installation room 48–72 hours, follow manufacturer acclimation guidance, and maintain recommended perimeter and junction gaps.
Skipping this invites costly repairs and voided warranties.
Using improper adhesives or fasteners
When you grab the wrong adhesive or use nails meant for hardwood, you’ll end up with loose planks, discolored joints, or a finish that fails prematurely.
Choose glue rated for laminate or click-lock systems and corrosion-resistant fasteners. Avoid construction adhesives that stain or expand, and never force incompatible nails.
Test a small area first to confirm bond strength and appearance.
How these mistakes affect warranty and floor performance
Although a small shortcut on adhesives or fasteners might save time up front, it can void your manufacturer’s warranty and undermine long-term performance.
Loose planks, edge swelling, and stain migration are common signs that improper materials are at fault, and manufacturers often refuse claims tied to incorrect installation products.
You’ll pay for repairs, face warranty denial, and reduce durability, so choose approved supplies and follow specs exactly.
Best Practices and Tips for Smooth Installation
Plan for waste by calculating a 5–10% allowance and ordering a few extra planks for pattern matching and future repairs.
Let the boards acclimate to the room’s temperature and humidity for the recommended time, adjusting longer in cold or humid seasons.
Work efficiently with a clear layout, proper cutting sequence, and finish with maintenance tips like using pads and humidity control to protect your investment.
How to calculate correct waste allowance and order extras
Start by measuring each room’s length and width and calculating the total square footage you’ll need.
Then add a waste allowance to cover cutting, mistakes, and pattern matching. Use 5–10% for simple layouts, 10–15% for angled or patterned rooms, and 15–20% for irregular spaces.
Round up and order extra planks to match dye lots and future repairs.
Acclimation tips for different climates and seasons
After you’ve ordered the right amount of planks, give them time to acclimate in the room where they’ll be installed—proper acclimation prevents gaps, buckling, and uneven seams.
Keep boxes closed, spread them flat, and maintain indoor temperature and humidity near the manufacturer’s recommended range.
In cold or humid seasons extend acclimation time; in stable indoor climates 48–72 hours usually suffices.
Efficient cutting, layout, and sequencing strategies
Because a smart layout and cutting sequence saves time and reduces waste, you’ll want to map the room and set a baseline before making any cuts: establish a straight starter line, work toward the far wall, stagger end joints at least 8–12 inches, and group similar cuts to run through the saw in one go so you’re not changing blades or measurements constantly.
Mark panels, dry-fit rows, trim last-row widths, and label cut pieces.
Maintenance tips to protect your investment
When you finish installing laminate, protect it with simple routines that keep scratches, moisture, and dirt from shortening its life: place felt pads on furniture, use mats at entries, and avoid wet mopping.
Wipe spills immediately, control humidity between 35–65%, and trim pet nails.
Refinish edges with manufacturer-approved products and inspect seams periodically to catch issues early.
Tools and Materials Checklist for Different Project Sizes
To tackle your laminate project efficiently, you’ll want tailored checklists for small rooms (up to 150 sqft), medium rooms (150–500 sqft), and whole-house or open-plan areas.
Each size needs specific quantities of planks, underlayment, trim, adhesives, and the right tools so you won’t stop mid-job.
We’ll list precise items and estimated amounts for each project size so you can shop and plan confidently.
Small room (up to 150 sqft) detailed checklist
For a small room up to 150 sqft, you’ll need a focused set of tools and materials that lets you work efficiently without overbuying — measuring tools, underlayment, trim, and basic cutting and tapping gear are essential.
You’ll typically need:
- Tape measure, chalk line, spacers
- Underlayment roll, moisture barrier, threshold strips
- Laminate planks, tapping block, pull bar, saw
Medium room (150“500 sqft) detailed checklist
A medium room—150 to 500 square feet—calls for a slightly expanded kit so you can keep pace without wasting materials.
You’ll need more underlayment, extra planks, and larger tool capacity.
Essentials:
- Underlayment roll (and seam tape)
- 10–15% extra laminate plus junction strips
- Tapping block, pull bar, mallet, saw, spacers, adhesive for trims
Plan waste and staging space.
Whole house or open-plan area detailed checklist
Moving from a single medium room to an entire house or open-plan space means scaling up both supplies and logistics—you’ll need larger quantities, heavier-duty tools, and room-by-room staging plans to keep the job efficient.
You’ll coordinate deliveries, protect finished areas, and schedule installers. Prioritize durable gear, extra underlayment, and clear workflows:
- heavy-duty saw and mallet
- extra planks and threshold strips
- bulk adhesive and underlayments
Frequently Asked Questions (FAQ)
You’ll find answers here to common questions like whether you need special underlayment, if you can lay laminate over tile or hardwood, and how much extra to buy for waste.
You’ll also learn which rooms (basements, bathrooms) are suitable for laminate and which tools are essential versus optional.
If you have a specific situation, ask and I’ll give tailored guidance.
Do I need special underlayment for laminate?
Wondering whether laminate needs special underlayment? You usually do.
Underlayment provides moisture barrier, sound dampening, and minor subfloor leveling. Choose one rated for laminate—foam, cork, or rubber—matching installation type and subfloor moisture conditions.
Some laminates have attached underlayment; check manufacturer recommendations.
Install continuous seams, tape edges, and leave expansion gaps per guidelines for best performance and warranty compliance.
Can I install laminate over existing tile or hardwood?
Can you install laminate over existing tile or hardwood? Yes—if the surface is level, clean, and securely bonded.
Remove loose grout, fill uneven spots, and use a suitable underlayment or vapor barrier per manufacturer. Avoid carpeting, cushioned vinyl, or water-damaged boards beneath.
Check door clearances and threshold strips.
Follow click-lock instructions; improper subfloor prep causes squeaks, gaps, or premature failure.
How much extra flooring should I buy for waste?
Plan on buying about 5–15% extra laminate to cover waste, depending on room shape and your experience: aim for 5–7% in simple, rectangular rooms with straight cuts, 10% for irregular layouts or lots of diagonal/short end pieces, and up to 15% if you’re new to installation or the pattern requires matching.
Also round up to full boxes, keep a few spare planks for future repairs.
Is laminate suitable for basements and bathrooms?
How well does laminate hold up in damp areas like basements and bathrooms? Laminate resists light moisture but isn’t waterproof. In basements with humidity or occasional water you should use moisture barriers, choose water-resistant or SPC options, and guarantee subfloor dryness. For bathrooms, stick to waterproof vinyl or tile; standard laminate risks swelling at seams if exposed to standing water or persistent humidity.
What tools are absolutely essential vs. optional?
You’ll need a few core tools to get laminate flooring down correctly: a good tape measure, a utility knife or laminate cutter, a tapping block and pull bar, spacers, a rubber mallet, and a saw (circular, miter, or jigsaw) for cuts.
Essential extras include underlayment and a level.
Optional tools: flooring nailer, oscillating tool, mitre saw, knee pads, and a chalk line for speed and precision.