How to Level a Bathroom Floor Before Tiling for a Flat and Even Surface
You’ll start by clearing fixtures and checking the subfloor with a straightedge and level to find dips, highs, and soft spots. Sand or grind high areas and patch low spots with a cement patch or self-leveling compound after priming; reinforce or replace rotten plywood and sister joists if there’s deflection. Allow proper cure, recheck flatness, and install backer or membrane before tiling. Keep going to get step-by-step mixes, tools, and troubleshooting tips.
How to Level a Bathroom Floor Before Tiling Quick Answer
You’ll prep the subfloor, fix low spots with patching compound or a self-leveling mix, then confirm it’s flat and dry before tiling.
Use minor patching for localized dips under about 1/4 inch, but plan a full re-level with underlayment or a deeper leveling compound if large areas are uneven or slopes exceed about 3/16 inch over 6 feet.
If you’re unsure, measure with a straightedge and level to decide the right approach.
One-sentence summary of the process
Start by removing fixtures and loose material. Check the subfloor with a level, then patch low spots with a leveling compound or skim coat.
Reinforce high spots by sanding or grinding until the surface is flat, dry, and ready for a tile underlayment.
You’ll then verify evenness, apply primer if needed, and follow manufacturer directions so how to level a bathroom floor results in a stable, tile-ready base.
When you need a full re-level vs. minor patching
After patching small dips and smoothing high spots, decide whether the floor needs a full re-level or just minor fixes by measuring overall flatness: if you find multiple areas more than 1/8 inch out over a 12-inch span or any slope that affects drainage or tile layout, opt for a full re-level.
Use a straightedge, long level, or laser to map the problem, and if damage includes widespread rot, significant deflection, or uneven subfloor heights greater than 1/4 inch across the room, plan on removing and replacing the subfloor or installing a self-leveling underlayment across the entire surface rather than spot repairs.
Understanding Bathroom Floor Leveling What and Why
Before you start, know that leveling means creating a flat, stable substrate so tiles sit evenly, grout lines stay uniform, and waterproofing performs as meant.
Uneven floors usually come from settling, poor subfloor prep, or water damage, and industry tolerances typically allow only a few millimeters of variation over several feet.
Understanding these causes and standards helps you choose the right repair method and avoid tile failures.
What leveling means for tile installations
Although it might seem like a minor detail, leveling a bathroom floor means creating a flat, stable surface so your tiles sit evenly, bond properly, and don’t crack or pop loose over time.
You’ll remove dips, high spots, and irregularities, then apply appropriate underlayment or compound so tiles align, grout joints stay uniform, and the installation performs reliably under foot traffic and moisture.
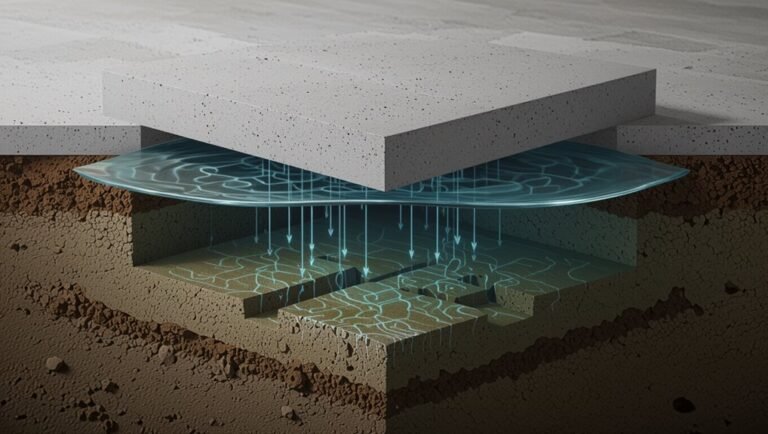
Why a flat, even substrate matters for tiles, grout, and waterproofing
When you start tile work on a bathroom floor, a flat, even substrate makes everything else possible: tiles bed consistently, grout lines stay uniform, and waterproofing systems perform as designed, so you avoid leaks, cracked tiles, and premature repairs.
You’ll get even load distribution, simpler installation, reliable grout adhesion, and continuous waterproof membranes, reducing callbacks and extending the finish’s lifespan.
Common causes of an uneven bathroom floor
Now that you know why a flat, even substrate matters, let’s look at what actually makes a bathroom floor go out of level.
Common causes include settling or structural movement, water damage and rot, uneven subfloor installation, joist deflection, poor previous repairs, and heavy localized loads.
You’ll also find issues from warped plywood, improper adhesive use, and tiled overlays that weren’t bonded properly.
Acceptable tolerances for tile installations (industry standards)
Because tiles demand a flat, stable base, industry standards set clear tolerances you’ll need to meet to avoid lippage, cracking, and premature grout failure.
Generally, floors must be level within 1/8″ over 10′ and 1/16″ over 2′. Local codes or manufacturers may tighten limits.
Use a straightedge and level, and correct deviations with self-leveler or spot leveling before tiling.
Assessing Your Floor Tools, Measurements, and Diagnostics
Before you start, gather the tools and materials you’ll need—straightedge, level or laser level, moisture meter, fasteners, patching compound, and safety gear.
Inspect the subfloor to confirm whether you’re working on concrete, plywood, or exposed joists, and use a straightedge or laser to measure flatness and locate dip points.
Check for moisture, rot, or structural damage and plan repairs first so your leveling work rests on a sound surface.
Tools and materials checklist
You’ll want to gather the right tools and materials before you start so you can diagnose issues and work efficiently: a long straightedge or 6–8 ft level, a laser or bubble level, a carpet of shim stock or feeler gauges, a moisture meter, a chalk line, tape measure, and basic carpentry tools (hammer, pry bar, drill, screws).
Gather leveling compound, floor patch, and safety gear.
- Levels and straightedges
- Measuring and marking tools
- Patching and fasteners
How to inspect subfloor type: concrete, plywood, or joists
Want to know what’s under your tile or vinyl so you can plan the right fix?
Peel back trim, lift a loose tile or cut a small inspection hole. Identify concrete slab, plywood subfloor, or exposed joists.
Note thickness, damage, rot, moisture stains, and fastener types. Photograph findings and mark problem areas before choosing repair or leveling method.
Measuring flatness: straightedge, level, laser level, and dip points
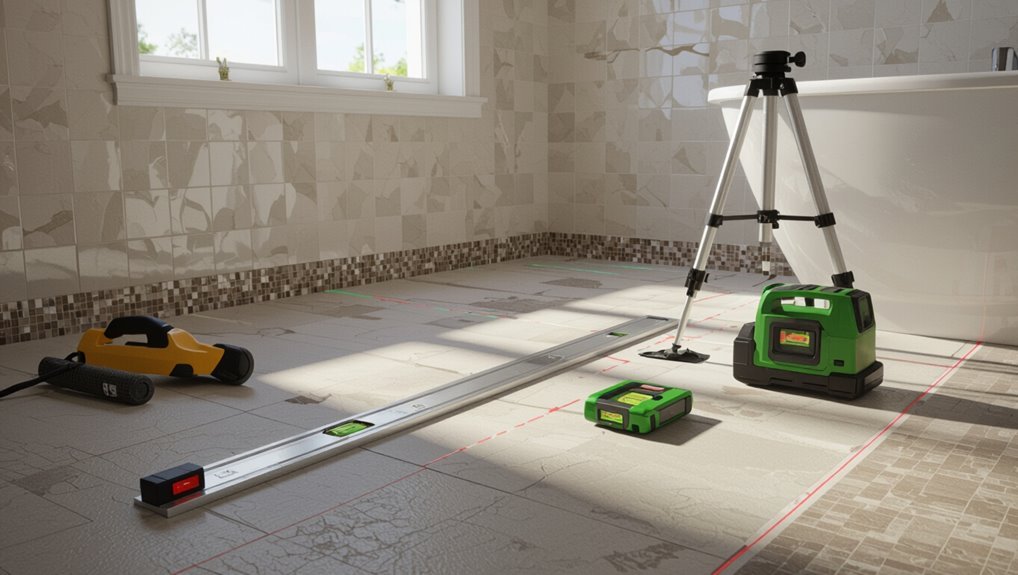
Once you’ve exposed the subfloor and noted its materials and damage, it’s time to quantify how flat it really is so you can pick the right repair.
Use a 6–8 ft straightedge to find gaps, a torpedo level for local slopes, and a laser level for room-wide datum.
Mark dip points every few feet, record deviations, and map high and low zones before repairing.
Identifying moisture, rot, and structural issues to repair first
Start by looking—and feeling—for signs of moisture and decay before you plan any leveling work.
Probe soft spots, check for mold, musty odors, and warped boards. Use a moisture meter, pry up suspicious sections, and inspect joists and subfloor connectors.
Repair or replace rotten framing, fix leaks, and guarantee proper ventilation.
Don’t level until structural and moisture issues are resolved.
Quick Fixes vs. Full Re-Level Decision Guide
If the floor has only minor to moderate unevenness, you can use a self-leveling compound for a fast, affordable fix.
For severe deflection, rot, or joist damage, you’ll need to rebuild the subfloor or sister joists for a durable solution.
Compare speed, cost, durability, and complexity before you choose so you don’t end up fixing the problem twice.
When to use self-leveling compound (minor to moderate unevenness)
When your bathroom floor has shallow dips, slight slopes, or isolated low spots that don’t affect structural integrity, you can use a self-leveling compound to fix the problem quickly and with minimal disruption.
You’ll prep by cleaning, priming, and containing the area, then pour or trowel the mix. It’s ideal for up to about 1/2 inch depth and for achieving a smooth, tile-ready surface.
When to rebuild subfloor or sister joists (severe deflection or damage)
Because surface fixes won’t stop sagging or cracked tile caused by rotten subfloor or severely bowed joists, you’ll need to contemplate rebuilding the subfloor or sistering joists to restore structural integrity.
Choose rebuilding when rot, widespread delamination, or excessive bounce exist.
Sister joists when framing is sound but bowed: bolt new lumber alongside, guarantee level, and reinforce connections to joists and rim joist for lasting support.
Comparison of methods: speed, cost, durability, and complexity
Now that you’ve decided whether the issue needs structural work or sistering, you’ll want to weigh quick fixes against a full re-level. Quick fixes are faster and cheaper but less durable; full re-levels cost more, take longer, and last. Use the table to compare.
| Method | Speed | Durability |
|---|---|---|
| Quick fix | Fast | Temporary |
| Full re-level | Slow | Long-lasting |
Step-by-Step: Leveling a Concrete Bathroom Floor with Self-Leveling Compound
You’ll start by prepping the concrete—clean it, chip out loose bits, and patch cracks—then prime the surface according to the product instructions and drying times.
Mix the self-leveling compound to the correct ratio, pour within the working time, and use a spike roller to remove air and control depth while smoothing.
Let the compound cure fully, sand any high spots, and check flatness before you install tile.
Step 1 Prepare the surface: clean, remove loose material, and repair cracks
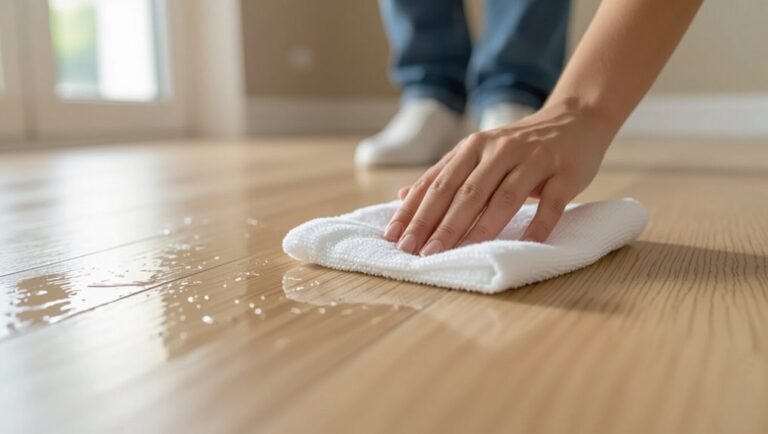
Start by giving the floor a thorough cleaning: sweep and vacuum to remove dust, dirt, and loose debris, then scrub away grease or soap residue with a mild detergent.
Knock out loose concrete or thinset with a chisel, vacuum again, and inspect for cracks.
Fill hairline and larger cracks with a suitable patching compound, level and let it cure fully before proceeding.
Step 2 Prime the concrete for SLU adhesion (product types and drying times)
With repairs cured and the surface clean, the next step is to prime the concrete so the self-leveling compound (SLU) bonds properly.
Choose a primer specified for SLU—acrylic or epoxy-based—following manufacturer directions.
Roll or brush it evenly, avoid puddles, and note drying times: usually 30 minutes to 2 hours for acrylic, longer for epoxy.
Confirm tack-free surface before applying SLU.
Step 3 Mix and pour self-leveling compound (ratios, working time)
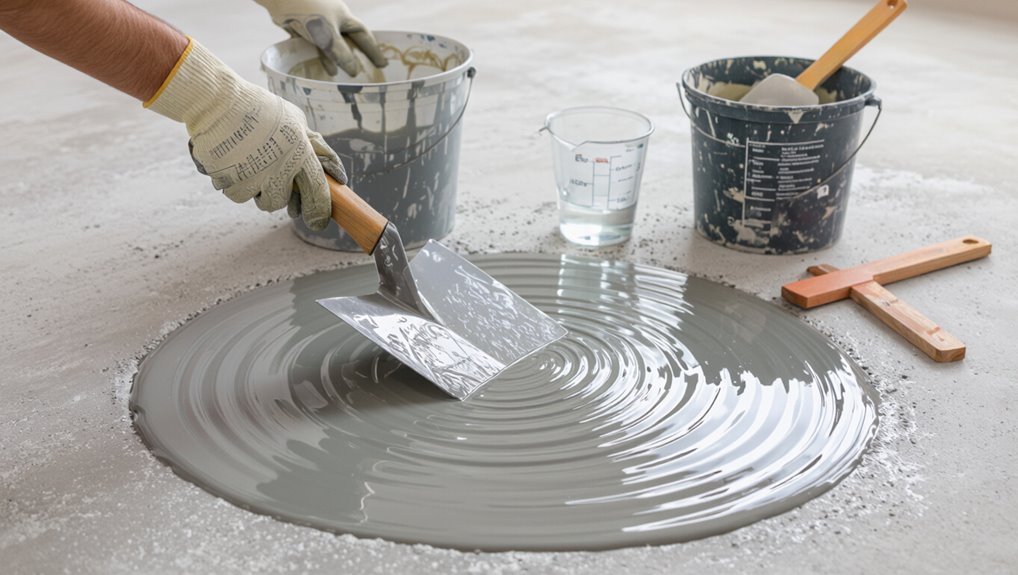
Mix the self-leveling compound to the manufacturer’s specified powder-to-water ratio—usually about 2.5–3 parts powder to 1 part water by volume—and work only within the pot life (often 15–30 minutes) so it stays pourable and self-leveling.
Pour in continuous sections from low to high, keep an eye on consistency, avoid overmixing, and complete placement before the mix loses fluidity to guarantee a smooth, level surface.
Step 4 Use spike roller and smoothing techniques; control depth
Once you’ve poured a workable section, move quickly to release trapped air and even out the surface using a spike roller and finishing tools.
Roll systematically in overlapping passes, keeping spikes submerged to pop bubbles. Use a flat trowel or gauge rake for edges and junctions, feathering into low spots.
Monitor compound depth with your guide screws and adjust pour rate to maintain desired thickness.
Step 5 Cure time, sanding, and final flatness check before tiling
Give the compound at least 24 hours to cure under normal room conditions, and up to 48 hours for thicker pours or cooler, more humid environments.
After curing, lightly sand any high spots with a pole sander and 120–150 grit.
Vacuum and wipe with a damp cloth.
Use a straightedge and feeler gauge to confirm flatness; rework or feather small imperfections before priming and tiling.
Step-by-Step: Leveling a Wood Subfloor Before Tiling
Before you tile, you’ll need to check for joist deflection and any structural issues so the floor can support the load.
If joists are weak you can sister them, add blocking, or install new plywood, then choose cement backer board or an uncoupling membrane (thin-set or screw-attached) before addressing low spots with floor patch or feathering compound.
Finish by sanding, priming, and verifying flatness to guarantee a durable tile installation.
Step 1 Assess structural deflection and joist integrity
Start by checking how much the floor moves when you walk across it: you want to know whether the joists are stiff enough to support tile without excessive deflection.
Measure bounce by standing in the center and noting flex, then span measurements between supports.
Inspect joists for rot, cracks, insect damage, and loose hangers.
Record findings to plan necessary reinforcement.
Step 2 Reinforce subfloor: sistering joists, adding blocking, or new plywood
Reinforce the subfloor to guarantee a stiff, flat base for tile—sister joists, add blocking, or install new plywood depending on the extent of deflection and damage you found.
Sister weakened joists to a sound neighbor with matching lumber and construction adhesive.
Install blocking between joists to stop bounce and twist.
If plywood is delaminated, replace or add a new, screwed and glued plywood layer for rigidity.
Step 3 Install cement backer board or uncoupling membrane options (thin-set vs. screws)
Now choose whether you’ll use cement backer board or an uncoupling membrane—each system fastens differently and affects prep, floor height, and long-term performance.
Cement board is thin-set bonded and screwed to the subfloor for rigid support; it raises height slightly.
Uncoupling membranes are thin-set bonded only, isolate movement, and can simplify tile layout.
Follow manufacturer fastening patterns and perimeter joints.
Step 4 Use floor patch or feathering compound for minor dips
Patch low spots with a polymer-modified floor patch or feathering compound designed for wood subfloors, mixing to the manufacturer’s consistency and working quickly before it skins over.
Apply with a trowel or putty knife, feathering edges into surrounding surface. Build thin layers, let each cure per instructions, then recheck for level.
Clean tools and dispose of waste per product guidance.
Step 5 Final sanding, priming, and flatness verification before tile
Finish by sanding any remaining high spots, priming the patched areas, and verifying flatness so the floor’s ready for tile.
Sand with a fine-grit block or orbital sander until smooth, vacuum thoroughly, then apply a primer recommended for your patch material.
Once dry, re-check flatness with a 6-foot straightedge and a feeler gauge, addressing any gaps before tiling to guarantee a stable, level surface.
Waterproofing and Tile Underlay Considerations
Before you set tile, decide whether you’ll use a liquid or sheet waterproof membrane and when to apply it so seams and junctions stay watertight.
Check that your chosen leveling compound is compatible with that waterproofing system to avoid bond failures or curing issues.
Consider an uncoupling membrane like Ditra over the leveled floor to reduce tile cracking from movement and simplify waterproofing details.
When and how to install waterproof membranes (liquid vs. sheet)
When you’re ready to protect your leveled bathroom floor, decide whether a liquid or sheet waterproof membrane best fits the space and your skill level.
Apply liquid membranes with rollers/brushes for seamless coverage on irregular areas; let each coat cure fully.
For sheet membranes, measure, cut, and bond to a primed substrate, sealing seams with manufacturer tape.
Test for continuity before tiling.
Compatibility of leveling compounds with waterproofing systems
Because waterproofing and leveling products interact directly, you need to choose compounds that are chemically and mechanically compatible with your membrane and tile underlayment.
Check manufacturer datasheets for approved combinations, cure times, and primer requirements.
Avoid gypsum-based mixes over moisture barriers unless specified.
Test adhesion on a small area, follow thickness limits, and confirm the leveling compound won’t impair the membrane’s elasticity or void warranties.
Using uncoupling membranes (e.g., Ditra) to prevent cracking
If you want to protect tile from subfloor movement and reduce cracks, an uncoupling membrane like Schluter-Ditra creates a buffer between the substrate and the tile assembly.
You’ll bond Ditra with thinset, then set tile into fresh mortar. It isolates differential movement, improves waterproofing when paired with appropriate membranes, and helps maintain grout integrity.
Follow manufacturer coverage, trowel size, and seam sealing instructions.
Materials, Tools, and Cost Estimates
You’ll want a clear budget comparison showing DIY material costs versus professional labor so you can decide when to hire help.
I’ll list recommended products and specs—self-leveling compound types, waterproof membranes, and suitable underlayment—and explain why each matters.
Then I’ll provide a compact tool list with brief usage notes so you know what to buy or rent.
Budget breakdown: DIY vs. professional labor
When weighing whether to level your bathroom floor yourself or hire a pro, factor in materials, tool rentals or purchases, and the labor time each option requires; these elements together determine the real cost and risks.
DIY saves labor fees but adds time, potential mistakes, and tool costs.
Hiring pros raises upfront expense but shortens schedule, guarantees quality, and shifts warranty and liability away from you.
Recommended products and specifications
Now that you’ve weighed DIY versus pro costs and risks, let’s look at what you’ll actually need to do the job right.
Choose a cement-based floor patch or self-leveling compound rated for bathrooms, a moisture barrier and primer matched to the compound, and quality tile backerboard.
Estimate: $30–$60 compound, $20–$40 primer/barrier, $10–$30 backerboard per sheet.
- Cement-based self-leveler
- Primer/moisture barrier
- Tile backerboard
Tool list with usage notes
Before you start, gather the essential tools so the job goes smoothly: a mixing drill with paddle, a large bucket, straightedge or screed, gauge rake (for self-levelers), margin trowel, smoothing float, notched trowel (for thinset), a utility knife, tape measure, level, chalk line, and a sturdy knee pad.
Use each for mixing, spreading, smoothing, measuring, and marking.
- Mixing: drill, bucket
- Spreading: rake, trowels
- Checking: level, straightedge
Common Mistakes and Problems to Avoid
Don’t apply self-leveling underlayment too thick or skip primer, or it won’t bond properly.
Don’t tile over a soft or flexing subfloor, and don’t ignore signs of moisture or structural damage.
Finally, respect curing times—premature tiling will lead to failures down the line.
Applying SLU too thick or without primer
If you lay self-leveling underlayment (SLU) too thick or skip a primer, you’ll likely end up with adhesion failures, shrinkage cracks, or a surface that won’t cure properly.
You should follow manufacturer thickness limits, apply primer to porous or dusty substrates, and pour in multiple thin passes if needed.
Test adhesion and allow full cure before traffic or tiling to avoid bond failures.
Tiling over soft or flexing subfloor
When you tile over a soft or flexing subfloor, the finished floor will almost always fail sooner rather than later because thinset and rigid tile can’t tolerate movement; adhesives crack, grout fractures, and tiles pop loose.
You need to stiffen the substrate first: add proper joist reinforcement, screw down plywood, or install an uncoupling membrane.
Don’t skip fixing deflection before tiling.
Ignoring moisture or structural damage
Even a small leak or hidden rot can wreck a floor leveling job, so you should find and fix moisture and structural damage before you lay any new material.
Don’t ignore damp subfloors, mold, or compromised joists — they’ll undermine patches, thinset, and tiles.
Replace rotten wood, repair leaks, and guarantee the structure is dry and sound; otherwise your level job won’t last.
Poor curing times and premature tiling
Fixing leaks and rotten joists isn’t the last step — you’ll also need to respect cure times for whatever patching or leveling material you use.
Rushing to tile before compound, mortar, or self-leveler fully sets causes cracks, adhesion failure, and uneven settling.
Follow manufacturer cure times, control temperature and humidity, and wait the full recommended period before tiling to guarantee a durable, flat surface.
Best Practices and Pro Tips
To keep your floor truly flat and your tiles lasting, you’ll want to use the right underlayment, control movement with proper expansion joints, and follow manufacturer cure times.
Plan work in logical stages—prep, pour/patch, cure, and tile—so each step has enough drying time and you’re not reworking areas.
Also wear PPE, ventilate when using solvents or primers, and use proper lifting technique or help for heavy boards and bags of mix.
How to ensure long-term flatness and tile longevity
While you’re planning the leveling work, prioritize substrate stability and proper materials so your floor stays flat and your tiles last for decades.
Use cement backer boards or quality self-leveling compound, control moisture with waterproof membranes, guarantee full-bed mortar coverage, maintain correct expansion joints, and follow recommended tile spacer and grout specifications.
Inspect periodically and repair grout or movement promptly to prevent failure.
Work sequencing and timing tips for multi-day projects
Because multi-day leveling lets materials cure and inspections happen without rushing, plan each step by day and stick to realistic timelines so you don’t trap yourself with unfinished work.
Sequence prep, moisture barriers, screed or self-leveler pours, drying, and sanding across days.
Schedule inspections and deliveries early, allow manufacturer cure times, and avoid starting tiling until readings and surfaces fully meet specs.
Safety tips: ventilation, PPE, and heavy-lift handling
If you’re working on a bathroom floor, prioritize ventilation, proper PPE, and safe lifting from the start so you protect your lungs, eyes, and back throughout the job.
Open windows, run a fan, and avoid confined dust buildup.
Wear N95 respirator, safety glasses, gloves, and knee pads.
Use a dolly, team lifts for heavy materials, and bend at the hips to prevent strain.
Project Examples and Scenario-Based Guidance
You’ll see three common scenarios: a small powder room with minor dips where a fast self-leveling underlayment (SLU) fixes the problem, a full bathroom renovation with rotten joists that needs a structural rebuild workflow, and cases where tiling over existing tile is acceptable and how to prep for it.
For each, I’ll walk you through the decision points, required materials, and step-by-step actions.
That way you can pick the right approach and avoid costly mistakes.
Small powder room with minor dips fast SLU approach
When you’re dealing with a small powder room that only has a few shallow dips, a fast skim, level-underlayment (SLU) approach gets you a flat, stable surface without tearing up the whole floor.
Clean and prime, apply a thin bonded SLU compound, feather edges, and sand lightly when cured.
Check flatness with a straightedge, then proceed to tile—minimal disruption, quick cure, reliable results.
Full bathroom renovation with joist issues structural rebuild workflow
Because a full bathroom redo often exposes hidden joist damage, you should plan a structural-first workflow that sequences demolition, assessment, repair, and rebuild so the rest of the renovation rests on a sound frame.
Remove finishes, inspect joists for rot/settling, sister or replace damaged members, check subfloor flatness, address plumbing/electrical, install new subfloor with proper blocking, then proceed to level and tile.
Tiling over existing tile when it’s acceptable and how to prepare
If the existing tile is sound, well-bonded, and level enough for your new finish, you can save time and waste by tiling right over it—provided you prep it properly.
Clean grease and soap scum, repair cracks and loose tiles, and scuff or apply a bonding primer to glossy surfaces.
Use a suitable thinset and check floor level before laying new tile.
Frequently Asked Questions (FAQ)
You probably have questions like whether you can tile over a slightly uneven floor, how thick a self-leveling compound can go in one pour, and whether you need a pro for the job.
You’ll also want to know how long to wait after leveling before tiling and if leveling compounds will mask moisture problems.
Below are clear answers to each of these common concerns.
Can I tile over a slightly uneven floor without leveling?
Can you tile over a slightly uneven floor without leveling? You can in very minor cases, but it’s risky.
Small dips or high spots may be corrected with thinset during installation, yet larger irregularities cause lippage, grout cracking, and uneven wear.
Assess with a straightedge and handle deviations properly: shim, sand, or use a leveling method to guarantee a durable, flat tiled surface.
How thick can self-leveling compound be applied in one pour?
Minor unevenness might be fixed with thinset, but larger deviations call for a proper leveling product — and that brings up how much self-leveling compound you can pour at once.
Typically manufacturers allow 1/8″ to 1/4″ for feathering up to 1/2″–1″ per pour.
Thicker pours often require multiple layers, mesh or reinforcement, and longer cure times—follow the product instructions.
Do I need a professional to level my bathroom floor?
Wondering if you should hire a pro? If you’re comfortable mixing materials, following levelness tolerances, and handling drains, you can often DIY small, simple slopes with self-leveling compound.
Hire a professional if the floor has significant structural issues, heavy unevenness, moisture problems, or plumbing complications.
Pros save time, guarantee proper substrate prep, and reduce risk of tile failures or costly repairs.
How long after leveling can I start tiling?
After you level the floor, wait until the compound or mortar reaches its manufacturer-specified cure time and is fully dry to the touch—typically 24–48 hours for most self-leveling compounds and up to 7 days for thicker cement-based screeds.
Always check product instructions and ambient conditions (temperature/humidity) because cooler or humid environments can extend curing.
Once cured, you can tile; verify the surface is clean, firm, and free of dust before applying adhesive.
Will leveling compounds hide moisture problems?
While leveling compounds can temporarily mask visible damp spots or minor efflorescence, they won’t fix underlying moisture issues.
You should identify and address the source of moisture—like leaks, rising damp, or poor ventilation—before applying any compound.
If you cover problems, they’ll return as adhesion failures, mold, or continuing damage.
Fix leaks, improve ventilation, and use appropriate waterproofing before leveling and tiling.