How to Replace a Bathroom Floor From Start to Finish the Right Way
You can replace a bathroom floor the right way by planning, inspecting the subfloor, and choosing a water‑appropriate finish. Shut off water and power, demo carefully, repair or replace damaged subfloor and joists, then install proper underlayment and a waterproof membrane where needed. Lay tile or vinyl with correct adhesives, grout or seam‑seal, allow full cure, reinstall fixtures, and trim for expansion gaps. Follow manufacturer specs and local codes, and more detailed steps await if you want them.
How to Replace a Bathroom Floor from Start to Finish & Overview
Here’s the quick rundown: you’ll get a direct answer, typical cost range, and the skill level needed so you can decide if this is a DIY weekend or a pro job.
I’ll point out when it makes sense to hire someone and when you can tackle it yourself.
Then you’ll get a clear visual roadmap of each step from demo to finish.
Direct answer summary time, cost range, and skill level
Anyone can tackle a bathroom floor replacement with the right prep: expect a typical DIY project to take a weekend to two weekends, cost between $200 and $1,200 for materials (plus $300–$1,500 if you hire pro labor), and require basic-to-intermediate skills—measuring, demolition, subfloor repair, waterproofing, and tile or plank installation.
You’ll need tools, patience, and attention to detail when learning how to replace bathroom floor.
When to DIY vs hire a pro
Deciding whether to DIY or hire a pro comes down to the scope of the job, your comfort with key steps (like demo, subfloor repair, and waterproofing), and how much time or risk you’re willing to accept.
Consider:
- You’re handy, save money, and have time.
- You lack experience with water barriers or structural fixes.
- Tight timeline or resale concerns favor pros.
- Complex layouts or radiant heat installations need expertise.
Visual roadmap of the process
If you’ve weighed the DIY vs pro factors, the next step is to map the job from start to finish so you know what you’ll actually do and when.
Lay out phases: demo, subfloor repair, waterproofing, layout, tile/luxury vinyl install, grout/seal, trim and fixtures.
Assign tools, materials, permits, and realistic time blocks so you stay on schedule and budget.
Basic Understanding What You’re Replacing and Why It Matters
Before you start, know what floor material you’re removing—tile, vinyl, laminate, or engineered wood—as each has different removal steps and repair needs.
You’ll want to weigh pros and cons for bathrooms (water resistance, durability, comfort, and cost) to pick the right replacement.
Also check bathroom-specific challenges like moisture protection, subfloor condition, and tight layouts so you can plan fixes before installing the new floor.
Common bathroom floor types (tile, vinyl, laminate, engineered wood)
Floors set the tone and performance of your bathroom, so knowing the differences between tile, vinyl, laminate, and engineered wood helps you pick the right replacement. Each material varies in moisture resistance, durability, installation method, and feel underfoot, so you’ll match style with function.
| Type | Key trait |
|---|---|
| Tile | Water-resistant |
| Vinyl | Affordable, flexible |
| Laminate | Looks like wood |
| Engineered wood | Stable real wood |
Pros and cons of each material for bathrooms
While each material can look great, you’ll want to weigh real-world tradeoffs—water tolerance, durability, maintenance, cost, and comfort—because those factors determine how long your new bathroom floor will hold up and how much upkeep it’ll need.
Tile: very durable, cold, grout upkeep.
Luxury vinyl: waterproof, softer, can dent.
Laminate: budget look, poor water resistance.
Engineered wood: warmer, moderate moisture tolerance, pricier.
Key bathroom-specific challenges (moisture, subfloor, layout constraints)
Choosing the right material is only step one; now you need to evaluate the specific bathroom challenges that will affect how long that material lasts and how it performs.
Check moisture sources—vapors, leaks, spills—and plan waterproofing.
Inspect and level the subfloor; repair rot or add cement backer.
Account for tight layouts, fixtures, and thresholds so cuts and connections stay watertight and visually neat.
Tools, Materials, Permits, and Safety Prep
Before you start, gather a complete tool and material checklist keyed to your floor type—tile, vinyl, or engineered wood each needs different supplies.
Wear proper safety gear and follow best practices for dust control, ventilation, and safe tool use.
Check local permits, building-code requirements, and any waterproofing standards that apply to bathroom floors.
Complete tool and material checklist by floor type
One clear, organized checklist will save you time and prevent costly mistakes when replacing a bathroom floor—below you’ll find the specific tools, materials, permit considerations, and safety preparations tailored to common floor types (tile, vinyl, engineered wood, and laminate).
You’ll need different adhesives, underlayment, and fasteners; check local permit rules for structural changes.
- Tile: thinset, tile cutter, grout
- Vinyl: seam roller, adhesive, utility knife
- Engineered wood: underlayment, nailer, finish
- Laminate: spacers, tapping block, locking planks
Safety equipment and best practices
With your checklist ready, you’ll also need the right safety gear and habits to protect yourself and the room—especially when tearing out old flooring or cutting materials.
Wear safety glasses, dust mask or respirator, ear protection, gloves, and knee pads.
Ventilate well, run a HEPA vacuum, contain dust with plastic sheeting, shut off water and power, and use proper lifting techniques to avoid injury.
Permit, building code, and waterproofing requirements to check
Because local rules can affect scope and materials, check permit and building-code requirements before you tear out anything or install waterproofing.
Contact your local building department for required permits, inspections, and approved waterproofing methods.
Verify floor assembly, membrane type, slope, and shower curb details meet code.
Keep receipts and product data sheets for inspectors, and schedule inspections at prescribed stages to avoid rework or fines.
Pre-Work Assessment Inspect, Measure, and Plan
Before you start demo, inspect the subfloor, joists, and plumbing for rot, soft spots, or leaks so you know what needs repair.
Measure the room carefully, calculate waste allowance for tile or boards, and sketch cuts to avoid surprises.
Then choose the proper underlayment/backer board and a waterproofing system that matches your flooring and moisture exposure.
How to inspect subfloor, joists, and plumbing for damage
Start by removing the finish flooring and any fixtures so you can see the subfloor, joists, and exposed plumbing clearly; you’ll want unobstructed access to spot soft spots, rot, mold, leaks, or sagging.
Probe suspect areas with a screwdriver, look up from below for joist cracks, inspect pipe joints for corrosion or drips, and note any framing or water damage needing repair before proceeding.
Accurate measuring and waste allowance calculations
When you’ve cleared the room and inspected the structure, measure the floor area precisely—lengths in both directions, plus any alcoves, niches, and cutouts for fixtures—so you can calculate material needs and waste allowances accurately.
Then:
- Sketch the room and note measurements.
- Calculate total square footage.
- Add 10–15% waste for cuts and breakage.
- Account separately for changes in level, thresholds, and odd shapes.
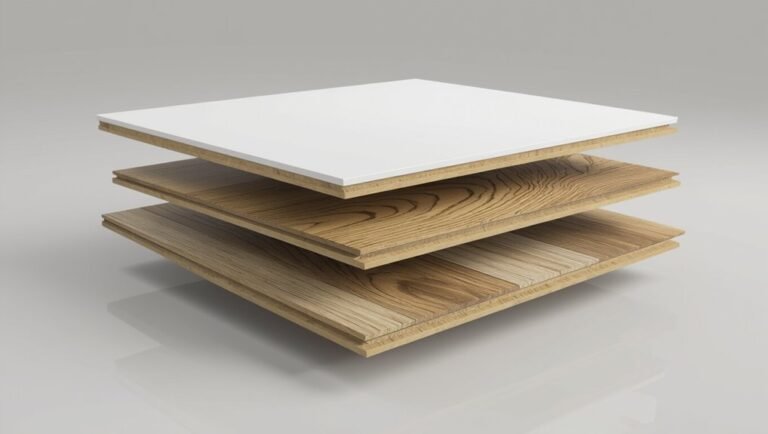
Selecting the right underlayment, backer board, and waterproofing system
Choosing the right underlayment, backer board, and waterproofing system matters more than you might think—these layers determine how durable, level, and watertight your floor will be, so match materials to your subfloor type, tile choice, and moisture exposure.
Inspect subfloor for rot, choose cement board or foam backer for tile, use uncoupling membrane when needed, and apply a tested waterproofing membrane at joints and wet zones.
Step-by-Step Replacement Process
You’ll start by tearing out the old floor and any fixtures. Then inspect and repair the subfloor and framing as needed.
Next you’ll handle plumbing, changes at the shower or tub, and door clearance before installing or replacing underlayment/backer board and snapping layout guides.
Finish by applying the appropriate waterproofing and moisture barriers based on wet and dry zones.
Step 1 Demolition: safe removal of existing flooring and fixtures
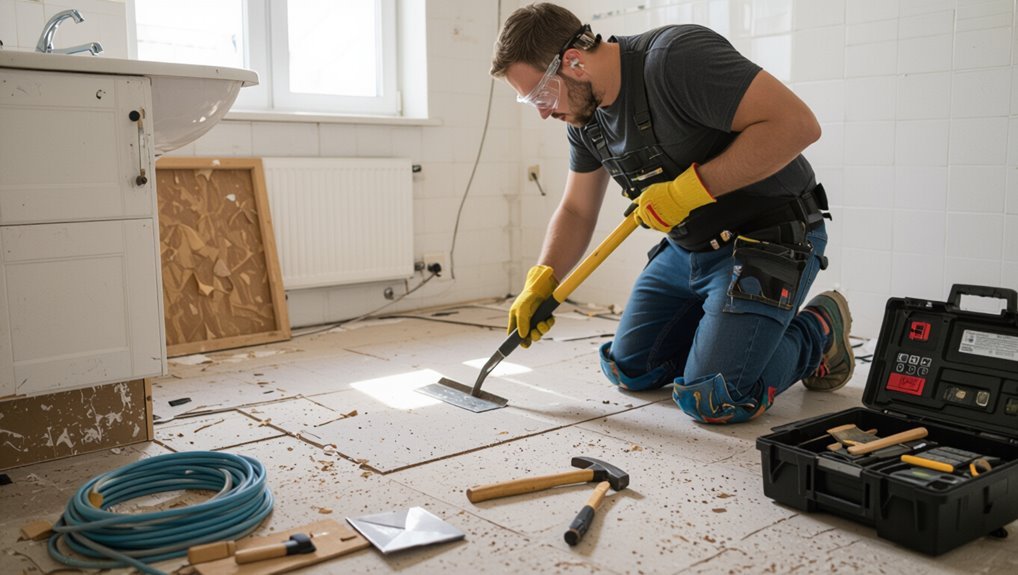
Start by clearing the room and shutting off water and power to any fixtures you’ll be removing; safety comes first.
Put on gloves, eye protection, and a mask.
Remove trim, baseboards, toilet, vanity, and flooring in logical order, keeping fasteners and salvageable parts.
Bag debris, label plumbing, and cap lines.
Ventilate and use proper tools to avoid damage and injury.
Step 2 Inspect and repair subfloor and framing
Inspect the subfloor and framing thoroughly before you lay any new material so you can spot rot, water damage, soft spots, or structural issues that’ll compromise the new floor.
Probe with a screwdriver, look under fixtures, and check joist alignment.
Remove and replace damaged plywood or joists, sister weakened members, secure loose fasteners, and guarantee a flat, solid, dry base before proceeding.
Step 3 Address plumbing, shower/tub transitions, and door clearance
With the subfloor repaired and secured, move on to plumbing, shower/tub junctions, and door clearance so the new floor fits and functions properly.
Verify drain height and flange placement, trim or rebuild ledges at tub/shower connections, and seal gaps to prevent leaks.
Check door swing and trim bottom of the door or adjust jamb so the finished flooring clears without binding or scraping.
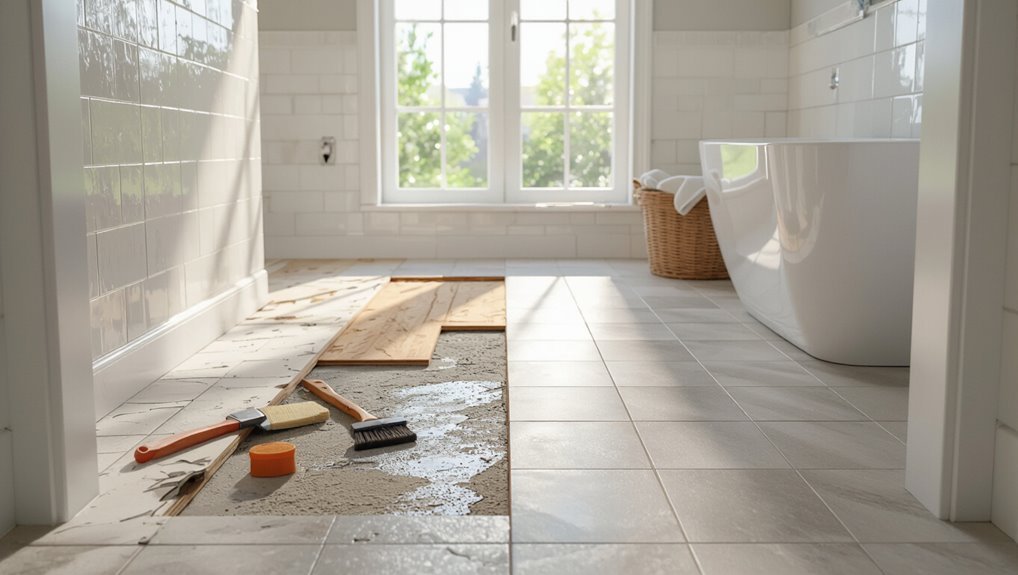
Step 4 Install or repair underlayment/backer board and layout guide lines
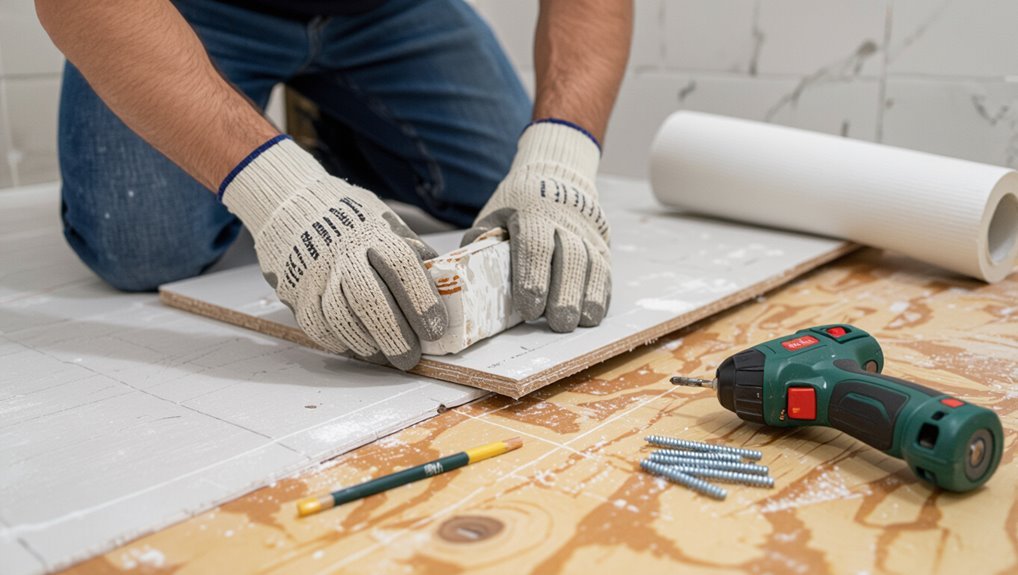
Lay down or repair the underlayment/backer board so your tile or vinyl has a stable, flat surface to bond to; secure it with the proper screws and stagger joints to minimize movement and squeaks.
Check for level, shim or plane low spots, and fasten every panel per manufacturer specs.
Snap chalk lines for tile layout, mark cuts and fixtures, and dry-fit pieces before adhesive.
Step 5 Waterproofing and moisture barriers (wet vs dry areas)
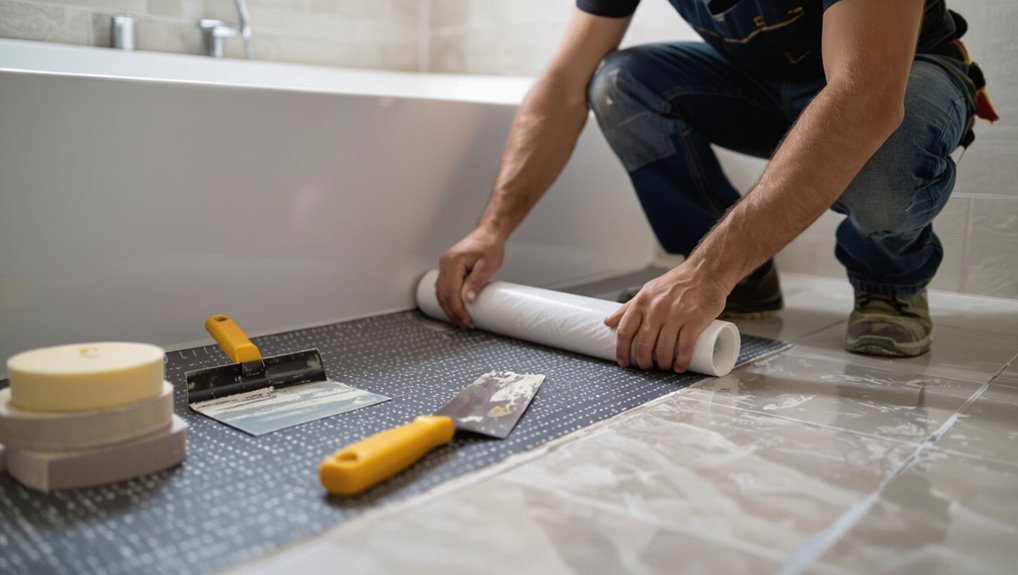
Because bathrooms mix showers, tubs, and sinks with tile or vinyl, you’ll need to treat wet and dry zones differently to keep water from reaching the subfloor.
Define wet areas (inside shower/tub splash lines) and apply waterproof membrane or cementitious barrier.
In dry zones, use water-resistant underlayment and seal seams.
Flash around penetrations, slope showers correctly, and follow manufacturer specs for compatibility.
Step 6 Laying the new floor: starter rows, adhesives, grout, or click-lock installation
1. Begin at a straight wall, snapping a chalk line for your starter row.
Apply thinset or adhesive per manufacturer instructions; for click-lock, angle and lock planks. Stagger joints at least 6 inches.
Cut end pieces to fit, leaving expansion gaps.
For tile, press tiles into mortar, use spacers, then grout after curing.
Clean seams and remove excess.
Step 7 Finishing touches: trim, thresholds, baseboards, and transitions
Once your new floor is secure and any grout or adhesive has cured, finish the job by installing trim, thresholds, and baseboards to give the room a polished look and cover expansion gaps.
Measure and cut molding precisely, use adhesive or finish nails as appropriate, fit thresholds at doorways, seal edges with flexible caulk, and verify connections are flush and secure for a professional finish.
Step 8 Reinstalling fixtures and cleanup; curing and first use timeline
Carefully reinstall your fixtures and clean the area so the room’s ready for use without risking damage to the new floor: reattach the toilet, vanity, and any trim per manufacturers’ torque and sealant specs,
wipe away grout haze and adhesive residue with appropriate cleaners, and remove dust and debris to prevent scratching.
Allow adhesives and grout to cure per labels—typically 24–72 hours—before heavy use; avoid mats.
Material-Specific How-To Notes and Variations
Now you’ll focus on material-specific notes that affect installation and longevity.
For tile, use proper thinset, spacers, and sealed grout; for vinyl sheet or LVP, choose between adhesive or floating methods; and for engineered wood or laminate, acclimate boards and follow floating-floor best practices.
With natural stone, confirm a suitable substrate and plan for thorough sealing before and after grouting.
Ceramic/porcelain tile: thinset, spacers, grout sealing
Working with ceramic or porcelain tile means you’ll use a cement-based thinset to bed the tiles, plastic spacers to keep joints consistent, and a grout that you’ll seal after it cures to resist stains and moisture.
Prepare substrate, trowel thinset, press tiles evenly, remove excess.
- Use notched trowel for coverage
- Check level frequently
- Keep spacer pattern consistent
- Wait full cure before sealing
Vinyl sheet and luxury vinyl plank (LVP): adhesive vs floating installations
If tile isn’t your choice, vinyl sheet and luxury vinyl plank (LVP) offer quicker, often cheaper options with two main installation styles: adhesive (glue-down or full-spread) and floating (click-lock or loose-lay).
Adhesive gives superior waterproofing and stability—good for irregular subfloors—but needs precise troweling and full cure.
Floating installs faster, eases replacement, and tolerates minor subfloor movement but needs proper perimeter sealing.
Engineered wood and laminate: acclimation, floating floor best practices
Because engineered wood and laminate react to humidity and temperature, you’ll want to acclimate the flooring in the bathroom area before installing it; leave the unopened boxes in the room for 48–72 hours (longer in high-humidity climates) so the boards reach stable moisture content.
Use a floating installation with proper expansion gaps, stagger end joints, install moisture barrier underlayment, and avoid direct water exposure.
Natural stone: substrate requirements and sealing
When installing natural stone in a bathroom, you’ll need a rigid, flat, and waterproof substrate—typically a cement backer board or a properly installed mortar bed—so tiles don’t crack or soak up moisture.
Also confirm the subfloor can support the stone’s weight and has no deflection over 1/360 of the span.
Use polymer-modified thinset, full-bedding for large formats, grout with sealed joints, and apply a penetrating sealer per manufacturer directions, reapplying periodically.
Common Problems During and After Installation (Troubleshooting)
Expect a few common headaches after or during installation and know how to spot them early.
You’ll learn to fix uneven floors and lippage, address adhesive failures, loose tiles or plank gaps, and tackle mold, mildew, or persistent moisture.
Also check door clearance, watch for buckling, and allow for thermal movement to prevent future problems.
Uneven floors, lippage, and how to correct
If your new bathroom floor feels wavy or tiles meet at uneven heights, you’re dealing with lippage and subfloor irregularities that can ruin the finish and create tripping hazards.
Check with a straightedge, mark high and low spots, sand or plane peaks, fill depressions with a leveling compound, and guarantee the substrate is flat before reinstalling.
Use proper underlayment and correct tile spacing.
Adhesive failures, loose tiles, or plank gaps
Once you’ve fixed flatness and lippage, you’ll still need to watch for adhesive failures, loose tiles, or gaps between planks—problems that often show up during use rather than right away.
Check bonds, reapply appropriate thinset or adhesive where loosening appears, tighten or replace loose tiles/planks, and use proper grout or flexible filler for gaps.
Test stability and trim or shim connections as needed.
Mold, mildew, and persistent moisture issues
When moisture keeps returning under tiles or between planks, mold and mildew will take hold quickly, so you need to address both the source of water and the contaminated materials.
Locate leaks, repair flashing, and improve ventilation.
Remove affected substrate, treat remaining surfaces with an antimicrobial, and replace with moisture-resistant underlayment.
Seal joints, install proper waterproofing, and monitor humidity to prevent recurrence.
Door clearance, buckling, and thermal movement problems
Because flooring expands and contracts with temperature and humidity, you may notice doors sticking, buckling planks, or gaps forming if you don’t allow proper clearance and movement.
Check door clearances before installing; trim or plane doors if needed.
Leave recommended expansion gaps at walls and around fixtures, use appropriate underlayment, and acclimate materials.
Monitor and adjust thresholds to prevent binding.
Preventive Measures, Best Practices, and Maintenance
You’ll want to prioritize long-term waterproofing and proper ventilation to keep moisture from wrecking your new floor.
Follow maintenance routines tailored to your flooring type—tile grout gets sealing, vinyl needs gentle cleaners, and wood may need periodic refinishing.
Schedule inspections or professional maintenance if you spot persistent moisture, loose tiles, or any structural soft spots.
Long-term waterproofing strategies and ventilation solutions
Although small fixes can stop immediate leaks, long-term waterproofing and proper ventilation keep your new bathroom durable and mold-free.
Seal seams with membrane systems, use waterproof backer boards, and slope floors to drains.
Install a rated exhaust fan on a timer or humidity sensor, vented outdoors.
Monitor humidity, replace caulk when cracked, and inspect penetrations annually to prevent failures.
Routine maintenance tips by flooring type
Long-term waterproofing and proper ventilation set the stage for whatever floor you choose, but each material needs its own routine care to stay watertight and attractive.
You’ll clean, dry, seal, and inspect regularly. Tailor tasks to materials:
- Tile: grout sealant yearly, mop and dry daily
- Vinyl: gentle cleaner, avoid solvents
- Engineered wood: wipe spills immediately
- Laminate: keep dry, use mats
When to schedule inspections or pro maintenance
If your bathroom gets heavy use or you spot signs like soft spots, persistent odors, or grout that keeps failing, schedule a professional inspection sooner rather than later; otherwise plan routine checks every 1–3 years depending on flooring type and moisture exposure.
Also call a pro after leaks, flooding, major remodeling, or when DIY fixes don’t stop damage—timely intervention prevents rot, mold, and costly replacements.
Cost Breakdown and Time Estimates
Next, you’ll look at typical costs by material and bathroom size so you can set a realistic budget.
We’ll compare labor versus materials, highlight DIY savings, and point out hidden expenses to watch for.
Finally, you’ll get a typical project timeline and practical scheduling tips to keep the job on track.
Typical cost ranges by material and bathroom size
Costs for replacing a bathroom floor vary widely depending on the material you choose and the room’s size, so you can expect a small half-bath to cost a fraction of what a full master bath will. Expect approximate ranges: vinyl $100–$400, ceramic tile $300–$1,200, luxury tile $800–$2,500. Compare choices by durability and budget.
| Size | Typical range |
|---|---|
| Half-bath | $100–$800 |
| Full bath | $300–$2,500 |
Labor vs materials: DIY savings and hidden costs
Having settled on materials and a budget, you’ll now weigh labor versus doing the work yourself to see where real savings lie and what hidden costs might appear.
DIY saves on hourly rates but adds tool purchases, potential mistakes, and longer disruption. Contractors cost more but offer speed, warranty, and expertise.
Compare quotes, factor permit, disposal, and unforeseen repairs before deciding.
Typical project timeline and scheduling tips
A typical bathroom-floor replacement takes 2–5 days for a straightforward job and up to a week or more if you need subfloor repairs, plumbing adjustments, or tile curing time.
Plan for at least one full day of demo, one for prep and repairs, one for installation, and extra time for grout, sealant, and inspections.
Schedule trades, order materials early, allow buffer days, and confirm inspections.
Mistakes to Avoid
Don’t skip inspecting and repairing the subfloor — hidden rot or unevenness will wreck any new floor.
Make sure you pick the right underlayment and waterproofing, plan tile layout to avoid awkward cuts and changes, and let adhesives, grout, and sealants cure fully before use.
Missing any of these steps will cost you time and money down the road.
Skipping subfloor inspection and repair
If you skip inspecting and repairing the subfloor, you’ll likely face warped tiles, squeaks, or even structural failure down the line.
You should lift the flooring, check for rot, mold, soft spots, and water damage.
Replace or reinforce compromised areas, secure joists, and guarantee a flat, stable base.
Neglecting this invites costly repairs and shortens your new floor’s lifespan.
Incorrect underlayment or waterproofing choice
Once you’ve confirmed the subfloor is solid, pick the right underlayment and waterproofing—poor choices will let moisture bypass your new floor and cause swelling, mold, or tile failure.
Use materials rated for wet areas, follow manufacturer instructions, seal seams and connections, and bond membranes properly.
Don’t assume generic products will protect against long-term moisture or chemical exposure in a bathroom.
Poor layout leading to awkward cuts and transitions
When you rush the layout, you’ll end up with tiny tile slivers and awkward changes that scream “afterthought”; take time to plan tile runs, sightlines, and threshold placements so cuts fall in discreet places and movement between surfaces stays smooth.
Measure thoroughly, mock up patterns, and align focal lines with doorways. Use proper connector strips and stagger joints to keep the look intentional and durable.
Rushing curing times and grout/sealant application
Planning cuts and sightlines won’t save you if you rush the finishing steps; curing and sealant work demand the same patience as your layout.
Don’t grout or seal until adhesives and mortar fully cure per manufacturer instructions.
Apply grout evenly, remove haze promptly, and let grout set before sealing.
Rushing causes weak bonds, stains, and failed seals—wait the full cure time for a durable, watertight floor.
Tools and Materials Comparison Cheat Sheet
Now that you’ve avoided the common mistakes, let’s look at a quick selection guide to pick the best tools and materials for wet areas, budgets, and durability. Use the cheat sheet below to compare options at a glance and decide what fits your bathroom needs. Pick the column that matches your priorities and proceed with confidence.
| Priority | Best choice |
|---|---|
| Wet areas | Porcelain tile |
| Budget | Vinyl plank |
| Durability | Natural stone |
| Ease of install | Luxury vinyl tile |
| Underlayment | Cement backer board |
Quick selection guide: best choices for wet areas, budget, and durability
Choosing the right floor for a bathroom comes down to three priorities: water resistance, cost, and longevity—so you’ll want a quick, side-by-side look at common options and their trade-offs.
Pick based on wet-area needs and budget, balancing durability and maintenance.
- Porcelain tile: highly water-resistant, higher cost, long-lasting.
- Vinyl plank: affordable, good moisture resistance.
- Waterproof laminate: budget-friendly, moderate durability.
- Natural stone: premium, maintenance-heavy, very durable.
FAQ Common Questions About Replacing a Bathroom Floor
You probably have a few practical questions before you start, like how long the whole project will take and whether you can install tile or LVP over your existing floor.
You’ll also want to know how to tell if the subfloor needs replacing, the best waterproofing for shower areas, and when it’s smarter to call a pro.
Let’s answer those FAQs so you can plan the job with confidence.
How long does a bathroom floor replacement take from demo to finish?
How long will your bathroom floor project take from demo to finish?
Expect 1–4 days for a standard small bathroom: a day for demo and subfloor repairs, one for underlayment and leveling, a day for tile or LVP installation, plus curing/grout time.
Complex jobs or major plumbing/electrical work can extend this to a week or more.
Plan buffer time for inspections.
Can I install tile or LVP over existing flooring?
Wondering whether you can lay tile or LVP over your current floor? You can in some cases—if the existing floor is level, dry, secure, and compatible (vinyl, tile, or well-adhered plywood).
Clean and prep thoroughly, use appropriate underlayment or leveling compound, and follow manufacturer installation guidelines.
Avoid adding excessive height that interferes with doors, thresholds, or fixtures.
How do I know if I need to replace the subfloor?
If the existing floor seems sound but you’re unsure about the subfloor, start by checking for soft spots, sagging, or bounce when you walk—those are clear signs the subfloor may be compromised.
Also lift a toilet flange cover or trim to inspect for rot, check for water stains or mold, and probe with a screwdriver.
Replace if structural damage, persistent moisture, or unevenness exists.
What’s the best waterproofing method for a shower area?
Which waterproofing method you choose depends on the shower type and your skill level: for most DIY and professional installs, a bonded waterproofing membrane (liquid-applied) or a sheet membrane over a properly sloped mortar bed gives the most reliable protection.
Using a full pre-sloped foam base or a complete waterproofing system (membrane plus curb and drain integration) is essential where water exposure is highest.
Choose materials rated for showers, seal seams and connections, and follow manufacturer instructions.
When should I call a professional instead of DIY?
When should you call a pro instead of tackling the job yourself?
Call a pro if you find extensive water damage, mold behind subflooring, structural rot, or hidden plumbing/electrical issues.
Also hire one if you lack tools, time, or experience with layout, leveling, and waterproofing, or if local codes and permits are required.
A pro avoids costly mistakes and guarantees lasting, code-compliant results.
Project Checklist and Final Inspection Before First Use
Before you call the job done, run a short checklist and a final inspection to catch missed steps and confirm the floor’s ready for use.
Check grout and sealant cures, verify tile or plank adhesion, check trim and connections are secure, and make sure drains slope correctly.
Don’t forget final cleaning and ventilation before foot traffic.