
How to Remove Ceramic Floor Tile From a Concrete Slab Without Cracking It
You can remove ceramic tile from a concrete slab without cracking it by working slowly, using the right tools, and protecting the slab. Start by scoring grout lines and prying at a perimeter or weak tile with a chisel and hammer, then switch to a rotary or demolition hammer with carbide bits for stubborn areas. Keep tools flat, use shallow angles, and stop if you see cracks. Clean and patch thinset and pits afterward, and continue for more tips on technique and tools.
Can You Remove Ceramic Floor Tile from a Concrete Slab Without Cracking It?
Yes — you can often remove ceramic tile from a concrete slab without cracking the slab if you work carefully and use the right tools like a chisel, hammer, and rotary hammer with a carbide bit.
If the tiles are thin-set and the slab is sound, you can usually handle it as a DIY weekend project; call a pro if the adhesive is foam-backed, the slab is old or cracked, or you need the surface perfectly smooth for a new finish.
When in doubt, get a contractor to assess the risk before you start.
Short, direct answer and bottom-line recommendation
You can usually remove ceramic tile from a concrete slab without cracking the slab, provided you use the right tools and techniques and work carefully to avoid concentrating force.
Bottom line: you can do this yourself if you follow proven steps for how to remove ceramic floor tile from concrete slab—use thinset removers, pry with wide chisels, lift gradually, and stop if the slab shows signs of damage.
When to call a pro vs. DIY
Wondering whether to tackle tile removal yourself or call a pro?
If you have good tools, patience, and the slab shows no major cracks or thinset issues, you can DIY small areas.
Call a pro if the job is large, the slab’s structural integrity is unclear, you lack equipment, or you want a guaranteed finish.
Pros minimize risk and save time.
Basic Understanding What You’re Removing and Why It Matters
Before you start prying up tile, know what you’re actually removing: ceramic tiles bonded to concrete with thinset, mastic, epoxy, and held together with grout.
That matters because different adhesives and attachment methods require different tools and force, and using the wrong approach can chip or crack the slab.
Look for hairline cracks, hollow-sounding areas, crumbling edges, or previous patchwork—those signs mean the slab is already vulnerable and you’ll need extra care.
What is ceramic tile and typical adhesive/setting materials
Ceramic tile is a hard, fired clay product glazed or unglazed, and knowing its makeup helps you choose the right removal method.
Tiles are typically set with thinset mortar, mastic (organic adhesive), or backerboard and thinset combinations, each bonding differently and responding to tools and moisture in distinct ways.
You’ll encounter varied thickness, porosity, and edge profiles that affect how tiles fracture and come off.
How tiles are attached to concrete slabs (thinset, mastic, epoxy, grout)
When tiles are bonded to a concrete slab, you’ll usually find one of a few adhesives—cement-based thinset, organic mastic, epoxy, or grout—each of which behaves differently during removal and determines the tools and effort required.
You’ll pry and chip thinset, soften mastic with solvents or heat, grind or chip epoxy mechanically, and remove grout with specialized blades or a scraper.
Risks to the concrete slab during tile removal
Expect some damage to the concrete slab when you remove tile—chipping, gouging, surface scaling, and adhesive residue are common—and knowing what causes each type helps you choose the right method and avoid costly repairs.
You’ll risk deeper fractures from heavy prying, surface pitting from aggressive grinders, and embedded mortar that resists removal. Work deliberately, use proper tools, and stop if cracks appear.
Signs the slab may already be damaged or vulnerable
If the slab’s already showing cracks, spalling, or soft spots, you’ll want to slow down and inspect carefully before tearing out tile.
- Hairline or active cracks radiating from grout lines.
- Flaky or powdery concrete surface (spalling).
- Areas that depress or feel hollow underfoot.
- Discolored patches, efflorescence, or moisture stains indicating water damage.
Required Tools, Materials, and Safety Gear
Before you start, gather the right gear: power tools like a demolition or rotary hammer and an oscillating multi-tool, hand tools such as a cold chisel, floor scraper, pry bar, and hammer, plus tarps and a shop vac for protection and cleanup.
Don’t forget personal protective equipment — a respirator, eye and ear protection, and knee pads are essential.
If you’ll only do a small job or lack storage, rent the heavier tools instead of buying them.
Power tools (demolition hammer, rotary hammer, oscillating multi-tool)
When you’re ready to tackle tile removal, power tools speed the job and reduce strain: a demolition hammer breaks up thick mortar and stubborn tiles, a rotary hammer with a chisel bit handles concrete and large areas, and an oscillating multi-tool lets you score grout, cut undercut trim, and work in tight spots.
- Pick correct bit types and sizes.
- Use vibration-damping gloves.
- Control dust with a vacuum.
- Pace to avoid slab damage.
Manual tools (cold chisel, floor scraper, pry bar, hammer)
Reach for a set of reliable manual tools—cold chisel, floor scraper, pry bar, and hammer—to tackle edges, small patches, and delicate areas where power tools would be too aggressive.
- Use a cold chisel to score grout and lift tile corners.
- Employ a floor scraper for adhesive and thinset residue.
- Leverage a pry bar to gently separate tiles.
- Tap with a hammer for controlled loosening.
Surface protection and cleanup equipment (shop vac, tarps)
While you’re chipping and scraping, protect surrounding floors, furnishings, and vents with heavy-duty tarps and drop cloths so dust and debris stay contained.
Use a shop vac with a HEPA filter and long hose to catch slurry and dust. Tape edges, funnel debris into buckets, and replace or launder coverings promptly.
- Heavy-duty tarps
- Drop cloths
- HEPA shop vac
- Utility buckets
Personal protective equipment (respirator, eye and ear protection, knee pads)
You’ll need proper PPE to protect lungs, eyes, ears, and knees when removing tile.
Wear an N95 or better respirator for dust, shatter-resistant safety goggles, and ear protection against hammering and power tools.
Use padded knee pads to prevent joint strain during prolonged work.
Check fit and condition before starting, and replace damaged gear immediately.
- N95 respirator
- Safety goggles
- Ear protection
- Knee pads
When to rent vs. buy tools
Decide whether to rent or buy based on how often you’ll use the tool, the cost difference, and the complexity of the job.
If it’s a one-off or specialized piece, rent; if you’ll reuse it, buy. Consider storage, maintenance, and warranty.
- Rent bulky breakers or floor grinders
- Buy quality chisels and pry bars
- Rent diamond blades briefly
- Buy PPE and basic power drill
Preparatory Steps Before Removing Tile
Before you start prying tiles up, inspect the floor and plan the removal sequence so you know where to begin and how to work across the room.
Test adhesion with a small tile removal to see how stubborn the mortar is, then clear the room and cover nearby surfaces to protect them.
Finally, score grout lines and create expansion breaks to make tiles come up cleaner and reduce damage to surrounding areas.
Inspecting the floor and planning the sequence
Start by walking the room and closely inspecting the tile, grout lines, changes, and any fixtures you’ll need to work around so you know what you’re up against.
Note cracked tiles, uneven areas, shifts to other flooring, and thresholds.
Plan a removal sequence that progresses from least visible to doorways, working toward exits and avoiding concentrated stress near fragile fixtures or walls.
Testing tile adhesion and a small patch removal trial
You’ll want to test how firmly the tiles are bonded by removing a small patch first so you can gauge effort, tools, and whether the underlayment or thinset will come up with the tile.
Choose an inconspicuous corner, loosen a single tile with a chisel and hammer, then a few adjacent ones.
Note adhesive behavior, required force, dust, and any substrate damage before proceeding.
Clearing the room and protecting surrounding surfaces
Clear out furniture, rugs, and anything fragile from the room so you have an unobstructed work area and easy access to exits; stash smaller items in another room or sealed boxes to keep dust off.
Tape heavy-duty plastic over doorways, vents, and trim. Protect adjoining floors with rosin paper or plywood.
Wear eye, ear, and respiratory protection, and keep a trash path clear for debris removal.
Scoring grout lines and creating expansion breaks
Before you lift any tiles, score the grout lines and cut expansion breaks so the tiles come up in controlled sections; this reduces chipping and makes removal safer and faster.
Use a carbide blade or grout saw to cut 1/8–3/16 inch deep along grout, then make intermittent expansion breaks every 3–4 feet.
Clean dust and mark sections before prying to prevent slab damage.
Step-by-Step Tile Removal to Minimize Slab Damage
Start by clearing grout and removing perimeter tiles so you can expose edges and work without stressing the slab.
Use a chisel and hammer for initial loosening, then switch to a hammer drill with a chisel bit or an oscillating tool at the correct angle and setting to pry tiles up without cracking concrete.
Finish by scraping remaining thinset or adhesive carefully and use specialized removal methods for epoxy or very strong adhesives to avoid gouging the slab.
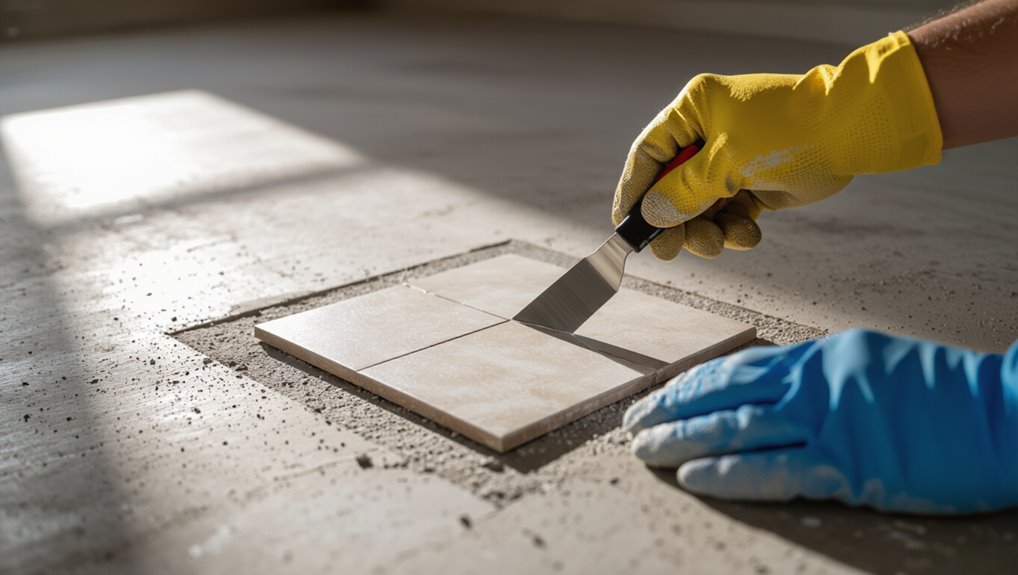
Step 1 Remove grout lines and perimeter tiles safely
Wear gloves and eye protection as you score and remove the grout around the perimeter tiles, working in short sections so you don’t chip the slab.
Use a grout saw or oscillating tool with a grout blade, keeping angle shallow.
Pry only loosened edge tiles, support adjacent tiles with wood shims, and vacuum debris frequently to keep the work area clear and visible.
Step 2 Loosen tiles using manual methods (chisel + hammer) technique tips
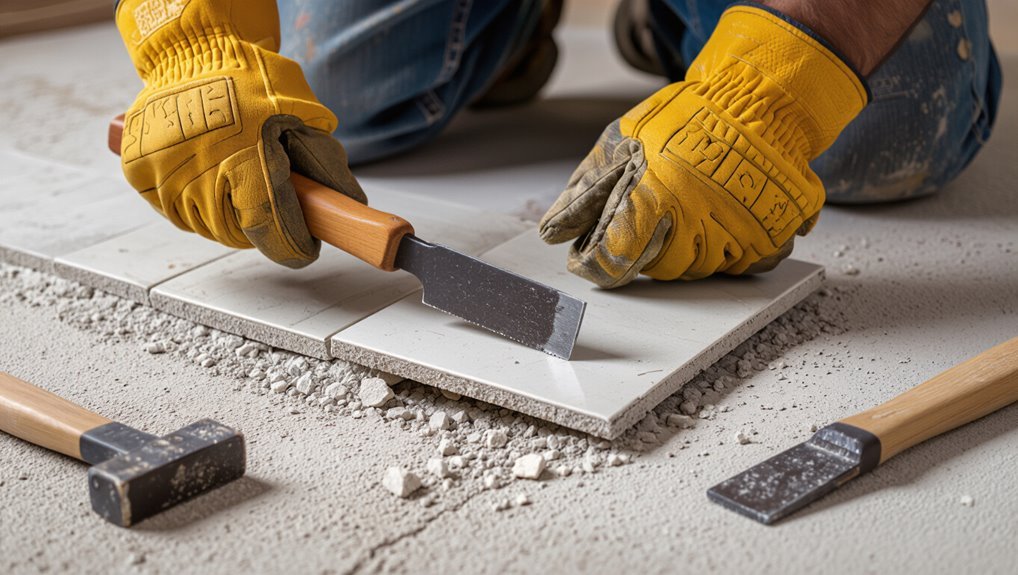
Tap the chisel lightly along the grout lines and beneath a loosened tile edge, letting controlled strikes separate the tile from the thinset without digging into the slab.
Hold the chisel at a low angle, use short hammer taps, and work from one corner outward.
Pry gently once a gap forms, inspect for thinset adhesion, and pause if the slab feels resistant.
Step 3 Using power tools properly (hammer drill with chisel bit, oscillating tool) settings and angles
Switch to power tools once manual chiseling stalls, and set your hammer drill to low-impact chisel mode or your oscillating tool to a medium-speed, rigid-blade setting to avoid shocking the slab.
Hold tools at a shallow 15–30° angle, apply steady pressure, and let the bit do the work. Move slowly, lift often to inspect, and keep dust control and proper PPE in place.
Step 4 Removing stubborn adhesive and thinset without gouging concrete
You’ll need patience and the right sequence of tools to remove stubborn adhesive and thinset without gouging the concrete slab: start with a floor scraper or wide putty knife to lift loose material.
Then use a carbide scraper blade or grinder with a diamond cup at low speed for remaining thinset.
Keep tools flat, work in small sections, and clean frequently to monitor surface condition.
Step 5 Dealing with epoxy or very strong adhesives
Epoxy and industrial-strength adhesives bond far more aggressively than thinset, so you’ll need a different approach and tougher protections before you begin.
Wear a respirator, eye protection, gloves, and knee pads.
Heat softens some epoxies—use a heat gun carefully—or apply a commercial epoxy remover per instructions.
Work in small sections, pry gently with a carbide scraper, and avoid heavy hammering that could stress the slab.
Step 6 Cleaning and leveling the slab after tile removal
Start by sweeping and vacuuming the slab to remove loose debris.
Scrape remaining thinset with a floor scraper or grinder fitted with a diamond cup, keeping dust controlled.
Spot-prime deep pits, then fill with a polymer-modified patching compound.
Screed and trowel to level, let cure per instructions, and lightly sand high spots.
Inspect for flatness before new flooring.
Techniques and Tools Compared
You’ll weigh manual methods against pneumatic and power tools to match effort with the job.
Choose tools based on tile material and how stubborn the adhesive is, since some tiles pop off with a pry bar while others need a hammer drill or chisel.
Consider cost, speed, and the risk of slab damage when picking the approach.
Manual vs. pneumatic/power methods
When deciding between manual and pneumatic/power methods for removing ceramic floor tile, weigh your budget, the scale of the job, and how much dust and noise you can tolerate; manual tools give you control and low cost for small areas, while powered breakers, grinders, and rotary hammers speed up large jobs but need more skill, safety gear, and containment.
| Method | Pros/Cons |
|---|---|
| Manual | Low cost; slower |
| Pneumatic | Fast; loud |
| Power | Efficient; dusty |
| Hybrid | Balanced; complex |
Best tool choice by tile type and adhesive strength
Because tile types and adhesive strength change how tiles come up, pick tools that match the materials and force required: choose a flat chisel or pry bar for thin-set on mortar, a hammer and chisel for small ceramic, a floor scraper or rotary hammer for thick mastic, and a jackhammer only for stubborn stone.
| Tile type | Adhesive | Recommended tool |
|---|---|---|
| Ceramic thin | Thin-set | Flat chisel |
| Ceramic small | Mortar | Hammer/chisel |
| Porcelain | Strong mastic | Floor scraper |
| Stone | Epoxy | Rotary hammer |
| Porcelain large | Industrial mastic | Demo hammer |
Cost, speed, and damage-risk tradeoffs
Although cheaper tools can keep upfront costs low, they often slow you down or raise the chance of substrate damage.
So weigh price against time and risk before you start. Choose higher-powered breakers for speed but expect higher cost and skill need; hand tools save money but increase labor and scrap.
- Budget tools: low cost, slow.
- Mid-range: balanced speed/risk.
- Demolition hammer: fast, risky.
- Tile scraper: precise, time-consuming.
Common Problems and How to Avoid Them
As you strip tile, you’ll want to watch for common problems like slab cracking or chipping, surface pitting or gouging, and damage from excessive vibration or over-torqued power tools.
Know the prevention steps and repair options—proper tooling, controlled force, and timely patching will save you time and money.
Also check for hidden hazards such as rebar, radiant heat, or electrical lines with scanning tools before you start.
Cracking or chipping the slab root causes and prevention
When you see cracks or chips in the slab beneath your tile, it’s usually due to movement, poor curing, or heavy point loads that the original concrete couldn’t handle; addressing these root causes early prevents tile failure and saves you time and money.
Inspect for settling, plumbing leaks, and inadequate reinforcement. Stabilize substrate, control moisture, fix structural issues, and avoid concentrated loads during removal to prevent new damage.
Pitting, gouging, and surface roughness repair options
Start by evaluating the surface for pits, gouges, and rough spots so you can pick the right repair method and materials.
Clean debris, then use epoxy or polymer-modified patching compounds for deep gouges.
For shallow pitting, apply cement-based skim coats or microtoppings and smooth with a resin float.
Sand and vacuum between layers, then cure fully before installing new tile.
Vibration and over-torquing issues with power tools
Two things you’ll notice fast when using power tools on tile removal are excessive vibration and the temptation to crank the torque—both can damage tools, ruin blades, and create uneven cuts or cracked tiles.
Hold tools firmly with both hands, use anti-vibration mounts or pads, pick the right RPM and torque settings, and let the tool work—don’t force it.
Hidden hazards (rebar, radiant heating, electrical) and how to detect them
How can you be sure there aren’t hidden surprises under your tile? Use scans and care: a concrete scanner, thermal camera, and non-contact voltage tester before chipping. Probe gently and consult plans.
- Rebar: scanner for bars and cover depth
- Radiant heating: thermal imaging when warm
- Electrical: voltage tester and conduit mapping
- Mark hazards and stop if readings are uncertain
Repairs and Preparation After Tile Removal
After you strip the tile, you’ll need to assess the slab for gouges and cracks and repair them with the appropriate patching compound or epoxy based on the damage.
Decide whether grinding or skim-coating will give the smooth, level surface your new flooring needs, and perform moisture testing to confirm it’s safe to install.
If you find major structural cracks, uneven settlement, or persistent moisture problems, call a professional for structural repair before proceeding.
Filling gouges and cracks in concrete (materials and methods)
Before you lay new tile, fill any gouges and cracks in the concrete so the surface’s flatness and strength won’t be compromised; choose a repair material based on the damage size—use a polymer-modified cement or floor patch for wider chips and a concrete crack filler or epoxy for hairline to medium cracks—and follow manufacturer prep and curing instructions.
Clean debris, widen tiny cracks slightly, dampen surfaces, apply product, tool smooth, and let cure fully before proceeding.
Grinding vs. skim-coating for a smooth finish
When you need a truly flat, durable base for new tile, decide between grinding the concrete to remove high spots and roughness or skim-coating to fill low areas and create a uniform surface.
Grind if surface variations are isolated and you can access a grinder; skim-coat when widespread low spots exist or you need a fresh, bondable surface.
Both require proper cleaning and curing.
Moisture testing and leveling for new flooring installation
Once you’ve got a flat, clean substrate from grinding or skim-coating, check for moisture and levelness before laying new flooring.
Use a reliable moisture meter and ASTM-compliant tests (RH or calcium chloride) for adhesives or vinyl.
Spot any high readings, then feather in a self-leveling compound per manufacturer instructions.
Allow full cure, recheck moisture, and proceed only when within recommended limits.
When the slab requires professional structural repair
If you find widespread cracking, significant settlement, or exposed rebar after removing tile, you’ll need a structural contractor to evaluate and repair the slab rather than trying DIY fixes.
They’ll assess load-bearing issues, core samples, and reinforcement needs, then recommend epoxy injection, section replacement, or underpinning.
Follow their timeline, get permits, and don’t install new flooring until repairs pass inspection to avoid future failures.
Best Practices, Tips, and Time-Saving Strategies
Start by sequencing work to protect the slab and reduce rework—strip edges and changes first, then clear large tile fields.
Keep tools sharp and matched to the job, use dust-control attachments and plastic barriers to limit indoor mess, and pick blades/bits that cut adhesive cleanly.
Save whole tiles for reuse, bag broken pieces for disposal, and label recyclable material to speed cleanup.
Step sequencing for efficiency and slab protection
Work through the job in a planned order so you save time and protect the slab beneath the tile.
Start at a perimeter or weakest tile, remove grout lines, then strip tiles in manageable sections toward your exit.
Pause to clean debris, inspect the slab, and adjust technique.
Sequence heavy demolition last, keep protective barriers in place, and work methodically to avoid accidental chips.
Tool maintenance and blade/bit selection tips
Because dull blades and neglected bits slow you down and risk damage, keep tools sharp, clean, and correctly matched to the material before you begin.
Use diamond-tipped blades for tiles and carbide-tipped bits for mortar. Inspect for wear, replace warped or chipped blades, and check arbor fit.
Lubricate moving parts, tighten fasteners, and follow manufacturer RPM limits to prolong life and guarantee safe, efficient cutting.
Minimizing dust and debris for indoor projects
When you’re removing ceramic tile inside, control the dust from the first cut to keep the mess—and health risks—down; set up containment, use dust-capturing tools, and wear appropriate PPE so cleanup and downtime stay minimal.
- Seal doorways with plastic and a zipper entry.
- Run a HEPA air scrubber in the work zone.
- Use vacuums with shroud attachments on grinders.
- Damp-wipe surfaces and bag debris frequently.
Reuse and disposal tips for tile and waste
A smart approach to tile removal treats salvage, recycling, and disposal as equally important steps so you save money, reduce waste, and avoid hassles; inspect tiles for reuse, set aside intact ones, and clean adhesive off for resale or patching.
Bag broken pieces, label hazardous materials, and locate local recycling centers or construction-waste dropoffs.
Rent a dumpster only if necessary to save time.
Estimated Time, Cost, and When to Hire a Professional
Expect a small bathroom to take a day or two and cost a few hundred dollars in tools and disposal, while larger rooms can run several days and into the low thousands.
If the tile is glued, the subfloor looks damaged, or you don’t have time and proper tools, you should hire a pro.
Ask contractors about their removal method, disposal plans, timeline, and a written estimate before you hire them.
Typical DIY time and cost breakdown by room size
If you’re tackling tile removal yourself, your time and costs will scale predictably with room size and condition—small bathrooms can take a day or two and cost under $150 for tools and disposal, while larger kitchens or living areas may need several days and $300–$600 in supplies and rental fees.
| Room Size | Time/Cost |
|---|---|
| Small (30–50 sq ft) | 1–2 days / <$150 |
| Medium (80–150 sq ft) | 2–4 days / $150–$300 |
| Large (200+ sq ft) | 3–6 days / $300–$600 |
| Notes | Rent demo hammer for efficiency |
Indicators you should hire a pro
Once you’ve sized up the time and cost for a DIY job, you should also recognize when the scope or risks make hiring a pro the smarter choice.
Hire one if tile covers large areas, tile’s stubbornly bonded, slab shows cracks or settlement, or you lack tools or strength.
Pros reduce damage risk, handle disposal, and meet code for integrated systems or waterproofing.
What to ask and expect from a contractor
How much should you plan for, and what should you get in writing?
Ask for a detailed estimate: labor hours, disposal fees, permits, and unexpected repair allowances.
Confirm start/end dates, warranty on work and materials, and liability insurance.
Expect professionals to inspect, protect adjacent areas, and remove debris.
Hire a contractor when scope, time, or structural risk exceeds your skills.
Frequently Asked Questions
You’ll probably have questions about tools, slab condition, and cleanup as you start removing tile.
Can you do it without power tools, will thinset harm the concrete, and how can you tell if the slab’s compromised are all common concerns.
You’ll also want to know whether you can tile over repairs and how to dispose of old tile and thinset safely.
Can I remove tile without any power tools?
Wondering if you can remove ceramic floor tile without power tools? Yes—you can, but it’s slower and tougher.
Use a cold chisel, hammer, pry bar, and sturdy gloves and eye protection. Score grout first, pry tiles at seams, and work small sections.
Expect more physical effort and longer time; patience and care help prevent concrete surface damage without motors.
Will thinset removal damage the concrete?
Will removing thinset chip or scar your concrete slab? You can minimize damage by using proper tools and technique: a floor scraper or chisel at a shallow angle, pneumatic or oscillating tools with carbide blades, and patience.
Avoid aggressive jackhammering. Test a small area first.
Light surface scuffs are common but usually cosmetic and easily repaired with patching and grinding rather than structural damage.
How do I tell if the slab is structurally compromised?
How can you tell if the concrete slab under your tile is structurally compromised?
Look for large, widening cracks, sagging or uneven areas, visible chunks missing, or movement when you walk.
Check for persistent moisture, efflorescence, or rust stains from rebar.
Tap the surface—hollow sounds suggest delamination.
If doubts remain, get a structural engineer or qualified contractor to inspect.
Can I install new tile directly over repaired slab?
If your slab shows only minor damage that you’ve repaired—small cracks filled, surface delamination patched, and any moisture issues addressed—you can often install new tile directly over it.
Make certain the surface is flat, clean, and profiled for bond.
Use a quality cementitious thinset or mortar recommended for concrete overlays, follow manufacturer instructions, and check for movement before tiling to avoid future failures.
How do I dispose of old ceramic tile and thinset?
Wondering what to do with leftover ceramic tile and old thinset? You can haul intact tiles to a recycling center or construction debris facility; many accept ceramic.
Break tiles into manageable pieces for disposal if required. Thinset is inert once cured—scrape it into bags and dispose as construction waste.
Check local landfill rules, rental dumpsters, or a hauling service for large volumes.
