How to Clean Cat Poop From the Floor Safely and Eliminate All Odor
Act quickly: put on gloves, pick up solids with paper towels, seal and discard them, then blot remaining residue from the outside in. Ventilate the area and apply an enzymatic cleaner following label directions; avoid ammonia or bleach and don’t scrub hard or you’ll grind waste into fibers. For carpets use a wet/dry extractor or repeat enzyme treatments, then dry with fans. Thorough cleanup prevents parasites and lingering smell—keep going and you’ll get step‑by‑step tips and prevention advice.
Fast Safe Steps to Clean Cat Poop and Remove Odor
When you find fresh cat poop, act within the first five minutes: pick up solids with gloves or a disposable scoop and blot any residue with paper towels.
Contain waste in a sealed bag and wash the area with mild soap and water to remove bacteria.
For quick, pet-safe odor control, sprinkle baking soda, use enzymatic cleaners labeled safe for pets, or ventilate the space—avoid ammonia or bleach around cats.
Immediate actions (first 5 minutes)
Act quickly: gather gloves, paper towels, a sealable plastic bag, and an enzymatic cleaner so you can remove the mess and stop odors before they set.
Put on gloves, blot solids with paper towels, and seal waste immediately.
Scrape remaining residue gently, dispose of towels in the bag, and ventilate the area.
Start enzymatic treatment per label—this is essential for how to clean cat poop from floor.
Quick deodorizing options that are safe for pets
Once you’ve removed the bulk and started an enzymatic treatment, you’ll want quick deodorizing options that won’t harm your cat.
Use baking soda lightly to absorb odors, vacuum after an hour, or sprinkle activated charcoal nearby (sealed container).
Steam clean hard floors if safe for the finish.
Avoid citrus, essential oils, ammonia, and bleach; ventilate the area and keep your cat away until dry.
Why Proper Cleanup Matters
You should clean cat poop thoroughly because it can carry parasites and bacteria that threaten you and other pets.
Bad smells stick around when organic matter soaks into fabrics or porous surfaces and breaks down.
If your cat seems unwell after an incident or the stain and odor won’t go away, call your vet or a professional cleaner.
Health risks to humans and pets
Exposure to cat feces can put both people and pets at risk of infections and parasites, so cleaning it up promptly and correctly matters.
You should avoid direct contact, wear gloves, and wash hands thoroughly afterward.
Toxoplasmosis, roundworms, and bacterial infections can spread from contaminated surfaces.
Prompt disinfection and isolating curious pets reduce transmission, protecting immune-compromised household members and young children.
Why odors linger and how they form
Although it may seem like the smell fades after you scoop the litter, cat feces leave behind microscopic residues and gases that keep odors lingering until they’re properly removed.
You need to break down organic matter and neutralize volatile compounds; otherwise bacteria continue releasing smells.
Use enzymatic cleaners, scrub porous surfaces, and ventilate so you remove both residues and airborne odors, not just visible mess.
When to consult a vet or professional cleaner
If the smell won’t go away, the mess seems excessive, or your cat’s health looks off, call a vet or professional cleaner right away.
You should consult a vet if your cat has repeated accidents, blood, diarrhea, lethargy, or vomiting.
Hire a professional cleaner for deep stains, porous flooring contamination, or persistent odor after home treatments.
Prompt action prevents health risks and lasting damage.
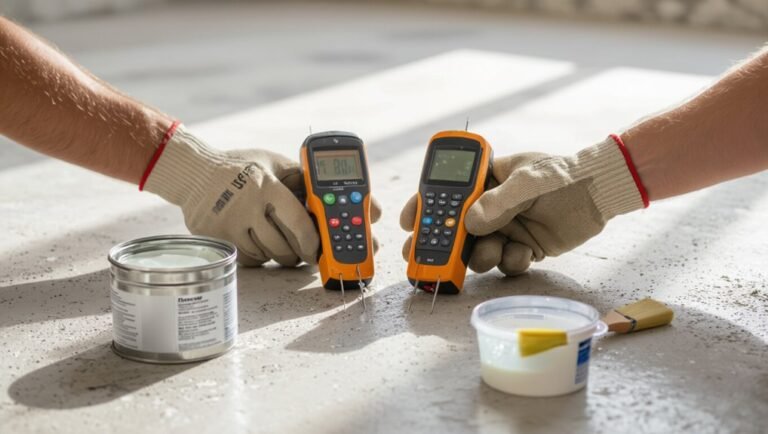
What You Need Before You Start
Before you begin, make sure you’ve got the right supplies—disinfectant, disposable bags, paper towels, and a gentle enzymatic cleaner for fabrics.
You’ll also want gloves, a mask, and open windows or a fan for ventilation to protect yourself.
Finally, note that cleanup tools and methods differ for hard floors, carpet, and upholstery, so prep the appropriate products for the surface you’re treating.
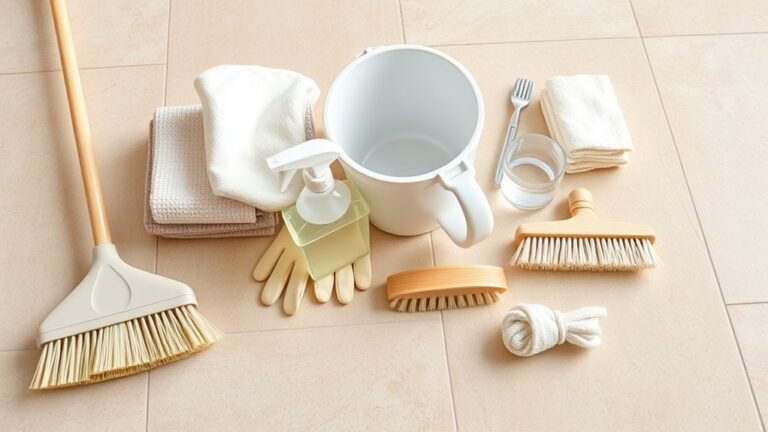
Safe cleaning supplies checklist
You’ll want a handful of reliable supplies on hand before you tackle cat poop to make cleaning safe, efficient, and sanitary.
Gather essentials so you can act quickly and prevent stains or odors.
- Disposable gloves and paper towels
- Enzyme-based cleaner for organic stains
- Mild detergent and warm water
- Plastic bags and a sealable container for waste
Personal protective equipment and ventilation
When you’re getting ready to clean cat poop, put on disposable gloves and consider a mask to avoid inhaling dust or aerosolized particles; open windows or run a fan to boost ventilation so odors and airborne contaminants don’t linger.
Also wear eye protection if splash is possible, use disposable shoe covers or dedicated shoes, and keep pets and people out of the area until cleaning finishes.
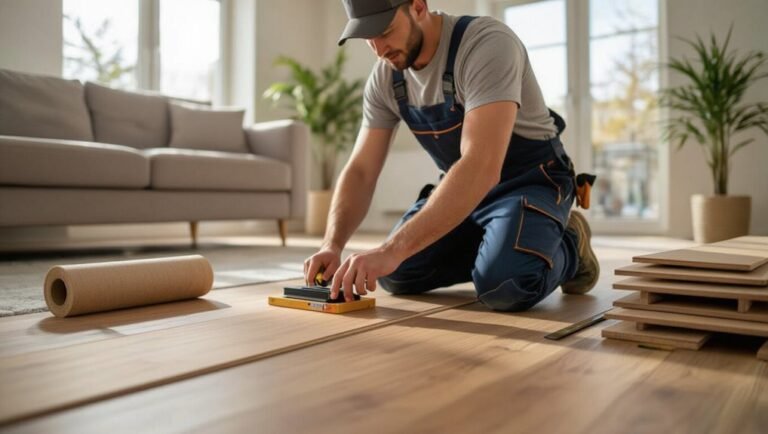
Surfaces and materials: how requirements differ (hard floor, carpet, upholstery)
Because different materials trap bacteria and odors in different ways, you’ll need specific supplies and steps for hard floors, carpets, and upholstery.
For hard floors, use disposable gloves, paper towels, enzyme cleaner, and a mop.
For carpets and upholstery, add a stiff brush, blotting cloths, a carpet cleaner or upholstery-safe enzyme spray, and consider steam cleaning for deep odors and stains.
Step-by-Step Cleanup for Hard Floors (Tile, Wood, Laminate, Vinyl)
Start by containing the area and carefully removing solids with gloves and a disposable scoop or paper towel.
Next you’ll do an initial wipe and disposal, then perform a deeper clean with a pet-safe cleaner, neutralize any odor without damaging the floor finish, and finally rinse, dry, and inspect the spot.
Follow each step in order to protect your floors and keep pets safe.
Step 1 Contain the area and remove solids safely
Contain the mess by closing doors and moving pets and people out of the room so you can work without spreading contamination.
Put on disposable gloves, a mask if needed, and grab paper towels or a plastic scoop.
Gently lift solids into a sealed bag, avoiding smear.
Seal the bag, dispose of it outdoors, and wash your hands even if you wore gloves.
Step 2 Initial wipe and disposal procedures
With the solids sealed and removed, prepare to wipe the area to remove residue and odor.
Put on disposable gloves, use paper towels to gently lift remaining smears, folding so clean surface contacts mess.
Seal used towels in a plastic bag, tie it tightly, and place in an outdoor trash bin.
Wash hands after glove removal.
Step 3 Deep cleaning with pet-safe cleaners
1. You’ll deep-clean using pet-safe solutions to remove residue without harming finishes.
Mix according to label, test a hidden spot, then clean gently. Follow with spot drying.
- Use enzyme cleaner for organic waste
- Choose pH-neutral floor cleaner for wood/laminate
- Avoid bleach or ammonia
- Rinse residue with clean water and dry promptly
Step 4 Neutralizing odor without harming finish or pets
After you’ve removed residue and rinsed the area, neutralizing lingering odor comes next so your floor and pets stay safe and comfortable.
Use a pet-safe enzymatic deodorizer labeled for hard floors; test a hidden spot first. Apply sparingly, follow dwell time, then blot—don’t scrub harshly.
For sealed wood or laminate, avoid ammonia or bleach; they can damage finish and irritate animals.
Step 5 Rinse, dry, and inspect
Now rinse the area thoroughly to remove any remaining cleaner or deodorizer, then dry it completely so residue and moisture won’t attract dirt or damage the floor.
Use clean water and a microfiber cloth or mop, blotting rather than rubbing.
Once dry, inspect for stains or odor; repeat spot-cleaning or deodorizing if needed, and ventilate the room until the smell is gone.
Step-by-Step Cleanup for Carpets and Rugs
When you find cat poop on carpet or a rug, start by lifting solids carefully so you don’t grind them into the fibers.
Next you’ll learn the right blotting technique versus scrubbing, which cleaners to use (including enzymatic options and safe DIY mixes), and when to pull out a wet/dry vacuum or extractor.
Finally, we’ll cover how to dry and deodorize the area and check for lingering stains or odors.
Step 1 Solid removal without grinding into fibers
Step 1: remove solid matter gently so it doesn’t get rubbed into carpet fibers — scoop or pick it up with a rigid piece of cardboard or a disposable plastic bag turned inside out, lifting straight up to avoid smearing.
After removal, seal waste in a bag, dispose promptly, and pat the area with a dry paper towel to lift remaining crumbs before treating the stain.
Step 2 Blotting vs. scrubbing: correct technique
With the solids removed and crumbs patted up, it’s time to treat the remaining residue without pushing it deeper into the pile.
Blot gently with paper towels or a clean cloth, working from the outside toward the center.
Don’t scrub — that grinds residue into fibers and spreads odor.
If moisture remains, continue blotting until mostly dry, then air-dry the area.
Step 3 Enzymatic cleaners and homemade alternatives
3 types of cleaners will do the heavy lifting: commercial enzymatic formulas, DIY enzyme methods, or simple household solutions — and you’ll want to pick based on stain age, odor strength, and fiber type.
Use enzymatic cleaners for protein breaks, DIY with pineapple/yeast starters, or vinegar baking soda for mild cases. Apply, dwell, blot, then air-dry.
- Read label instructions
- Test hidden spot
- Avoid bleach on dyes
- Repeat if odor persists
Step 4 Using a wet/dry vacuum or extractor
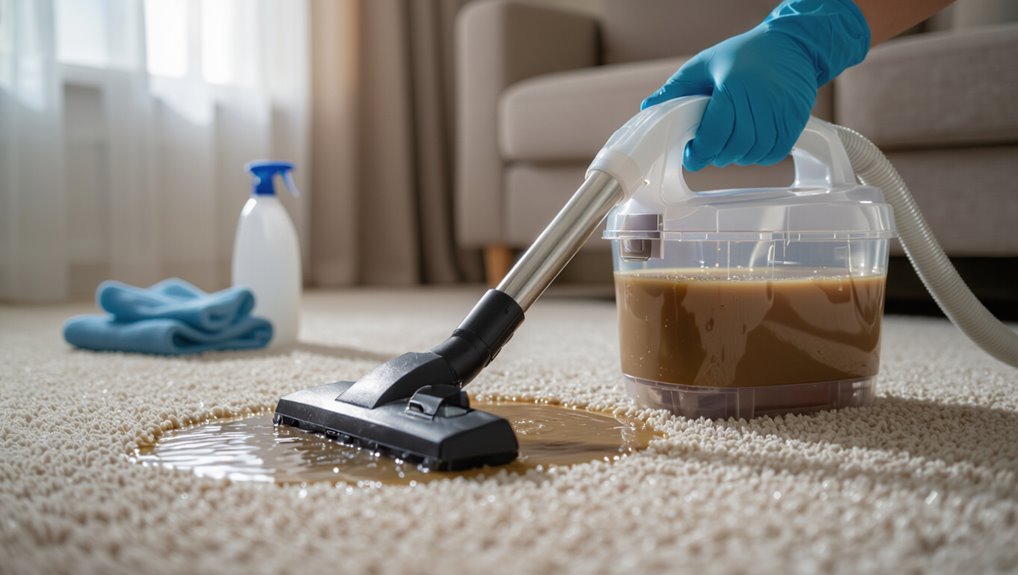
Turn on your wet/dry vacuum or carpet extractor and prepare to lift the remaining moisture and cleaner from the affected area—this is the step that actually removes dissolved waste and embedded odor rather than just masking it.
Slowly pass the nozzle over the spot multiple times, extracting until no more discoloration or foam appears.
Rinse with clear water and extract again to remove residue.
Step 5 Drying, deodorizing, and checking for stains/odor recurrence
Before the carpet fully dries, you’ll want to speed evaporation, neutralize any lingering odor, and inspect the area for stains so they don’t set.
Use fans and a dehumidifier, blot remaining dampness, then apply an enzymatic deodorizer according to instructions.
After drying, check for discoloration or smell recurrence; repeat spot treatment or consider professional cleaning if odor or stains persist.
Upholstery, Bedding, and Soft Surfaces Cleanup
Act quickly to remove solids and use fabric-safe spot treatments so stains and odors don’t set.
Check labels to separate machine-washable items from those that need surface cleaning or special care.
If stains, odor, or damage persist after cleaning, consider professional upholstery or textile cleaners.
Immediate removal and fabric-safe spot treatments
Blot fresh messes gently with paper towels or a clean cloth to lift as much solids and moisture as you can without rubbing them deeper into the fabric.
Then pre-treat spots with a fabric-safe enzymatic cleaner or a mild dish soap solution, testing an inconspicuous area first.
Work outward from the stain, dab gently, and air-dry; repeat until odor and staining are gone.
Machine-washable vs. non-washable items
When deciding how to tackle cat poop on soft surfaces, first sort items by whether they’re machine-washable or not so you can handle each safely and efficiently.
Machine-washable bedding and removable covers get pre-rinsed, treated with enzyme cleaner, then washed hot if fabric allows.
For non-washable upholstery, blot solids, apply spot cleaner, rinse minimally, and air-dry, testing cleaners on hidden areas first.
Professional cleaning indicators
Look for signs that the mess is beyond DIY—persistent stains, lingering odor after cleaning, fabric damage, large or repeatedly soiled areas, or if the item is antique or has complex construction; these are clear indicators you should call a professional who can assess material-specific risks and use restoration-grade treatments.
You should also contact pros for mold risk, urine saturation, delicate fibers, or when home remedies fail to neutralize odor or sanitize.
Best Cleaners and Homemade Solutions Comparison
You’ll want to compare enzymatic cleaners, which break down organic stains and odors, with disinfectants that kill bacteria but may not remove smells.
Try safe household options like a 1:1 vinegar-water spray, a baking soda paste for odors, or a diluted 3% hydrogen peroxide spot test, and always patch-test finishes first.
Avoid bleach, phenols, and other pet-toxic or finish-damaging chemicals.
Enzymatic cleaners vs. disinfectants
Although both products aim to remove odor and germs, enzymatic cleaners and disinfectants work very differently and suit different situations. You’ll use enzymatic formulas to break down organic stains and odors; disinfectants kill pathogens on surfaces. Choose enzymes for deep odor removal and disinfectants for infection control, then follow label directions and allow proper contact time.
| Enzymatic | Disinfectant |
|---|---|
| Breaks down organics | Kills microbes |
| Odor-focused | Sanitation-focused |
| Needs dwell time | Often fast-acting |
| Safe on fabrics? Check | Can be harsh |
| Pet-safe options exist | Use cautiously around pets |
Safe household options (vinegar, baking soda, hydrogen peroxide) and proportions
Enzymatic cleaners and disinfectants handle different jobs, but you can also use simple household items for many non-infectious messes.
You’ll neutralize odor and lift stains with correct mixes: dilute white vinegar 1:1 with water, baking soda paste with water, 3% hydrogen peroxide alone for stains, or vinegar then baking soda to deodorize.
Follow with rinse and blot dry.
- Vinegar 1:1
- Baking soda paste
- 3% H2O2
- Vinegar then soda
What to avoid harmful chemicals for pets and finishes
When protecting your pet and your home finishes, stick to cleaners that won’t leave toxic residues or strip sealants.
Avoid bleach, ammonia, phenols, pine oil, and citrus solvents—they irritate pets and damage wood or varnish.
Skip enzyme products with unverified additives.
Use labeled pet-safe formulas or simple vinegar/baking soda mixes, test hidden spots, ventilate, and rinse thoroughly to remove residues.
Odor Elimination Techniques That Actually Work
You’ll want to start with enzymatic cleaners because they break down the proteins in waste and stop odors at the source.
For surface and room-level control, use baking soda for fresh spots, activated charcoal for ongoing localized absorption, and air purifiers with HEPA and carbon filters for whole-room relief.
For long-term problems consider UV or ozone treatments only knowing ozone has health risks, or hire professionals for thorough, safe remediation.
How enzymatic cleaners remove odor at the source
Because they actually break down the molecules that cause smell, these cleaners stop odor at its source instead of just masking it.
You apply an enzymatic cleaner, enzymes digest organic matter—proteins, fats, and bacteria—turning them into odorless fragments.
Let it dwell per instructions, then blot. Repeat if needed.
Enzymes keep working until the food source is gone, preventing reodorization.
Baking soda, activated charcoal, and air purifiers when to use each
Although enzymatic cleaners tackle the source, you’ll still want dry and air-based options for ongoing room freshness: sprinkle baking soda on carpets or fabric for a few hours, then vacuum to absorb residual odor;
place activated charcoal in breathable containers for closets or litter areas to trap molecules;
run a HEPA/activated-carbon air purifier continuously in problem rooms to reduce airborne smells and particles.
Long-term odor removal: UV, ozone (risks), and professional options
For persistent smells that survive baking soda, charcoal, and air purifiers, you’ll want to contemplate more intensive approaches like UV, ozone, or professional treatments.
UV light can break down organic odor molecules but needs correct wavelength and exposure. Ozone removes odor but is hazardous to people and pets.
Prefer certified remediation pros for severe or recurring infestations; they identify sources, safely apply treatments, and guarantee results.
Common Mistakes and How to Avoid Them
Don’t scrub dried or fresh messes aggressively, because that can spread contamination instead of removing it.
Don’t use ammonia-based cleaners, since their scent can attract cats back to the spot.
Also check for saturation beneath surfaces and always ventilate and wear basic PPE to protect yourself.
Mistake 1 Scrubbing that spreads the mess
Scrubbing at dried or fresh cat poop with a brush or rag usually makes things worse by spreading bacteria and staining a larger area.
Instead, scoop solids gently with a disposable tool, blot liquids with paper towels, and lift residue with an enzymatic cleaner applied per instructions.
You’ll reduce contamination, prevent stains, and avoid pushing mess into seams or porous surfaces.
Mistake 2 Using ammonia-based cleaners that attract cats
Although it seems logical to grab a strong cleaner, avoid ammonia-based products when cleaning cat poop—you’ll often end up attracting your cat back to the spot.
Use enzyme-based cleaners instead; they break down organic matter and neutralize odor without mimicking urine.
Test any product on a hidden area, follow label instructions, and ventilate the room.
Don’t mix cleaners—especially ammonia and bleach.
Mistake 3 Ignoring saturation beneath surface layers
When you wipe away the visible mess, you can easily miss the moisture that’s soaked into carpets, padding, or upholstery; that hidden saturation can keep odors and bacteria trapped and lead to stains or mold if you don’t address it.
Check beneath fibers, lift cushions, and blot until dampness stops transferring.
Use appropriate enzyme cleaners and drying methods to fully remove moisture and odor.
Mistake 4 Failing to ventilate or use PPE
If you skip ventilating the area or putting on basic PPE, you’ll expose yourself to strong odors, airborne particles, and pathogens that can make you sick; open windows, run fans, and wear gloves and a mask to protect your lungs and skin.
Also protect eyes with goggles, use disposable towels, and change contaminated clothing promptly. Proper ventilation and PPE reduce infection risk and lingering smells.
Preventive Measures to Reduce Future Accidents and Odors
To prevent future accidents and lingering odors, you’ll want to focus on proper litter-box maintenance and smart placement, address any behavioral causes of inappropriate elimination, and protect vulnerable floors and fabrics.
Keep boxes clean and accessible, consult your vet or a behaviorist for sudden changes, and use washable mats, covers, or sealants where needed.
These steps cut down on mess, smell, and repeated incidents.
Litter box maintenance and placement best practices
Good litter box habits start with placement and upkeep: put boxes in quiet, ventilated spots away from noisy appliances and high-traffic areas, scoop waste daily, fully change litter and clean the box weekly, and keep one more box than the number of cats you have so each cat has options.
- Use low-sided boxes for accessibility
- Choose unscented, clumping litter
- Clean mats and surrounding floors often
- Inspect boxes for damage and replace when worn
Behavioral causes of inappropriate elimination and solutions
When cats start eliminating outside the box, it’s usually a message about stress, medical issues, or a problem with the litter setup.
Protecting floors and fabrics (mats, washable covers, sealants)
If you want to keep floors and furniture safe from accidents and lingering smells, start by adding washable barriers and easy-clean surfaces where your cat spends time.
Use waterproof mats under litter areas, machine-washable couch covers, and nonporous sealants on wood or laminate.
Clean spills promptly with enzyme cleaners, replace damaged fabrics, and reposition litter boxes to reduce repeat incidents and odors.
When to Call a Professional
If the smell won’t go away, stains persist, or the contamination is extensive, you should call a professional odor removal or restoration service.
They’ll assess the damage, explain their cleaning and deodorizing methods, and give you a cost estimate.
Expect trained technicians using specialized equipment to eliminate odors and restore surfaces safely.
Indicators you need professional odor removal or restoration
Because odors can hide deep in carpets, walls, and HVAC systems, you’ll want to call a professional when stains or smells persist despite your cleaning attempts.
Call if you notice recurrent odor after multiple cleanings, visible soiling or discoloration that won’t lift, lingering ammonia or sour smells, mold growth, or if pets keep revisiting the spot.
Severe saturation or health symptoms also warrant experts.
What to expect from professional cleaning services
When you decide to call a professional, expect a thorough assessment first: technicians will inspect the area, identify contamination levels, and explain which methods they’ll use and why.
They’ll secure the scene, remove and dispose of contaminated materials, deep-clean surfaces with hospital-grade agents, deodorize with enzymatic or ozone treatments if needed, and document work.
You’ll get care instructions and warranty or follow-up options.
FAQ Common Questions About Cleaning Cat Poop and Odor Removal
You’ll want to act quickly to prevent stains and lingering odor, but timing, products, and techniques will vary by surface and how fresh the mess is.
I’ll answer whether enzymatic cleaners are safe around kids and other pets, if bleach actually removes odor, and when a carpet shampooer helps with old stains.
You’ll also learn signs that recurrent accidents are medical versus behavioral so you can choose the right next step.
How soon should I clean up cat poop to prevent stains and odor?
If you want to prevent stains and lingering smells, clean up solid cat poop as soon as you can—ideally within an hour—and scoop litter daily so waste doesn’t sit and set into fabrics or hard surfaces.
Prompt cleanup stops bacteria growth and reduces odor penetration. Blot any residue immediately, use appropriate cleaners for the surface, and ventilate the area to speed drying and odor dispersal.
Are enzymatic cleaners safe for homes with multiple pets and children?
Are enzymatic cleaners safe around kids and other pets? Yes—most are non-toxic once dry and target organic stains and odors without harsh fumes.
You should choose pet-safe, fragrance-free formulas, follow label directions, keep children and animals away while treating and drying, and store products securely.
If anyone shows sensitivity, rinse the area and consult a vet or pediatrician.
Will bleach kill cat odor permanently?
Can bleach remove the smell of cat urine and feces for good? No — bleach can mask or neutralize some odors on hard, nonporous surfaces but won’t break down the organic compounds in urine or feces.
It’s ineffective on porous materials and can be hazardous around pets.
Use enzymatic cleaners for permanent odor removal and reserve bleach for disinfecting compatible hard floors after odor is gone.
Can I use a carpet shampooer on old cat poop stains?
Although a carpet shampooer can help with surface residue and loosened stains, it won’t reliably remove old cat poop stains or the deep-set odors on its own.
You should pretreat affected areas with an enzymatic cleaner to break down proteins, blot thoroughly, then use the shampooer.
Repeat pretreatment and airing; consider professional cleaning for stubborn, set-in stains and persistent smell.
How do I know if recurrent accidents are medical or behavioral?
When accidents keep happening, start by looking at timing, location, and any changes in your cat’s habits to decide whether it’s medical or behavioral.
Check for vomiting, straining, blood, weight loss, litter box avoidance, or sudden changes; these suggest medical issues—see your vet.
If health is clear, assess stressors, litter type, box cleanliness, or territory conflicts and adjust environment and routine.