How to Remove Ceramic Floor Tiles Safely Without Breaking the Subfloor
You can remove ceramic floor tiles without breaking the subfloor by working from an edge or loose tile, using grout saws and chisels to free joints, and prying gently with flat bars. Keep force controlled, use an oscillating tool on stubborn tiles, and protect adjacent tiles and the substrate. Vacuum dust, wear PPE, and inspect backerboard as you go. Follow careful, stepwise removal and you’ll preserve the subfloor — keep going to learn practical tools, tips, and repair steps.
Can You Remove Ceramic Floor Tiles Without Damaging the Subfloor?
You can usually lift ceramic tiles without wrecking the subfloor by working slowly, using the right tools (chisels, a pry bar, and a hammer or an oscillating tool), and supporting the floor as you go.
Stop and call a pro if the tiles won’t budge, the subfloor shows deep gouges or rot, or you hit unexpected layers like thin-set over plywood or mortar over concrete that’s bonded too tightly.
A contractor can assess structural damage and use specialized equipment to remove tiles while preserving the subfloor.
Short, Practical Summary of the Safest Approach
Although removing ceramic tiles without harming the subfloor takes care and the right tools, it’s entirely doable—if you work slowly, pry beneath each tile, and keep the impact localized.
Wear goggles and knee pads, use a flat pry bar, thinset scraper, and hammer with a chisel, and test a small area first.
For how do I remove ceramic floor tiles, proceed methodically and avoid sudden force.
When to Stop and Call a Pro
Taking a careful, methodical approach greatly reduces the risk of subfloor damage, but there are clear signs that you should stop and call a pro.
If tiles refuse to lift, mortar is bonded to plywood, or you see rot, mold, or structural movement, pause.
If you lack proper tools, time, or confidence, hiring a professional prevents costly mistakes and hidden damage.
Basic Understanding Materials, Layers, and Why Damage Happens
Before you start prying up tiles, you should know the typical build-up: tile set in thinset or mortar over backerboard or cement board, which sits on the subfloor.
Damage usually happens when too much force, the wrong tools, or prying at the wrong layer pulls away chunks of backerboard or splinters the subfloor.
Understanding which layer you’re hitting and using appropriate tools will help you avoid costly repairs.
Typical Tile Floor Build-Up (Tile, Thinset/Mortar, Backerboard, Subfloor)
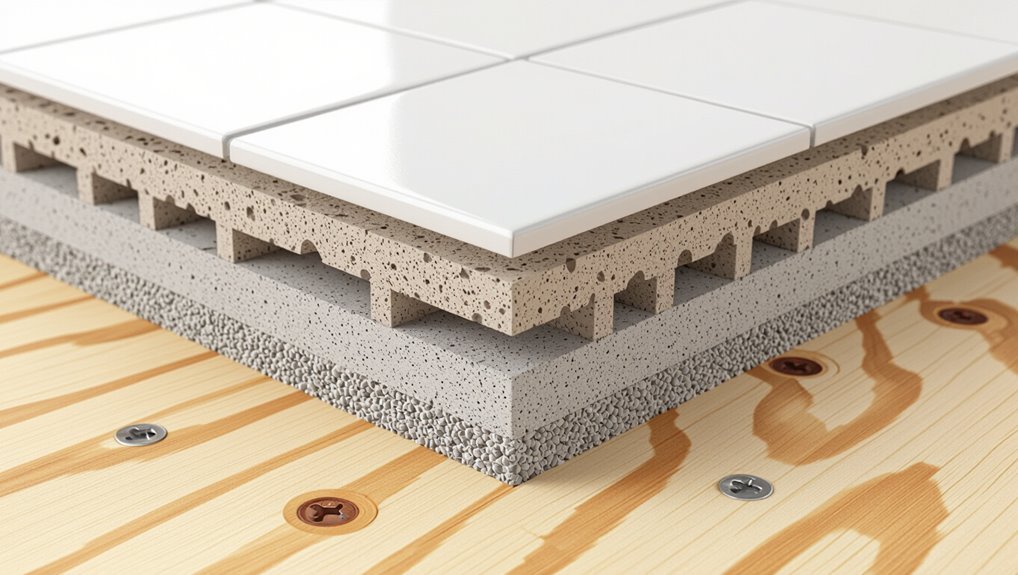
A typical ceramic tile floor is a layered system you’ll want to understand before you start demolition: the visible tile sits on a bed of thinset mortar or adhesive, which bonds to a rigid underlayer like cement backerboard or an uncoupling membrane.
All of which rest on the structural subfloor (plywood or concrete). Know each layer’s thickness, attachment method, and material so you can remove tiles without harming the subfloor.
Common Causes of Subfloor Damage During Tile Removal
When you pry up tile, the force you apply can easily tear or gouge the layers beneath if you don’t account for how they’re bonded and fastened.
You’ll damage subfloor by prying at seams, pulling fasteners, or levering against thinset-bonded backerboard.
Moisture-weakened layers, hidden fasteners, and brittle old materials split under stress.
Recognize these failure modes so you’ll work deliberately and avoid costly repairs.
Tools That Affect Risk to the Subfloor
Seeing how pry bars and brittle layers cause damage helps explain why the tools you pick matter so much to the subfloor.
You’ll prefer flat pry bars, thin chisels, and oscillating tool blades to reduce leverage and point loads.
Avoid heavy sledge hammers, wide demolition bars, and aggressive rotary grinders that tear plywood or chip cement backer.
Match tool to layer and work slowly.
Safety Precautions and Preparations Before You Start
Before you start, make sure you’ve got the right PPE—respirator, goggles, gloves, and knee protection—and a plan to control dust with plastic sheeting and a HEPA vacuum.
Clear the room of furniture, shut off or protect utilities, tape doors, and seal HVAC vents to keep debris and dust contained.
Do a spot test on a small tile to check how well it and the subfloor are bonded so you can pick the right tools and technique.
Personal Protective Equipment and Dust Control
Personal protective equipment (PPE) and dust-control measures are nonnegotiable: you’ll need a fitted N95 or P100 respirator, safety goggles, heavy-duty gloves, long sleeves, and knee protection to shield skin and joints from sharp shards and cement dust.
Use ventilation and containment to limit spread, and clean as you go.
- Seal vents and doorways
- Run a HEPA vacuum
- Use drop cloths
- Wet-scrape to minimize dust
Preparing the Room (Furniture, Utilities, Doors, HVAC)
With PPE on and dust controls in place, you’re ready to prep the room so work stays safe and efficient.
Remove furniture, small items, and wall hangings; roll up rugs.
Shut off and cap electrical circuits and gas lines if needed, and label breakers.
Close doors, seal vents or redirect HVAC to minimize dust spread, and post signage to keep others out.
How to Test Tile and Subfloor Adhesion (spot test)
Start by choosing a few inconspicuous tiles to perform a spot adhesion test so you can gauge how firmly the tiles and thinset are bonded to the subfloor.
Pry a corner gently with a chisel and hammer; listen and watch for movement. If tiles lift easily, you’ll need different removal tools and lower risk to the subfloor.
Note weak spots for repair planning.
Tools and Materials You’ll Need (Gentle-to-Aggressive Options)
Start with non-destructive tools like manual chisels, grout saws, and an oscillating multi-tool when you want control and to preserve the subfloor.
If tiles are stubborn, switch to power tools such as a hammer drill or demolition hammer, using them selectively to avoid unnecessary damage.
Have supplies on hand to protect and repair the floor—thin shims, underlayment patches, and plywood—so you can stabilize and cover exposed areas as you work.
Non-Destructive Tools (Manual chisels, grout saws, oscillating multi-tools)
Choose non-destructive tools when you want to remove tiles while preserving the substrate and surrounding surfaces; manual chisels, grout saws, and oscillating multi-tools give you control over how much material you remove and where you apply force.
Use steady pressure, keep edges sharp, and work slowly to avoid gouges.
- Manual cold chisel for prying loose tiles
- Grout saw to free edges
- Oscillating tool with blade attachment
- Thin pry bar for leverage
Power Tools and When to Use Them (hammer drill, demolition hammer)
If manual chisels and oscillating tools aren’t making progress or the tile covers a large area, power tools give you speed and controlled force for tougher jobs.
Use them selectively to protect the subfloor and yourself.
- Hammer drill with chisel bit for mortar loosening
- Demolition hammer for thick adhesive or long runs
- Variable-speed control for delicate sections
- Always wear eye, ear, and dust protection
Supplies for Protecting the Subfloor (thin shims, underlayment patches, plywood)
Before you pry up tiles, gather thin shims, underlayment patches, and sheets of plywood so you can support and protect the subfloor as you work.
Use shims to level, patches for small repairs, and plywood for temporary walkways.
Carry adhesive and screws for securing materials, and a utility knife for cutting underlayment.
- Thin shims
- Underlayment patches
- Plywood sheets
- Adhesive and screws
Step-by-Step: How to Remove Ceramic Tiles Safely Without Breaking the Subfloor
Start by scoring and removing grout around the tiles so you can work without prying against intact joints.
Then find a loose tile or edge to create a controlled entry point. Use manual pry bars and chisels with careful leverage, and switch to small power tools on low settings for stubborn pieces.
Finish by scraping thinset gently and, if needed, using a chemical remover to lift residue while protecting the subfloor.
Step 1 Score and Remove Grout Around Tiles
Score the grout lines and remove the surrounding grout to give yourself clean edges and a clear path to the tile seams.
Use a grout saw or oscillating tool, work in short sections, and keep dust down with a vacuum or wet sponge.
- Mark damaged grout first
- Cut deep enough to expose edges
- Remove loose material carefully
- Clean debris before prying
Step 2 Start at a Loose Tile or Edge; Create a Controlled Entry Point
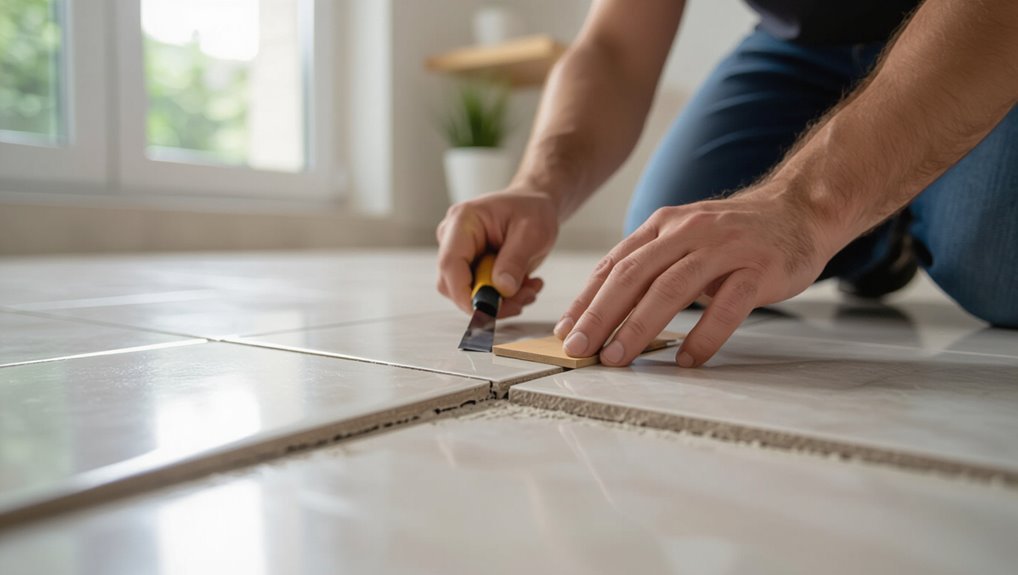
With the grout cleared, find a loose tile or an outer edge to create a controlled entry point—this gives you leverage and lowers the risk of cracking the subfloor.
Start where adhesive has weakened or at a perimeter tile. Work deliberately, clearing debris so you can access the gap.
This focused beginning reduces force needed and helps protect surrounding tiles and the subfloor beneath.
Step 3 Use Manual Tools to Pry Tiles Up Gently (technique details)
Pry up tiles gently using flat, sturdy tools—like a pry bar, chisel, and putty knife—so you don’t damage the subfloor.
Work from the entry point, slide the chisel under a corner, and lever slowly. Keep the angle low to reduce lift pressure. Use short, controlled taps with a hammer if needed.
Clear debris and check the substrate as you go.
Step 4 Switch to Small Power Tools for Stubborn Tiles (settings and tips)
Once manual tools stop making progress, switch to small power tools—like an oscillating multi-tool or a compact rotary saw with a carbide or diamond-tipped blade—to remove stubborn tiles without damaging the subfloor.
Use low speed, light pressure, and short bursts to control cuts. Keep blades perpendicular, change worn bits, wear PPE, and work from edges inward to prevent prying up the subfloor.
Step 5 Remove Thinset/Mortar Residue While Preserving Subfloor (scraping methods, chemical options)
After you’ve removed the tiles themselves, you’ll be left with thinset or mortar that can hide imperfections or prevent a new floor from bonding properly; removing it carefully will protect the subfloor beneath.
Use a floor scraper or oscillating multi-tool with a carbide blade, working shallow passes.
For stubborn residue, apply a diluted adhesive remover per instructions, rinse thoroughly, and avoid aggressive chiseling that risks gouging the subfloor.
Step 6 Inspect and Repair Any Minor Subfloor Damage Immediately
Inspect the subfloor closely as soon as the residue’s gone so you can catch and fix any nicks, gouges, or soft spots before they worsen.
Probe damaged areas, tap for hollow sounds, and mark repairs.
Sand minor high spots, fill shallow gouges with wood filler or leveling compound, and let cures fully.
Replace any soft or delaminated sections to guarantee a stable, long-lasting underlayment.
Alternative Approaches by Substrate Type
Your approach shifts depending on what’s under the tiles, so you’ll use different tools and caution for backerboard, concrete, or plywood.
For cement backerboard you’ll focus on cutting and prying panels without disturbing the subfloor, while concrete slabs usually need heavier chiseling or a floor scraper.
If the tiles sit on plywood, you’ll be extra careful to avoid tearing or splintering the wood as you remove adhesives and tiles.
Removing Tile Over Cement Backerboard
When you’re tackling tile removal over cement backerboard, pick your approach based on how the backerboard was installed and what you plan to do next; thin-set-bonded tiles behave differently than those nailed to wood subfloors.
The condition of seams, screws, and joints will dictate whether you can remove just the tiles, the backerboard, or both.
Pry tiles with a chisel, loosen thin-set with a hammer and scraper, remove damaged panels by unscrewing, and clean remaining thin-set before prepping for new underlayment or tile.
Removing Tile Over Concrete Slab
Start by identifying the slab’s surface and any toppings—thin-set over bare concrete, a bonded membrane, or a poured leveling compound—because each substrate calls for a different removal strategy and toolset.
For thin-set, use a floor scraper or oscillating tool.
For bonded membranes or leveling compounds, cut sections with a jackhammer or rotary hammer with masonry bits, work methodically, and remove debris to check for damage.
Removing Tile Over Plywood Subfloor
Removing tile laid over a plywood subfloor calls for different tactics than concrete because the wood can’t take heavy impacts or excessive moisture—so you’ll need to be gentler and more selective about tools and techniques.
Use a putty knife, pry bar with a shim, oscillating multi-tool, and heat gun or chemical adhesive remover.
Score grout, lift tiles slowly, avoid sledgehammers, and repair damaged plywood promptly.
Comparison of Removal Methods Speed vs. Subfloor Safety
Although you can rip up tiles quickly with a demo hammer or chisel, faster methods often put more stress on the subfloor—so you’ll need to balance speed with the risk of cracking, gouging, or loosening underlying material. Choose gentler methods when preserving the subfloor matters, accept slower progress, and use appropriate tools to minimize impact.
| Method | Speed | Subfloor Risk |
|---|---|---|
| Demo hammer | Fast | High |
| Chisel/pry bar | Moderate | Moderate |
| Heat/softener | Slow | Low |
| Oscillating tool | Moderate | Low |
Common Problems and Mistakes That Cause Subfloor Damage
When you pry tiles with too much force or the wrong chisel angle, you can gouge or crack the subfloor beneath.
If you reach for heavy demolition tools before removing grout and loosening tiles, you’ll magnify that damage.
Also, not controlling vibration and impact lets shock travel into the substrate and weaken it over time.
Using Too Much Force or the Wrong Chisel Angle
If you pry tiles up with excessive force or hold the chisel at the wrong angle, you can gouge or crack the subfloor beneath without realizing it.
Work with controlled taps, keep the chisel bevel close to the surface, and angle it shallowly to slide under adhesive.
Stop when you feel resistance change; reassess technique rather than forcing the tool and risking damage.
Relying Too Early on Heavy Demolition Tools
Because heavy demolition tools bite fast, don’t reach for them until you’ve exhausted gentler methods; using a jackhammer, demolition hammer, or large pry bar too soon can tear up tile and shatter or gouge the subfloor beneath.
Start with hand tools, tapping chisels and pry bars gently. Work small sections, and switch to powered tools only when adhesive and tile are safely loosened to avoid costly repairs.
Failing to Remove Grout First
Although it’s tempting to pry up tiles whole, skipping grout removal first locks pieces together and forces you to lever against the subfloor. This often leads to gouges, torn underlayment, or splintered plywood.
Always score and remove grout lines first so tiles separate cleanly. Use a grout saw or oscillating tool with a grout blade, work slowly, and lift individual tiles to protect the substrate.
Not Controlling Vibration and Impact
When you don’t control vibration and impact while removing tiles, every hammer strike or pry can send shock through the subfloor and crack, splinter, or loosen the underlayment.
You should use padded tools, tap gently, and work in small sections.
Clamp or brace nearby boards, cushion impacts with scrap wood, and switch to powered tools with vibration dampening to protect the structure.
Tips and Best Practices to Protect the Subfloor
Work in small sections and test frequently so you can spot how the adhesive and substrate respond before you commit to a full pull.
Use heat, solvents, or scoring to loosen stubborn adhesive when it’s safe, keeping your tools at the right angle and using proper leverage to avoid gouging the subfloor.
Decide early whether the backerboard is worth preserving — remove it only if it’s damaged or preventing a solid, level surface.
Work in Small Sections and Test Frequently
Because ceramic tiles and their adhesive can vary across a floor, tackle removal in small sections and test frequently so you can spot problems early and limit damage.
Work a few tiles at a time, inspect the subfloor after each batch, and adjust your technique if you see gouging, delamination, or unevenness.
Pause to repair minor issues before continuing.
Use Heat, Solvents, or Scoring to Loosen Adhesive When Appropriate
If you hit stubborn adhesive after removing a few tiles, loosen it with heat, a solvent, or careful scoring so you don’t pry into the subfloor.
Warm the glue with a heat gun on low, scrape gently with a putty knife, or apply a manufacturer-recommended adhesive remover.
Score only to break the bond—avoid deep gouges—and ventilate when using chemicals to protect yourself and the subfloor.
Maintain Proper Tool Angles and Leverage
Angle your tools correctly and let leverage do the heavy lifting to avoid gouging the subfloor. Hold chisels at a low angle, use pry bars with fulcrums close to the tile edge, and work in short, controlled motions.
Let the tool’s geometry lift adhesive and tile fragments; don’t force upward prying. Switch to smaller tools for tight spots to maintain control.
When to Preserve Backerboard vs. Remove It
Keeping your tools at the right angle helps protect the subfloor, but you also need to decide whether the backerboard can stay in place or must come up.
Inspect for water damage, loose seams, or mold—if present, remove it. If it’s sound and properly fastened, you can often leave it, skim and retile, saving time and minimizing subfloor risk.
Repair and Prep After Tile Removal
Once the tiles are out, inspect the subfloor for gouges, splits, or any signs of delamination so you know what needs repairing.
Clean away adhesive residue and high spots, then level the surface so new flooring will sit flat.
If damage is widespread or the subfloor is soft, replace it—if it’s isolated, patching and reinforcing will usually do.
Identifying and Repairing Gouges, Splits, or Delamination
After you’ve cleared the tiles and substrate, inspect the surface for gouges, splits, or delamination—these defects compromise adhesion and must be addressed before new flooring goes down.
Mark damaged areas, remove loose material, and use epoxy or polymer-modified patching compound for deep gouges and splits.
For delaminated plywood, replace affected panels or bond and screw them down with construction adhesive and corrosion-resistant fasteners.
Cleaning and Leveling the Subfloor for New Flooring
With damaged areas repaired or replaced, you’ll want to clean and level the subfloor so new flooring will bond and sit flat.
Remove dust, adhesive residue, and nails, then inspect for low spots. Use a grinder or sander for high areas and a leveling compound for dips.
Check moisture and let cures complete before installing new flooring.
- Sweep and vacuum thoroughly
- Scrape old adhesive
- Sand high spots smooth
- Pour and trowel leveling compound
When to Replace vs. Patch Subfloor
If you find soft spots, rot, or widespread damage in the subfloor, you’ll usually need to replace sections rather than just patch them.
Small, localized cracks or shallow gouges, however, can often be repaired with filler and a leveling compound.
Inspect joists and around plumbing for hidden damage.
Replace unstable panels, sister joists if necessary, then use appropriate patch materials, sand smooth, and recheck flatness before new flooring.
Cost, Time, and When to Hire a Professional
You can expect DIY tile removal to take anywhere from a full weekend for a small room to several days for larger areas, and it’s physically demanding work.
Compare tool rental and disposal costs against a contractor’s estimate to see if saving money is worth the extra time and effort.
If you hit major subfloor damage, asbestos concerns, or the job is blowing your schedule, stop and call a pro.
Estimated DIY Time and Labor Difficulty
Expect a range of costs and a fair bit of manual labor when you remove ceramic floor tiles yourself: a small bathroom can take a full weekend for one person, while larger rooms often need two or more days and help lifting debris.
Plan breaks, recruit a helper for heavy lifting, and factor in cleanup. If you’re short on time, consider hiring help.
Cost Comparison: DIY Tools vs. Hiring a Pro
When weighing costs, consider both the price of rental or purchase tools and the value of your time: DIY saves labor fees—renting a chisel, jackhammer attachment, or floor scraper and buying safety gear might run $50–$300.
Hiring a pro costs $200–$800+ per day but speeds work, reduces risk, and guarantees subfloor protection.
Choose DIY for small jobs and tight budgets; hire pros for scope or complexity.
Signs You Should Stop and Call a Specialist
If the job starts overrunning your budget, dragging past a weekend, or uncovering problems you didn’t anticipate, call a specialist—continuing can cost you more in repairs, wasted time, and safety risks than hiring pros up front.
Stop and hire help if you find major subfloor damage, suspect mold or asbestos, lack proper tools, or face structural concerns.
Pros save time and avoid costly mistakes.
FAQ Quick Answers to Common Questions
You’ll find quick answers here to common concerns like how long removal takes for an average room, whether tiles can be reused, and whether older homes risk structural damage.
You’ll also learn which tools minimize surface harm and the safest ways to dispose of tiles and mortar.
Use these FAQs to decide if you can tackle the job yourself or if you should call a pro.
How long does tile removal usually take for an average room?
Wondering how long tile removal will take for an average room? You can expect a typical 10×12-foot room to take a skilled DIYer or small crew about 6–10 hours.
Time varies with tile type, adhesive strength, grout condition, and tools.
Plan for extra time to protect the subfloor, clear furniture, and clean up debris safely afterward.
Can I reuse tiles after removal?
Can you reuse tiles after removal? You can sometimes reuse ceramic tiles if they come off intact with minimal mortar residue.
Carefully pry and lift whole tiles, clean old adhesive, and inspect for chips or cracks. Match size, color, and glaze wear; leftover tiles may not blend.
Keep extra for repairs, but expect a portion to be unusable after demolition.
Will tile removal create structural problems in an older house?
If some tiles survived removal intact, you might still worry about what pulling out the rest will do to an older home’s structure.
You probably won’t damage framing by removing floor tile itself, but watch for weakened subfloor, rot, or hidden water damage beneath.
Inspect joists, underlayment, and adhesive patterns first. If you find decay or loose boards, repair before reinstalling new flooring.
What is the least damaging tool to remove a tile?
Which tool will do the least harm to your subfloor? Use a flat pry bar or wide putty knife combined with a small hammer for controlled leverage.
Score grout first, work from a loosened edge, and lift slowly to avoid chipping.
For glued tiles, a floor scraper with a sharp, replaceable blade on low-impact strokes minimizes damage while keeping the substrate intact.
How do I dispose of tiles and mortar safely?
Wondering how to get rid of old tiles and the mortar beneath them safely?
Wear gloves, eye and respiratory protection. Break tiles into manageable pieces, bag sharp fragments, and keep mortar chunks separate.
Check local landfill or recycling rules—some accept ceramic; others require construction waste drop-off. For large amounts, hire a licensed hauler.
Never burn tiles or dump them illegally.