How to Lay Laminate Flooring on Wooden Floors the Right Way
You can lay laminate directly over a sound, flat wooden floor by prepping it, adding the right underlayment, and using a floating click-lock installation while leaving expansion gaps around the perimeter. Inspect for rot or loose boards, sand high spots, fill gouges, and screw or add plywood where the subfloor’s unstable. Acclimate planks, stagger end joints, and use spacers, trim, and connections for a clean finish. Keep going to get step-by-step tips and troubleshooting.
How to Lay Laminate Flooring on Wooden Floors Quick Answer
You can lay laminate directly over sound, flat wooden subfloors by installing an underlayment and using the floating click-together method.
This approach works well in bedrooms, living areas, and other dry rooms where the existing wood is level, firmly secured, and free of rot or major gaps.
If the joists squeak or the surface isn’t stable, you should repair or add a plywood layer first.
One-sentence summary of the correct method
When laying laminate over an existing wooden floor, start by ensuring the subfloor is clean, dry, flat, and firmly fastened.
Then, lay an appropriate underlayment, acclimate and stagger boards, maintain expansion gaps, snap or glue panels per manufacturer instructions, and fasten connections and trims.
Follow manufacturer guidelines throughout so you install correctly and avoid buckling, gaps, or warranty issues when learning how to lay laminate flooring on wooden floors.
When this method is appropriate (room types, subfloor condition)
If the wooden subfloor is flat, dry, and securely fastened, laminate is a great choice for most living areas—bedrooms, living rooms, hallways, and home offices—where moisture is limited and foot traffic is moderate.
You should avoid wet areas like bathrooms, basements without proper moisture control, or kitchens with heavy spills.
Verify subfloor is level, clean, and structurally sound before installing.
Basic Understanding What You Need to Know
You’ll learn what laminate flooring is and how it differs from hardwood and engineered wood, including durability and appearance.
Laying laminate over existing wooden floors can be a practical option, but you’ll need to weigh the pros and cons like height buildup and ease of installation.
Also check the wooden subfloor’s structure and moisture levels, since stability and dryness are critical for a long-lasting installation.
What is laminate flooring and how it differs from hardwood and engineered wood
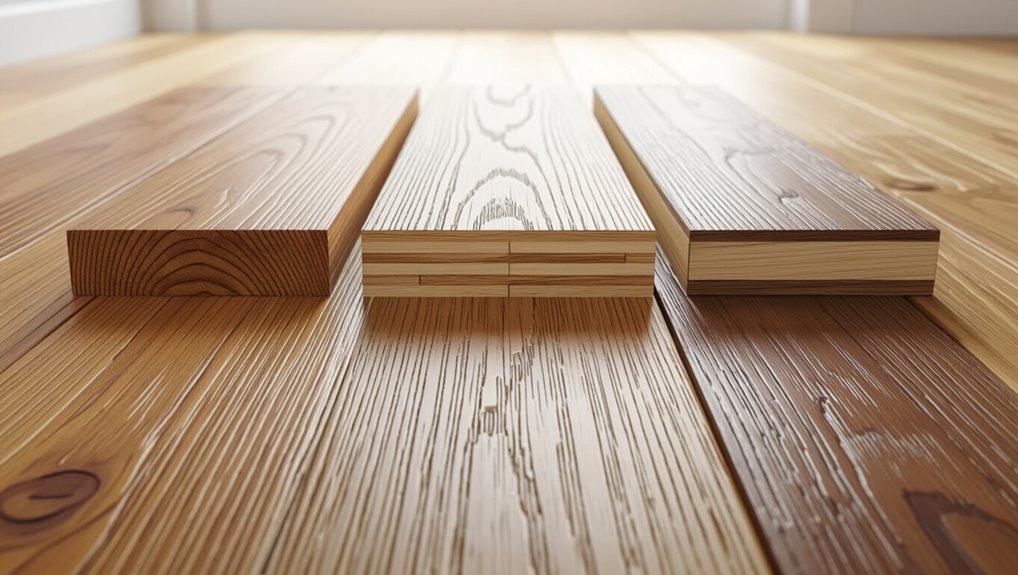
Laminate flooring is a man-made product that mimics the look of real wood by layering a high-resolution photographic image and protective wear layer over a core board.
It differs from hardwood and engineered wood in construction, durability, and cost.
You’ll find laminate has a fiberboard core and resin finish, is more scratch-resistant and affordable, but can’t be refinished like solid or engineered planks.
Why laying laminate over existing wooden floors can work pros and cons
When your existing wood floor is flat, stable, and securely fastened, laying laminate over it can save time and effort, but you’ll want to weigh a few important trade-offs first.
You’ll get faster installation, less mess, and preserved elevation, but you might reduce ceiling height, hide problems, complicate future repairs, and risk uneven wear if the substrate isn’t perfectly even.
Structural and moisture considerations for wooden subfloors
Because a wooden subfloor both supports the finished floor and separates it from moisture below, you need to check its structure and dampness before you start; inspect for rot, looseness, and uneven areas.
Measure moisture content with a meter, and verify joists and fastenings are solid so the laminate can float without premature failure.
Then level, repair, replace damaged boards, and confirm relative humidity and moisture readings meet manufacturer limits before installing.
Tools, Materials, and Preparations
Before you start, grab the essential tools and materials—saw, spacers, tapping block, underlayment, adhesive or trim, and enough planks and consumables for waste.
You’ll choose an underlayment suited to a wooden subfloor and gather anything extra for moisture or sound control.
Finally, inspect and measure the room carefully so you know plank layout, connections, and any subfloor repairs needed.
Tools required
You’ll need a compact set of tools to get laminate flooring down quickly and accurately: a tape measure, pencil, utility knife, spacers, tapping block, pull bar, rubber mallet, saw (miter, jigsaw, or circular with a fine-tooth blade), and safety gear (glasses, gloves, ear protection).
Use them to measure, cut, fit, and protect surfaces while working efficiently.
- Measure precisely
- Cut cleanly
- Fit snugly
- Protect yourself
Materials and consumables required
A few basic materials and consumables will keep your laminate installation smooth and durable: underlayment (foam or cork), moisture barrier (if installing over concrete), junction strips, quarter-round or baseboard, adhesive or manufacturer-recommended seam sealant (for certain designs), finishing nails or screws for trim, and replacement blades or sanding pads for last-minute adjustments.
- Spare planks for mistakes
- Changeover profiles
- Cleaners and rags
- Protective pads for furniture
Choosing the right underlayment for wooden subfloors
How do you pick the right underlayment for a wooden subfloor?
Choose a thin foam or cork underlayment designed for wood to cushion, reduce noise, and allow slight movement.
Make certain it has a vapor barrier if moisture is a concern.
Match thickness to your laminate manufacturer’s recommendation, and avoid compressible or rotting materials.
Install seams tightly and tape per instructions.
Inspecting and measuring the room checklist
Before you cut or lay a single plank, gather tools and walk the room to inspect and measure everything: tape measure, chalk line, straightedge, level, pry bar, utility knife, spacers, and a quality underlayment plus extra laminate for waste.
Check for flatness, moisture, door clearances, and threshold heights.
- Measure length and width
- Mark high/low spots
- Note obstacles and vents
- Calculate waste and layout plan
Pre-installation Inspection and Repairs (Step 1)
Before you start laying boards, you’ll want to inspect the subfloor for levelness—check for flatness within the manufacturer’s tolerance and mark any high or low spots.
Test for moisture in wooden floors and address loose boards, squeaks, gaps, and remnants of adhesives, finish layers, or nails that could interfere with the click system.
Repair or replace problem areas so the surface is dry, solid, and smooth before proceeding.
Checking for level and flatness acceptable tolerances
Because a flat, level subfloor determines how your laminate will look and perform, you’ll need to check for dips, humps, and slopes and compare them to the manufacturer’s tolerances before you start laying boards. Use a straightedge and level; measure deviations and note needed corrections.
| Issue | Tolerance |
|---|---|
| Dip | 3/16″ per 6′ |
| Hump | 3/16″ per 6′ |
| Slope | 1/8″ per 3′ |
Identifying and repairing loose boards, squeaks, and gaps
Uneven or loose subflooring often shows up as squeaks, visible gaps, or boards that shift underfoot.
So after checking flatness, you should walk the entire room and listen and feel for movement.
Secure loose boards with construction screws or ring-shank nails into joists.
Fill gaps with wood shims or floor-leveling compound, and replace severely damaged boards before installing underlayment and laminate.
Moisture testing wooden floors methods and thresholds
When you’re prepping a wooden subfloor for laminate, testing moisture is essential to prevent cupping, buckling, or premature failure; use both a reliable moisture meter and a secondary method (like the plastic-sheet or calcium chloride test) to confirm readings.
Aim for wood moisture content within manufacturer limits (typically 6–12%) and a subfloor-vapor differential under 2–4%.
Repeat tests across the room.
Dealing with adhesives, finish layers, and nails
Before you lay any planks, inspect and remove old adhesives, finish coatings, and protruding nails so the subfloor is flat, clean, and dry.
Scrape residual glue, sand glossy finishes to promote underlayment adhesion, and pull or countersink nails.
Fill gaps or gouges with wood filler, let it cure, then sand smooth.
Sweep and vacuum thoroughly before installing underlayment.
Preparing the Existing Wooden Floor (Step 2)
Before you lay planks, clean the wooden subfloor thoroughly, sand rough spots, and use a floor grinder or plane to flatten any high areas.
If the board layer is uneven or weak, install a repair sublayer or screw down a plywood underlayment to create a stable, level base.
Finally, choose and roll out the right underlayment and vapor barrier—foam for cushioning, cork for sound, or a vapor-rated option for moisture protection—and tape seams per manufacturer instructions.
Cleaning, sanding, and flattening high spots
Clear the room and give the existing wood a thorough sweep and vacuum so you can spot any dirt, nails, or loose boards that will interfere with the new laminate.
Remove nails, tighten loose boards, and fill gaps with wood filler.
Sand high spots with a belt or orbital sander until flat, then re-vacuum and wipe with a damp cloth to remove dust before laying underlayment.
Installing a repair sublayer or plywood if needed when and how
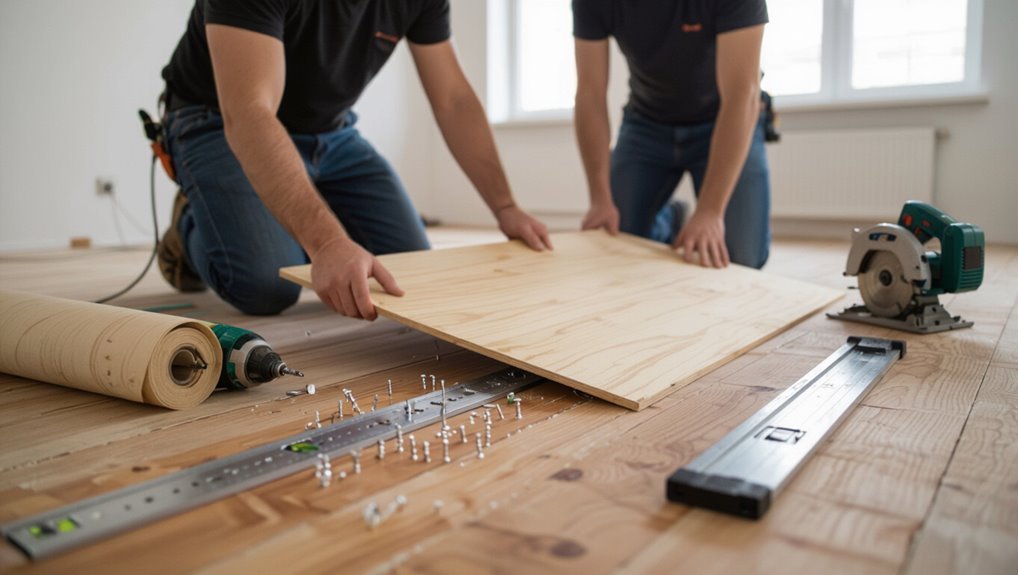
If your existing subfloor has soft spots, large gaps, or uneven areas that sanding and filler won’t fix, you’ll need to install a repair sublayer or a layer of plywood to create a stable, level base for the laminate.
Remove damaged boards, fasten joists, then screw down exterior-grade plywood (3/8″–1/2″ or as required) with staggered seams and construction adhesive for rigidity.
Laying appropriate underlayment vapor barrier, foam, cork options
1 essential layer you’ll add over the repaired wooden floor is the underlayment: it cushions, smooths minor imperfections, and can act as a vapor barrier depending on the material you choose.
Pick foam for basic cushioning and sound reduction, cork for superior noise control and eco benefits, or a combined foam/vapor barrier roll for moisture-prone areas.
Lay seams taped, continuous under boards, trim at walls.
Planning the Layout (Step 3)
Decide which direction the planks should run for the best look and room flow, and keep aesthetic details like staggered joints in mind.
Measure the space, calculate boards needed including a waste factor (usually 5–10%), and plan cuts with a tape measure.
Snap starter lines and leave the recommended expansion gap around the perimeter before laying the first row.
Determining installation direction and aesthetic considerations
When choosing the direction to lay your laminate, think about how light, room shape, and sightlines will affect the final look; run planks parallel to the longest wall or toward the main light source to make the space appear larger and more cohesive.
Also consider traffic flow, focal points, and connections to adjacent rooms. Stagger joints for a natural appearance and balance plank width with room scale.
Calculating material needs and waste factor measuring method
Now that you’ve settled on direction and stagger patterns, you’ll want to calculate how much laminate to buy and include a waste factor for cutting and mistakes. Measure room area, add 5–10% for straight runs, 10–15% for complex layouts. Round up to full boxes. Visualize with this quick reference:
| Item | Example |
|---|---|
| Room area | 200 sq ft |
| Waste factor | 10% |
| Boxes needed | 6 |
| Extra planks | 2 |
Marking starter lines and accounting for expansion gaps
Before you lay a single plank, snap a straight starter line and plan consistent expansion gaps so the floor can float and move without buckling.
Measure from the wall, mark the gap (usually 8–10mm) along the starter line, then use spacers as you install the first row.
Keep gaps at doorways and against fixed fixtures; record adjustments for trim and thresholds.
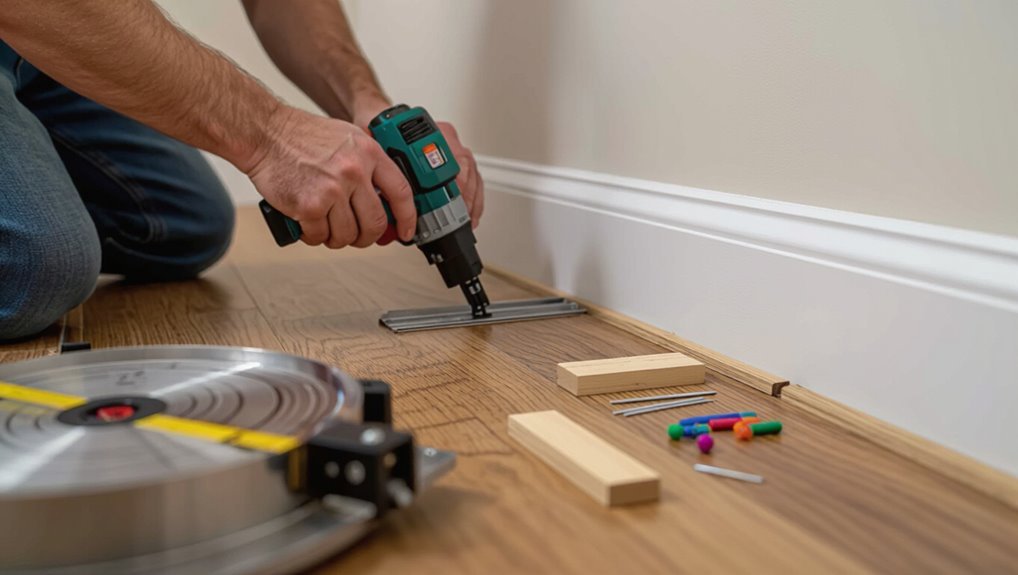
Installation Steps Step-by-Step Guide (Step 4)
Before you start, let the laminate acclimate in the room for the recommended time so the planks settle to the temperature and humidity.
Begin the first row by positioning planks with spacers, cutting as needed, then work each subsequent row using staggered joints and the manufacturer’s recommended stagger patterns.
Use proper locking techniques for click-lock or glue seams and carefully fit planks around doorways, radiators, and other obstacles.
Acclimating laminate planks
Because laminate expands and contracts with temperature and humidity, you should let the planks acclimate in the room where they’ll be installed for at least 48 hours.
Open boxes, lay planks flat off the walls, and keep HVAC running at normal conditions.
Check moisture of subfloor and planks; if readings exceed manufacturer limits, wait longer or address moisture before proceeding.
First row: positioning, spacers, and cutting
Start the first row along the longest, straightest wall, leaving an expansion gap and using spacers to keep that gap consistent as you snap each plank into place.
Measure and mark the final plank, cutting its length with a saw for a snug fit. Keep tongues facing the wall, check alignment frequently, and remove spacers only after several rows are secure.
Staggering joints and best stagger patterns

When you lay subsequent rows, stagger the end joints so they don’t line up with the joints in the previous row—this gives the floor strength and a natural look.
Aim for stagger distances of 6–12 inches for random appearance; avoid repetitive short joints.
Alternate long and short boards, cut starter pieces at varied lengths, and plan layout to prevent four-way joints for stability and visual flow.
Locking system techniques for click-lock and glued seams
Although the exact motion varies by manufacturer, you’ll engage the locking system by angling each board into the previous row and snapping it down or sliding it forward so the tongue and groove lock cleanly; for glued seams you’ll apply adhesive in the groove or on the short end, align carefully, and press firmly to eliminate gaps.
Work row by row, tapping joints with a block, wiping excess glue immediately.
Fitting around obstacles, doorways, and radiators
Measure and mark each board carefully before cutting so your planks fit snugly around doorways, pipes, and radiators; you’ll work left to right, fitting full boards first and scribing or notching the edge pieces to follow each obstacle’s shape.
Use a coping compass for curves, a jigsaw for cutouts, and test-fit pieces. Leave required gap at fixed objects and fasten junction trims around thresholds.
Final rows, trimming, and maintaining expansion gaps
As you reach the final rows, work carefully so your cuts are precise and the expansion gap stays consistent; you’ll trim the last boards lengthwise, scribe them to fit, and use a pull bar to lock them into place without forcing the joints.
Check gaps at walls and thresholds, maintain recommended spacing with spacers, reinstall trim or use reducer strips, and leave clearance for seasonal movement.
Finishing Touches and Reinstallations (Step 5)
Now you’ll add the finishing trim—install baseboards, quarter-round, and junction strips to cover gaps and create a clean edge.
Re-hang doors and adjust thresholds so they clear the new floor without binding.
Finish with a thorough clean and follow initial care tips to protect the surface while it settles.
Installing baseboards, quarter-round, and transition strips
Finish the look by reinstalling baseboards, adding quarter-round where the flooring meets the base, and fitting threshold strips at doorways and between different floor types.
Nail or adhesive-mount baseboards, coping corners for clean joints. Use flexible caulk behind quarter-round to hide expansion gaps.
Choose connector strips matching height and profile, secure per manufacturer instructions, and check for smooth, secure connections that prevent tripping.
Re-hanging doors and adjusting thresholds
1 careful step you shouldn’t skip is rehanging doors and adjusting thresholds so everything opens smoothly and seals correctly.
Check clearances, trim door bottoms if they catch, and reattach hinges with proper shims. Align door frames so latches engage.
Install or adjust thresholds and connector strips to bridge height differences and create a tight seal against drafts and moisture without binding the door.
Cleaning and initial care after installation
After rehanging doors and setting thresholds so everything operates smoothly, turn your attention to cleaning and initial care to protect your new floor.
Sweep or vacuum debris, then mop with a manufacturer-approved laminate cleaner—don’t use excess water.
Install felt pads on furniture, avoid high heels and heavy dragging, and maintain stable indoor humidity.
Check seams after a week and tighten trim if needed.
Common Problems, Mistakes to Avoid, and Troubleshooting
When things go wrong—buckling, gapping, cupping, squeaks, or moisture damage—you’ll want to spot the cause quickly and fix it correctly.
Check expansion gaps, underlayment and subfloor flatness, and moisture levels before blaming the boards.
I’ll also point out common DIY mistakes and practical fixes so you can prevent repeat problems.
Buckling, gapping, and cupping causes and fixes
If your laminate starts buckling, gapping, or cupping, it usually means moisture, improper acclimation, or installation errors created stresses the floor can’t handle; you’ll want to identify the specific cause quickly so you can choose the right fix.
Check moisture with a meter, verify proper acclimation, restore correct expansion gaps, replace damaged boards, fix subfloor unevenness, and address leaks or humidity with ventilation or dehumidification.
Squeaks or movement over wooden subfloors solutions
Moisture and poor installation can make boards cup or gap, but squeaks and lateral movement usually point to problems with the wooden subfloor or how the laminate was fastened.
Inspect joists and subfloor for loose or missing screws, add blocking where joists flex, tighten or replace fasteners, and use construction adhesive between subfloor seams.
Refloat or refasten loose planks to eliminate shifting.
Moisture-related failures and how to mitigate them
Because water and humidity attack laminate from both below and above, you need to treat moisture control as the top priority before and after installation.
Test subfloor moisture with a meter, use a vapor barrier and appropriate underlayment, seal gaps at thresholds and around pipes, maintain indoor humidity 30–50%, and address leaks quickly.
Regular inspections prevent swelling, cupping, and delamination.
Mistakes DIYers commonly make
Many DIYers rush into laying laminate and make avoidable errors that lead to squeaks, gaps, and premature failure. You can prevent most issues by preparing properly, following expansion gap rules, and using correct tools.
Check subfloor flatness, acclimate boards, and test-fit panels. Troubleshoot squeaks by tightening joins and replacing damaged planks.
- Skipping subfloor prep
- Ignoring expansion gaps
- Poor acclimation
- Using wrong tools
Best Practices and Pro Tips
You’ll learn simple tips that give your floor a crisp, professional edge—tight seams, staggered joints, and neat connections.
I’ll cover maintenance habits that keep laminate looking new longer, like proper cleaning, humidity control, and protective pads.
And we’ll flag when a job is worth calling a pro instead of trying it yourself.
Tips for a professional-looking finish
A few small habits will make your laminate job look like it was done by a pro: check and acclimate every plank, keep tight, consistent gaps at walls, and snap crisp, well-aligned seams as you go.
Use spacers, stagger end joints by at least 12 inches, trim doors for clearance, clean each row before locking, and inspect for chips or height mismatches as you finish.
Long-term maintenance to extend laminate life
Because laminate’s wear layer protects but doesn’t renew itself, regular care will keep your floor looking new and prevent costly replacements.
You’ll want predictable routines and quick fixes to avoid damage.
- Sweep or vacuum daily to remove grit
- Use a damp mop with manufacturer-approved cleaner
- Place mats at entries and felt pads under furniture
- Wipe spills immediately and monitor humidity levels
When to call a pro vs. DIY
Wondering whether to tackle a laminate project yourself or call a pro?
If you’ve got basic tools, straight rooms, and patience, you can save money by DIYing simple installs.
Call a pro for uneven subfloors, complex layouts, large areas, or moisture issues.
Pros guarantee proper underlayment, changes, and warranty compliance.
Weigh time, skill, and potential costly mistakes before deciding.
Comparison: Laying Laminate on Wood vs. Removing the Wooden Floor
You’ll weigh time, cost, and durability when deciding whether to lay laminate over existing wood or pull it up first.
Laying over wood is quicker and cheaper but can hide damage that shortens laminate life, while removal adds labor and expense but gives you a true flat, long-lasting base.
Choose removal when the subfloor is warped, rotted, or uneven enough to risk laminate performance.
Time, cost, and durability comparison
If you’re deciding whether to lay laminate over existing wood or tear the old floor out, consider how each option affects time, cost, and longevity. Laying over saves time and money, may shorten lifespan slightly if subfloor imperfect. Removing adds time and cost but gives a cleaner base and potentially longer durability.
| Option | Impact |
|---|---|
| Lay over | Faster, cheaper |
| Remove | Slower, costlier |
| Durability | Moderate vs higher |
| Disruption | Low vs high |
When replacement is preferable
When the existing wood is warped, rotten, uneven, or has major moisture damage, replacing the floor is usually the smarter choice because it gives you a stable, long-lasting base for laminate and prevents future problems that a quick overlay could hide.
You should also remove old boards if squeaks, insect damage, or persistent moisture exist; replacement lets you correct subfloor issues and guarantees warranty compliance.
Safety, Warranty, and Building Code Considerations
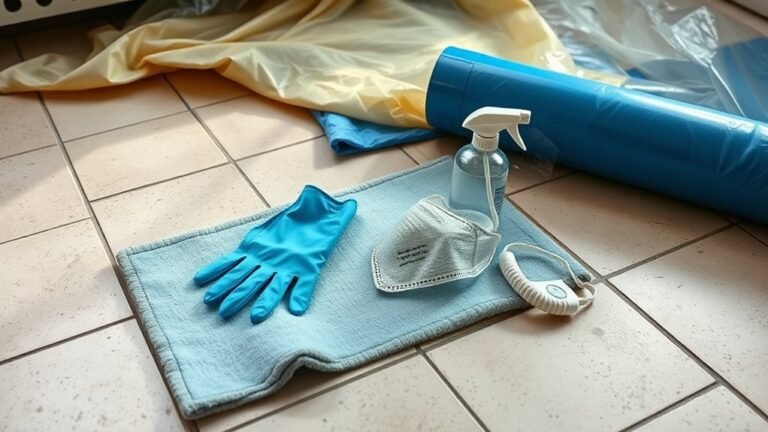
Before you start cutting and fitting, make sure you wear proper PPE—gloves, eye protection, and a dust mask—and follow safe tool practices to avoid injuries.
Check the manufacturer’s warranty for installation requirements, because improper underlayment, adhesive use, or subfloor prep can void coverage.
Finally, confirm local building codes and moisture barrier rules for your area so your installation is compliant and lasts.
Safety precautions and PPE
Safety comes first: wear proper PPE—safety glasses, knee pads, hearing protection, and a dust mask or respirator—and make sure your work area has good ventilation and stable lighting.
Keep gloves to protect hands while handling boards and tools. Use push sticks and guards with saws, secure loose rugs, unplug tools before adjusting, and store sharp blades safely to prevent trips, cuts, and hearing damage.
How installation affects laminate manufacturer’s warranty
You’ve taken steps to protect yourself and your workspace, and now you should pay attention to how your installation choices affect the laminate manufacturer’s warranty.
Follow the manufacturer’s instructions for acclimation, underlayment, expansion gaps, and approved adhesives or fasteners.
Deviating from guidelines, using improper materials, or failing to document conditions can void coverage.
Keep receipts and photos to support any future claims.
Local code considerations and moisture barriers
When planning your installation, check local building codes and any HOA rules for moisture barrier requirements, vapor retarder ratings, and approved underlayment types so you don’t install materials that’ll fail inspection or void permits; follow manufacturer and code specs for barrier placement, seams, and fasteners.
Test subfloor moisture, use approved vapor retarders where required, and keep documentation to prove compliance for warranties and inspections.
Frequently Asked Questions
You’ll find answers to common concerns like gluing laminate to wood, how much expansion gap to leave around walls and pipes, and whether you can skip plywood over uneven hardwood.
You’ll also learn whether laminate will hide minor subfloor imperfections and how long to wait before moving furniture back.
Read on for clear, practical guidance.
Can laminate be glued down over wooden floors?
Can you glue laminate directly over existing wooden floors? You can, but only in specific situations: the subfloor must be dry, flat, clean, and structurally sound.
Use manufacturer-approved adhesives and compatible laminate designed for glue-down installation. Avoid gluing over loose, cupped, or uneven boards.
Test adhesion in a small area first, and follow warranty and moisture guidelines to prevent future problems.
How much gap should I leave around walls and pipes?
Leave a 1/4-inch to 3/8-inch expansion gap around walls and at least a 3/8-inch gap around pipes and door jambs so the laminate can expand and contract without buckling.
Use spacers while laying boards, cut pipe collars or use rosettes to cover gaps, and trim under door jambs for a clean fit.
Measure consistently and maintain gaps around fixtures.
Can I install laminate over uneven old hardwood without plywood?
Wondering whether you can lay laminate over uneven old hardwood without plywood? You can, but only if you level and stabilize the surface first.
Floatable underlayments or self-leveling compound fix moderate dips; secure loose boards and fill gaps.
Severe irregularities still need a plywood or backer board layer.
Always check manufacturer tolerances for flatness before installing to avoid warranty issues.
Will laminate hide minor imperfections in wooden subfloors?
How much will laminate hide minor imperfections in a wooden subfloor?
Laminate and underlayment can mask small gaps, slight cupping, and shallow dents, but they won’t fix structural issues, large unevenness, or loose boards.
You should level, secure, and repair noticeable defects before installing.
Minor surface flaws are usually acceptable, but proper prep guarantees a stable, long-lasting floor and prevents clicking or damage.
How soon can I move furniture back after installation?
When can you start moving furniture back onto your new laminate floor?
Wait at least 24–48 hours for adhesive or click-lock seams to settle and for any underlayment moisture to equalize.
Use furniture sliders or lift heavy items to avoid scratches, and replace area rugs after a week.
Heavy pieces like cabinets may need professional reinstallation or extra support to prevent floor flexing.