How to Install Tongue and Groove Flooring: A Detailed Step-by-Step Guide
You can install tongue-and-groove flooring yourself by prepping a flat, dry subfloor, acclimating boards 72 hours, and laying a vapor barrier and underlayment. Start with a straight starter row, use spacers for expansion, angle tongues into grooves, and tap boards snug with a block and mallet while staggering end joints. Fasten per manufacturer instructions and finish trim after flooring settles. Follow these steps and you’ll learn detailed tips, troubleshooting, and pro techniques to finish like an expert.
How to Install Tongue and Groove Flooring and Overview
You can install tongue and groove flooring yourself if you’ve got basic carpentry skills and the right tools, but some jobs are better left to a pro.
Consider hiring help for complex layouts, uneven subfloors, or large areas to save time and avoid costly mistakes.
I’ll also cover how long a typical project takes, what it usually costs, and the skill level each stage requires.
Quick Answer: Can you install tongue and groove flooring yourself?
Curious whether you can install tongue and groove flooring yourself? Yes — you can.
With basic carpentry skills, proper tools, and patience you’ll follow how to install tongue and groove flooring: prepare subfloor, acclimate boards, stagger joints, and secure boards correctly.
Expect a learning curve; plan carefully, measure precisely, and work methodically for a neat, durable result you’ll be proud of.
When to hire a professional vs DIY
While many homeowners can tackle tongue-and-groove flooring, hire a pro when the project involves complex room layouts, problematic subfloors, or expensive hardwood that leaves little room for mistakes.
You’ll want expert help if you fear ruining material, can’t handle moisture issues, or need flawless results.
Consider emotions:
- Relief from stress
- Pride in perfect finish
- Anxiety about mistakes
- Confidence in warranty
Project time, cost estimates, and required skill level
Because subfloor prep, room size, and material choice all affect the schedule, plan realistic timeframes before you start. You’ll need basic carpentry skills for DIY, two days for a small room, and more for complex patterns. Budget depends on species and finish; labor raises costs.
| Task | Time | Cost Range |
|---|---|---|
| Prep | 4–8 hrs | $0–$200 |
| Install | 1–3 days | $200–$2,000 |
| Finish | 2–6 hrs | $50–$300 |
What Is Tongue and Groove Flooring and Why Choose It
Tongue and groove flooring features planks with a protruding tongue on one edge and a matching groove on the other. You’ll find them in solid, engineered, laminate, and softer woods like pine.
You’ll choose it for its tight fit and stability, long-lasting durability, and clean, continuous aesthetic.
Keep in mind materials and moisture levels affect suitability—solid wood is great for dry spaces, engineered and laminate work better where humidity varies.
Definition and construction (tongue, groove, plank types)
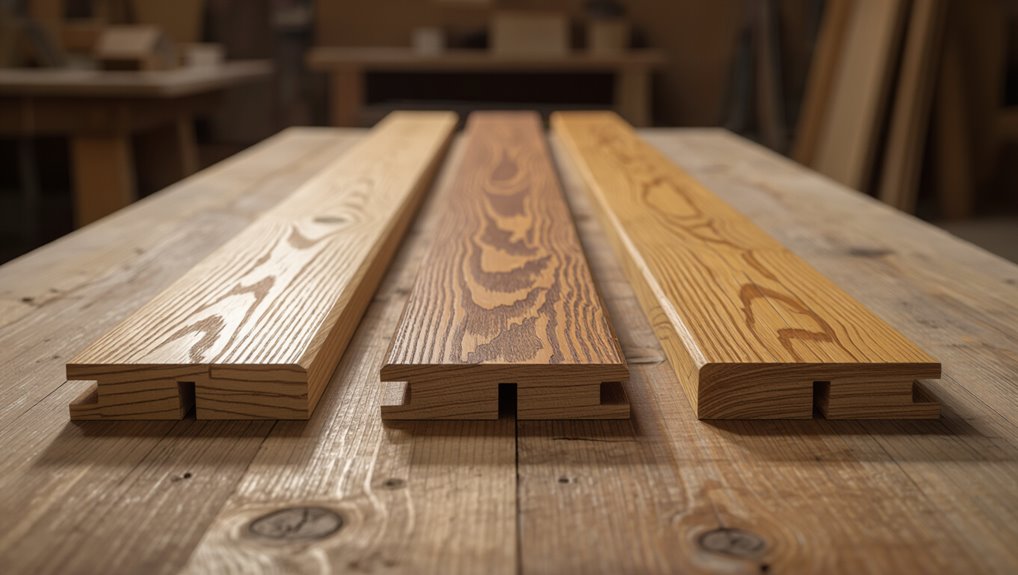
A secure interlocking profile makes tongue-and-groove flooring both sturdy and easy to install: each plank has a projecting “tongue” on one edge and a matching “groove” on the other that fit together to lock the boards in place.
You’ll encounter solid, engineered, and laminate planks, plus variations like micro-beveled or V-groove edges; milling precision and material affect fit and finish.
Benefits: durability, aesthetics, stability
Durability, visual appeal, and dimensional stability make tongue-and-groove flooring a smart choice for many homes and projects: it resists movement and gaps, looks seamless when installed, and stands up to daily wear better than many loose-laid options.
You’ll enjoy fewer repairs, consistent floorplane performance across seasons, and a polished, continuous look that boosts resale value while simplifying maintenance and long-term care.
Common materials: solid wood, engineered wood, laminate, pine
Flooring comes in several tongue-and-groove options—solid wood, engineered wood, laminate, and pine—so you can pick the balance of look, performance, and budget that fits your project.
Choose solid for authentic grain and refinishing, engineered for dimensional stability, laminate for cost-effective wear resistance, and pine for a softer, rustic feel.
Each material affects installation technique and finishing choices.
Limitations and suitability by room
Because tongue-and-groove planks interlock tightly, they work well in living areas and bedrooms where stability and a seamless look matter.
However, they’re less suitable for bathrooms, laundry rooms, or basements unless you choose water-resistant engineered or laminate options and take extra moisture-control steps.
You should avoid solid wood in high-humidity spots, prep subfloors for moisture barriers, and consider changes for temperature variations.
Tools, Materials, and Preparation
Before you start, gather a complete tool list (and any optional power tools) plus materials like underlayment, adhesives, and fasteners so you won’t stop mid-job.
Measure the room carefully, calculate board quantities with a waste allowance, and inspect the subfloor for flatness, damage, and moisture using a checklist and a moisture meter.
Finally, prepare the site by acclimating the flooring, controlling temperature and humidity, and clearing the room.
Full tools list and optional tools
Tools make the job predictable and faster, so gather everything you’ll need before you start: essential tools include a tape measure, carpenter’s square, chalk line, rubber mallet, pneumatic or manual flooring nailer (or a nail set if face-nailing), circular saw or miter saw, jigsaw, pry bar, utility knife, knee pads, and a moisture meter;
optional items that speed installation or improve finish are a flooring pull bar, tapping block, floor roller, compressor and hose (for a pneumatic nailer), spacer wedges, and a finish nailer for trim.
- Feel confident
- Stay safe
- Save time
- Enjoy the result
Materials and accessories needed (underlayment, adhesives, fasteners)
You’ve got the right tools; now gather the materials and accessories that let the installation perform and last.
Choose a moisture-resistant underlayment (foam or cork) with vapor barrier where needed. Use recommended flooring adhesive for glue-down installations and construction adhesive for trims.
Select compatible finish nails or flooring cleats for nail-down jobs, plus adhesive gun, spacers, connector strips, and matching trim pieces.
Measuring and calculating materials (waste allowance)
When you measure your room accurately and account for waste, you’ll order the right amount of tongue-and-groove flooring and avoid costly delays. Measure length and width, add 5–10% waste for straight runs or 10–15% for angled cuts. Round up to whole boxes. Use the table to track dimensions, coverage per box, and waste allowance.
| Room | Coverage/Box | Waste % |
|---|---|---|
| A | 20 sq ft | 10% |
| B | 25 sq ft | 12% |
Subfloor inspection checklist and moisture testing
Before you lay any boards, inspect the subfloor and test for moisture so you don’t trap problems under your new floor.
Check for level, rot, squeaks, and proper fastening. Use a moisture meter and hygrometer; compare to manufacturer specs. Fix issues before proceeding.
- Don’t ignore soft spots
- Don’t gamble with dampness
- Don’t tolerate unevenness
- Don’t rush repairs
Site preparation: acclimation, temperature, humidity, room clearing
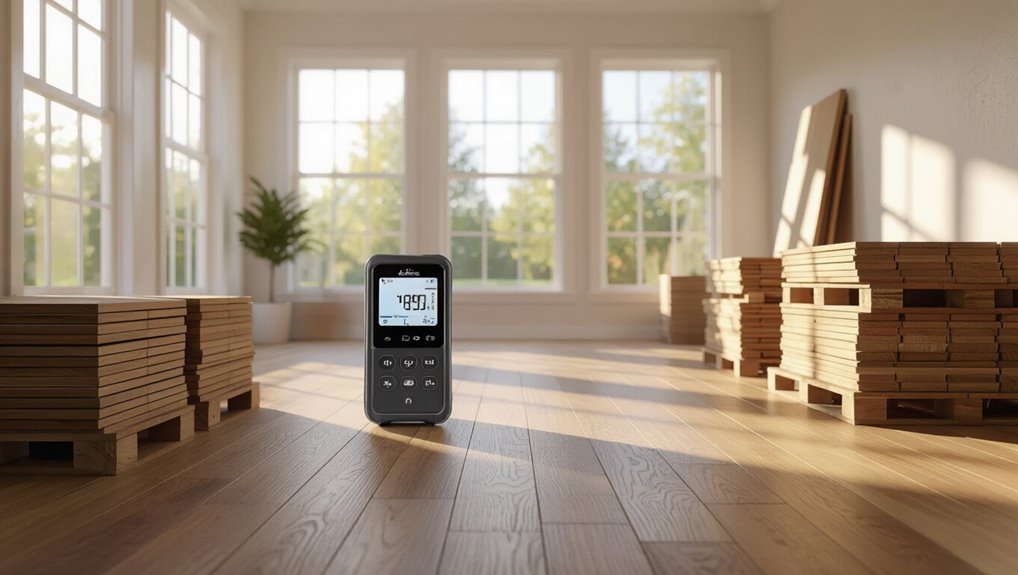
Because wood responds to its surroundings, you need to acclimate the flooring and control the room’s temperature and humidity before installation; clear the space of furniture and trim door jambs so boards fit and air can circulate.
Stack cartons off the floor on sticks, open boxes for several days, maintain 60–80°F and 35–55% RH, and use humidifier or dehumidifier as needed.
Step-by-Step Installation Process
Before you start laying boards, make sure you acclimate and inspect them, then prep the subfloor by leveling, cleaning, and repairing any damage.
Next, install the required underlayment and moisture barrier, plan your layout for direction, expansion gaps, and stagger, and mark your guide lines.
Begin the first row by aligning boards carefully and using spacers to maintain the correct gap.
Step 1 Acclimate and inspect boards
Acclimating and inspecting your tongue-and-groove boards is the first practical step you’ll take to guarantee a stable, long-lasting floor.
Store unopened bundles in the room for 72 hours, flat and off the ground.
Check each board for warps, splits, or color variation; set defective pieces aside.
Measure moisture content; accept boards within manufacturer-specified range before proceeding.
Step 2 Prep the subfloor: leveling, cleaning, repair
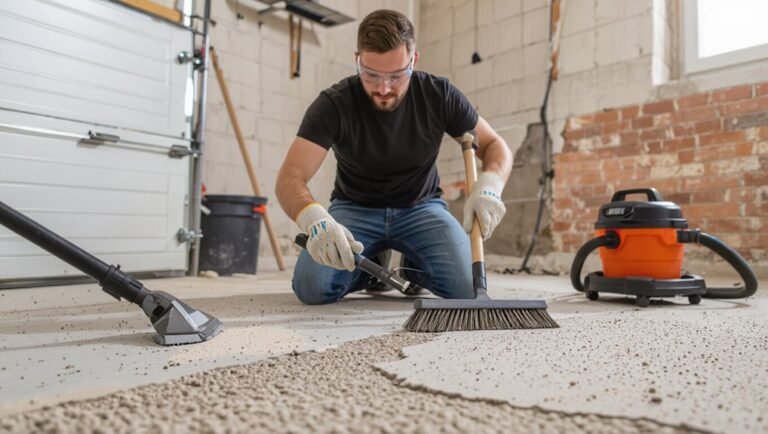
Step 2 gets your subfloor ready so the boards sit flat and lock properly: start by removing debris, nails, or old adhesive, then sweep and vacuum thoroughly.
Check for low spots, high spots, and squeaks.
Sand or shim high areas, fill gaps and depressions with floor-leveling compound, and repair rotten sections or loose panels so the surface is clean, solid, and uniformly flat.
Step 3 Install underlayment and moisture barrier (if required)
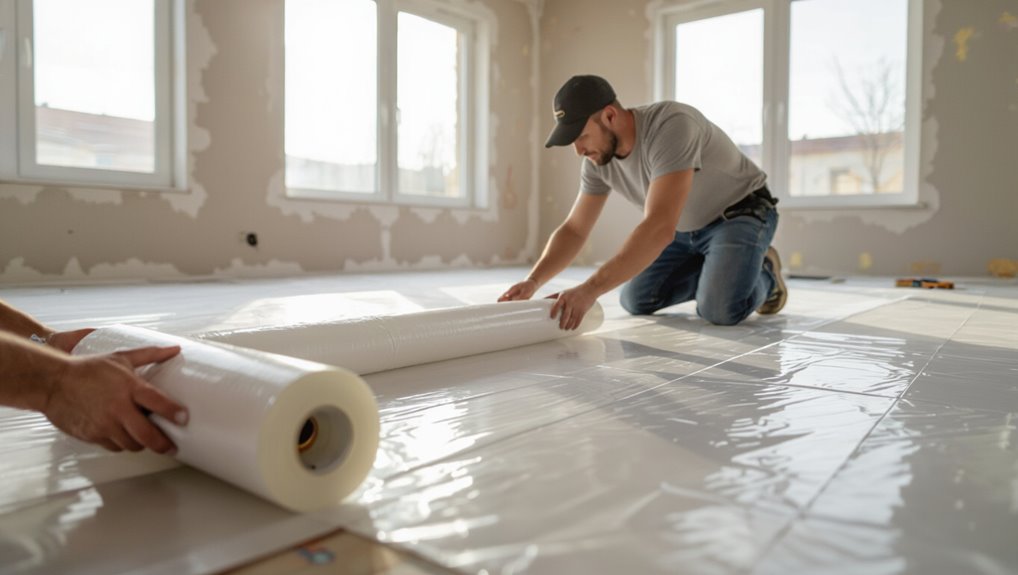
Now you’ll lay the underlayment and any required moisture barrier to protect the flooring and guarantee a flat, stable surface for the tongue-and-groove boards to lock into.
Roll out vapor barrier where moisture is a concern, overlap seams and tape.
Lay foam or cork underlayment smoothly, trimming at walls.
Butt seams tightly, stagger joints from subfloor seams, and follow manufacturer recommendations for adhesives or fasteners.
Step 4 Layout planning: direction, expansion gaps, stagger pattern
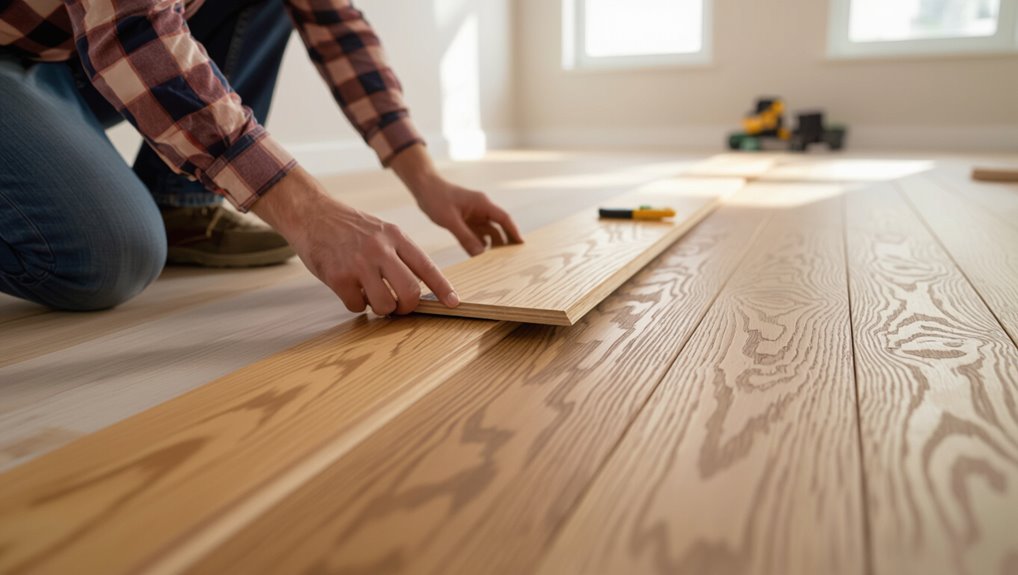
With your underlayment and moisture barrier in place, plan the board layout so the floor looks balanced and performs well.
Choose running boards parallel to the longest light source or main traffic flow.
Allow 1/4″–3/8″ expansion gaps at walls and fixed objects.
Stagger end joints at least 6–12″ to avoid a herringbone effect and guarantee structural stability and visual rhythm.
Step 5 First row installation: alignment and spacers
Before you lay the first board, dry-fit a full row along the starting wall to check alignment and trim the final piece so it’s at least the minimum width recommended by the manufacturer.
Place the first real board with its groove toward the wall, use consistent spacers to maintain the expansion gap, and guarantee boards sit straight using a chalk line or straightedge.
Step 6 Installing subsequent rows: joining tongue and groove, tapping techniques

Start each new row by angling the tongue of the board into the groove of the previous row and lowering it flat until the seam closes; if the boards resist, use a tapping block and a mallet to gently tap the tongue until it fits snugly, keeping the face of the board flush and the end joints tight.
Continue row by row, staggering seams, checking alignment, and tapping lightly to close gaps without damaging edges.
Step 7 Cutting and fitting end pieces, doorways, and radiators
Measure and mark each final row and tricky opening carefully, then cut pieces to fit while preserving the required expansion gap.
For end pieces, rip boards to width with a circular saw, test-fit, and trim as needed.
Around doorways and radiators, scribe cuts to adjacent walls or pipe shapes, leaving clearance for movement.
Clean edges and secure pieces per manufacturer instructions.
Step 8 Installing final rows and dealing with tight fits
When you reach the final rows, you’ll work carefully from left to right, fitting narrow strips and tapping them into place while maintaining the required expansion gap.
Use a pull bar for tight joints and check alignment frequently so you don’t force pieces out of row.
Trim last boards to width, test-fit before locking, sand any high spots, and use spacers to keep the gap uniform.
Step 9 Finishing touches: trim, transition strips, baseboards
3 finishing steps tie the job together: install threshold strips at doorways and room changes, fit quarter-round or shoe molding to cover the expansion gap, and refasten or reinstall baseboards so they sit flush over the new floor.
Measure and cut pieces precisely, nail or screw trim into studs or blocking, seal joints where needed, and check connections for smooth, safe passage between surfaces.
Step 10 Clean-up, initial care, and curing time
With the trim and baseboards back in place, clean-up is the next priority so your new floor can settle properly.
Remove debris, sweep, and vacuum grooves to prevent scratching. Wipe with a manufacturer-recommended cleaner and avoid excess water.
Keep traffic light for 24–48 hours and heavy furniture off for 72 hours to allow adhesives and finishes to cure.
Monitor humidity as recommended.
Installation Variations and Special Cases
You’ll choose between floating, glue-down, or nail-down installations based on your subfloor and traffic needs, and you’ll follow specific precautions for radiant heat systems.
You’ll also learn techniques for coping with uneven walls, maneuvering through hallways and open plans, and fitting boards on stairs or around fireplaces.
Each situation has its own preparation and fastener or adhesive choices, so plan before you start.
Floating vs glue-down vs nail-down methods
Although the basic tongue-and-groove profile stays the same, you’ll choose between floating, glue-down, or nail-down installations based on subfloor type, room use, and the flooring material’s recommendations. You’ll float for DIY speed, glue for stability over concrete, and nail for solid wood over plywood. Choose per manufacturer specs and traffic.
| Method | Best Subfloor | Typical Use |
|---|---|---|
| Floating | Any level | Rentals |
| Glue-down | Concrete | Basements |
| Nail-down | Plywood | Living rooms |
Installing over radiant heat systems
When installing tongue-and-groove flooring over a radiant-heat system, you need to confirm compatibility, follow temperature limits, and prep the subfloor to prevent movement or heat-related damage.
Check manufacturer specs for maximum surface temp (usually 80–85°F), use recommended adhesives or floating methods approved for radiant, install proper insulation and vapor barriers, acclimate boards, and monitor temperatures during and after installation.
Working with uneven walls, hallways, and open plans

Having verified compatibility and temperature limits for radiant systems, turn your attention to the layout challenges that uneven walls, narrow hallways, and open-plan spaces present.
Scribe and trim boards to follow irregular walls, use spacers for consistent expansion gaps, and stagger end joints for strength.
In hallways work lengthwise; in open plans plan shifts, align sightlines, and maintain consistent board direction for flow.
Installing on stairs and around fireplaces
Staircases and fireplaces demand extra care because they combine safety, wear, and tricky changes. You’ll need to adapt cutting, fastening, and finishing techniques to suit treads, risers, nosing, and hearths.
Measure each tread and riser, scribe and cope joints, glue and screw where concealed, allow expansion at nosing, use heat-resistant trim near fireplaces, and finish with non-slip coatings and secure connection pieces.
Common Problems and How to Fix Them
You’ll run into a few common problems—gapping and cupping, squeaks and loose boards, moisture damage, and visible seams or misaligned planks—and each has a straightforward set of fixes.
Start by diagnosing the cause (humidity swings, subfloor issues, or improper nailing) so you can pick the right remedy, from acclimation and fastening to localized repairs or moisture barriers.
Below are clear steps to identify and correct each issue.
Gapping and cupping causes and remedies
If your tongue-and-groove floor develops gaps between boards or boards that cup upward, it’s usually a sign of moisture imbalance or improper acclimation and installation; addressing the root cause prevents recurrence and guides the right repair.
Check humidity, acclimate new boards, and guarantee subfloor dryness.
To fix gaps or cupping, reduce moisture, refasten or replace affected planks, and sand and refinish only after stability returns.
Squeaks and loose boards: diagnosis and repair
Gaps and cupping often point to moisture issues, but squeaks and loose boards usually come from movement at the fastenings or a shifting subfloor; diagnosing which will guide a straightforward repair.
Walk the floor, pinpoint squeaks, mark spots.
Tighten or add screws through tongues, use construction adhesive where boards lift, or secure subfloor with screws.
Replace damaged fasteners and refit loose boards.
Moisture-related issues and corrective steps
Because moisture is the most common culprit behind cupping, crowning, and gaps, you should start by identifying its source and level before making repairs.
Measure humidity, inspect leaks, and check subfloor vapor barriers.
Dry affected areas, improve ventilation, and repair plumbing or roof issues.
Replace severely warped boards and acclimate new flooring.
Recheck moisture levels before finishing to prevent recurrence.
Visible seams or misaligned boards: corrective techniques
Visible seams and misaligned tongue-and-groove boards are usually the result of improper installation, uneven subfloors, or wood movement, and you can fix most problems without ripping up the entire floor.
Start by tightening loose boards with proper nails or glue; sand high edges and plane stubborn tongues.
Shim or level the subfloor where gaps recur, then fill small seams with matching wood filler and finish.
Best Practices, Tips, and Prevention
To keep your tongue-and-groove floor lasting and looking great, you’ll want to control moisture and allow for seasonal movement.
Stagger boards for strength and appearance, use the right blades and jigs for cleaner cuts and faster installs, and follow simple maintenance routines after installation.
Below we’ll cover practical tips and prevention steps you can use on every job.
Preventing moisture damage and seasonal movement
When you install tongue-and-groove flooring, controlling moisture and allowing for seasonal movement are the two most important steps to prevent cupping, gapping, and warping.
Acclimate boards, maintain 30–50% indoor humidity, use vapor barriers on concrete, guarantee subfloor dryness, leave proper expansion gaps at perimeter, and avoid fastening through tongue.
Monitor conditions seasonally and adjust humidification as needed.
Stagger patterns for strength and appearance
Although random-looking layout often seems easiest, you should stagger end joints so they’re at least 6–8 inches apart between adjacent rows (or follow manufacturer minimums) to boost structural stability and create a balanced appearance.
You’ll plan runs, mix board lengths, and avoid repeating short seams.
Consider:
- Confident rhythm
- Visual harmony
- Reduced buckling risk
- Professional finish
Tool tips for cleaner cuts and faster installs
Grab the right tools and set them up properly so your cuts are cleaner and each row goes in faster.
Use a sharp blade on your circular saw or miter saw, set fences and stops for repeatable lengths, and clamp boards when ripping.
Keep a pull saw or jamb saw for trim, use spacers and a mallet for snug fits, and check blade alignment regularly.
Maintenance best practices after installation
Once your tongue and groove floor is down, regular care and quick attention to issues will keep it looking great for years.
Sweep or vacuum weekly, use a damp mop with manufacturer-approved cleaner, and avoid excess water.
Place pads under furniture, use rugs in high-traffic areas, and control humidity.
Promptly repair gaps, scratches, or loose boards to prevent bigger problems.
Cost, Time, and Material Comparisons
You’ll want a clear cost breakdown that separates materials, tools, and labor so you can budget accurately.
I’ll give realistic time estimates based on room size and installation method so you can plan the job.
Then we’ll compare solid versus engineered tongue-and-groove for longevity and overall cost to help you choose.
Cost breakdown: materials, tools, and labor
A clear cost breakdown helps you plan the tongue-and-groove flooring project with confidence. You’ll estimate materials (boards, underlayment), tools (saws, nailer), and labor (DIY vs pro). Compare per-square-foot prices and factor waste, delivery, and fastening supplies to set a realistic budget.
| Item | Typical Cost | Notes |
|---|---|---|
| Materials | $2–$8/ft² | Species varies |
| Tools | $50–$600 | Buy or rent |
| Labor | $3–$8/ft² | Depends on skill |
Time estimates by room size and method
Now that you’ve broken down costs, let’s look at how room size and installation method affect the time you’ll need.
For a 100–200 sq ft room, expect 4–8 hours for floating installs, 8–12 for glued, and 10–16 for nail-down.
Larger 300–500 sq ft rooms multiply times; add prep, acclimation, and trim time.
Work pace and experience alter estimates.
Comparing solid vs engineered for longevity and cost
Which will give you the best lifespan for your budget?
You’ll find solid hardwood lasts longer—refinish it multiple times—but costs and installation time run higher.
Engineered lasts well in moisture-prone areas, installs faster, and generally costs less upfront; refinishing is limited.
Choose solid for longevity if budget allows; pick engineered for value, stability, and quicker installation when cost or environment constrains you.
FAQ
You’ve probably got questions like how big an expansion gap to leave, whether you can install over existing flooring, and how long to acclimate boards before installation.
You’ll also want to know if glue is required and the best way to repair a damaged tongue and groove board.
Keep reading for clear, practical answers to each of these points.
How much expansion gap do I need for tongue and groove flooring?
How much expansion gap you need depends on the material and the room size: for solid hardwood leave 3/4 inch around the perimeter, for engineered wood 1/4 to 1/2 inch is usually sufficient, and laminate typically needs 1/4 inch;
always check the manufacturer’s recommendations and allow slightly more in rooms that get very hot or humid.
Leave consistent gaps at walls, doorways, and around pipes.
Can tongue and groove be installed over existing flooring?
Can you install tongue-and-groove over existing flooring? Yes, in many cases you can lay it over stable, level surfaces like plywood, vinyl, or well-secured hardwood.
Remove loose material, repair damage, and confirm height won’t disrupt doors or changes in elevation.
Follow manufacturer guidelines for underlayment and fastening.
Don’t install over damp, cushioned, or uneven floors that compromise stability or warranty.
How long should I acclimate my flooring before installation?
Wondering how long to let your tongue-and-groove flooring acclimate?
You should let boards sit in the installation room for 48–72 hours for engineered and 7–14 days for solid wood, depending on thickness and humidity.
Keep boxes closed, spread boards flat, and maintain normal indoor temperature and 35–55% relative humidity.
Check moisture readings before you install.
Is glue necessary for tongue and groove flooring?
Although many tongue-and-groove floors lock together mechanically, you’ll sometimes need glue—particularly for solid hardwood, installations over concrete, or in high-traffic areas—to prevent movement, squeaks, and moisture entry.
Use recommended flooring adhesive sparingly at seams or as manufacturer specifies. Don’t glue floating installations unless allowed.
Proper subfloor prep, expansion gaps, and fasteners often determine whether adhesive is necessary for long-term stability.
How do I repair a damaged tongue and groove board?
If a board gets cracked, warped, or gouged, you can often fix or replace it without ripping up the whole floor.
Remove adjacent boards if needed, pry out damaged plank from tongue, clean slot, then slide a replacement into place.
For minor damage, fill cracks with wood filler, sand smooth, and touch up stain or finish to match surrounding boards.
Resources and Next Steps
Before you start, use a simple checklist to confirm you’ve got tools, materials, underlayment, and a clear work plan for installation day.
If you hit unexpected issues or the job feels beyond your skill level, call a flooring professional.
Ask about experience with tongue-and-groove systems, warranty coverage, timeline, and a written estimate.
Checklist for your installation day
- Gather tools, materials, and clear the space so you’ll work confidently. Check measurements, acclimate boards, and plan layout before you start.
- Breath: pause, you’ve got this.
- Checklist: tape measure, spacers, mallet, saw.
- Safety: goggles, knee pads, mask.
- Timeline: realistic goals, breaks scheduled.
Follow this list to keep momentum and calm on installation day.
When to call a professional and what to ask them
You’ve got your tools and plan, but some situations call for a pro: complex subfloor issues, extensive leveling, moisture problems, or a layout with many cuts and shifts.
Call a licensed flooring contractor when structural fixes or moisture mitigation exceed DIY skills.
Ask about experience with tongue-and-groove, references, warranty, timeline, permits, and a clear written estimate including prep, materials, and cleanup.