How to Repair Vinyl Plank Flooring: Fix Scratches, Cracks, and Loose Planks
You can fix most vinyl plank issues yourself with basic prep and the right materials: clean the area, pick a compatible filler or vinyl putty for scratches or gouges, sand and color-match once cured, and reseat or re-glue loose edges after removing old adhesive. For click-lock planks, cut and replace damaged pieces; for glue-down, use proper adhesive and weights while curing. Follow safety and moisture checks, and keep going to learn step-by-step techniques and tool tips.
How to Repair Vinyl Plank Flooring: and Overview
You’ll get a quick look at common fixes like replacing damaged planks, repairing seams, and addressing scratches or dents.
I’ll help you decide which jobs you can handle yourself and which need a pro.
Then you’ll see the basic tools and materials you’ll need to get the job done.
Common Fixes at a Glance
Start with the simplest fixes first: most vinyl plank issues—scratches, loose edges, mild buckling, and small gaps—can be resolved with a few basic tools and materials you probably already have.
For how to repair vinyl plank flooring, you’ll patch scratches with filler, replace or re-glue loose planks, use heat to flatten minor buckling, and seal gaps with caulk or trim for a clean, durable finish.
When to DIY vs. Call a Professional
Wondering whether to tackle a vinyl plank repair yourself or call in a pro? Assess damage: minor scratches, a loose plank, or small cracks you can handle if you’re comfortable with basic steps.
Call a professional for extensive buckling, subfloor issues, water damage, or pattern-matched replacements.
Also hire help if you lack time, tools, or confidence to avoid worsening the problem.
Tools and Materials You’ll Need
Gathering the right tools and materials before you begin makes a repair faster and reduces mistakes. You’ll want basic hand tools, repair compounds, and replacement planks ready.
Keep everything organized and nearby so repairs go smoothly and you don’t damage surrounding flooring.
- Utility knife, pry bar, and measuring tape
- Vinyl repair kit or colored filler and sealant
- Replacement planks and adhesive
Understanding Vinyl Plank Flooring: Types, Causes of Damage, and Repairability
You’ll first want to know the difference between LVP, SPC, and WPC planks because construction affects how they wear and how you can fix them.
Scratches, cracks, and loose boards usually come from heavy traffic, impacts, moisture, or improper installation, and each shows different repair needs.
Evaluating damage severity—surface finish issues versus structural plank failure—guides whether you can spot-repair, reglue, or need full plank replacement.
What Is Vinyl Plank Flooring? (LVP vs. SPC vs. WPC)
Vinyl plank flooring comes in several engineered formats—LVP, SPC, and WPC—each built for different performance and feel, so it helps to know how they differ before you repair or replace a board.
LVP is flexible luxury vinyl, SPC has a rigid stone-plastic core for stability, and WPC uses a wood-plastic core offering extra cushion.
Knowing cores guides repair choices.
Common Causes of Scratches, Cracks, and Loose Planks
Because different plank constructions react differently to stress, scratches, cracks, and looseness can come from a few predictable sources you can address quickly.
Heavy foot traffic, grit and pet claws abrade surfaces. Dropped or dragged furniture causes impact chips and fractures.
Subfloor movement, improper acclimation, and poor installation create gaps or shifting. Moisture and temperature swings also warp or separate planks.
How Construction Type Affects Repair Options
When you’re deciding whether a damaged plank can be fixed or must be replaced, the flooring’s construction is the key factor: rigid-core (WPC/SPC), flexible luxury vinyl, and engineered vinyl plank (with thicker wear layers) each respond differently to scratches, dents, and moisture.
Rigid-core resists bending but can crack; flexible vinyl can be patched; engineered planks tolerate light abrasion and allow refinishing of thicker wear layers.
How to Assess Damage Severity
Now that you’ve matched repair options to construction type, you need a clear way to judge how bad the damage is before choosing a fix.
Inspect surface, core, and substrate: superficial scratches need buffing; deeper gouges or exposed core need patching or plank replacement; loose or buckled boards suggest moisture or installation issues.
Prioritize safety, extent, and cost when deciding repair versus replace.
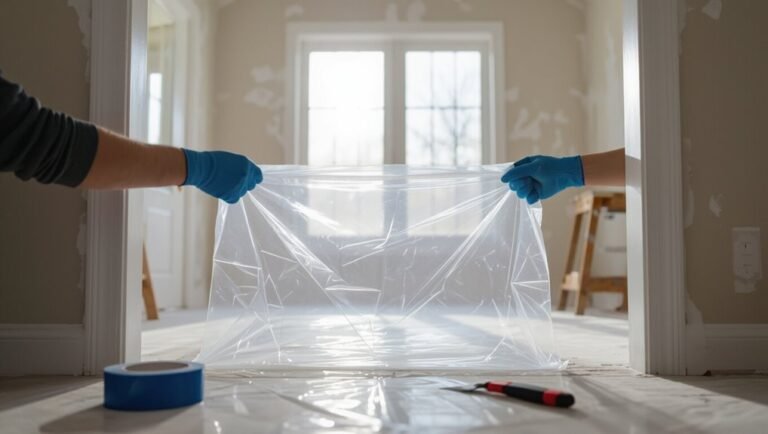
Safety and Preparation Before Repairs
Before you start repairs, put on gloves, eye protection, and a dust mask and make sure the room is well-ventilated and at the recommended temperature for the vinyl.
Clear and clean the work area, check the subfloor for moisture or damage, and move furniture out of the way.
If you need to remove baseboards or threshold strips, pry them off carefully with the right tools to avoid damaging the trim or adjacent planks.
Safety Precautions and Personal Protective Equipment
Although vinyl plank repairs can seem straightforward, you should prioritize safety and gear up properly before you touch any tools or adhesives.
Wear safety glasses, nitrile gloves, and a dust mask or respirator when sanding or using solvents. Use knee pads for prolonged work and sturdy shoes to prevent slips.
Keep a first-aid kit and fire extinguisher nearby in case of accidents.
Preparing the Work Area: Cleaning, Temperature, and Subfloor Checks
With your safety gear on and tools ready, clear the room so you have unobstructed access to the damaged planks and surrounding floor.
Sweep and vacuum to remove grit, guarantee room temperature matches flooring requirements (usually 65–85°F), and inspect the subfloor for moisture, levelness, and damage before starting repairs.
- Clean thoroughly to prevent trapped debris
- Verify stable, dry subfloor
- Maintain proper acclimation temperature
How to Remove Baseboards and Transition Strips Safely
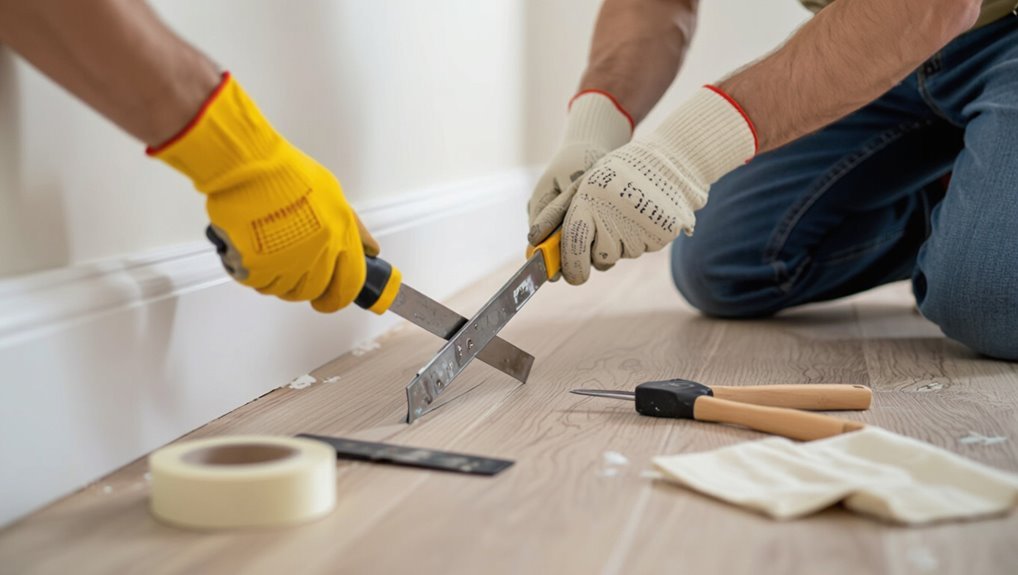
Remove baseboards and threshold strips carefully to prevent damaging trim or adjoining flooring.
Use a utility knife to cut caulk or paint seal, then slide a thin pry bar behind the trim, protecting the wall with a scrap wood block.
Work slowly, prying near studs every few inches.
Label pieces and keep fasteners for reinstallation; clean substrate before repairs.
Quick Fixes for Surface Scratches and Scuffs
Start by cleaning and inspecting the scratch so you can see how deep it’s and which fix will work best.
Try vinyl-specific cleaners and erasers for light scuffs, then use repair kits—fillers, pens, or waxes—following the kit instructions for application.
Finish by buffing and blending the area to restore a seamless look.
Cleaning and Inspecting the Scratch
Begin by cleaning the scratched area so you can accurately assess the damage: wipe away dust and debris with a soft broom or vacuum, then use a damp microfiber cloth and a mild cleaner to remove grime or residues.
Once dry, inspect the scratch under good light and at an angle. Note depth, length, and whether the wear layer is breached before choosing a repair method.
Using Vinyl Floor Cleaners and Erasers
While deeper gouges need more involved fixes, surface scratches and scuffs on vinyl plank flooring are often resolved quickly with the right cleaners and a vinyl floor eraser.
You’ll usually get the best results by cleaning the area first, then gently rubbing the mark with a product made for vinyl rather than harsh abrasives.
Afterward, wipe residue, inspect, and repeat gently until the scuff fades.
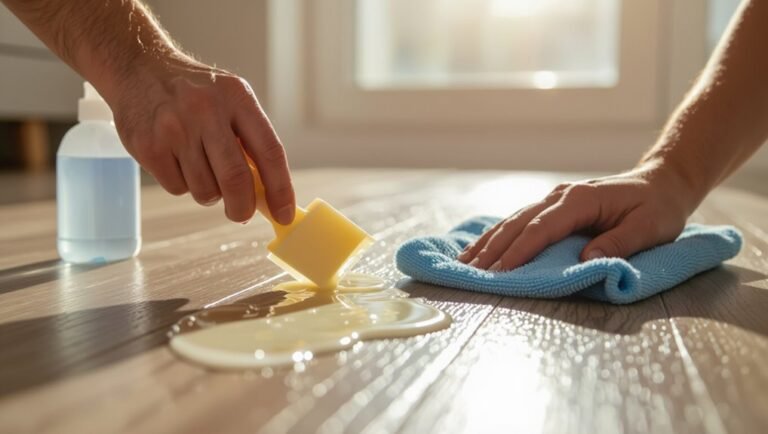
Applying Repair Kits: Fillers, Pens, and Waxes Step-by-Step
One quick way to hide surface scratches and scuffs is to use a vinyl repair kit—fillers, color-matching pens, and wax sticks each tackle different blemishes, and you’ll get the best results by choosing the right product for the damage and following a careful, step-by-step approach.
Clean area, dry thoroughly, test color on scrap, apply filler or pen in thin layers, shape wax with a plastic scraper, let cure, and wipe excess.
Buffing and Finishing for Seamless Blends
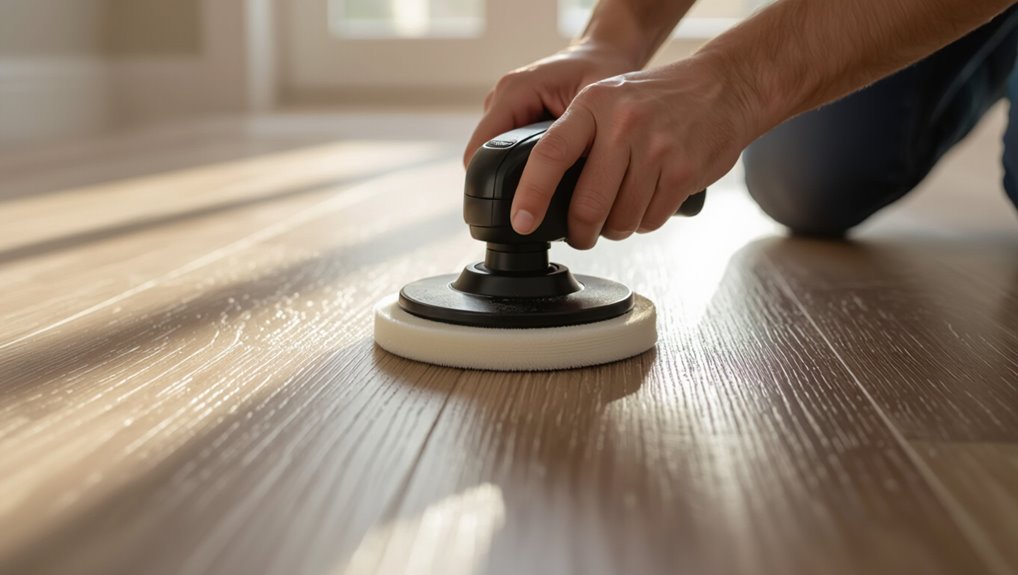
After the repair material has cured, gently buff the area so the patched spot blends with the surrounding plank; you’ll use light, circular motions with a soft cloth or a fine synthetic pad to remove excess sheen and feather the edges.
Then wipe clean, assess color match, and apply a thin, compatible finish or floor polish if needed. Let cure before light traffic.
Repairing Deep Scratches, Gouges, and Small Cracks
For deeper scratches, gouges, or small cracks you’ll choose between a fast-setting two-part filler for structural repairs or vinyl putty for surface-level fixes.
Start by cleaning and drying the area thoroughly, then apply the filler or putty, follow the manufacturer’s drying times, and sand or texture the patch to match the plank.
If the damage is extensive, you can also cut a matching patch from extra planks and glue it in place for a seamless repair.
When to Use Two-Part Fillers vs. Vinyl Putty
When you’re facing deep scratches, gouges, or small cracks in vinyl plank flooring, choosing between a two-part filler and vinyl putty comes down to depth, location, and expected wear; two-part fillers offer stronger, long-lasting repairs for structural damage or high-traffic areas, while vinyl putty works well for shallow surface blemishes and quick cosmetic fixes.
Use two-part for load-bearing edges; use putty for simple touch-ups.
Step 1: Clean and Prep the Area
Now that you’ve picked between a two-part filler and vinyl putty based on the damage and traffic, get the area ready before applying anything.
Remove loose debris with a soft brush, vacuum the crevice, and wipe surrounding vinyl with isopropyl alcohol to strip oils and cleaners.
Dry thoroughly.
Mask adjacent planks and protect seams so filler adheres only where needed.
Step 2: Apply Filler or Putty Technique and Drying Times
1. You’ll fill deep scratches or gouges with a vinyl-specific filler or putty, pressing it into the damaged area with a plastic spatula.
Smooth excess flush with the plank surface.
Follow manufacturer drying times—usually 30 minutes to several hours—before light handling.
Confirm full cure (often 24 hours) prior to traffic or trimming to avoid reopening the repair.
Step 3: Sand, Texture, and Color-Match
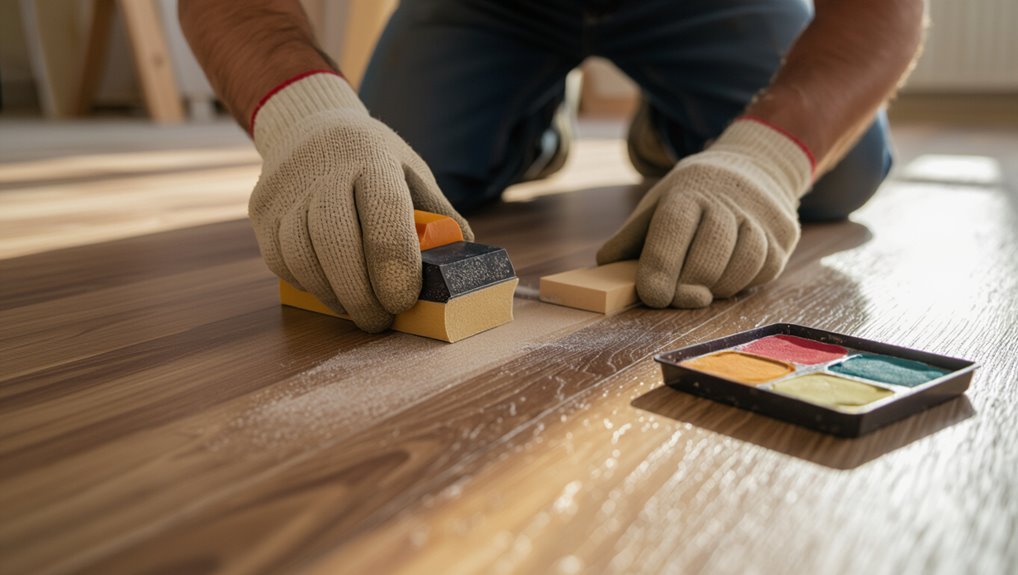
Step 3: Sand, texture, and color-match the filled area so it blends seamlessly with the surrounding plank; start by sanding the cured filler flush with the vinyl using fine-grit sandpaper or a sanding block, feathering the edges to avoid a noticeable lip.
Lightly texture with a scotch-brite pad to mimic grain, then apply thin layers of matching repair paint or marker, blending tones until seamless.
Alternatives: Patch Pieces from Extra Planks
Consider using patch pieces cut from extra planks when scratches, gouges, or small cracks are too deep for filler to hide; this method gives you a near-original texture and pattern by replacing only the damaged section rather than the whole plank.
Cut a matching patch, trim precisely, dry-fit, then bond with vinyl adhesive.
Sand lightly, blend edges, and seal for a seamless, durable repair.
Fixing Cracked or Broken Planks
First decide whether the damage is repairable or if the plank needs replacing. Then I’ll show you how to remove just that plank without disturbing the rest.
You’ll learn how to cut and prepare the replacement and install it using click-lock, glue-down, or loose-lay techniques.
Finally, I’ll cover seaming and finishing tips so your repair is as invisible as possible.
Determining If a Plank Must Be Replaced
How do you know when a cracked or broken plank really needs replacing rather than a quick patch?
Inspect depth, length, and structural stability: surface hairline cracks can be repaired, but deep splits, disintegration, or moisture damage that warps edges mean replacement.
If seams separate, subfloor is exposed, or repairs won’t match texture/color, plan to replace the plank for lasting results.
Removing a Damaged Plank without Disturbing Others Step-by-Step
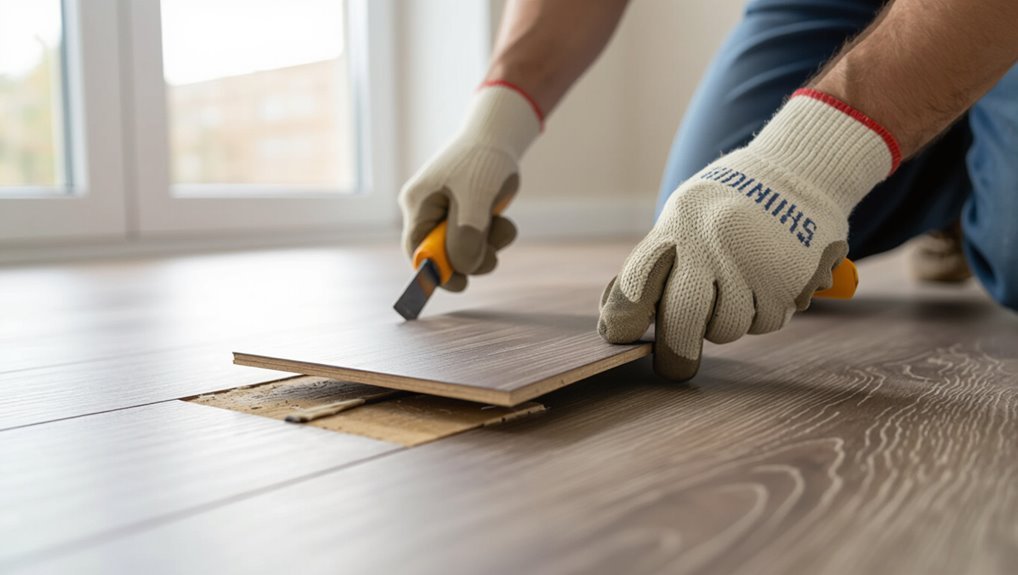
You’ll remove a damaged plank without disturbing the surrounding floor by working methodically and using the right tools: score and cut the damaged piece into manageable sections, lift each section from the center outward to avoid prying up adjacent tongues or grooves, and clean the cavity thoroughly so the replacement seats flush.
Then pry out remaining fragments, remove adhesive residue, vacuum debris, and inspect edges for damage.
Cutting and Preparing Replacement Plank
Measure the cavity and transfer those exact dimensions to the replacement plank, accounting for the tongue or groove you’ll trim so it fits flush. Cut the plank slightly oversized at first and test-fit before making final adjustments.
Remove any backing or underlayment material, mark trim lines, and use a straightedge with a utility knife or fine-tooth saw for clean cuts. Sand edges lightly for a snug fit.
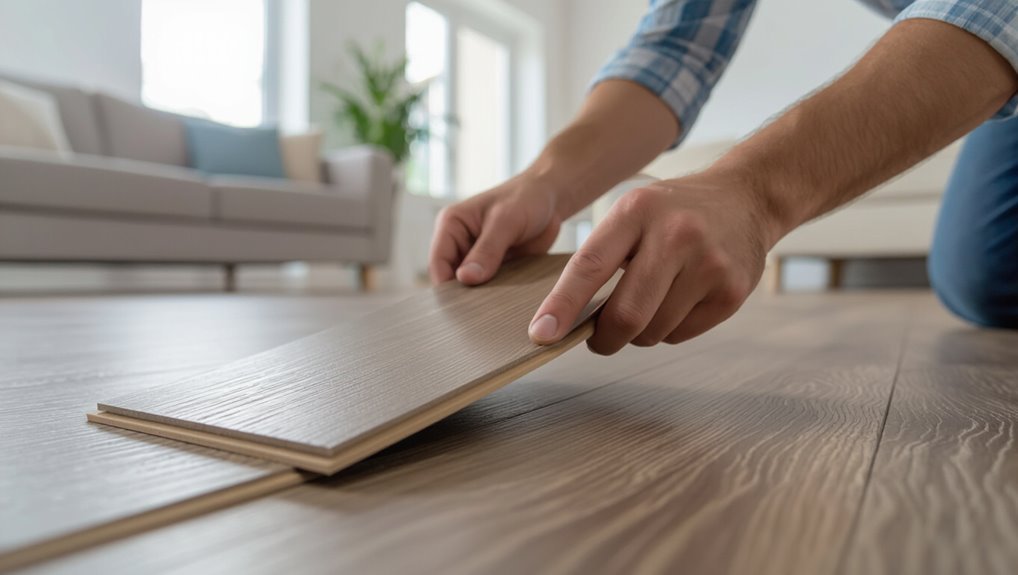
Installing the Replacement: Click-Lock, Glue-Down, and Loose-Lay Methods
Start by identifying which installation type your plank uses—click-lock, glue-down, or loose-lay—since each requires a different approach to seating and securing the replacement.
Then install accordingly: click-lock snaps in, glue-down needs adhesive and pressure, loose-lay relies on weight and tight fit. Check alignment and floor level before finishing.
- Use manufacturer adhesive for glue-down
- Tap seams for click-lock
- Verify stability for loose-lay
Seaming and Finishing for Invisible Joins
Once your replacement plank sits correctly, focus on blending seams so the repair disappears.
Clean edges, remove debris, and apply a thin bead of matching vinyl seam adhesive. Press seam tightly, wipe excess, and clamp or weight until set.
If color varies, use a tinted seam sealer or marker to match grain.
Finish by buffing gently for a seamless, durable result.
Repairing Loose, Warped, or Buckling Planks
When you spot loose, warped, or buckling planks, first check for moisture, subfloor issues, or improper acclimation as likely causes.
You can often fix them by re-gluing or refastening the plank, but sometimes replacement and subfloor repair are necessary.
Below are clear steps for re-gluing a loose plank and how to address moisture and subfloor problems to prevent recurrence.
Identifying Causes: Moisture, Subfloor, and Acclimation Issues
Any loose, warped, or buckling vinyl plank usually points to one of three culprits: excess moisture, a problematic subfloor, or improper acclimation.
Check for water stains, high humidity, or leaks.
Inspect subfloor flatness, damage, and drainage.
Verify installation gaps and whether boards sat in the room to acclimate per manufacturer guidelines.
Pinpoint the root cause before choosing repairs.
Repair Options: Re-gluing, Refastening, or Replacing Planks
Start by matching the fix to the problem: re-glue boards that’ve lifted from the adhesive, refasten planks that’ve pulled away at the edges, and replace boards that’re badly warped, split, or water-damaged.
For each, assess subfloor condition and surrounding planks. Use appropriate adhesive or fasteners, allow proper drying or acclimation, and replace only when structural integrity or appearance is irreparably compromised.
Step-by-Step: Re-gluing a Loose Plank
Inspect the loose plank closely to determine whether it’s lifted from adhesive, warped at the edges, or buckling from moisture — then gather the right glue, a putty knife, a roller, and weights.
Clean subfloor and plank, apply manufacturer-recommended adhesive sparingly, press plank down, smooth seams with roller, wipe excess, weight it overnight.
Check alignment and trim any raised edges before resuming use.
Addressing Moisture Problems and Subfloor Repairs

If your vinyl planks are buckling, cupping, or separating at the seams, moisture or a damaged subfloor is often to blame, so you’ll need to pinpoint the source before you repair the boards.
Inspect for leaks, high humidity, or plumbing issues.
Dry the area, replace warped underlayment, and guarantee proper vapor barrier.
Reinstall or replace affected planks, allowing acclimation and expansion gaps.
Repairs for Edge Lifting and Gapped Seams
Edge lifting and gaps usually come from moisture, temperature changes, or improper installation, so you’ll want to identify the cause before you start.
You can re-seat loose edges by gently lifting and locking planks back in place or using adhesive where the click system won’t hold.
Finish by sealing any remaining seams with a flexible seam sealer and address humidity or installation issues to prevent future separation.
Causes of Edge Lifting and Gaps
When planks lift or seams open, it’s usually because something’s changed the floor’s stability—moisture, temperature shifts, subfloor irregularities, or improper installation are the common culprits.
You should inspect for water leaks, high humidity, or spill history.
Check for uneven or warped subfloor, inadequate underlayment, and excessive expansion gaps.
Heavy traffic or sharp impacts can also separate edges.
How to Re-seat and Secure Edges
Now that you’ve identified what’s causing the planks to lift or seams to open, you can focus on re-seating and securing those edges to restore a flat, stable surface.
Gently lift affected planks, clean debris and old adhesive, then press edges back into place or tap with a block and mallet.
Use adhesive recommended by the manufacturer and weight the area while it cures.
Sealing Gaps and Preventing Future Separation
Because gaps invite moisture and dirt that can worsen lifting, you should seal seams promptly with the right products and techniques to stop further separation.
Clean and dry the seam, then apply a flexible vinyl flooring seam sealer or clear polyurethane caulk.
Smooth with a damp finger or tool, remove excess, and allow cure.
Check periodically and reapply sealant where traffic or temperature changes cause gaps.
Color Matching, Texture, and Cosmetic Blending Strategies
When you’re matching color and grain, use samples, lighting checks, and touch-up kits to test fit before committing.
Pay attention to surface texture and finish—sanding, recoating, or embossing tools can help blends look natural.
If the plank’s pattern or wear is too different to mask, don’t hesitate to replace the full plank for a seamless result.
How to Match Color and Grain: Techniques and Tools
Although matching color and grain can feel fiddly, you can get convincing results by combining careful observation with the right tools and simple blending techniques.
Compare planks in natural light, photograph samples, and test repair compounds on scrap pieces.
Use color pencils, alcohol-based inks, or diluted acrylics to tint filler.
Feather strokes to mimic grain, then seal with a clear coat to protect the repair.
Creating Texture and Finish Consistency
To make a repair disappear, you’ll need to match not just color but the plank’s surface texture and sheen so light behaves the same across the floor.
Feel the grain, then use fine abrasives or texture pads to mimic it.
Blend edges with feathered coats of matching finish or clear topcoat.
Test sheen levels on scraps until reflections align seamlessly.
When to Consider Full-Plank Replacement Instead of Cosmetic Repair
If matching color, texture, and sheen still leaves the repair visible or risks compromising adjacent planks, you should opt for full-plank replacement instead of chasing cosmetic fixes.
Choose a replacement that matches grain, bevel, and wear layer.
Replace when damage affects structural integrity, repeated repairs show, or visible seams persist.
Professional color-matching helps, but full-plank swaps deliver the cleanest, longest-lasting result.
Common Mistakes to Avoid During Vinyl Plank Repairs
Don’t grab whatever adhesive or filler is handy — using the wrong products will cause bonds to fail or fillers to shrink.
Check the subfloor and moisture before you install or repair, and don’t rush acclimation or curing times.
Also avoid poor color-matching and over-sanding, which can make repairs stand out or damage the plank surface.
Using the Wrong Adhesive or Filler
When you grab the wrong adhesive or filler, repairs can fail fast and leave you with stains, swelling, or loose seams that get worse over time.
Choose products labeled for vinyl plank specifically; avoid solvent-based glues that can melt wear layers.
Match flexible fillers to expansion needs and color.
Test a hidden area first, follow manufacturer cure times, and clean residues promptly.
Skipping Subfloor or Moisture Checks
Because moisture problems often start below the surface, skipping subfloor and moisture checks can turn a small repair into a bigger, recurring issue.
You should lift affected planks, inspect for rot, mold, or damp insulation, and measure moisture levels with a meter. Ignoring these steps lets hidden moisture warp or delaminate new planks, wasting time and materials.
Poor Color-Matching and Over-Sanding
1 common mistake people make during vinyl plank repairs is rushing color-matching and then trying to fix it by over-sanding; you’ll end up with mismatched seams and a damaged wear layer that’s impossible to hide.
Take time selecting replacement planks or touch-up pigments, test in different light, and sand minimally.
Preserve the wear layer and blend tones gradually to avoid obvious repairs.
Not Allowing Proper Cure and Acclimation Times
Mismatched color and over-sanding can leave repairs obvious, but rushing the follow-up steps will make them worse.
Don’t skip acclimation: let replacement planks sit in the room 48–72 hours to match humidity and temperature.
Allow adhesive and fillers to cure fully per manufacturer instructions before walking or reinstalling furniture.
Patience prevents gaps, warping, adhesive failure, and visible seams.
Prevention and Best Practices to Keep Vinyl Plank Floors Looking New
To keep your vinyl plank floors looking new, you should stick to simple routines like sweeping, damp-mopping with a manufacturer-approved cleaner, and wiping up spills promptly.
Use furniture pads and rugs in high-traffic areas, manage foot traffic, and monitor indoor humidity to prevent cupping or mold.
Schedule a professional inspection if you notice persistent gaps, lifting, or moisture issues so small problems don’t become costly repairs.
Routine Cleaning and Maintenance Tips
Keeping your vinyl plank floors looking new starts with simple, regular care you can fit into your weekly routine.
You should sweep or vacuum soft-brush weekly, mop with a pH-neutral cleaner, and wipe spills promptly to prevent staining. Avoid abrasive tools and steam cleaners.
- Sweep or vacuum gently
- Mop with a mild solution
- Spot-clean spills immediately
Furniture Pads, Rugs, and Traffic Management
After you’ve got a regular cleaning routine down, protect high-wear areas by using furniture pads, rugs, and smart traffic patterns to reduce scratches, dents, and wear.
Place felt pads on chair and table legs, use nonstaining rug pads under entryway and high-traffic rugs, rotate runners, and create walking paths to avoid concentrated wear.
Check pads periodically and replace when compressed.
Controlling Indoor Humidity and Preventing Moisture Damage
Because vinyl plank flooring holds up best within a stable humidity range, you should manage indoor moisture to prevent cupping, gapping, and mold under the planks.
Use a dehumidifier or humidifier to keep 30–50% RH, guarantee proper ventilation in bathrooms and kitchens, fix leaks promptly, dry spills quickly, and maintain gaps for expansion.
Monitor with a hygrometer regularly.
When to Schedule Professional Inspections
When should you call in a pro? If you spot persistent buckling, wide gaps, recurring moisture stains, or soft spots, schedule an inspection promptly.
Also call a professional after major water events, if seams continually separate, or when subfloor issues are suspected.
Regular checkups every few years help catch hidden damage early and extend your vinyl’s lifespan.
Cost, Time, and Material Estimates
You’ll get a clear picture of typical DIY versus professional repair costs, including when paying a pro makes sense.
I’ll give time estimates for common fixes—like replacing a single plank, patching gouges, or fixing seams—so you can plan the work.
Finally, we’ll compare repair versus full replacement to help you choose the most cost-effective option.
Typical Costs for DIY vs. Professional Repairs
A few straightforward repairs—like replacing a single damaged plank or re-gluing a loose seam—can often be done DIY for under $100 in materials and an afternoon or two of your time, while more extensive fixes or water-damage restoration typically cost several hundred dollars to over $1,000 and require a pro’s tools and labor.
| Repair | DIY Cost | Pro Cost |
|---|---|---|
| Scratch repair | $0–$30 | $50–$150 |
| Single plank | $20–$80 | $100–$300 |
| Water damage | $50–$200 | $300–$1,500 |
Time Estimates by Repair Type
Now that you’ve seen how costs stack up for common fixes, let’s look at how long each repair typically takes and what materials you’ll need.
Small scratch touch-ups: 10–30 minutes using repair kits and microfiber.
Deep gouges or cracked planks: 1–3 hours, plus replacement plank, adhesive, and cutter.
Loose planks: 20–60 minutes with adhesive or reseating tools.
When Repair Is More Cost-Effective Than Replacement
When the damage is localized and your planks are otherwise in good shape, repairing usually beats replacing in cost, time, and waste—you’ll save money on materials, cut downtime, and avoid a full rip-out.
Estimate parts (single planks, adhesive, filler), labor (DIY hours or pro rate), and tools.
Minor fixes often cost a fraction of replacement; choose repair when matching planks are available and subfloor is sound.
Tools, Products, and Recommended Brands
You’ll want a compact set of tools—utility knife, pry bar, tapping block, straightedge, and a heat gun—for most vinyl plank repairs.
Pick repair kits, adhesives, and fillers made for vinyl (look for vinyl-specific glue and color-matched filler) and test on a scrap before using.
Buy from reputable home centers or flooring specialists, read labels and reviews, and choose brands with clear VOC, warranty, and compatibility info.
Essential Tools for DIY Repairs
A basic toolkit makes vinyl plank repairs much easier, and you don’t need to buy every specialty item to get good results.
Gather a utility knife, pry bar, and rubber mallet for cutting, lifting, and seating planks. Include a straightedge, microfiber cloths, and a small vacuum.
Choose reliable brands you trust for tools and wear gloves.
- Utility knife
- Pry bar
- Rubber mallet
Recommended Repair Kits, Adhesives, and Fillers
After you’ve got the basic tools on hand, pick repair kits and adhesives that match your vinyl’s construction and finish so repairs blend in and hold up.
Choose color-matched fill sticks or repair kits (Renu, M-D), flexible vinyl adhesive (Bostik, Roberts), and clear seam sealer.
Use solvent-free, low-VOC formulas for indoor use. Test on scrap before applying to visible planks.
Where to Buy Supplies and How to Choose Quality Products
Supplies and quality matter, so shop where you can compare products, read specs, and return items if they don’t fit—home centers (Home Depot, Lowe’s), specialty flooring stores, and reputable online retailers (Amazon, Build.com, FlooringInc) all carry the tools, adhesives, and repair kits you need.
Choose waterproof adhesives, color-matching fillers, and carbide blades; prefer trusted brands (Roberts, Mapei, Bostik) and read reviews, specs, and warranty details.
Step-by-Step Repair Guides (Cheat-Sheet)
Now you’ll get quick, practical steps for common fixes: repairing a small scratch, replacing a single click-lock plank, and re-gluing a loose glue-down plank.
Each mini guide will list the tools, prep, and exact actions so you can work confidently.
Follow the sequence and safety tips to finish each repair cleanly and efficiently.
Fix a Small Scratch
When you spot a small scratch in your vinyl plank, you can often fix it yourself quickly using a few simple steps and common materials.
Clean the area, buff lightly with a soft cloth, then apply a vinyl repair kit compound or matching color filler.
Smooth with a plastic spreader, let cure, and gently blend edges.
Finish with a protective clear coat if needed.
Replace a Single Plank (Click-Lock)
If a scratch turns out to be more than surface-level or the plank is warped or cracked, you can remove and replace a single click-lock plank without pulling up the whole floor.
Slide back adjacent planks, detach and lift the damaged plank, clean the subfloor, position the new plank, click it into place, and reseat surrounding boards for a seamless repair.
Re-glue a Loose Glue-Down Plank
Lift the loose glue-down plank carefully to check the adhesive and subfloor beneath so you can decide whether re-gluing will fix it.
Clean old adhesive and debris, roughen surfaces if manufacturer recommends, then apply vinyl flooring adhesive evenly.
Press the plank into place, roll with a floor roller or weighted board, wipe excess adhesive, and let cure per adhesive instructions before walking on it.
Frequently Asked Questions (FAQ)
You probably have quick questions about scratches, water damage, and how long repairs will hold up, so let’s answer the most common ones.
You’ll learn whether scratches can be fully removed, if repairs stay invisible, how long fixes typically last, when water damage requires replacement, and whether heat is safe for flattening warped planks.
Read on for clear, practical answers.
Can vinyl plank scratches be completely removed?
Wondering whether vinyl plank scratches can be completely removed?
You can often eliminate light surface scratches with cleaning, a color-matching marker, or a vinyl repair kit.
Deeper gouges may be minimized but not erased; you’ll likely need a fill compound or plank replacement for flawless results.
Assess scratch depth before choosing repair—simple fixes work for minor damage, replacements suit severe cuts.
How long does a vinyl floor repair last?
How long a vinyl floor repair lasts depends on the type of damage, repair method, and how well you care for the floor afterward.
Minor scratch touch-ups can hold for years with gentle cleaning and protective mats.
Patch or replacement longevity varies with traffic, moisture, and installation quality.
Maintain proper cleaning, avoid harsh chemicals, and address subfloor or moisture issues promptly to maximize lifespan.
Will repaired areas be visible?
Minor repairs often blend in well, but visibility depends on the damage type, repair method, and how closely the replacement piece matches the original.
You’ll often hide scratches with fillers or touch-up pens; patching a plank may show seams if grain or sheen differ. Proper color-matching, careful sanding, and blending reduce noticeability, but perfect invisibility isn’t guaranteed.
Can I repair water-damaged vinyl planks?
Can you often salvage water-damaged vinyl planks? It depends on damage extent.
If only the surface swelled slightly or edges lifted, you can dry, clean, and reattach or replace affected planks.
Severe buckling, mold, or adhesive failure usually means replacement.
Act fast: stop moisture source, dry thoroughly, inspect subfloor, and replace any compromised planks to prevent ongoing issues.
Is it safe to use heat to flatten warped vinyl planks?
Curious whether you can safely use heat to flatten warped vinyl planks?
You can cautiously use a hair dryer or heat gun on low, keeping it moving to avoid scorching or melting. Test a small hidden area first.
Never exceed recommended temperatures and maintain distance.
For severe warping or glued planks, remove and replace instead of risking heat damage and adhesive failure.