How to Fix Water Damage on Laminate Flooring Before It Spreads
Act fast: stop the leak, blot up standing water, and remove rugs and furniture so moisture won’t spread. Turn off power if outlet areas are wet, then boost airflow with fans and a dehumidifier and lift trim to dry edges. Inspect for swelling, buckling, stains, or mold; clean minor surface spots with a pH-neutral cleaner and replace swollen planks. If rot or mold appears, tear out and repair the subfloor. Keep going to learn specific repair and prevention steps.
How to Fix Water Damage on Laminate Flooring Before It Spreads
If you spot water on your laminate, act fast: blot up standing water, lift wet rugs or furniture, and use fans or a dehumidifier to speed drying.
Stop the source—shut off valves or fix leaks—so moisture doesn’t spread under the planks.
If the damage is extensive, the floor warps, or mold appears, call a professional; for small, recent spills you can usually handle it yourself.
Quick Answer Immediate Actions to Stop Damage
When water’s pooling on laminate, act fast to limit swelling and surface damage: stop the source, remove standing water, and increase airflow.
Blot with towels, use a wet/dry vacuum, and prop open doors or windows. Lift trim if needed to dry edges.
Dry with fans and dehumidifiers, inspect for cupping or discoloration, and document damage—this is how to fix water damage on laminate flooring.
When to Call a Professional vs. DIY
After you stop the leak and start drying, you’ll need to decide whether you can handle repairs yourself or should call a pro.
If damage is minor—small swelling, surface stains—you can sand, replace boards, and dry thoroughly.
Call a pro if subflooring, extensive warping, mold, or persistent odors appear, or if insurance, structural concerns, or large areas are involved.
Understanding Water Damage on Laminate Flooring
You need to know what counts as water damage on laminate — from surface stains to saturated cores — so you can spot problems early.
Laminate is vulnerable because its layered construction, glued seams, and fiberboard core swell and separate when wet.
Watch for stages like discoloration, edge swelling, buckling, and eventual mold growth so you can act quickly.
What Constitutes Water Damage on Laminate
Although laminate looks solid, it’s actually vulnerable to moisture because the fiberboard core swells and the top layer can delaminate when exposed to water.
You’ll notice cupping, buckling, soft or spongy spots, discoloration, surface bubbling, or separating seams.
Early signs include musty odors and swollen edges. These indicate damage that needs prompt drying, assessment, and often plank replacement to prevent spread.
Why Laminate Is Vulnerable (construction, seams, core materials)
Because laminate uses a thin wear layer bonded to a fiberboard core, it’s inherently less water-resistant than solid wood or tile. That construction is why moisture so easily causes problems.
You should know seams, tongue-and-groove joints, and exposed end-grains let water penetrate. The core swells as it absorbs moisture, and backing layers can delaminate, accelerating spread if you don’t act quickly.
Signs and Stages of Damage (discoloration, swelling, buckling, mold)
How can you tell when water’s started to damage laminate flooring?
You’ll first notice discoloration or dark spots where finish changes.
Next the boards swell, edges feel soft and joints gap.
Buckling or warped planks lift from the subfloor.
Finally mold or mildew appears in seams or underboards, smelling musty.
Act fast to dry, repair, or replace affected sections.
Assessing the Situation What to Check First
Start by finding where the moisture is coming from so you can stop ongoing damage.
Next, check whether the problem is just a wet surface or if the subfloor and boards are swollen or buckled, which needs stronger repair.
Also consider safety—shut off power to affected areas and watch for mold that could pose health risks.
Identify the Source of Moisture
Before you rush into repairs, take a moment to pinpoint where the moisture’s coming from so you can stop further damage and choose the right fix.
Check obvious sources, then inspect hidden ones. Use this quick checklist:
- Appliance leaks (dishwasher, fridge)
- Plumbing (pipes, joints)
- Exterior entry (doors, windows)
- Condensation or humidity sources
Determine Extent of Damage: Surface vs. Structural
Once you’ve stopped the leak, assess whether the damage is only cosmetic or has compromised the floor’s structure—this determines if you can repair a few planks or need to replace sections.
Check for cupping, buckling, swollen seams, or soft spots by pressing and walking across the area.
Lift a plank to inspect the core and subfloor; water-stained underlayment signals deeper damage.
Safety and Health Considerations (electrical, mold)
While you’re evaluating damage, pay close attention to electrical hazards and mold risk so you don’t create a bigger problem—turn off power to wet areas if outlets, cords, or appliances are affected, and don’t walk through standing water that could be energized.
Wear gloves, N95 or higher respirator, and eye protection.
Ventilate, dry fast, and monitor for discoloration or musty odors indicating mold needing professional remediation.
Step-by-Step Emergency Response (Stop the Spread)
First, shut off the water source and cordon the area to prevent more damage.
Then remove standing water fast, set up fans and a dehumidifier for thorough drying, and decide whether to lift affected planks to check beneath.
Finally, inspect the subfloor and underlayment so you can plan repairs or replacements.
Step 1 Cut Off Water Source and Contain the Area
Turning off the water and containing the area stops damage from spreading and makes cleanup safer. You should act quickly: shut valves, unplug electronics, and block traffic.
Then isolate the room to prevent tracked moisture and mold.
- Locate and close main or fixture valve
- Unplug powered items and move them up
- Seal doorways with towels or plastic
- Post a warning sign
Step 2 Remove Standing Water Quickly
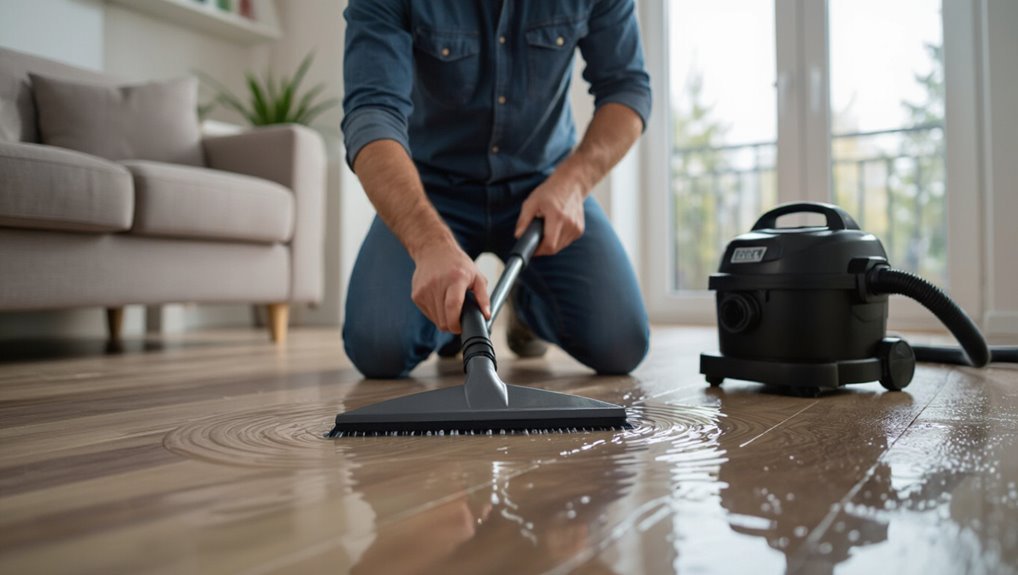
Act quickly to remove standing water to prevent further swelling, warping, and mold growth in your laminate flooring.
Use towels, a mop, and a wet/dry vacuum to extract water; wring and replace soaked cloths frequently.
Lift any area rugs and blot seams and boards.
If water sits in joins, gently pry boards to drain and inspect subflooring for leaks or deterioration.
Step 3 Drying Strategy: Fans, Dehumidifiers, and Ventilation
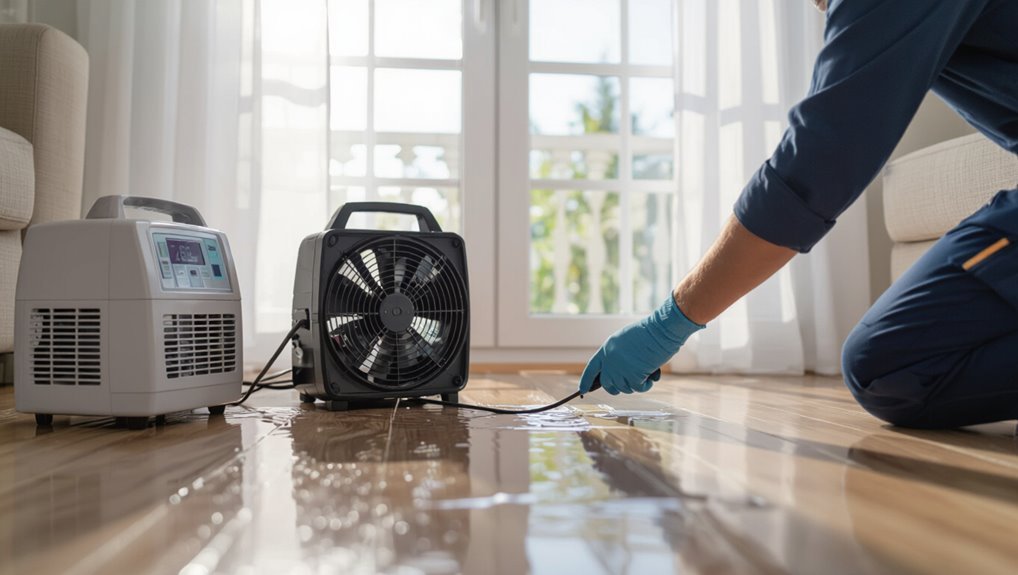
Start drying immediately by positioning fans, running a dehumidifier, and improving ventilation to pull moisture out of the boards and subfloor.
Aim airflow along seams and gaps, elevate fans for circulation, and set the dehumidifier to a low target (40–50% RH).
Open windows if weather’s dry, close doors to confine airflow, and monitor moisture with a meter until levels stabilize.
Step 4 Lift or Remove Affected Planks (when to pull up boards)
When should you pull up boards?
Pull up planks if swelling, buckling, persistent cupping, or mold appears despite drying.
Start at the affected area edge, loosen seams gently with a pry bar, and lift only damaged pieces to limit disruption.
Remove wet underlayment if soaked.
Label and stack removed planks for inspection or replacement; keep them dry and ventilated.
Step 5 Inspect Subfloor and Underlayment
After you’ve removed swollen or moldy planks, inspect the subfloor and underlayment immediately to stop further damage and contamination.
Check for soft spots, warping, stains, and musty odors. Pull back underlayment where needed to view adhesive failures or hidden mold.
Dry with fans and dehumidifiers, treat mold with an appropriate cleaner, and mark areas that need repair or replacement before reinstalling flooring.
Repair Options Based on Damage Severity
Now that you’ve stopped the spread, it’s time to match repairs to the damage level so you don’t over- or under-treat the problem.
For minor surface issues you can clean, dry, and use cosmetic fixes; moderate damage usually means replacing individual planks and resealing seams.
If damage is severe you may need full floor removal, subfloor repair or replacement, and mold remediation—decide whether DIY or a professional is appropriate.
Minor Surface Damage: Cleaning, Drying, and Cosmetic Fixes
If damage is limited to surface stains, slight warping at the edges, or minor finish wear, you can often restore the look of your laminate with targeted cleaning, thorough drying, and simple cosmetic fixes.
Follow these steps:
- Blot and air-dry the area immediately.
- Clean with a pH-neutral laminate cleaner.
- Use fine steel wool for scuffs gently.
- Apply matching repair paste or polish.
Moderate Damage: Replacing Individual Planks and Seams
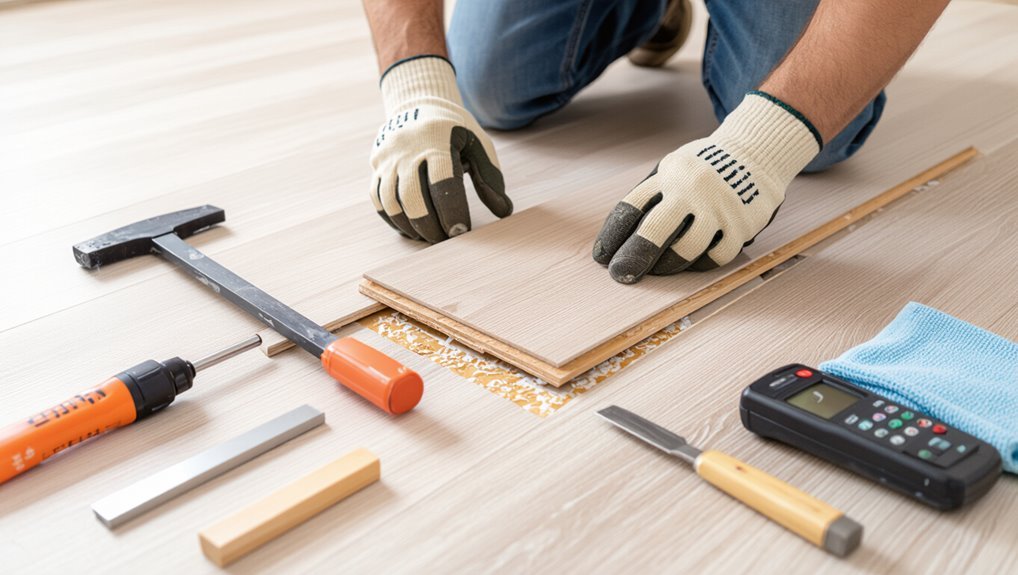
When cleaning and simple touch-ups won’t fix bubbling, buckling, or water-saturated boards, you’ll need to remove and replace the affected planks and repair the seams to prevent further damage.
Cut out damaged boards, match replacements for color and locking profile, dry and level the subfloor, then install new planks.
Reseal seams with waterproof tape or silicone and inspect nearby boards for spreading moisture.
Severe Damage: Full Floor Removal, Subfloor Repair, and Replacement
Tear out the damaged laminate and assess the full scope: severe water damage usually means you’ll remove the entire floor, inspect and repair or replace the subfloor, and then install new material—sometimes changing to a more water-resistant option.
Check for rot, warping, and structural compromise.
Dry, treat, and replace compromised sections, level the surface, and reinstall with moisture barriers and proper acclimation.
Mold Remediation Steps (DIY vs. professional)
After removing damaged flooring and fixing the subfloor, you’ll often find mold hidden in seams, underboards, or in wall cavities—addressing it properly determines whether you can handle remediation yourself or need a pro.
You should:
- Assess extent and moisture source.
- Contain and dry area.
- Clean small spots with detergent/bleach.
- Hire a professional for extensive contamination or HVAC involvement.
Materials, Tools, and Products You’ll Need
Before you start repairs, gather the essentials so you can assess damage and work efficiently.
You’ll need basic assessment and repair tools, drying and dehumidifying equipment to remove moisture, and the right sealants, adhesives, plus matching replacement planks.
Having these on hand will speed the job and help prevent future problems.
Essential Tools for Assessment and Repair
When you’re ready to assess and repair water-damaged laminate, gather a compact kit of reliable tools and materials so you can work quickly and accurately.
You’ll need basic diagnostic and repair gear to spot rot, test moisture, and perform targeted fixes.
- Moisture meter
- Utility knife and pry bar
- Replacement planks and spacers
- Waterproof adhesive and sealant
Recommended Drying and Dehumidifying Equipment
If you want to prevent mold and warping, choose drying and dehumidifying equipment that moves air efficiently and removes moisture reliably; you’ll typically need fans for airflow, a dehumidifier sized for the room, moisture-absorbing desiccants for tight spots, and specialized tools like wet/dry vacs and floor-leveling air movers to speed drying under planks.
Add hygrometers to monitor humidity and temperature, and use extension cords, timers, and safety gear.
Sealants, Adhesives, and Replacement Plank Selection
Once the floor’s dry and humidity’s under control, you’ll need the right sealants, adhesives, and replacement planks to restore integrity and appearance.
Choose water-resistant polyurethane or silicone sealant for seams, a laminate-specific adhesive for tongue-and-groove joins, and matching planks by color, thickness, and wear rating.
Have a utility knife, tapping block, pull bar, and spacers ready for precise replacement.
Cost, Timeframe, and When Replacement Is Necessary
You’ll want to know typical cost ranges for common fixes—like spot repairs, plank replacements, or full reinstallation—so you can budget accurately.
I’ll also outline the expected time for drying, repairs, and reinstalling so you can plan the work.
Finally, you’ll get clear criteria to decide when a repair is enough or a full replacement is necessary.
Typical Cost Ranges by Repair Type
Several common repair options cover most laminate water-damage scenarios, each varying in cost, time, and when full replacement becomes the only choice. You’ll see small fixes, plank swaps, subfloor repairs, or full replacement; costs and urgency rise accordingly. Choose based on visible swelling, mold, and structural compromise.
| Repair | Typical Cost | When to Replace |
|---|---|---|
| Surface seal | $20–$100 | Rarely |
| Plank swap | $50–$300 | If many fail |
| Full replace | $500+ | If mold/warp widespread |
Expected Time to Complete Each Repair Stage
Now that you’ve seen typical costs for surface seals, plank swaps, and full replacements, let’s look at how long each repair stage actually takes and when you’ll need to move from a quick fix to replacing boards or the whole floor.
Surface sealing: 1–3 hours.
Plank swaps: half a day to a day per room.
Partial replacement: 1–3 days.
Full replacement: 2–7 days, depending on size.
How to Decide Between Repair and Full Replacement
Wondering whether to patch a few planks or replace the whole floor? Assess damage extent, moisture, and subfloor condition.
Repair if damage is localized, planks snap out, and the subfloor’s dry; expect lower cost and a day or two of work.
Choose replacement when warping, widespread staining, mold, or a compromised subfloor exist—budget more time and cost for full removal and install.
Common Mistakes to Avoid
Don’t wait until stains or warping get worse—act at the first sign of water to avoid bigger repairs.
Don’t use high heat or hairdryers, paint over mold, or just swap out planks without finding and fixing the moisture source.
If you do any of those, you’ll likely end up back at square one with more damage and higher costs.
Waiting Too Long to Act
If you wait too long to address water damage, the problem usually gets worse quickly—warping, mold growth, and delamination can spread beyond the initial area and become far costlier to repair.
Act promptly: stop the water source, remove standing moisture, lift affected boards if possible, and ventilate the space.
Delaying lets damage spread, increases replacement needs, and raises health risks from mold.
Using Heat or Incorrect Drying Methods
While it might seem faster to blast wet laminate with high heat, doing so can warp boards, loosen adhesive, and crack the wear layer; instead, use controlled drying methods like dehumidifiers, fans, and gentle air circulation to pull moisture out without causing more damage.
Don’t use space heaters, direct sunlight, or hairdryers on high—they create uneven drying, cupping, and delamination.
Painting Over or Masking Mold/Damaged Areas
Although slapping paint over stained or moldy laminate might seem like a quick fix, you’ll only hide problems that will come back worse—mold keeps spreading beneath coatings, adhesives fail, and damaged boards can delaminate or warp out of sight.
Don’t paint, seal, or mask contamination. Instead, remove affected material, clean with appropriate biocide, and inspect seams and underlayment so remediation actually resolves the issue.
Replacing Planks Without Addressing Underlying Moisture
Because moisture often comes from beneath the surface, simply swapping out warped or stained planks won’t stop the problem—you’ll just be replacing symptoms, not the cause.
If you don’t locate and fix leaks, humidity sources, or damp underlayment, new boards will fail too.
Inspect subfloor, seal leaks, dry thoroughly, and replace damaged underlayment before installing new laminate to prevent recurring damage.
Prevention: Best Practices to Protect Laminate Floors
To keep water damage from happening, you’ll want a simple routine of inspection and maintenance plus the right underlayment and moisture barrier during installation.
Use mats, wipe up spills immediately, and control indoor humidity so small issues don’t become big ones.
Choosing proper installation methods and quick-response habits will save you time and money down the road.
Routine Maintenance and Inspection
When you keep up with simple, regular checks and cleaning, you’ll catch small issues before they turn into water-damage nightmares.
- Sweep and vacuum weekly to remove grit that scratches seals.
- Wipe spills immediately with a dry cloth; follow with a damp wipe if needed.
- Inspect seams and baseboards monthly for dark spots or warping.
- Test area rugs and pet bowls for leaks; relocate if dampness appears.
Moisture Barriers, Proper Installation, and Underlayment Choices
Routine checks help catch surface problems, but preventing water at the construction level offers the strongest protection for laminate floors.
You should install a vapor barrier over subfloor joints, choose water-resistant underlayment, and follow manufacturer spacing and locking instructions.
Properly sealed connections and perimeter gaps with silicone or trim prevent capillary wicking.
Correct installation minimizes moisture intrusion and limits future repair needs.
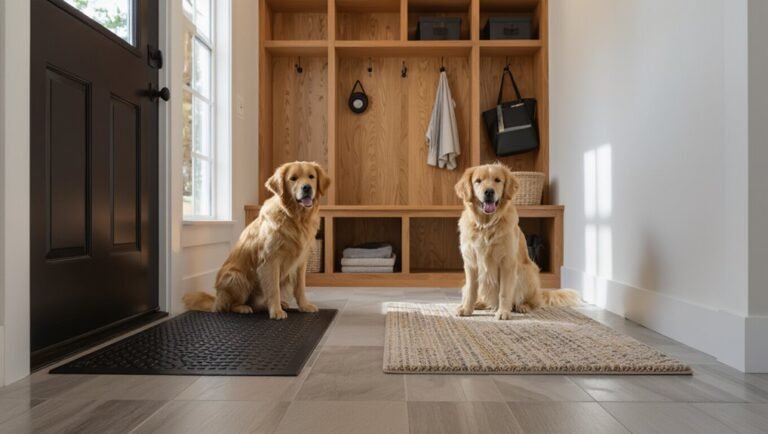
Quick-Response Habits (mats, prompt cleanup, humidity control)
If you want your laminate floors to stay looking good, adopt quick-response habits: place absorbent mats at entrances and sinks, wipe spills immediately with a dry cloth, and avoid soaking the floor.
Monitor indoor humidity with a hygrometer and use a dehumidifier or HVAC to keep levels between 30–50%.
Regularly dry damp areas and check beneath furniture for hidden moisture to prevent damage.
Checklist: Immediate Actions and Follow-Up Steps
Start by stopping the source of water right away and protecting unaffected areas: turn off water at the main or affected valve, unplug nearby electronics, and lay down towels or plastic sheeting to block the spread.
Then follow this checklist:
- Remove standing water with a wet vac or mop.
- Lift baseboards and dry under edges.
- Run fans and dehumidifiers.
- Document damage and schedule repairs.
FAQ
You’ll find quick answers here to common concerns like whether warped laminate can be repaired or must be replaced and how long wet laminate can sit before it’s permanently damaged.
You’ll also get guidance on using hairdryers or heaters safely, what to expect from insurance claims, and how to spot and assess mold under your flooring.
If you have a specific situation, ask and we’ll walk through the best next steps.
Can warped laminate be fixed or does it need replacement?
Wondering whether warped laminate can be saved or if you’ll need a full replacement? You can sometimes fix minor cupping or slight plank lift by drying thoroughly, re-seating loose boards, and replacing connector pieces.
Severe buckling, delamination, or widespread swelling usually means replacement is best.
Inspect underlying subfloor and moisture source first, because fixing warp without addressing moisture will let the problem return.
How long can laminate sit wet before permanent damage occurs?
If you’ve determined whether warped planks can be repaired, the next question is how long wet laminate can sit before sustaining permanent damage.
Generally, laminate tolerates minutes to a few hours of surface moisture; prolonged exposure—24–48 hours—risks swelling, edge lifting, delamination, and mold.
Fast cleanup and drying within that window can often prevent irreversible harm, though thicker or sealed boards may last longer.
Is it safe to dry laminate with a hairdryer or heater?
While a hairdryer or space heater can speed surface drying, you should use them cautiously because high, concentrated heat can warp edges, loosen joints, or damage the wear layer.
Use low heat, keep the device moving, and hold it several feet away.
Combine with fans and dehumidifiers, lift baseboards if soaked, and stop immediately if planks buckle or feel hot to the touch.
Will insurance cover water damage to laminate flooring?
Who pays for laminate repairs depends on the cause and your policy: most homeowners insurance covers sudden, accidental water damage (like a burst pipe), but it usually won’t cover damage from long-term leaks, neglect, or gradual wear.
Check your policy, document the damage with photos, get repair estimates, and contact your insurer promptly.
You may need proof of maintenance and rapid response to file a claim.
How can I tell if mold under laminate is present and dangerous?
Wondering whether mold is hiding under your laminate? Lift a plank in a small area—look for fuzzy growth, dark stains, or a musty odor.
If you have persistent respiratory symptoms, visible discoloration, or damp subflooring, treat it as hazardous.
Wear gloves and a mask, dry the area, and consult a professional for testing and remediation if growth is extensive or health effects occur.