How to Install Tile Edge Trim for a Seamless Border Finish
You can get a seamless border finish by measuring exposed edges precisely, dry-fitting trim pieces, and cutting them accurately with the right tools. Clean and level the surface, spread thinset or recommended adhesive evenly, then press the trim into place and set tiles snug against its lip. Miter or overlap corners depending on skill, grout carefully, and seal joints with silicone. Let everything cure fully; follow the next sections for step-by-step tips and troubleshooting.
How to Install Tile Edge Trim for a Seamless Border Finish
You can install tile edge trim yourself with basic tools and a bit of patience, and this guide will show you the steps.
You’ll learn how to measure, cut, and secure trim for a clean, even border. It also covers common mistakes to avoid and tips for matching trim to your tile and finish.
Quick Answer Can You Install Tile Edge Trim Yourself?
Wondering if you can install tile edge trim yourself? Yes—you can.
With basic tools, patience, and clear instructions on how to install edge tile trim, most DIYers handle straight runs and simple corners.
Measure accurately, cut trim to fit, set tiles with proper adhesive, and secure trim before grout.
Complex profiles or uneven surfaces may warrant professional help.
What This Guide Covers
Although installing tile edge trim can seem fiddly at first, this guide walks you through each step so you’ll get a clean, durable border finish.
You’ll learn what tools and materials you need, how to prep and measure, install and secure trim, then finish and seal edges for longevity.
- Tools & materials
- Preparation & measuring
- Installation steps
- Finishing touches
Why Tile Edge Trim Matters
You’ll want edge trim because it protects tile edges, prevents sharp cuts, and makes installations more durable.
It also finishes the look, so your project appears professional instead of rough.
Different materials and profiles—aluminum, PVC, bullnose, and L-shaped trims—work better in different spots, so choose the type that fits the tile, traffic, and moisture conditions.
Purpose and Benefits of Edge Trim (safety, durability, aesthetics)
Functionality matters: tile edge trim protects sharp tile edges from chipping and keeps people from catching toes or bare feet on rough corners, while also reinforcing vulnerable seams to extend the life of your installation.
You’ll also boost aesthetics with neat, consistent borders, simplify cleaning, and reduce maintenance. Overall, trim delivers safety, durability, and a finished look that elevates your tiling project.
Types of Tile Edge Trim and Where to Use Them
There are several common types of tile edge trim—aluminum, PVC, stainless steel, and bullnose tiles—each designed for specific uses and finishes, so you can pick the profile that matches your tiles and the area’s wear and moisture conditions. Choose aluminum for modern looks, PVC for budget and moisture, stainless for heavy traffic, and bullnose for seamless changes.
| Trim Type | Best Use |
|---|---|
| Aluminum | Edges, modern |
| PVC | Wet areas |
Choosing the Right Trim and Materials
When picking trim, you’ll choose materials and profiles—aluminum, stainless steel, PVC, or shapes like bullnose, L-shaped, and J-profile—based on durability and the look you want.
Measure your runs and add about 10% for cuts and mistakes so you can estimate how much trim to buy.
Make sure you have the right tools, adhesive, and a short supplies checklist before you start.
Materials and Profiles (aluminum, stainless steel, PVC, bullnose, L-shaped, J-profile)
Choosing the right tile edge trim starts with the material and profile, since those two factors determine durability, appearance, and installation method.
You’ll pick based on use, look, and budget.
- Aluminum: lightweight, modern, anodized finishes.
- Stainless steel: durable, wet areas, sleek.
- PVC: budget, flexible, paintable.
- Profiles: bullnose for rounded edges, L and J for exposed edges.
Measuring and Estimating How Much Trim You Need

Start by measuring every exposed tile edge you’ll trim—count linear feet for walls, floors, countertops, and steps—so you can buy the correct lengths and profiles.
Add 10% waste for cuts, mitered corners, and mistakes. Note each profile needed per location and match trim height to tile thickness.
Convert total feet into standard trim lengths (typically 8–10 ft) when ordering.
Tools, Adhesives, and Supplies Checklist
Gather a compact kit of the right tools, adhesives, and trims before you cut or mix anything so you won’t interrupt the job to hunt for a missing part.
Pick trim profile and material, appropriate thinset or adhesive, grout, and matching sealant. Have these essentials ready:
- Trim lengths and corner pieces
- Tile adhesive/thinset
- Grout and grout float
- Sealant and silicone gun
Preparation Before Installation
Before you start, inspect the tile edges and clean or level the surface so the trim will sit flush.
Measure and cut the trim to size with the right tools and techniques, keeping cuts square and burr-free.
Finally, dry-fit the pieces and mark your layout so installation goes straight and fast.
Inspecting Tile Edges and Surface Preparation
Carefully inspect each tile edge and the surrounding surface for chips, uneven grout lines, or loose pieces that could compromise the trim fit.
Remove debris, dust, and old adhesive; verify surfaces are dry and stable.
Tap tiles gently to check for hollowness.
Fill gaps or repair damaged edges with appropriate thinset or grout so the trim sits flush and bonds securely during installation.
Cutting Trim to Size Tools and Techniques
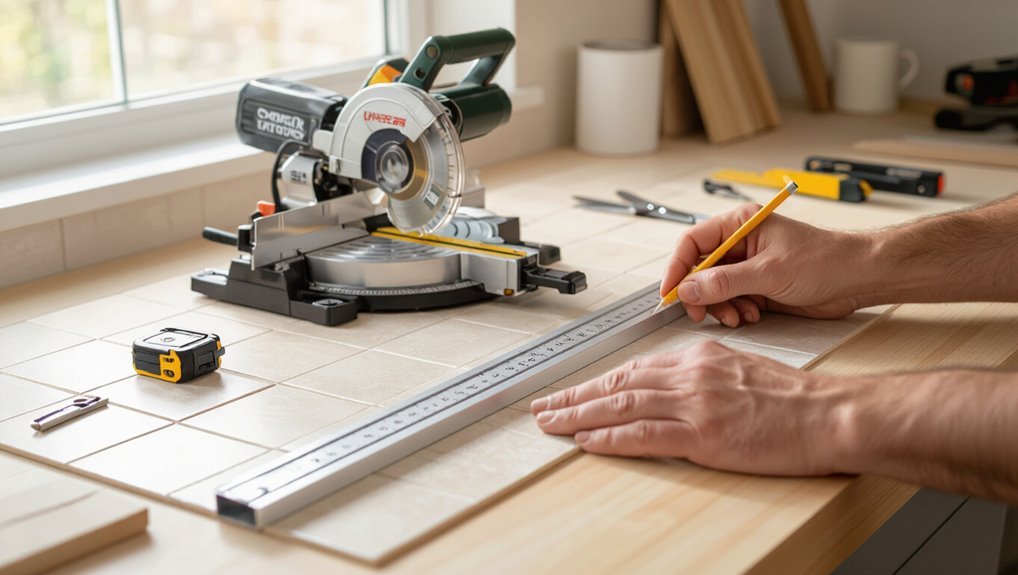
Start by measuring each run of trim and marking cut lines clearly—accurate measurements are the foundation of a clean installation.
Choose the right tools: a hacksaw or mitre saw with a fine-tooth blade for aluminum, tin snips for slight adjustments, and a file for deburring.
Wear safety glasses, clamp trim firmly, cut slowly, and test fit pieces for smooth joints.
Dry Fitting and Marking Layout
With your trim cut and deburred, lay each piece along the walls and around corners to check fit and reveal any adjustments needed.
You’ll dry fit without adhesive, align exposed faces, and note gaps. Transfer marks for cuts and fastener positions with a pencil or masking tape before final setting.
- Check corner joins
- Align trim faces
- Mark cut lines
- Note fastener locations
Step-by-Step Installation Process
Now you’ll follow a clear sequence to install the trim: spread adhesive or thinset, position and secure the trim, and set the adjacent tiles against it.
After that you’ll grout and seal the trim joint, then clean up, finish edges, and allow proper curing time.
Each step matters for a neat, durable result.
Step 1 Apply Adhesive or Thinset Properly
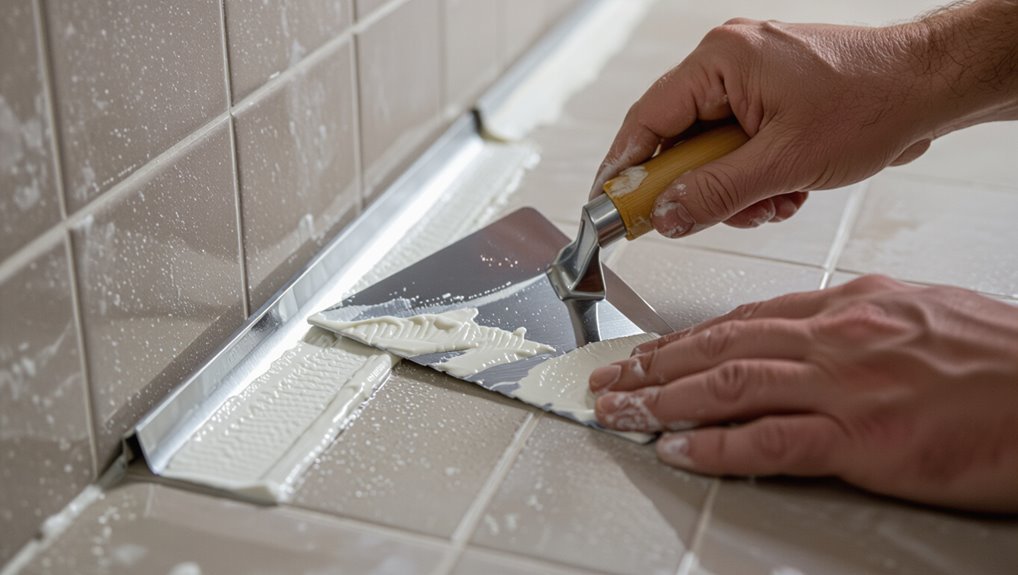
Mix the adhesive or thinset to a smooth, lump-free consistency and apply it evenly where the trim will sit, ensuring full contact with both the tile edge and the substrate.
Use a notched trowel to comb thinset for uniform thickness, back-butter trim if needed, and remove excess promptly.
Keep the area clean and work within the product’s open time for best bond.
Step 2 Positioning and Securing the Trim
1. Position the trim along the exposed edge, aligning its lip with the tile face and checking level and plumb.
Press the trim into the fresh adhesive, tapping gently with a rubber mallet if needed. Secure corners and overlaps with recommended screws or adhesive clips.
Wipe excess thinset immediately. Recheck alignment before the adhesive sets to guarantee a straight, even border.
Step 3 Setting Adjacent Tiles Against the Trim
With the trim in place, set each adjacent tile so its edge butts snugly against the trim lip, keeping a consistent grout joint width with spacers as you go.
Press tiles into the mortar bed, tapping gently with a rubber mallet until flush with the trim face.
Check alignment frequently, adjust spacers for uniform gaps, and remove excess mortar from the trim profile.
Step 4 Grouting and Sealing the Trim Joint
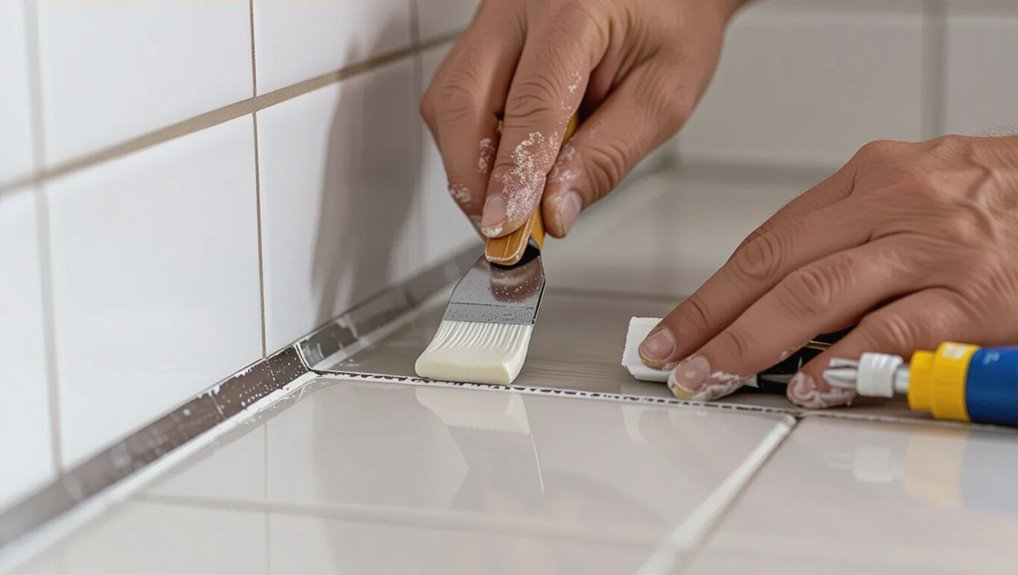
Start by removing the spacers and sweeping any loose debris from the grout joint and trim profile so the grout can bond cleanly.
Then dampen the tiles and trim lightly with a sponge to prevent the grout from drying too fast.
Mix grout to manufacturer specs, pack joints firmly, and tool the grout flush with the trim.
After initial set, apply silicone sealant where trim meets walls to waterproof the joint.
Step 5 Cleaning, Finishing Touches, and Curing Time
Wipe away grout haze and excess sealant promptly using a damp sponge and a soft cloth so the trim and tiles look crisp and clean; rinse your sponge often and change the water when it gets cloudy to avoid smearing residue back onto the surface.
- Inspect seams for gaps and touch up with sealant.
- Polish metal trim with a soft cloth.
- Allow grout and sealant to cure per manufacturer time.
- Recheck edges after full cure and clean lightly.
Special Situations and Variations
When you hit corners or outside edges you’ll choose between mitering pieces for a seamless look or overlapping for easier installation.
Adjust trim profiles or add shims to match varying tile thicknesses and get smooth height changes.
Apply purpose-made trims and slip-resistant profiles for stairs, and seal carefully on countertops and shower niches to protect edges.
Installing on Corners and Outside Edges (miters vs. overlap)
Corners and outside edges demand a different approach than straight runs, so you’ll need to decide between mitering trim pieces for a clean, continuous joint or overlapping them for a simpler, more forgiving finish.
Mitered corners give a seamless look but require precise cuts and tight alignment.
Overlaps are quicker, forgiving of small errors, and easier to adjust on uneven walls or awkward angles.
Working with Different Tile Thicknesses and Height Adjustments
After you’ve decided between mitering or overlapping, you’ll face another common challenge: mismatched tile thicknesses and varying finished heights.
Measure both tile and trim profiles, then choose adjustable or stepped trims.
Shim or back-butter thinner tiles to align faces, or raise substrate under thinner areas.
Cut trim lips where necessary and use flexible sealant to bridge tiny gaps for a clean, even finish.
Using Trim on Stairs, Countertops, and Shower Niches
Because stairs, countertops, and shower niches each have unique edges and traffic patterns, you’ll need to pick trims and install methods that handle wear, water, and safety without sacrificing appearance.
On stairs use nosing or bullnose trims for slip resistance and durability.
For countertops choose rounded or metal edge profiles to resist chips.
In shower niches seal all trim joints and use corrosion‑resistant materials.
Common Mistakes and How to Avoid Them
Don’t pick the wrong profile or skip careful measuring, because ill-fitting trim is the most common setback.
Watch your adhesive choice and alignment—using the wrong glue or crooked placement will show immediately.
Be careful with grout and cleanup to avoid staining, chipping, or knocking trim out of place.
Wrong Trim Selection and Poor Measurement
When you pick the wrong trim profile or mis-measure your runs, the finished edge will look off and you’ll waste time and materials.
Check tile thickness, edge style, and junction height before buying. Measure each run twice, account for corners and miters, and include a small waste allowance.
Match trim finish to grout and tile for a cohesive result.
Improper Adhesive Use and Alignment Errors
If you use the wrong adhesive or skip careful alignment, your edge trim won’t sit flush and can pop loose or show uneven gaps.
Choose a manufacturer-recommended adhesive, apply consistent thin-bed coverage, and butter the trim’s back where needed.
Use spacers, a level, and clamps or tape to hold position until cured.
Check alignment frequently and remove excess adhesive before it sets.
Grouting Mistakes and Damage During Cleanup
Although grouting seems straightforward, common mistakes during mixing, application, and cleanup can stain or chip your trim and ruin a tidy finish. You should use correct grout consistency, protect trim edges, clean haze promptly, and avoid abrasive scrubbing that scratches metal or vinyl.
- Mix to manufacturer specs.
- Mask or tape trim.
- Wipe haze within 15–30 minutes.
- Use soft sponges, not steel wool.
Best Practices and Pro Tips
To get durable, flush, and even trim, you’ll set profiles level with the tile and use the right adhesive and backer.
For professional-looking seams, use careful cutting, consistent spacing, and clean tooling before the mortar skins over.
To keep trim and grout looking good, wipe excess promptly, seal grout as recommended, and address chips or gaps right away.
Ensuring Durable, Flush, and Even Results
When you want tile edge trim that lasts and looks seamless, focus on proper prep, accurate measurements, and consistent techniques from start to finish.
Check substrate flatness, use compatible adhesive, and dry-fit trim.
Maintain even grout joints, level trim with a spirit level, and clamp until set.
Seal edges where moisture’s possible, and inspect for gaps or misalignment before final curing.
Finishing Techniques for Professional-Looking Seams
If you want seams that read as intentional and professional, focus on clean shifts and controlled movements during final tooling and sealing.
Use a slightly damp rounded tool to compress and shape joints, wipe excess with a microfibre cloth, and score any cured bulges.
Match sealant texture to surrounding grout, work in consistent strokes, and let adhesives cure undisturbed for crisp, durable edges.
Maintenance Tips to Preserve Trim and Grout
Keeping seams clean and sealed is only part of the job; regular maintenance preserves both trim and grout so your finish stays sharp.
Inspect monthly for chips, cracks, or loose trim. Clean with pH-neutral cleaners and soft brushes, avoid abrasive pads.
Reseal grout annually and touch up caulk or epoxy where needed. Address stains or damage immediately to prevent spread.
Cost, Time, and When to Hire a Pro
Expect to pay a few dollars per trim plus grout, adhesives, and any specialty tools, and plan on an hour or two for a simple run or half a day for complex cuts and corners.
If you spot uneven walls, large layouts, tricky changes, or you don’t have steady tools and skills, it’s smarter to hire a pro.
We’ll break down typical costs, time estimates, and clear signs that warrant professional help.
Typical Cost Breakdown and Time Estimates
Typical jobs for installing tile edge trim usually cost between $20 and $200 for materials and 1 to 4 hours for a DIY install, depending on trim type and length; hiring a pro adds labor — typically $50–$100 per hour — but cuts risks and speeds the job.
| Item | Cost | Time |
|---|---|---|
| PVC trim | $10–$40 | 0.5–1 hr |
| Metal trim | $20–$120 | 1–3 hrs |
| Pro labor | $50–$100/hr | variable |
Signs You Should Hire a Professional
Those cost and time estimates give you a baseline, but some situations make hiring a pro the smarter move.
Hire one if your trim runs into uneven substrates, complex cuts, or matching metal profiles.
Also consider pros when deadlines are tight, you lack tools or experience, or warranty coverage matters.
Get quotes and check reviews to balance cost against risk and quality.
FAQ Tile Edge Trim Installation
You’re probably wondering about common issues like cutting metal trim without nicking it, fitting trim to very thin or very thick tiles, and whether silicone or grout works best for the joints.
You’ll also want quick fixes for damaged trim and whether you can install trim over existing tile.
Below are clear, practical answers to those FAQs so you can finish the job cleanly.
How do I cut metal trim without damaging it?
If you want clean cuts without bending or scratching metal tile trim, choose the right blade and steady technique: score thin trims with a carbide-tipped snips or a fine-tooth hacksaw.
Support the trim firmly on a flat surface, clamp it near the cut, and finish burrs with a file or emery cloth.
Measure and mark accurately, cut slowly, deburr edges, and test-fit before installing.
Can I use tile trim with very thin or very thick tiles?
Wondering whether tile trim will work with unusually thin or thick tiles? Yes — but you must match trim profile and adhesive build-up to tile thickness.
Use adjustable or wider-leg trims for thick tiles and low-profile or recessed trims for thin tiles.
Shim or back-butter tiles to align faces, then check that the trim lip covers edges without lifting.
Measure carefully before purchase.
Is silicone or grout better for finishing trim joints?
Which works best — silicone or grout — depends on where the trim sits and how it moves.
Use grout for fixed, flush joints between tile and trim on floors or walls; it hardens and matches tiles.
Choose silicone for corners, exterior edges, or anywhere movement and water resistance matter; it stays flexible and prevents cracking.
Match color and tool neatly.
How do I repair damaged trim after installation?
Start by evaluating the damage to see whether the trim needs a simple touch-up or a full replacement.
For scratches or loose sealant, clean, sand lightly, and apply matching paint or silicone.
For bent, cracked, or deeply gouged trim, remove the damaged section, clean the substrate, and install a new trim piece with adhesive and grout or sealant.
Finish and allow proper cure time.
Can trim be installed over existing tile?
Can you install tile edge trim over existing tile? Yes—you can, but prep matters.
Clean and level the tile, remove loose grout, and confirm edges are straight. Use a trim designed to overlap or sit against tile, secure with appropriate adhesive or thinset, and grout or seal gaps.
Test fit before final bonding to guarantee a flush, durable finish.