How to Clean Wax Off a Floor Without Stripping the Surface
You can remove wax without stripping the finish by softening or hardening it, then lifting gently and cleaning the residue. Start by warming small spots with a hair dryer or placing an ice pack to harden flakes, then pry up softened or chilled pieces with a plastic scraper. Wipe residue with a microfiber cloth and a mild pH‑neutral cleaner, testing solvents like mineral spirits in an inconspicuous spot first. Follow with a dry buff to restore shine and learn step‑by‑step tips and precautions.
Quick Answer How to Remove Wax Without Stripping the Floor
You can remove wax without stripping the floor by softening the wax and lifting it with gentle tools.
Start by heating the wax with a hair dryer or warm towel, then scrape carefully with a plastic scraper and wipe residue with a microfiber cloth dampened in a mild, pH-neutral cleaner.
Repeat as needed and finish by buffing dry to restore shine.
One-paragraph direct method summary
If wax has built up on your floor but you don’t want to strip the finish, start by softening the wax with a warm, damp cloth or a hair dryer set to low.
Then gently scrape up loosened bits with a plastic putty knife.
Follow by applying a mild solvent like mineral spirits or a commercial wax remover to a soft cloth and rubbing the area in small sections until residue lifts.
Finish by wiping with a clean damp cloth and buffing with a dry microfiber towel to restore shine.
To clean wax from the floor, work patiently, test solvents in an inconspicuous spot, and avoid harsh scrubbing that damages the finish.
Basic Understanding What Wax Is and Why Some Removal Methods Damage Floors
Waxy spills from candles, furniture polish, or floor products are mostly made of oils, paraffin or beeswax, and synthetic polymers that bond differently to wood, tile, and vinyl.
You’ll find that heat can melt wax into finish pores, solvents can strip protective coatings, and scraping can gouge softer surfaces if you use the wrong technique.
Know when to avoid stripping—on delicate finishes—or when aggressive removal is necessary, like on layered polymer build-up.
What candle, furniture, and floor wax are made of
A candle’s drip, a polish sheen on a table, and the protective coat on a hardwood floor all come from mixtures of long-chain hydrocarbons and additives that set them apart from water-based substances.
You’ll find paraffin, beeswax, or soy blends in candles; waxes plus solvents, oils, and fragrances in furniture waxes; and polymer-enhanced, oil-modified blends in floor waxes for durability and gloss.
How common removal methods (heat, solvents, scraping) can affect different floor surfaces
Knowing what waxes are made of helps you predict how removal methods will interact with different floors.
Heat can melt wax but may soften vinyl, damage finishes, or lift adhesive.
Solvents dissolve wax yet can strip polyurethane or discolor sealed wood.
Scraping removes buildup but risks scratching hardwood, tile grout, or laminate.
Test a small, hidden area before full treatment.
When to avoid stripping vs. when stripping is necessary
If your floor still has its original protective finish and only a thin coat of wax sits on top, you should avoid full stripping—instead try gentler methods like buffing, warm water, or a mild solvent spot test first.
Strip only when wax is thick, yellowed, or repeatedly reapplied, or when finish is damaged beyond repair. Always test a small area before proceeding.
Identify Your Floor Type Before Starting
Before you start scraping or waxing away, identify your floor type because finished hardwood, unfinished wood, laminate, and engineered planks each react differently to heat, solvents, and abrasion.
Check whether vinyl, linoleum, PVC, tile, stone, or cork is sealed or unsealed—sealed stone and tiles tolerate stronger cleaners than unsealed surfaces or porous cork.
Knowing the specific material will help you choose safe removal methods and avoid permanent damage.
Hardwoods (finished vs. unfinished)
Because finished and unfinished hardwood react differently to heat and solvents, you should identify which type you have before removing wax.
Finished floors have a protective coating; you can use gentle heat and mild solvent sparingly to soften wax without damaging the finish.
Unfinished wood absorbs products and can stain, so avoid solvents—use scraping, gentle heat, and blotting with minimal moisture, then sand and refinish if needed.
Laminate and engineered wood
Finished and unfinished hardwood differ in how they handle wax, and laminate or engineered wood have their own rules you should know first.
You shouldn’t use abrasive scrapers or harsh solvents on laminate’s printed surface or engineered wood’s thin wear layer. Use a plastic scraper, gentle detergent, and minimal water.
Test a small area, blot rather than rub, and dry promptly to avoid swelling.
Vinyl, linoleum, and PVC
1. For vinyl, linoleum, and PVC, you’ll want to test a small hidden area first.
Use a plastic scraper to lift excess wax, then apply warm soapy water or a mild vinegar solution—don’t use abrasive pads or harsh solvents that can dull or melt the surface.
Dry completely, then buff gently with a soft cloth.
If residue remains, repeat carefully.
Tile and stone (sealed vs. unsealed)
Before you start, identify whether your tile or stone floor is sealed or unsealed, since the approach for removing wax differs considerably and using the wrong method can damage the surface.
For sealed surfaces, use gentle heat and a mild solvent or detergent to lift wax.
For unsealed stone, avoid harsh chemicals; scrape gently and blot with mineral spirits sparingly, then reseal if needed.
Cork and other specialty floors
If you have cork or another specialty floor, first confirm the exact material and finish so you can choose a safe removal method.
These surfaces can be sensitive to heat, solvents, and abrasion, and what works on vinyl or hardwood may damage them.
Test any solvent or heat source in an inconspicuous area, use gentle mechanical removal, and consult manufacturer care instructions before proceeding.
Quick floor-type identification checklist
Start by identifying your floor so you can pick a safe, effective wax-removal method that won’t cause stains or damage.
- Wood: warm grain, feel for finish—solid or engineered; avoid excess water or solvents.
- Vinyl/Linoleum: flexible sheet or tiles; test solvent in a hidden spot.
- Tile/Stone: grout lines visible; porous stone needs pH-neutral cleaners and careful blotting.
Materials and Tools You’ll Need (Gentle-to-Moderate Kit)
You’ll want a few household basics—ice for hardening wax, a plastic scraper, and microfiber cloths—for the gentlest removal.
Keep heat tools like a hair dryer or an iron (used with a protective cloth) as safe alternatives, and have mild cleaners on hand: dish soap, rubbing alcohol, or mineral spirits depending on the finish and stain severity.
Don gloves, lay down drop cloths, and choose pH-neutral cleaners where recommended to protect yourself and your floor.
Household supplies (ice, plastic scraper, microfiber cloths)
Gather a few simple household supplies—ice, a plastic scraper, and microfiber cloths—to remove wax gently and avoid damaging your floor.
Use ice in a sealed bag to harden wax, then lift flakes carefully with a plastic scraper held flat.
Wipe residue with damp microfiber, repeat as needed, and dry thoroughly to prevent streaks or water damage.
Heat tools and safe-use alternatives (hair dryer, iron with cloth)
If scraping and chilling didn’t lift all the wax, gentle heat can soften remaining residue so you can wipe it away.
Use a hair dryer on low, keeping it several inches away and moving constantly.
For stubborn spots, place a thin cotton cloth over the wax and press briefly with a warm iron on low—never steam.
Test a hidden area first.
Mild cleaning agents and solvent options (dish soap, rubbing alcohol, mineral spirits) with safety notes
Start with the gentlest options and move up only as needed: mild dish soap loosened in warm water will tackle most waxy residues.
Rubbing alcohol works well on sticky spots and adhesive left behind.
Mineral spirits handle tougher, cured waxes on hard floors.
Test any solvent in an inconspicuous spot, ventilate the area, use sparing amounts, and wipe surfaces dry to prevent damage.
Protective gear and floor-care supplies (gloves, drop cloths, pH-neutral cleaners)
You’ll want a compact kit of protective gear and gentle floor-care supplies before you tackle wax removal.
Wear nitrile or rubber gloves to protect skin and grip tools. Use a breathable mask if using solvents.
Lay down drop cloths to catch drips and protect adjacent surfaces.
Choose a pH-neutral cleaner for final wiping to preserve finish and avoid stripping the floor.
Step-by-Step Removal Methods (Start Gentlest → Stronger, with Floor-Type Notes)
You’ll start with the gentlest fixes—freeze the wax with an ice pack and scrape with a plastic tool—then move to heat-softening with a hair dryer or an iron over a towel, taking care not to scorch the finish.
If those don’t fully work, try warm soapy water and blotting, then test rubbing alcohol on a hidden spot before using it on residue.
Reserve mineral spirits or a commercial wax remover for stubborn spots and only use them with caution to avoid damaging the floor’s finish.
Step 1 Harden-and-scrape method (ice pack + plastic scraper)
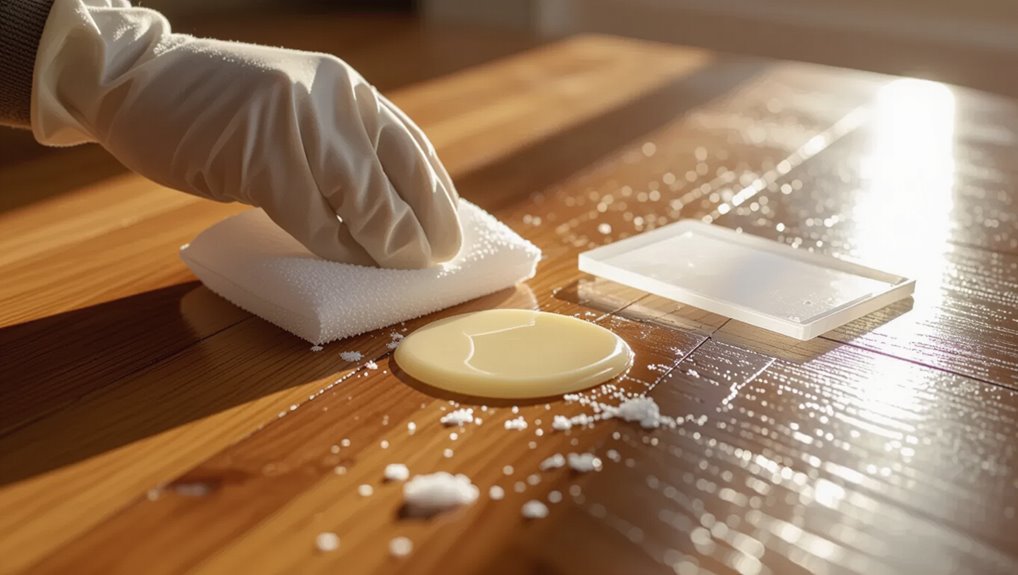
Freeze the wax with an ice pack or a bag of frozen peas to harden it.
Then gently lift and scrape it away using a plastic scraper or an old credit card.
Work slowly at a low angle to avoid gouging.
Collect flakes with a soft brush and wipe residue with a damp microfiber cloth.
Repeat freezing if stubborn spots remain.
Step 2 Heat-soften method (hair dryer or iron over towel) with precautions
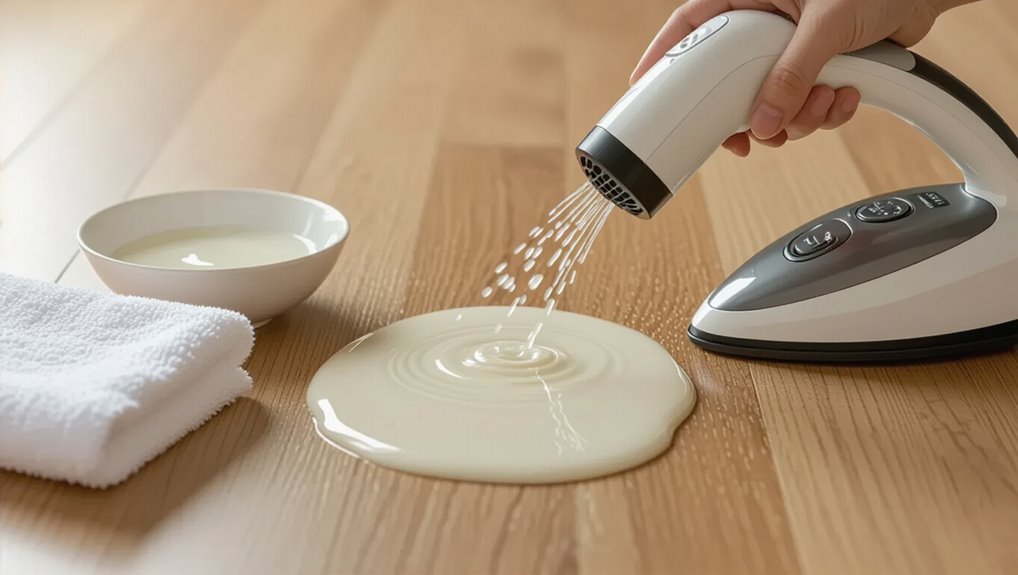
If the ice-and-scrape approach didn’t remove all the wax, you can soften remaining residue with controlled heat so it wipes away instead of flaking.
Hold a hair dryer 6–8 inches away, moving constantly; or press an iron on low through a clean towel to melt wax into the cloth.
Test a hidden spot, avoid high heat on vinyl or laminate, and ventilate.
Step 3 Warm soapy solution and blotting (when heat or scraping isn’t enough)
When heat or scraping hasn’t lifted all the wax, mix a warm, mild soapy solution and blot the area to dissolve residue without damaging the floor; use a few drops of dish soap in warm water.
Work from the outer edges toward the center, and change cloths as they pick up wax so you’re always blotting with a clean, damp pad.
Gently press and lift until residue fades, then rinse and dry.
Step 4 Rubbing alcohol or isopropyl wipe for residue (how to test and use safely)
Although heat and soap removed most of the wax, you can use rubbing alcohol or an isopropyl wipe to dissolve stubborn residue—after testing first on an inconspicuous spot to verify it won’t harm your floor’s finish.
Dampen a cloth or use a wipe, rub gently, and work small areas. Rinse with water, dry promptly, and stop if finish softens or dulls.
Step 5 Mineral spirits or commercial wax removers for stubborn residue (when to use and how to avoid finish damage)
Because heat, soap, and rubbing alcohol sometimes leave a stubborn film, you’ll reach for mineral spirits or a commercial wax remover only after gentler methods fail and you’ve identified your floor type.
These stronger solvents dissolve remaining wax but can also strip or dull finishes, so use them sparingly, test in an inconspicuous spot, ventilate the area, wear gloves, and follow manufacturer instructions to avoid damage.
Use a soft cloth, apply minimal solvent, blot—not rub—then reassess.
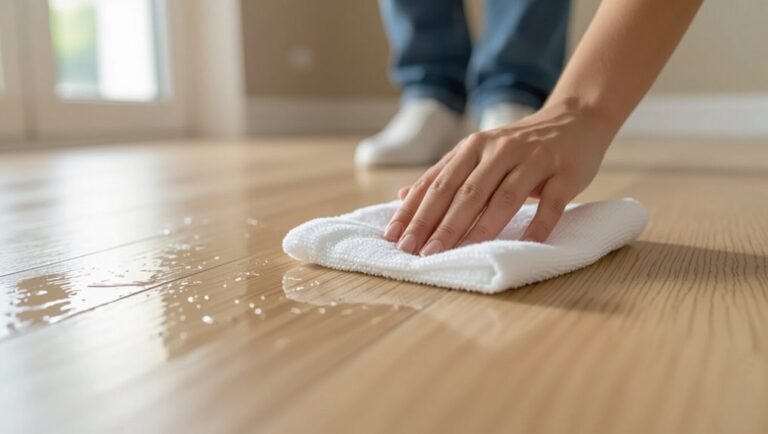
Step 6 Final cleaning and neutralizing (pH-neutral cleaner, rinse, dry)
After you’ve removed wax residue—even with stronger solvents—you’ll want to neutralize any remaining cleaner and restore the floor’s surface.
Mix a pH-neutral floor cleaner per label, mop or wipe thoroughly, then rinse with clean water to remove cleaner residue.
Dry the floor with microfiber cloths or a fan to prevent streaks and moisture damage.
Check for missed spots and repeat if needed.
Tailored Procedures by Floor Type (Apply Steps with Specific Adjustments)
For each floor type you’ll follow the basic removal steps but make specific adjustments to protect the surface and finish.
On finished hardwood avoid harsh solvents that strip finish and on unfinished hardwood take extra care and consider a pro for deep wax buildup.
Watch heat and solvent limits on laminate/engineered floors, use safe solvents for vinyl/linoleum to prevent adhesion issues, and protect sealers and grout on tile and stone.
Finished hardwood preferred sequence and products to avoid finish stripping
When cleaning wax off finished hardwood, start with the gentlest methods so you don’t strip the factory finish—you’ll save time and avoid costly repairs by escalating only if needed.
Begin with a soft microfiber and warm water, then a pH-neutral hardwood cleaner.
If residue remains, use mineral spirits sparingly on a cloth.
Avoid abrasive pads, ammonia, bleach, oil soaps, or wax removers meant for stripped floors.
Unfinished hardwood extra precautions and professional advice
If your home has unfinished hardwood, treat it differently than factory-finished floors: unfinished wood soaks up liquids and solvents, so you’ll want to avoid water saturation and strong cleaners that can raise the grain or stain the wood.
Blot excess wax gently, use minimal solvent on a cloth, test a hidden spot, sand lightly if needed, and consult a flooring pro for large areas or stubborn residue.
Laminate and engineered wood heat limits and solvent warnings
Because laminate and engineered wood have thin wear layers and glued layers beneath, you need to respect their heat limits and avoid harsh solvents that can delaminate or discolor the surface.
Use low-heat methods like cool iron with cloth or warm water and mild detergent.
Test any cleaner in an inconspicuous spot, blot—don’t soak—and stop if finish softens or lifts.
Vinyl and linoleum safe solvents and adhesion concerns
Although vinyl and linoleum tolerate more solvents than delicate laminates, you still need to pick cleaners that won’t weaken adhesive or strip surface coatings; choose mild, pH-neutral detergents, isopropyl alcohol diluted with water, or commercial vinyl-safe removers, and always test a hidden spot first.
Work gently with a soft cloth, avoid solvent puddles near seams, and rinse thoroughly to prevent residue that impedes adhesion.
Tile and stone sealing considerations and grout care
When you’re working on tile or natural stone, sealing and grout care change how you remove wax and protect the floor afterward; different materials absorb solvents and sealers differently, so tailor your approach to the substrate.
Test solvents on an inconspicuous spot, avoid acidic cleaners on stone, protect grout lines with gentle brushes, rinse thoroughly, and reseal porous tiles or grout to restore protection without harming the surface.
Cork and specialty floors recommended gentle-only approaches
Moving from tile and stone, cork and other specialty flooring demand an even gentler approach: they scratch, swell, or discolor easily, and many finishes won’t tolerate heat or harsh solvents.
You should test a small area first, use a soft cloth, mild detergent, and room-temperature water.
Gently lift wax with a plastic scraper, avoid steam, and reapply manufacturer-approved finish if needed.
Common Problems and How to Fix Them
You may still see wax smears or a haze after cleaning, which often responds to a gentle rewash with a mild detergent or a microfiber mop.
If spots are discolored or the finish looks dull, try temporary fixes like spot-cleaning with a polish; reserve refinishing for widespread or deep damage.
For scratches, gouges, or tacky residue that attracts dirt, use appropriate fillers or a light sanding and follow with a protective coat, then maintain with regular, residue-free cleaning.
Wax smear or haze after cleaning causes and remedies
Often a thin hazy film or streaky smear appears after cleaning, and it usually means wax wasn’t removed evenly, the floor wasn’t rinsed properly, or the finish is reacting with cleaning residues.
To fix it, buff gently with a microfiber mop, rewash with a mild detergent and clear water, then dry.
Repeat rinsing until residues vanish; avoid over-waxing.
Discolored spots or finish dulling temporary fixes and when to refinish
When heat, water, or harsh cleaners hit waxed floors, they’ll sometimes leave discolored spots or dull patches that won’t respond to ordinary mopping.
So you should try targeted, temporary fixes before deciding to refinish. Test a mild solvent or specialized wax restorer on an inconspicuous area, buff gently, and reapply a thin layer of paste wax.
If damage persists, consider refinishing.
Scratches or gouges from scraping repair options
Scrape-resistant wax can hide light scratches, but deeper gouges need more than a quick buff—you’re looking at targeted repair to restore both appearance and protection.
Clean the area, remove loose debris, then fill gouges with a color-matched wood filler or wax stick.
Sand smooth, feather edges, and apply a thin finish coat. Buff gently to blend; repeat if necessary.
Residue that attracts dirt preventive follow-ups
After you repair gouges and buff the area, watch for leftover wax or finish residues that can act like a magnet for dust and grime.
You should remove residue with a mild solvent or warm, soapy water, then rinse thoroughly.
Dry and apply a thin, compatible maintenance product sparingly.
Check weekly; wipe spills immediately to prevent buildup and reapply maintenance sparingly.
Prevention and Best Practices to Avoid Future Wax Spills
To prevent future wax spills, make a habit of using mats, coasters, and furniture pads in wax-prone areas.
If a spill happens, have a quick-response routine—blot excess, harden with ice, then remove gently—to stop it from spreading.
Stick to recommended floor-care products and a regular maintenance schedule to keep surfaces protected and easier to clean.
Protective measures (mats, coasters, furniture pads)
Because prevention is easier than cleanup, set up simple barriers like mats, coasters, and furniture pads to keep wax off your floors in the first place. They catch drips, protect high-traffic zones, and prevent heat transfer from hot objects.
Choose nonstick, washable materials and replace worn pads regularly.
- Use absorbent mats near candles.
- Place coasters under wax melts.
- Add felt furniture pads.
Quick-response routine for new spills
If a wax spill happens, act fast: blot up excess with a paper towel, chill the spot to harden remaining wax, and avoid rubbing so you don’t spread it.
Once hardened, gently lift flakes with a plastic scraper. Warm any residue with a hairdryer on low and blot with a soft cloth and mild detergent, then dry.
Repeat promptly to prevent buildup.
Recommended floor-care products and maintenance schedule
When you want to prevent future wax spills, pick floor-care products that match your flooring type and use them on a regular schedule; that means a pH-neutral cleaner for sealed wood and laminate, a gentle, oil-free cleaner for vinyl, and specialized stone cleaners for natural tile.
Clean weekly, deep-clean monthly, and reseal or buff sealed floors every 6–12 months. Wipe up cosmetics immediately.
Comparison Table: Removal Methods vs. Floor Types
To help you pick the quickest, safest approach, the table below lines up common wax-removal methods against different floor types so you can spot which techniques suit your surface at a glance.
| Floor Type | Gentle Method | Tougher Option |
|---|---|---|
| Hardwood | Warm cloth, mild solvent | Light scraping, mineral spirits |
| Vinyl | Vinegar solution, soft mop | Plastic scraper, rubbing alcohol |
| Tile | Warm water, soft pad | Scraper, diluted acetone |
Step-by-Step Checklist You Can Print and Follow
1. Print this checklist and keep it nearby as you work so you won’t miss steps.
- Remove excess wax: scrape gently with a plastic scraper, vacuum debris.
- Soften remaining wax: apply warm iron over brown paper or use a hair dryer, blot with cloth.
- Clean residue: apply a mild floor cleaner, rinse, and dry. Inspect and repeat if needed.
Frequently Asked Questions
You probably have a few specific concerns after following the checklist, and this FAQ will answer them.
You’ll learn whether heat can be used on hardwood, which household solvents are safe for vinyl, and how to get wax out of grout without harming tiles.
We’ll also cover whether you should re-wax after removal and when it’s time to call a professional.
Can I use heat on hardwood without damaging the finish?
Wondering if heat will harm your hardwood finish? You can use gentle warmth to soften wax—think low-setting hair dryer or warm (not hot) iron over a cloth—but avoid high heat and prolonged exposure.
Test an inconspicuous spot first. Keep the device moving, maintain distance, and wipe softened wax away quickly to prevent finish softening, discoloration, or cupping.
What household solvents are safe for vinyl flooring?
If gentle heat can soften wax on hardwood, you’ll want equally careful methods for vinyl—many common solvents can damage its surface or remove the printed layer.
Use mild options: warm soapy water, a 50/50 mix of water and isopropyl alcohol (test first), or a dedicated vinyl floor cleaner.
Avoid acetone, nail polish remover, and harsh citrus solvents.
Test in an inconspicuous spot.
How do I remove wax from grout without harming tiles?
How do you get wax out of grout without damaging the surrounding tile?
Use a plastic scraper to lift excess wax, then apply a warm damp cloth to soften residue.
For stubborn bits, dab a cotton swab with rubbing alcohol or a mild citrus cleaner, test a hidden spot first, and work gently.
Rinse grout with water and dry to prevent staining or tile damage.
Will waxing again after removal restore the floor?
Removing wax from grout and tile sets you up to contemplate the next step: will re-waxing restore your floor’s appearance and protection?
Yes, if your tile or grout finish supports wax. Clean thoroughly, let surfaces dry, and apply a compatible wax or sealer in thin, even coats.
Test a small area first. Re-waxing improves sheen and adds protection but won’t fix deep damage.
When should I call a professional?
When you’re unsure about the type of floor finish, the extent of damage, or the right solvent to use, call a professional—especially for porous stone, antique wood, or large areas with stubborn buildup.
Call if DIY attempts spread residue, cause discoloration, or require harsh chemicals you don’t have.
Pros diagnose finish, use proper solvents or low‑impact machines, and prevent costly mistakes.