Can You Install Tile Over Vinyl Flooring? Key Things to Check First
You can install tile over vinyl in some cases, but only if the vinyl is firmly bonded, flat, and undamaged. Check for secure adhesion, no cushions or loose sections, minimal seams or bubbles, and acceptable thickness. Test for moisture and deflection, clean and scuff the surface, and consider a backer board or membrane if needed. Use a polymer-modified thinset and follow manufacturer specs. Keep going to see step-by-step prep, risks, and pro tips.
Can You Install Tile Over Vinyl Flooring? Quick Answer
Yes — you can install tile over vinyl in some cases, mainly when the vinyl is fully bonded, flat, and in good condition; otherwise you’ll need to remove it first.
You’ll gain time and less mess by tiling over sound vinyl, but you risk poor adhesion, height issues, and trapped moisture that can cause failures.
Check the vinyl’s stability, seams, and manufacturer recommendations before proceeding.
Short direct answer (Yes/No and when)
You can install tile over vinyl flooring in some cases, but only when the vinyl is firmly adhered, flat, and free of damage or excessive cushioning.
Yes, you can install tile over vinyl flooring if it meets those conditions and rests on a structurally sound subfloor.
If the vinyl is loose, cushioned, or damaged, remove it first to guarantee proper adhesion and long-term performance.
One-sentence summary of risks and benefits
If the vinyl is flat, firmly bonded, and on a sound subfloor, tiling over it can save time and money—but if the vinyl is cushioned, loose, or damaged you risk poor adhesion, cracked tiles, and moisture issues, so removal is safer.
You’ll gain speed and lower cost when conditions are right, but improper substrates cause failures, extra repairs, and higher long‑term expense.
Basic Understanding What Is Vinyl Flooring and How It Interacts with Tile
You need to know the kind of vinyl you’re dealing with—sheet, luxury vinyl plank/tile, and whether it’s glued-down or loose-lay—because each behaves differently under tile.
Tile sets with thinset or mortar require a stable, properly prepared substrate that controls adhesion, moisture, and deflection.
Understanding those compatibility and support issues will tell you whether you can tile over the existing floor or must remove or reinforce it first.
Types of vinyl flooring (sheet, luxury vinyl plank/tile, glued-down vs. loose-lay)
Vinyl comes in a few distinct forms—sheet, luxury vinyl plank (LVP) or tile (LVT), and various installation styles like glued-down and loose-lay—and each behaves differently when you plan to tile over it.
Sheet vinyl is continuous and can trap adhesive; LVP/LVT have seams and rigid cores.
Glued-down holds substrate firmly, while loose-lay can shift, affecting tile adhesion and movement.
How tile installation works (thinset, mortar, substrate requirements)
Think of tile installation as a layered system: the tile is bonded to a mortar bed or thinset, which must be supported by a stable, flat substrate that can handle weight and movement.
You’ll use thinset for most tiles, mortar for larger tiles or leveling, and often a cement backerboard or uncoupling membrane over existing floors.
Proper curing and flatness are essential.
Why substrate matters: adhesion, stability, moisture, and deflection
After you’ve established the mortar or thinset layer, the surface beneath it dictates whether the tile will stick, stay flat, and resist moisture over time.
You’ll need a clean, rigid substrate; vinyl that’s loose, cushioned, or water-damaged won’t bond reliably.
Check for moisture, deflection, and seams.
Repair or remove unsuitable vinyl, reinforce joists if needed, and guarantee a stable, dry base before tiling.
When It’s Acceptable to Tile Over Vinyl Conditions to Check
Before you start tiling over vinyl, check that the vinyl is firmly bonded to the subfloor and not lifting.
Make sure the added tile height won’t create problematic changes, and confirm the subfloor is flat, level, free of moisture damage, and within acceptable deflection limits.
If any of those conditions aren’t met, you’ll need repairs or removal before tiling.
Vinyl securely bonded to subfloor
1 key condition for tiling over vinyl is that the vinyl must be tightly bonded to the subfloor—if it’s loose, lifting, or bubbling, you’ll need to remove it first because loose vinyl won’t give the thinset a stable base.
Check by pressing and tapping; glue failure or seams mean removal. If bonded, clean thoroughly, roughen glossy surfaces, and verify no soft spots before tiling.
No excessive height or transition conflicts
If the added tile height will create awkward steps or misaligned door thresholds, you shouldn’t proceed without planning adjustments.
Check connections to adjacent rooms, cabinet clearances, and appliance doors. You’ll need reducers, ramps, or threshold modifications to maintain safe, code-compliant connections.
Factor in tile plus underlayment thickness early so you don’t compromise door swings, accessibility, or create trip hazards.
Subfloor flatness and levelness requirements
When you’re planning to tile over existing vinyl, the subfloor must be flat and level enough to support thinset and tile without cracking or lippage.
Check for dips, humps, and a 1/8-inch variance over 10 feet (or manufacturer specs).
Use a straightedge and level, shim or level the subfloor, and apply a self-leveling compound where needed before tiling.
Moisture and water damage considerations
After confirming your subfloor is flat and level, check for moisture and water damage before you commit to tiling over vinyl.
Inspect for soft spots, mold, bubbling, or adhesive breakdown; these indicate trapped moisture. Use a moisture meter on the vinyl and subfloor.
Fix leaks, replace damaged sections, and guarantee the area dries completely. Don’t tile over compromised materials.
Structural deflection limits
Because tile and grout are rigid, they need a stable support system; you’ll want to verify the floor’s deflection is within acceptable limits before tiling over vinyl.
Check joist span and subfloor stiffness—industry recommends L/360 for ceramic tile.
If the floor bounces, reinforce with additional blocking, thicker subfloor, or a decoupling membrane.
Address deflection now to prevent cracking later.
Inspection Checklist Before Tiling Over Vinyl
Before you start tiling, you’ll want to run a quick inspection to confirm the vinyl and subfloor meet the basic requirements.
Check these key items and tests so you don’t run into problems after the tile’s installed:
- Visuals: damage, seams, bubbles, and overall condition
- Adhesion tests: edge pull and small spot removal
- Flatness/level: straightedge check and allowable tolerances
- Moisture and composition: moisture meter, tape test, thickness and material type
Visual inspection items (damage, seams, bubbles)
Start by scanning the vinyl surface methodically for any visible damage—rips, gouges, lifting seams, or trapped bubbles—and mark each problem area so you can address it before tiling.
Check seams for separation or raised edges, note curled or blistered spots, and identify soft or spongy areas indicating underlying damage.
Photograph trouble spots for reference during repairs.
Adhesion test steps (edge pull, spot test)
Once you’ve documented damage and marked trouble spots, test how well the vinyl will hold thinset or adhesive by performing simple edge-pull and spot tests.
For edge-pull, lift vinyl at a seam or edge with a putty knife—any loose, easily lifted areas mean removal.
For a spot test, roughen a small area, apply adhesive, wait manufacturer time, then try peeling to judge bond strength.
Flatness and levelness checks (straightedge, tolerances)
If the floor isn’t flat and level, tile will crack or grout will fail, so check every room with a straightedge and level before you proceed.
Lay a 6–10 ft straightedge along multiple directions; note high or low spots.
Tolerances: keep deviations under 1/8″ in 10 ft for large tiles, 1/16″ for smaller.
Mark areas needing leveling compound or repair.
Moisture testing methods (moisture meter, tape test)
After confirming the floor is flat and level, check for moisture because excess dampness under or within vinyl can ruin tile installations.
Use a moisture meter (relative or pinless) across multiple spots and record readings.
For a simple localized check, tape a plastic sheet over areas for 24–48 hours; condensation or darkening indicates trapped moisture.
Address any moisture before tiling.
Thickness and composition verification
Because vinyl comes in many thicknesses and layers, you’ll need to verify both the overall thickness and what’s beneath the surface before you tile over it.
Measure vinyl thickness, check for foam or cushioned backing, and determine if it’s sheet or plank.
Thin, flexible vinyl or vinyl over wood subfloors often needs removal.
Solid, glued-down vinyl may be suitable if flat, stable, and fully bonded.
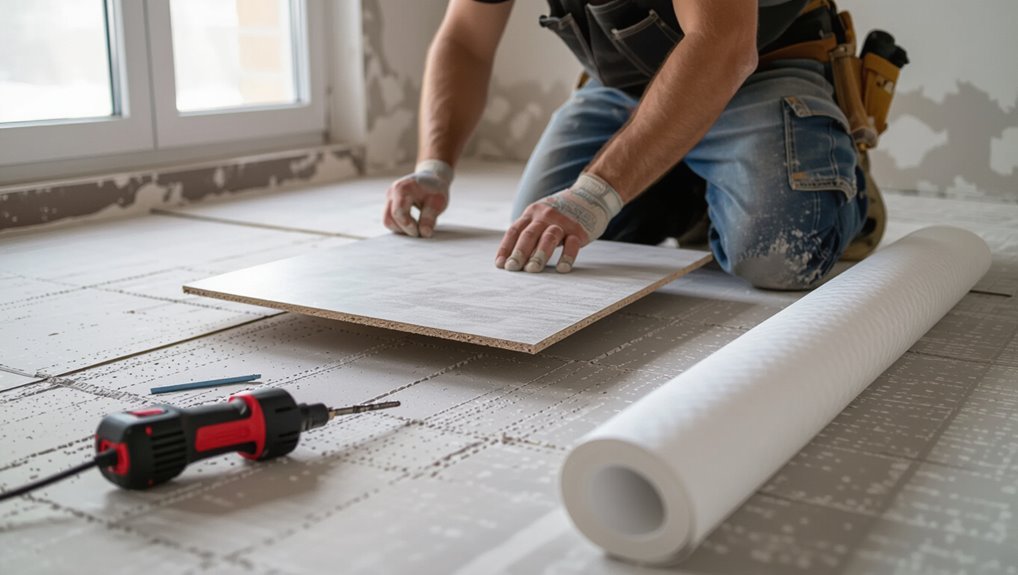
How to Prepare Vinyl Flooring for Tile Step-by-Step
Before you lay any tile, you’ll follow a clear sequence: clean and degrease the vinyl, fix or replace damaged areas, and scuff smooth surfaces so adhesive can bond.
Next you’ll choose a compatible primer or bonding agent and decide whether a cement backer board or an uncoupling membrane is needed.
Each step affects adhesion and long-term performance, so you’ll want to take them in order and use recommended products.
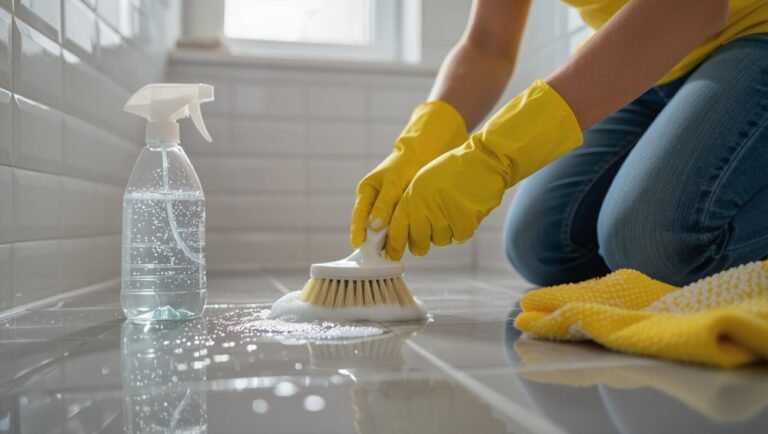
Step 1: Clean and degrease surface
Start by giving the vinyl a thorough cleaning so the tile adhesive can bond properly.
Remove loose dirt, vacuum seams, and mop with a mild detergent.
Degrease with a dedicated cleaner or trisodium phosphate solution, rinsing thoroughly and letting it dry.
Wipe away residues and test for slick spots; any remaining film will compromise adhesion, so repeat cleaning until the surface is completely clean and dry.
Step 2: Repair or replace damaged vinyl sections
Inspect the vinyl closely and mark any areas that are cracked, bubbled, lifting, or missing—these spots will prevent tile from laying flat and must be fixed or removed.
Cut out damaged sections, clean substrate, and assess underlayment. Replace large or water‑damaged sheets; patch small areas with matching vinyl or cement board where needed.
Confirm repairs are level, secure, and fully bonded before tiling.
Step 3: Scuffing or roughening smooth vinyl surfaces
You’ll need to scuff or roughen any smooth vinyl so tile adhesive can grip properly; glossy surfaces repel mastic and will cause tiles to lift if left untreated.
Use 80–120 grit sandpaper or a mechanical sander on low speed, working evenly until sheen dulls.
Vacuum debris, wipe with a damp cloth, and let dry before proceeding to the next preparation step.
Step 4: Applying primer or bonding agent (product types and compatibility)
After scuffing and cleaning the vinyl, apply a primer or bonding agent to help the adhesive stick to the smooth surface.
Choose a primer labeled for vinyl or non-porous substrates—acrylic or epoxy-based products work well.
Follow manufacturer compatibility with your thinset or adhesive, apply evenly, and let cure fully.
Test a small area before tiling to confirm proper adhesion.
Step 5: Using a suitable underlayment or backer board (cement board, uncoupling membrane)
Step 5 brings in a stable underlayment—either cement backer board or an uncoupling membrane—to create a rigid, waterproof surface for tile over vinyl.
You’ll fasten cement board with corrosion-resistant screws and tape joints with mesh and thinset, or roll out an uncoupling membrane that isolates movement.
Both options protect tiles from substrate movement; choose based on floor deflection, moisture, and manufacturer recommendations.
Step 6: Proper mortar selection and setting techniques
6 key choices now determine how well your tile bond performs: pick a mortar formulated for your tile type and substrate—typically a polymer-modified thin-set for ceramic or porcelain over a cement board or uncoupling membrane—and follow manufacturer specs for open time, pot life, and trowel size so you get full coverage and proper bedding.
Mix to consistency, use correct trowel notch, back-butter large tiles, apply even pressure, and cure undisturbed.
Full Removal vs. Tiling Over Pros and Cons
You’ll weigh the main trade-offs between tiling over vinyl and fully removing it to decide what fits your budget, timeline, and long-term goals. Below is a quick comparison to help you spot benefits, drawbacks, and performance differences at a glance. Use this as a starting point for choosing the approach that matches your project priorities.
| Topic | Tiling Over Vinyl | Full Vinyl Removal |
|---|---|---|
| Primary benefit | Saves time and labor | Best long-term stability |
| Primary drawback | Potential adhesion/height issues | Higher cost and effort |
| Cost | Lower upfront | Higher upfront |
| Time | Faster install | Longer prep time |
| Long-term performance | Mixed, depends on condition | Superior, more reliable |
Benefits of tiling over vinyl
While removing old vinyl can give you a totally fresh substrate, tiling over existing vinyl often saves time, mess, and money—especially when the floor is level, firmly adhered, and free of damage.
You’ll cut labor and disposal costs, reduce project downtime, and avoid subfloor exposure. It’s quicker, less disruptive, and can be a practical, cost-effective choice when conditions are right.
Advantages of full vinyl removal
Because removing old vinyl gives you a clean, stable surface, you’ll avoid many of the hidden problems that can plague tile installations—like trapped moisture, adhesive residue, or uneven bonding—so the new tile can last longer and perform better.
You’ll also uncover and repair subfloor damage, achieve proper mortar coverage, guarantee consistent grout lines, and create a surface that meets tile manufacturer requirements for warranty and longevity.
Cost, time, and long-term performance comparison
Although tiling over vinyl can save you money and time upfront, it often shifts costs into the future through higher maintenance, potential failures, and warranty issues.
If you remove vinyl, you’ll pay more now for demolition and prep but gain a stable substrate, longer-lasting tile performance, and fewer repairs.
Weigh immediate savings against likely replacements, adhesive problems, and resale impact.
Common Mistakes and Problems When Tiling Over Vinyl
When you tile over vinyl, you can run into problems like poor adhesion and tiles popping loose if the surface isn’t prepped properly.
Movement in the subfloor or wrong mortar/omitting underlayment can cause cracking, and the extra thickness often creates trip hazards or awkward thresholds.
Also watch for hidden moisture or mold under the vinyl that’ll compromise the installation if you don’t address it first.
Poor adhesion and tile delamination
If you don’t properly prepare the vinyl surface, tiles can fail to bond and eventually delaminate, leaving you with loose, cracked sections and costly repairs.
You should remove contaminants, roughen or prime smooth vinyl per manufacturer instructions, and use an appropriate adhesive.
Test a small area first and monitor bond strength; addressing adhesion now prevents tile pop-ups, water intrusion, and premature replacement.
Movement and cracking due to deflection
Because tiles and grout are rigid, they’ll crack if the subfloor bends even slightly under foot traffic; you need a stiff, well-supported substrate or an anti-fracture system to stop movement from transmitting up through the vinyl and through the tile.
Check joist spacing, damaged or soft spots, and deflection limits.
Reinforce or replace the subfloor, or use a rated decoupling membrane before tiling.
Trip hazards and threshold issues from added height
Although adding tile over vinyl can give you a fresh, durable floor, the extra height often creates trip hazards and awkward thresholds that you need to address before installation.
You’ll need to measure changes to adjoining rooms, adjust or replace thresholds, and consider tapered reducers or carpentry to maintain safe step heights.
Don’t ignore door clearances or appliance fit when planning elevation changes.
Hidden moisture and mold risks
Raising the floor height can fix thresholds, but it can also trap moisture under the new tile assembly, creating hidden mold risks you mightn’t notice until damage appears.
You should inspect vinyl seams, adhesive condition, and any soft spots before tiling. If moisture’s present, remove the vinyl or remediate substrates.
Ignoring trapped dampness lets mold spread, ruin finishes, and compromise indoor air quality.
Using wrong mortar or skipping underlayment
If you use the wrong mortar or skip a proper underlayment, your new tile can loosen, crack, or fail long before its time.
Don’t assume any adhesive will bond to vinyl; use a manufacturer-recommended thinset or an uncoupling membrane.
Proper underlayment evens the substrate, manages movement, and prevents delamination.
Invest in correct materials and preparation to avoid costly repairs.
Best Practices and Professional Tips
You’ll save time and avoid headaches by knowing when to call a pro versus tackling the job yourself—complex substrate repairs, large areas, or warranty-sensitive installations are good reasons to hire help.
Use recommended primers, thinsets, and uncoupling or waterproofing membranes suited to tile-over-vinyl work, and plan changes and thresholds so adjacent rooms stay level and watertight.
Check product warranties and local code requirements before you start so your finished floor is durable and compliant.
When to call a pro vs. DIY
Sometimes it makes sense to tackle tile-over-vinyl yourself, but knowing when to call a pro will save time, money, and headaches.
Call a pro if the vinyl is glued, the subfloor is soft or uneven, moisture issues exist, or you need complex layout cuts and changes.
DIY when the floor is smooth, secure, level, and you’re comfortable with prep and tile skills.
Recommended products and materials (primers, mortars, membranes)
When preparing to tile over vinyl, pick products that bond to nonporous surfaces, bridge movement, and resist moisture—start with a high-quality primer designed for vinyl, a polymer-modified thin-set mortar rated for nonporous substrates, and an uncoupling or waterproofing membrane where movement or moisture is likely.
Choose flexible, latex- or polymer-enhanced mortars, manufacturer-matched primers and membranes, and appropriate grout and sealers rated for the installation.
Tackling transitions, thresholds, and adjacent rooms
Having the right primers, mortars, and membranes in place makes handling floor junctions far simpler, because the materials dictate where you can safely change heights, run joints, and manage movement between rooms.
You should align tile edges with thresholds, use joining strips where heights differ, install movement joints at doorways, and coordinate grout lines so adjoining rooms flow visually while allowing for expected expansion and contraction.
Warranty and code considerations
Because warranty coverage and code compliance affect both liability and long-term performance, you should review manufacturer requirements and local regulations before you start tiling over vinyl.
Check adhesive and underlayment warranties—some void if vinyl remains.
Confirm membrane, vapor barrier, and substrate standards, plus local building codes for moisture, fire ratings, and load.
Document approvals to protect yourself and future buyers.
Cost and Time Estimates
You’ll want to budget for both materials (tile, thinset, grout, underlayment) and labor, since labor can be a significant portion of the total cost.
Plan for several hours to a couple of days for prep and removal of loose vinyl, a day or two for setting tile depending on room size, and additional time for grout and sealant.
Remember that curing and full use can take 24–72 hours or longer, so factor drying times into your schedule.
Typical cost breakdown (materials vs. labor)
A clear split usually exists between materials and labor when you’re budgeting to install tile over vinyl: materials typically account for about 30–50% of the total cost—tiles, thinset or mortar, backer board or underlayment, grout, and any leveling compounds—while labor makes up the remaining 50–70%, reflecting the prep work, removal (if needed), and time-intensive tile setting and grouting.
You should factor in waste, specialized tools, and contractor rates.
Timeframe for prep, installation, and curing
Cost influences the schedule just as much as it does material choices: higher-end tiles or extensive leveling usually add prep time and labor hours.
You’ll strip or secure vinyl, assess and repair subfloor (1–2 days), set backer board or leveling compound (1–2 days drying), tile installation (1–3 days), grout and seal (24–72 hours curing).
Expect 4–8 days total for typical rooms.
Real-World Scenarios and Case Examples
You’ll meet different conditions when installing tile over vinyl, so we’ll look at three common cases: glued-down sheet vinyl in good condition, luxury vinyl plank with seams, and damaged vinyl over a concrete subfloor.
For each scenario you’ll learn what prep is required, whether tile can go directly over the vinyl, and any long-term risks to watch for.
Use these examples to decide the safest, most cost-effective approach for your project.
Scenario A: Glued-down sheet vinyl in good condition
When the glued-down sheet vinyl is sound, smooth, and well-adhered, you can often tile directly over it after proper preparation; this saves demolition time and cuts disposal costs.
You’ll clean, sand, and apply a suitable primer or bonding membrane, check for moisture issues, and use a modified thinset.
Confirm edges are stable and changes are addressed so tiles bond evenly and last.
Scenario B: Luxury vinyl plank with seams
If your floor is luxury vinyl plank (LVP) with visible seams, you’ll need to treat it differently than a smooth sheet vinyl: seams can telegraph through tile, allow movement, and trap moisture.
So assess seam condition, plank flexibility, and how the LVP is attached before deciding to tile over it.
If seams are tight, planks rigid and fully glued, you might skimcoat and use an uncoupling membrane; otherwise remove.
Scenario C: Damaged vinyl over concrete subfloor
Because the vinyl’s damaged and it’s sitting on concrete, you should treat the situation as a repair-and-assess job rather than a simple overlay:
Remove loose or bubbled vinyl, inspect concrete for cracks, moisture, and adhesive remnants.
Repair cracks, level low spots, and test for moisture.
If concrete’s sound and dry, you can install tile with a suitable mortar; otherwise, fix issues first.
FAQs Common Questions About Tiling Over Vinyl
You probably have a few practical questions before you start, like whether bathrooms and wet areas are safe for tile-over-vinyl and whether the added layers will raise floor height too much.
You’ll also want to know how long tile needs to set before grouting and foot traffic, whether radiant heating works over a vinyl-and-tile assembly, and if manufacturer approval or warranty changes are required.
Let’s answer those common concerns so you can plan the job correctly.
Can you tile over vinyl in bathrooms and wet areas?
When planning a bathroom or other wet area, consider how the existing vinyl will affect moisture management and long-term performance if you plan to tile over it.
You can tile over well-adhered, non-cushioned vinyl only if it’s stable, clean, and properly primed.
Address subfloor waterproofing, seams, and vinyl condition; otherwise remove vinyl to guarantee a reliable, waterproof tile installation.
Will tiling over vinyl raise floor height too much?
How much will tiling over vinyl raise your floor?
Expect about 1/4″–3/8″ for thin-set and tile plus the tile thickness (commonly 3/16″–3/4″), so total increase often ranges from 1/2″ to 1-1/8″.
Consider changes at doorways, baseboard adjustments, and appliance clearances.
If height is critical, remove vinyl or use thinner tiles and low-profile setting materials.
How long should tile set before grout and foot traffic?
Although the thin-set bonds quickly, you should wait at least 24 hours before grout and keep foot traffic off the new tile for 48–72 hours to allow the mortar to cure properly.
After grouting, avoid heavy traffic and rugs for another 24–48 hours. Full strength develops in 7 days; delay heavy furniture and permanent fixtures until then to prevent shifting or cracking.
Can radiant floor heating be used over vinyl + tile?
Can you install radiant heat over existing vinyl and new tile? Yes—if the vinyl is stable, thin, and fully bonded, you can install thin electric mats or low-profile hydronic tubing under the tile.
Confirm proper uncoupling/membrane and thinset compatibility, follow manufacturer temperature limits, and avoid overheating the vinyl.
Test adhesion and floor flatness first to prevent tile or membrane failure.
Is warranty or manufacturer approval required?
If you plan to install tile over existing vinyl, check product warranties and get manufacturer approval first—what you do now can affect coverage later.
Manufacturers often void warranties if their flooring is covered, altered, or installed over improper substrates.
Before proceeding, contact both vinyl and tile manufacturers, document approvals in writing, and follow specified methods and materials to preserve warranty rights and avoid disputes.