Can You Paint Laminate Flooring? What You Need Before You Try
You can paint laminate flooring for a low‑traffic or temporary update, but you’ll need clean, undamaged boards and strong surface prep to get good results. Lightly sand or etch, use a high‑bond primer made for nonporous surfaces, apply durable floor paint in thin coats, then seal with a tough clear topcoat. Expect shorter lifespan and possible chipping compared with replacement; if you want guidance on materials, technique, design options and upkeep, keep going for full steps and tips.
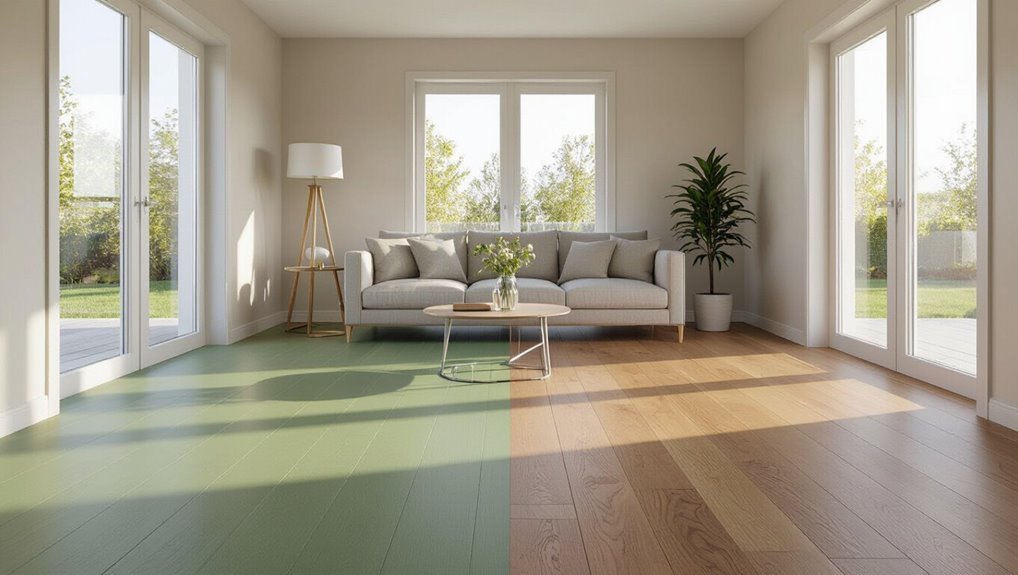
Can You Paint Laminate Flooring?
Yes — you can paint laminate flooring in certain situations, like to refresh worn-looking rooms or change color in low-traffic areas.
It’s quick and affordable, but the finish can chip, and prep plus primer are essential for adhesion.
We’ll cover when it’s appropriate and the main pros and cons so you can decide.
Direct yes/no summary and when it’s appropriate
While you technically can paint laminate flooring, you should only do it in specific situations where the surface is clean, undamaged, and not meant for heavy, long-term wear.
So, can you paint laminate flooring? Yes, for low-traffic areas, temporary updates, or rentals.
No, if you need durable, long-lasting results or warranty-safe solutions.
Assess usage, condition, and expectations before proceeding.
Short pros and cons overview
If you decide painting is right for your laminate—say for a short-term refresh or a rental update—you should weigh the pros and cons quickly.
Painting can cut costs and change style, but it may chip and shorten flooring life. Consider maintenance and resale impact before starting.
- Glossy painted planks reflecting light
- Scraped edges revealing original finish
- Budget-friendly color shift
- Short-lived wear patches
- Easier temporary makeover
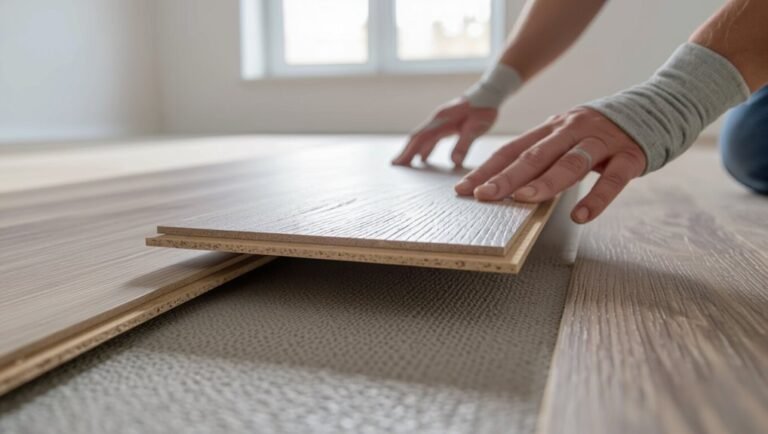
What Is Laminate Flooring and Why Painting Is Different
Laminate flooring is made of compressed fiberboard with a printed design layer and a hard, sealed wear layer, so it isn’t porous like wood.
That sealed surface makes paint adhesion tricky without proper sanding, priming, or special coatings. You might paint to refresh a small, low-traffic area or for a temporary look, but replacing the planks is usually better for heavily worn or water-damaged floors.
Laminate composition and surface characteristics
Think of laminate flooring as a multi-layered engineered product: a decorative printed layer and clear wear layer sit atop a high-density fiberboard core, all bonded under heat and pressure.
You’ll notice a smooth, often glossy wear layer designed to resist scratches and moisture. Edges are sealed; joints interlock.
Those sealed, nonporous surfaces and uniform texture define how you must approach any surface treatment.
Why paint adherence is challenging on laminate
Those sealed, nonporous surfaces that protect laminate are also what make paint stubborn to grip.
You’ll find the factory finish is dense, smooth, and often contains melamine or UV-cured resins that repel coatings. Without proper scuffing, etching, or a compatible primer, paint beads and flakes.
Temperature, wear patterns, and moisture also reduce long-term adhesion, so surface prep is critical.
Situations where painting makes sense vs. when replacement is better
When the board surface is structurally sound and the wear is mostly cosmetic, painting can be a fast, budget-friendly way to refresh the look without ripping out flooring.
Choose paint when scratches, faded color, or a dated finish are the main issues.
Replace when boards are warped, delaminating, water-damaged, or when you need a different floor type for durability or resale value.
Materials, Tools, and Cost Estimate You Need Before You Try
Before you start, you’ll want to gather the right primers, paints, sealers, sanders, vacuums, rollers, tape, and any optional bonding agents or extra topcoats for durability.
Consider how much time each step will take and whether DIY costs for materials and rental tools beat hiring a pro. That way you’ll know the realistic time and cost breakdown before you commit.
Required materials (primers, paints, sealers)
Paint, primer, and sealer form the trio you’ll need to successfully refinish laminate floors—each plays a specific role: a high-bond primer to promote adhesion, a durable floor or porch-and-deck paint designed for wear, and a clear sealer to protect the finish.
Choose water-based or oil-based systems compatible with laminate and ventilation needs.
- Pale primer coat drying under light
- Smooth satin paint spreading evenly
- Roller nap leaving fine texture
- Clear sealer ambering slightly
- Cured surface resisting scuffs
Tools and consumables (sanders, vacuums, rollers, tape)
Now that you’ve picked compatible primer, paint, and sealer, gather the right tools and consumables to get a professional result.
You’ll need sanding gear, dust control, application tools, and masking supplies. Prepare to work methodically: sand, clean, prime, paint, and seal for lasting adhesion.
- Orbital sander with 120–220 grit
- Shop vacuum with HEPA filter
- Microfiber tack cloths
- 4″ foam roller and angled brush
- Low-tack painter’s tape
Optional extras for durability (bonding agents, topcoats)
If you want the painted finish to last under foot traffic, add optional bonding agents and higher-build topcoats to your shopping list; they boost adhesion and abrasion resistance so the coating performs more like a factory finish.
You’ll prep, apply a primer/bonding coat, then a durable polyurethane or acrylic topcoat for wear.
- A can of liquid bonding primer
- Roller and foam brush
- Fine-grit sanding pad
- High-build polyurethane
- Nonskid additive
Time and cost breakdown (DIY vs. pro)
While you can save a lot by doing the work yourself, factor in the time for prep, drying, and multiple coats—expect a weekend for a small room but several days for larger areas. You’ll pay $60–$200 DIY (materials) and 4–16 hours; pros charge $300–$1,200 and 1–3 days. Decide by budget, skill, and tolerance for disruption.
| Task | DIY | Pro |
|---|---|---|
| Materials | $60–$200 | Included |
| Time | 4–16 hrs | 1–3 days |
| Total cost | Low | Higher |
Step-by-Step Guide to Painting Laminate Flooring
Before you start, you’ll assess the laminate for damage, wear, and whether it’s a good candidate for painting.
Then you’ll clean and degrease, lightly sand or scuff (or chemically etch) the surface, and apply a proper bonding primer.
Finally, you’ll choose the right paint and use the recommended application method—rolling, brushing, or spraying—for a durable finish.
Step 1 Assess the floor: damage, wear, and suitability
Start by giving the floor a close, systematic inspection so you can judge whether painting is practical and worth the effort.
Check for peeling laminate, deep scratches, water swelling, loose seams, and heavy wear that may hide paint. If damage is extensive, painting won’t last.
Visualize problem areas:
- Flaking edges
- Dark water stains
- Raised seams
- Gouges in high-traffic zones
- Worn finish patches
Step 2 Clean and degrease thoroughly
Get the floor squeaky clean so paint will adhere and look even. You’ll remove dust, grease, and residues with a mop, degreaser, and microfiber cloths.
Rinse and let dry completely before any primer.
- Greasy footprints near the sink
- Dust bunnies along baseboards
- Sticky spills at doorways
- Fingerprints on high-traffic planks
- Soap film in seams
Step 3 Prepare the surface (light sanding, scuffing, or chemical etch)
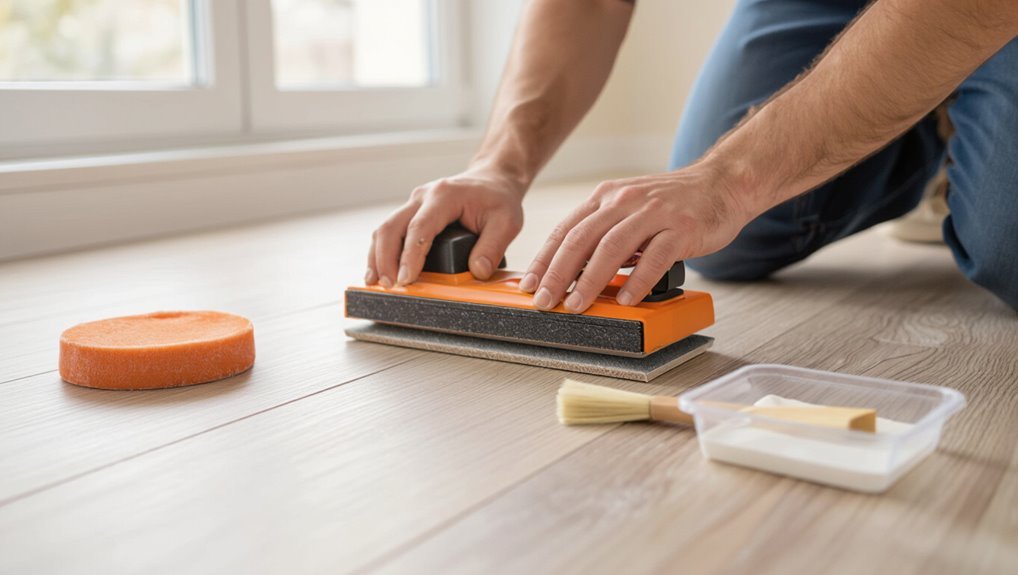
Once the floor is spotless and dry, you’ll need to roughen the smooth laminate surface so primer and paint will grip.
Lightly sand with a fine-grit pad, or scuff with a sanding block or abrasive pad; for stubborn gloss, use a chemical etch per product instructions.
Clean dust thoroughly before coating.
- smooth, satin-finished planks
- gritty residue on fingertips
- faint sanding lines
- dull, matte surface
- vacuumed, tack-cloth ready
Step 4 Apply primer/bonding agent (types and application tips)
4. You’ll choose a bonding primer or adhesion promoter made for slick surfaces.
Apply thin, even coats, let each dry fully, and sand lightly between coats if needed. Ventilate well and test a small patch first.
- a smooth, tacky primer sheen
- brush strokes disappearing
- thin, even wet edge
- no pooling along seams
- cured, hard surface ready
Step 5 Paint selection and application techniques (rollering, brushing, spray)
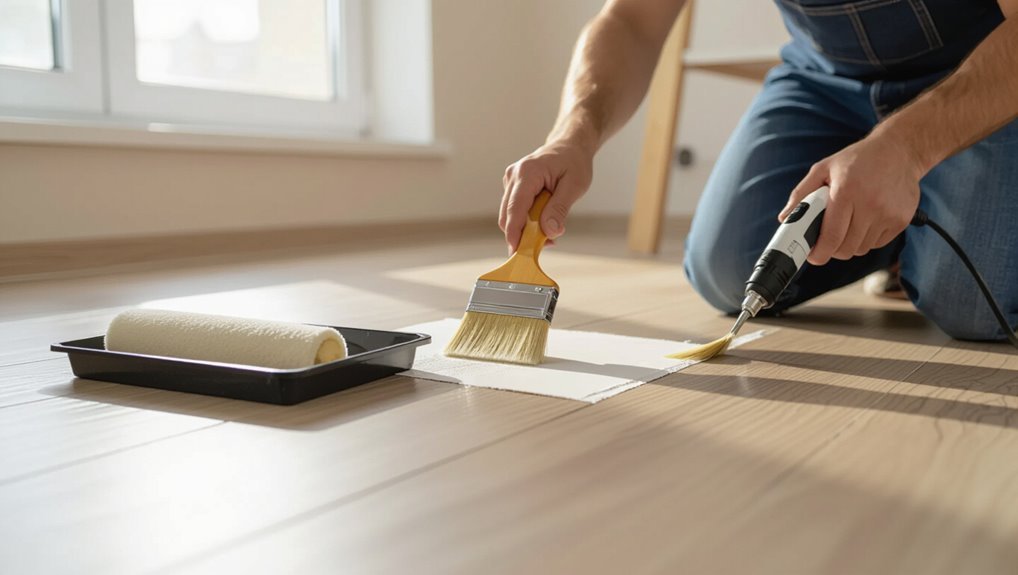
After your bonding primer has cured to a hard, slightly tacky sheen and you’ve sanded any imperfections, pick paints and application methods that match your room’s traffic and look.
Choose durable, low-VOC floor enamel; test color.
Roll for large areas, brush edges, or spray for smooth coats.
Work in thin, even layers; let each dry between coats.
- Sunlit hallway with a satin sheen
- Smooth, even roller strokes
- Sharp, clean brush lines
- Fine mist from a sprayer
- Dry, cured surface ready for use
Step 6 Apply protective topcoat or sealer for durability
Seal the job with a durable topcoat to protect your painted laminate from scuffs, moisture, and daily wear.
You’ll choose a water-based polyurethane or acrylic sealer, apply thin even coats with a foam roller, sand lightly between coats, and follow manufacturer recoat times for best adhesion.
- Rolling a smooth glossy finish
- Light sanding dust
- Even wet sheen
- Protective clear layer
- Faint brush stroke texture
Step 7 Drying time, curing, and when to return furniture
While the topcoat may feel dry to the touch in a few hours, full curing takes longer, so give the floor time to harden before heavy use.
You should wait at least 24–48 hours for light foot traffic and 7 days for heavy furniture. Move items carefully, use pads, and monitor finish hardness.
- Sunlit room warming the finish
- Felt pads under chair legs
- Cardboard ramp for heavy pieces
- Humid air slowing cure
- Bare feet testing gently
Design Options and Finishes
You can go bold with a single solid color, mimic real wood or tile with faux patterns, or get creative with stenciling and stripe techniques to change the room’s vibe.
Pick a matte, satin, or high-gloss finish to control sheen, durability, and how much wear shows.
Consider how pattern complexity and finish choice will affect upkeep and the overall style you want.
Solid color vs. faux wood or tile patterns
If you want a clean, modern look, go with a solid color; if you prefer warmth or pattern, mimic wood planks or tile layouts to add texture and visual interest.
You’ll choose based on room size, light, and upkeep. Solid hides seams; faux adds character.
Consider scale and contrast so the floor complements, not overwhelms, your space.
- Matte charcoal solid
- Honey oak planks
- Slate tile grid
- Herringbone walnut
- Soft white porcelain
Stenciling and striping techniques
Stenciling and striping let you turn plain laminate into a custom floor without ripping anything up. They work well whether you want subtle accents or bold graphic statements.
You’ll prep with degreasing and light sanding, use quality painter’s tape or rigid templates, apply bonded primer, then paint with durable floor paint.
Seal with a compatible clear topcoat and let each layer cure fully.
Matte, satin, and high-gloss—how finish affects look and maintenance
While finish choice might seem purely cosmetic, it actually shapes both the room’s vibe and the care you’ll do: matte hides scuffs and hides imperfections. Satin balances subtle sheen with easy cleaning, and high-gloss gives a dramatic, reflective look but shows scratches and footprints more readily.
Choose matte for low-maintenance, satin for versatile durability, and high-gloss only where you’ll accept extra upkeep.
Comparison: Painting Laminate vs. Alternative Solutions
When you’re weighing options for worn or outdated laminate, painting can be the quickest and most budget-friendly route compared with full refinishing or replacing the floor.
Refinishing gives a more durable, factory-like finish but usually isn’t possible on most laminate, while replacing costs more upfront yet lasts longest.
And don’t forget that temporary fixes like area rugs or peel-and-stick overlays can be the smartest short-term choice if you want a fast change without major work.
Painting vs. refinishing vs. replacing laminate
If you’re weighing options for tired laminate flooring, deciding between painting, refinishing, or replacing comes down to budget, durability, and how much work you want to do; painting is fastest and cheapest, refinishing (where possible) restores the original look, and replacement gives the longest-lasting, highest-quality result.
| Option | Cost | Longevity |
|---|---|---|
| Paint | Low | Short |
| Refinish | Medium | Medium |
| Replace | High | Long |
When temporary fixes (rugs, overlays) are better
Because you’re looking for a quick, low-risk fix, temporary options like rugs, peel-and-stick overlays, or floor runners often beat painting laminate—especially when you want to hide wear, test a new look, or plan to sell soon.
They’re faster, cheaper, reversible, and don’t risk peeling or warranty issues. Use them to patch problem areas, experiment with color, or protect high-traffic zones until you decide.
Common Mistakes and How to Avoid Them
Don’t skip thorough surface prep—you’ll pay for peeling and poor adhesion later.
Pick a primer and paint made for laminate, allow proper ventilation and full curing time, and don’t rush sealing.
Finally, protect the floor from moisture and abrasion with the right topcoat and care.
Skipping proper surface prep
When you skip proper surface prep, the paint won’t bond and problems like peeling, bubbling, and uneven coverage show up fast.
Clean thoroughly, remove grease, and sand glossy finish to dull it. Fill gaps and repair damage so the surface’s profile is consistent.
Work in sections, vacuum debris, and tack cloth before painting to guarantee adhesion and a smooth, long-lasting result.
Using the wrong primer or paint
If you pick the wrong primer or paint, your makeover will look great at first and fail fast—peeling, poor adhesion, and scuffed finishes follow.
Choose a high-bond primer made for slick surfaces, then use a durable floor or enamel paint.
Test compatibility on a scrap, follow manufacturer instructions, and avoid latex over oil without proper bonding primer to guarantee lasting results.
Insufficient ventilation or curing time
Poor ventilation and rushed curing undo even the best preparation, so plan airflow and time before you start painting.
Open windows, run fans, and keep traffic off the floor for the full recommended cure period. You’ll avoid tacky finishes, solvent odors, and premature scuffs.
Check product instructions for drying and full cure times, and don’t shorten them to save time.
Failing to protect against moisture and wear
Because painted laminate isn’t inherently waterproof, you’ll need to seal and protect it to prevent peeling, swelling, and premature wear.
Use a high-quality, water-resistant primer and several durable clear coats rated for floors.
Caulk seams, add rugs in high-traffic zones, and avoid excessive water when cleaning.
Recoat periodically and inspect for chips so you can repair small areas before damage spreads.
Maintenance, Longevity, and Troubleshooting After Painting
After painting your laminate floor, you’ll want a simple routine for cleaning and gentle care to protect the finish.
When chips, scratches, or peeling appear, you can make targeted repairs with touch-up paint, sealant, or light sanding depending on the damage.
I’ll also cover how long painted laminate typically lasts and clear signs that it’s time to repaint or replace.
Routine cleaning and care tips
Once your painted laminate floor’s cured, regular care will keep the finish looking fresh and durable.
You should sweep daily, mop gently, protect high-traffic areas, and avoid harsh cleaners or abrasive tools that strip the topcoat.
Use furniture pads and rugs to prevent scuffs, and spot-clean spills immediately to prevent staining.
- Soft broom bristles
- Damp microfiber mop
- Runner rug along hallways
- Felt pads under chairs
- Blot spills with cloth
How to repair chips, scratches, and peeling paint
Check the floor regularly for chips, scratches, and any flaking paint so you can address small problems before they spread.
Sand rough edges, clean dust, apply laminate primer, feather touch-up paint, then seal with a clear polyurethane. Keep repairs small and quick to prevent moisture intrusion.
- Tiny chip near door trim
- Hairline scratch across a plank
- Flaking paint patch
- Faded scuff by chair
- Sharp gouge from dropped tool
Expected lifespan and signs it’s time to repaint or replace
While painted laminate can look fresh for several years, how long it lasts depends on traffic, prep quality, and the finish you used—expect anywhere from 3 to 7 years in normal conditions.
Check for worn gloss, peeling at seams, visible substrate, or persistent staining.
Repaint if damage is localized; replace if boards delaminate, warp, or damage spreads across large areas and affects function.
Safety, Environmental, and Warranty Considerations
Before you start, consider health and environmental risks: choose low‑VOC paints, ventilate well, and wear a respirator and gloves.
Check whether painting will void your floor’s manufacturer warranty or affect resale value.
If the job feels beyond your skills—or the warranty or VOC risks are significant—hire a pro.
VOCs, ventilation, and protective gear
Because paint and primers release volatile organic compounds (VOCs) that can irritate eyes, lungs, and throats, you’ll want to control exposure by using low-VOC products, ventilating the space, and wearing appropriate protective gear.
Open windows, run fans, and take breaks. Protect skin and clothes.
- N95 or respirator mask
- Chemical-resistant gloves
- Safety goggles
- Long-sleeve coveralls
- Box fans directing air outside
Impact on manufacturer warranties and resale value
You’ve done the hard work protecting yourself and the room, but altering laminate surfaces can have consequences beyond aesthetics: painting may void the flooring manufacturer’s warranty and affect how buyers view your home.
Check warranty terms before you start—many cover wear, moisture, and structural issues only for unaltered finishes.
Painting can lower resale appeal or require disclosure during sale; weigh risks carefully.
When to hire a professional
If you’re unsure about the coatings, ventilation, or the fine prep work required, hire a pro—especially when safety, environmental rules, or your warranty are on the line.
A professional guarantees proper ventilation, uses approved low-VOC products, and documents work to protect warranties.
Call a licensed contractor if VOC exposure, complex repairs, or HOA and resale implications could cause liability or costly mistakes.
Cost-Benefit Checklist: Is Painting Laminate Worth It for You?
Before you start, run through a quick checklist of decision factors—budget, desired aesthetics, and your long-term plans for the space—to see if painting fits your goals.
Use a simple scoring system (e.g., low cost + short-term use = DIY; high cost of repairs or long-term ownership = replace) to guide the choice.
This will help you decide fast whether to paint the laminate yourself or opt for replacement.
Decision factors checklist (budget, aesthetics, long-term plans)
Because painting laminate can save money now but may add maintenance later, weigh three practical factors—budget, desired look, and your long-term plans—before you start.
Consider outlay, durability, resale impact, upkeep, and style fit so you don’t regret the choice.
- Paint cans, rollers, and primer stacked on a garage floor
- Faded woodgrain becoming crisp matte color
- Scratches showing through high-traffic areas
- Homebuyers inspecting finish
- Seasonal touch-up buckets nearby
Quick scoring system to decide DIY vs. replace
You’ve weighed budget, aesthetics, and long-term plans—now use a quick scoring system to turn that thinking into action.
Assign 1–5 points for: floor condition, expected lifespan, budget flexibility, DIY skill, resale impact.
Total 5–15: paint.
16–20: consider professional refinish.
21–25: replace.
Tiebreaker: if unsure, get a pro estimate before committing.
Frequently Asked Questions
You’ll want clear answers on durability, prep, and upkeep before you start.
Can painted laminate last for years, handle glued planks, take the right primer, resist pet claws and heavy furniture, and be recolored later without full stripping?
Below are concise FAQs that address each of those points.
How long will paint last on laminate flooring?
How long paint lasts on laminate flooring depends mostly on prep, paint type, and how much wear the surface gets; with proper cleaning, light sanding, a high-quality bonding primer, and durable floor paint or sealer, you can expect 3–7 years of good performance in low- to moderate-traffic areas.
While high-traffic spots may show wear in 1–2 years. You’ll also extend life by using rugs, felt protectors, and regular touch-ups.
Can I paint laminate planks that are glued down?
If your painted laminate has held up for a few years, you might be wondering whether glued-down planks can be repainted or refinished in the same way.
Yes, but access and adhesion matter: glued-down boards limit sanding and lifting, so striping or deep prep isn’t feasible.
Clean, scuff, and use appropriate coatings; expect shorter lifespan versus removable planks and plan accordingly.
What type of primer works best on laminate?
Although laminate’s slick, nonporous surface makes adhesion a challenge, the right primer will bond and create a stable base for paint.
Use a high-bonding, solvent-based or oil-based primer designed for slick surfaces or melamine. These primer types promote adhesion and block stains.
Apply per manufacturer instructions, sanding lightly between coats. Avoid water-based primers unless specified for laminate surfaces.
Will painted laminate withstand pet claws and heavy furniture?
When you paint laminate flooring, expect reasonable durability but not the same toughness as a factory finish. Properly prepped surfaces with a high-bond primer and a durable topcoat will resist everyday pet claws and furniture movement, but sharp nails, heavy concentrated loads, and dragging can still chip or wear the paint over time.
Use felt pads, trim pets’ nails, avoid dragging, and touch up promptly to prolong coverage.
Can I change the paint color later without stripping it?
Curious about swapping colors down the road? You can change paint without fully stripping if you sand lightly, clean thoroughly, and apply a bonding primer between coats.
For drastic color shifts or damaged finish, scuffing to bare laminate and re-priming guarantees adhesion. Always test a small area first and use durable topcoat to reduce future refinishing needs.