Can You Paint Bathroom Floor Tiles? What Works and What Doesn’t
Yes — you can paint bathroom floor tiles for a quick, budget-friendly refresh, but it’s a temporary fix and needs proper prep to last. Clean, sand or etch glossy tiles, use a high-bond primer, then apply floor-grade epoxy or enamel and a durable clear topcoat; avoid standard wall paints, chalk paint, or skipping primer. Expect wear in high-traffic, wet areas and plan for touch-ups; keep going to learn the exact steps, products, and pitfalls.
Can You Paint Bathroom Floor Tiles?
Yes—you can paint bathroom floor tiles, but it’s best as a cosmetic, temporary fix rather than a permanent solution.
If you’re on a budget, renting, or planning to remodel soon, painting can work well; if the tiles are damaged, porous, or you want a long-lasting result, skip painting and replace them.
Also consider traffic, moisture, and proper prep: those factors determine whether your paint job will hold up.
Direct, concise verdict
You can paint bathroom floor tiles, but only if you prep them properly, use the right primer and floor-grade paint, and accept that the finish won’t last as long as replacing tiles.
In short: yes, can you paint bathroom floor tiles — with careful prep and realistic expectations.
It’s a budget-friendly cosmetic fix, not a permanent structural solution; expect touch-ups and eventual resealing or repainting.
Who should consider painting tiles and who should avoid it
The short verdict sets the scene, but whether you should paint your bathroom floor tiles depends on your goals, timeline, and skill level.
You should consider painting if you want a quick, budget refresh, have sound subflooring, and can follow prep and sealing steps.
Avoid it if you need durability, plan long-term resale, or lack patience for meticulous prep and maintenance.
When painting is a temporary fix vs. a long-term solution
When should painting your bathroom floor be treated as a stopgap rather than a permanent fix?
Treat it as temporary if tiles are cracked, uneven, peeling, or in high-traffic wet zones where moisture will undermine adhesion.
Use paint for cosmetic refreshes, rentals, or budget constraints.
Opt for replacement or professional resurfacing when durability, resale value, or long-term waterproofing matters.
Basic Understanding What Painting Bathroom Floor Tiles Means
When you consider painting bathroom floor tiles, start by noting the material—ceramic, porcelain, quarry, vinyl, or natural stone—as each accepts paint differently.
You’ll need to know how paint bonds to the surface, since porosity and glaze affect adhesion and prep requirements.
Also weigh painting against reglazing or full replacement, because durability, cost, and finish quality vary greatly.
Types of floor tiles commonly found in bathrooms (ceramic, porcelain, quarry, vinyl, natural stone)
Tiles come in several common types you’ll encounter in bathrooms—ceramic, porcelain, quarry, vinyl, and natural stone—each with different porosity, durability, and surface texture that affect how paint will adhere and wear.
You’ll find ceramic and porcelain smooth and less porous. Quarry is rougher, vinyl is flexible and nonporous, and natural stone varies widely, often needing special prep and sealers.
How paint bonds to different tile materials
Understanding how paint bonds to different bathroom floor materials helps you choose the right prep and products for a durable finish. You’ll sand or etch porous tiles, prime glazed ceramics, use adhesion primers on vinyl, and avoid painting delicate stone without proper sealers. Match primer and paint to substrate and traffic.
| Tile Type | Bonding Trait | Prep Needed |
|---|---|---|
| Ceramic | Moderate | Etch/prime |
| Porcelain | Low | Abrade+prime |
| Vinyl | Challenging | Adhesion primer |
| Stone | Variable | Seal/prime |
| Quarry | Good | Clean/prime |
Differences between painting tiles vs. reglazing or replacing
If you want a quick, budget-friendly refresh, painting your bathroom floor tiles can work, but it’s not the same as reglazing or full replacement: painting masks wear, updates color, and costs less, but it’s less durable and harder to repair.
Reglazing restores original gloss and longevity; replacement gives permanent structural and style change.
Choose based on budget, durability needs, and long-term plans.
What Works Paint Types, Primers, and Topcoats That Adhere Well
You’ll want to pick paints made for floors and moisture—epoxy, floor enamel, and acrylic or latex blends are the usual choices.
For non-porous tiles use an etching or bonding primer, then finish with a durable, moisture-resistant topcoat or sealer designed for high-traffic areas.
Gather the right tools too—sander or abrasive pads, quality brushes/rollers, tack cloths, and proper safety gear—before you start.
Recommended paint types for bathroom floors (epoxy, floor enamel, acrylic, latex blends)
Because bathroom floors face constant moisture, foot traffic, and cleaning chemicals, you want paints that bond strongly and resist wear—epoxy, commercial floor enamel, and high-quality acrylic or latex blends are the usual winners.
You should pick epoxy for durability and chemical resistance, enamel for tough wear and gloss retention, and premium acrylic/latex blends for easier application and flexibility in less-demanding bathrooms.
Primer selection for non-porous tiles (etching primers, bonding primers)
When tiles are non‑porous, standard primers won’t grab, so you need an etching or high‑bond primer designed for slick surfaces; these chemically or mechanically prepare the glaze so epoxy, enamel, or quality acrylic topcoats can form a lasting bond.
Choose a primer labeled for ceramic/glazed tile or multi-surface adhesion, follow manufacturer prep and cure times, and test a small area before full application.
Best topcoats and sealers for durability and moisture resistance
If you want a bathroom floor that holds up to moisture and foot traffic, choose high‑bond systems—two‑part epoxies and water‑based or solvent‑borne urethanes—because they offer the best adhesion, chemical resistance, and wear performance over primed tile; pair them with a primer labeled for glazed tile and follow the manufacturer’s cure times to guarantee the topcoat forms a continuous, hard film that resists peeling, staining, and water intrusion.
Use non‑yellowing urethane or clear epoxy for top layers, consider a thin anti‑slip additive, and recoat per specs to maintain protection.
Tools and materials you’ll need
Getting the right tools and materials makes the difference between a lasting, professional-looking bathroom floor and a paint job that peels within months.
You’ll need quality products and proper prep:
- Etching cleaner, high-bond primer for tile, and epoxy or urethane floor paint.
- Waterproof polyurethane or marine-grade topcoat.
- Sandpaper, scrub brush, rollers, and tack cloths for clean, roughened surfaces.
What Doesn’t Work Paints and Methods to Avoid
Don’t use standard wall paint or unsealed chalk paint on bathroom floors—they just won’t bond or resist wear.
If you skip a proper primer and sealer, the finish will peel or chip fast.
Also avoid painting tiles in high-traffic or constantly wet zones unless you’re prepared for frequent touch-ups or replacement.
Common paints that fail (standard wall paint, unsealed chalk paint)
Some common paints that seem like a quick fix—standard interior wall paint and unsealed chalk paint—won’t hold up on bathroom floors because they lack adhesion, abrasion resistance, and moisture protection; you’ll see peeling, chipping, and premature wear within weeks or months.
Don’t use paints formulated for walls or decorative chalk finishes without proper floor-grade formulation and protective topcoat designed for wet, high-traffic environments.
Why skipping primer or sealer causes premature failure
If you skip a primer or sealer, the paint won’t properly bond to tile or grout and you’ll notice peeling, flaking, and bubbling much sooner than you’d expect.
Primer creates a keyed surface and seals porous grout, while a sealer protects edges and topcoat adhesion.
Without them, moisture and foot traffic exploit weak bonds, causing chips and wear that force repainting or full restoration.
Why high-traffic or constantly wet areas can outlast paints
Primer and sealer failures often show up first in the busiest, wettest spots, so it’s important to understand why certain paints and methods simply won’t hold up there.
You’ll find abrasion, constant moisture, and cleaning chemicals wear thin coatings fast. Flexible, waterproof systems and proper adhesion are essential; standard latex or chalk paints peel, blister, and flake under continual foot traffic and water exposure.
Step-by-Step Guide How to Paint Bathroom Floor Tiles (Preparation to Finish)
Before you start painting, you’ll inspect the tiles for looseness, cracks, and grout issues to make sure they’re a good candidate for a makeover.
Then you’ll clean and degrease thoroughly, repair any damage, and sand or etch surfaces as needed for proper adhesion.
Finally, you’ll apply the right primer, allow recommended drying time, and keep the area well ventilated.
Step 1: Evaluate tile condition and suitability (loose tiles, cracks, grout condition)
1. Inspect your bathroom tiles closely: press to find loose tiles, look for hairline or structural cracks, and check grout for crumbling, gaps, or mold.
You shouldn’t paint over unstable surfaces—repair or replace loose tiles, fill or replace cracked ones, and regrout where needed.
Only proceed once tiles and grout are sound; otherwise paint won’t adhere or last.
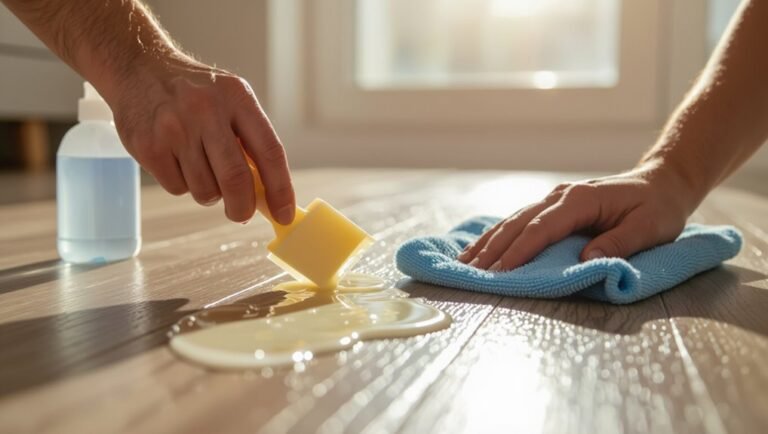
Step 2: Clean and degrease thoroughly (recommended cleaners and techniques)
Now that your tiles and grout are stable, it’s time to get the surface spotless so paint will stick.
You’ll remove soap scum, oils, and mildew using the right cleaners and techniques:
- Degrease with trisodium phosphate (TSP) or a strong tile cleaner, scrub with a stiff brush.
- Rinse thoroughly, vacuum or mop up residue.
- Wipe with isopropyl alcohol before priming.
Step 3: Repair and fill cracks or damaged grout
Patch and smooth any damaged areas so your painted floor looks professional and lasts.
Remove loose grout, chips, and debris with a screwdriver or utility knife.
Mix epoxy or polymer grout per instructions and press into gaps, smoothing with a damp finger or tool.
For hairline cracks, use a thin epoxy filler.
Let repairs cure fully before proceeding to the next step.
Step 4: Sanding or etching for adhesion (methods by tile type)
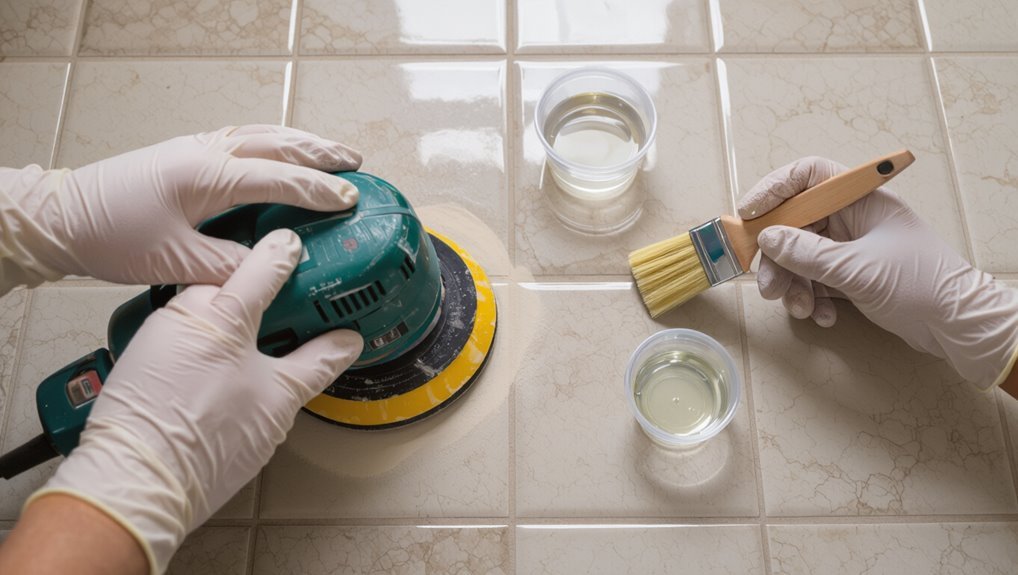
With repairs fully cured, you’ll prepare the tile surface so paint will stick—either by sanding to roughen glossy glazes or by etching to chemically profile dense porcelain and ceramic.
Use 120–220 grit sandpaper or a sanding block for glazed tiles; vacuum dust.
For porcelain or smooth stone, apply a commercial etcher per instructions, rinse thoroughly, and let dry.
Test a small area first.
Step 5: Apply primer techniques, drying time, ventilation
Before you paint, apply a bonding primer designed for tile so the topcoat adheres and resists peeling; choose a high-quality acrylic or epoxy primer labeled for ceramic, porcelain, or floors, and follow the manufacturer’s coverage and stir instructions.
Use a short-nap roller and brush for grout, maintain 50–70°F, provide cross-ventilation, and allow the recommended dry time before recoating or walking on the surface.
Step 6: Apply base coats number of coats, drying times
Begin rolling on the base coats evenly, working in small sections so paint doesn’t skin over or lap-mark; most tile paint systems call for two thin coats applied with a short-nap roller and a brush for edges and grout lines.
Let the first coat dry fully—usually 2–4 hours—then lightly sand any imperfections.
Apply the second thin coat, allow 24 hours curing before light foot traffic.
Step 7: Add patterns or stencil work (if desired) tips for durability
If you want to add patterns or stencil work, plan the design and placement carefully so each motif aligns and wears evenly.
Precise layout is the key to a professional look and longer-lasting results. Use high-quality adhesive stencils, secure edges with low-tack tape, and apply paint in thin, even layers to prevent bleeding.
Test a corner first and allow full drying between colors.
Step 8: Apply topcoat/sealer and cure time walking and full-use timelines
1 final step seals your work and sets the timeline: apply the topcoat or sealer evenly, then follow the manufacturer’s cure times so you know when it’s safe to walk on the floor and when to return to full use.
Work in thin, uniform coats, allow recommended tack-free times between layers, and avoid traffic until full cure—typically 24–72 hours for light use, 7 days for heavy use.
Step 9: Maintenance after painting (cleaners to use and avoid)
Once your topcoat has cured, keeping the finish looking good comes down to using the right cleaners and habits.
Use pH-neutral cleaners, mild dish soap, and warm water; mop gently and blot spills quickly.
Avoid harsh abrasives, bleach, ammonia, or acidic bathroom cleaners that dull or strip the sealer.
Place rugs at entrances and use felt pads on furniture to prevent scuffs.
Comparison Painted Tile vs. Alternative Solutions
When you weigh painted tiles against retiling, you’ll notice paint is cheaper and faster but less durable long-term.
Compared to peel-and-stick vinyl or overlays, paint keeps your original grout lines and profile but can’t match the thickness or immediate wear resistance of new surfaces.
Against professional reglazing or refinishing, painting is the most DIY-friendly option, while reglazing offers a tougher, longer-lasting factory-like finish.
Painted tiles vs. retiling
Although painting your bathroom tiles is quicker and cheaper, you’ll want to weigh that against durability and long-term value because retiling offers a more permanent, higher-end solution. You’ll save money and time painting, but expect touch-ups and eventual replacement. Retiling costs more now, lasts longer, and increases resale appeal.
| Option | Cost | Longevity |
|---|---|---|
| Paint | Low | Short |
| Retile | High | Long |
Painted tiles vs. peel-and-stick vinyl or flooring overlays
If you’re weighing painted tiles against retiling, you should also consider peel-and-stick vinyl and other flooring overlays as middle-ground options.
They install quickly, hide grout and uneven surfaces, and offer water-resistant finishes. You’ll get more consistent patterns and durability than paint but less permanence than full replacement.
Costs and lifespan vary, so match product quality to traffic and moisture levels before deciding.
Painted tiles vs. professional reglazing/refinishing
While painted tiles give you a quick, low-cost refresh you can DIY over a weekend, professional reglazing (also called refinishing) replaces the surface with a factory-like coating applied by trained technicians for a longer-lasting, water-resistant finish.
You’ll save money and personalize painted tiles, but reglazing delivers superior durability, warranty coverage, and moisture protection—worth the higher cost if you want longevity and fewer maintenance headaches.
Problems, Risks, and Common Mistakes
You’ll most often see paint failure from poor prep, wrong primer or skipping sealed tiles, which causes peeling and flaking.
Be aware of health and safety risks—use ventilation and PPE for fumes, and choose a finish that maintains slip resistance.
Also watch moisture and temperature swings, since humidity and thermal movement can make paint blister or separate from the tile.
Most common failures and why they happen
Several problems commonly derail bathroom tile paint jobs, and most stem from skipped prep or wrong product choices.
You’ll see peeling where tiles weren’t cleaned or sanded, blistering from moisture trapped under paint, and flaking when using non-adhesive primers or low-quality coatings.
Uneven sheen, visible grout lines, and rapid wear in high-traffic areas all trace back to poor surface bonding or unsuitable paint selection.
Health and safety risks (ventilation, fumes, slip resistance)
Because bathroom projects often stir up fumes, dust, and slippery surfaces, you need to treat ventilation, air quality, and slip resistance as top priorities.
Open windows, run a powerful exhaust fan, and wear an organic-vapor respirator if using solvent-based paints.
Use low-VOC products when possible, allow thorough drying, and add a textured, water-resistant topcoat or non-slip additive to prevent falls.
How moisture and temperature changes affect painted floors
Good ventilation and safe products only solve part of the problem — moisture and temperature swings can still wreck a painted bathroom floor.
You’ll see blistering, peeling, mold under paint, and adhesive failure where humidity or cold meet warm tile.
Avoid painting without proper moisture barriers, thermal primers, and flexible coatings.
Test overnight, control humidity, and accept repainting as routine maintenance.
Prevention, Tips, and Best Practices for Longevity
To keep painted bathroom tiles looking good, you’ll want slip-resistant finishes or additives, gentle cleaning routines, and strategic use of rugs or protective pads.
Use mild cleaners and soft tools to avoid scuffing the paint, and set up a simple touch-up plan so small chips don’t become big problems.
Know when repainting is due—usually after several years or extensive wear—and keep matching paint and tools on hand for quick repairs.
Choosing slip-resistant finishes and additives
1 simple change—choosing the right slip-resistant finish—can dramatically reduce falls and keep your painted bathroom floor safe and durable.
Pick water-based epoxy or polyurethane with added non-slip aggregates like fine silica or polymer beads.
Test texture and appearance on a spare tile, apply per manufacturer instructions, and balance grip with comfort.
Recoat when wear appears to maintain traction and safety.
Best cleaning routines to preserve paint
While occasional deep cleans are important, you’ll preserve painted bathroom floors best by using gentle, consistent routines:
Sweep or vacuum daily to remove grit, mop weekly with a pH-neutral cleaner and warm water, blot spills immediately, avoid abrasive pads and harsh chemicals, and dry surfaces after cleaning.
Recoat scuffed areas as needed and test cleaners on an inconspicuous spot first.
When to use rugs, mats, or protective pads
When should you place rugs, mats, or protective pads over painted bathroom floor tiles?
Use them immediately in high-traffic zones, near sinks, tubs, and entryways to reduce abrasion and moisture exposure.
Choose non-slip, breathable pads to prevent trapping water and avoid adhesive-backed rugs that can pull paint.
Replace worn mats promptly and wash or air-dry regularly to maintain protection and appearance.
How to plan for touch-ups and when to repaint
If you want painted bathroom tiles to look good for years, plan touch-ups and repainting before small chips or wear become big problems.
Keep a small repair kit: matching paint, fine brush, sandpaper, and sealer.
Inspect monthly, note fading or scratches, and spot-fix promptly.
Recoat high-traffic areas every 2–4 years or sooner if appearance or adhesion declines.
Cost, Time, and Durability Expectations
You’ll want to weigh the typical cost breakdown—materials like primer, paint, and sealant are inexpensive compared with hiring a pro for labor.
Expect a DIY project to take a weekend or two including curing time, while professionals can finish faster but charge more.
Plan for painted tile to last several years with proper prep and sealing, and check any contractor warranties or product guarantees before you start.
Typical cost breakdown (materials vs. labor)
Though DIY projects can cut labor expenses, the typical cost to paint bathroom floor tiles splits between materials—cleaners, etchers, primers, epoxy or enamel paint, sealers, and tools—and either your time or a contractor’s hourly rate; expect materials to run roughly $50–$200 for a small bathroom and professional labor to add $150–$600 depending on local rates and prep complexity.
| Item | Low | High |
|---|---|---|
| Materials | $50 | $200 |
| Labor | $150 | $600 |
| Total | $200 | $800 |
Time estimates for DIY projects vs. professional jobs
Now that you know how materials and labor break down, it’s worth looking at how long a tile-painting project will take and how that affects cost and longevity.
If you DIY, expect 1–3 days for prep, painting, and curing for small bathrooms; longer if tiles are large or damaged.
Pros typically finish in 1 day with faster curing systems but cost more upfront.
Expected lifespan and warranty considerations
If you want painted tiles to last, plan for realistic lifespans and check warranties up front: quality epoxy or urethane systems usually hold up 5–10 years in low-traffic bathrooms, while cheaper acrylic kits may start showing wear in 1–3 years.
You should register products, keep receipts, follow maintenance instructions, and expect limited or prorated warranties—professionals sometimes offer short labor guarantees.
When to Call a Pro Signs You Should Hire a Contractor
If you spot structural or waterproofing problems, you should call a pro right away because those need expert repair, not paint.
Hire a contractor when you want high-end finishes or complex patterns that require specialized skills and tools.
Also consider a pro for very large bathrooms or commercial spaces where scope and code compliance make DIY impractical.
Structural or waterproofing issues
When you spot cracked grout, loose tiles, persistent moisture, or soft spots underfoot, it’s a clear sign to call a professional—these problems often point to structural damage or compromised waterproofing that paint alone won’t fix.
Don’t try cosmetic fixes; a pro will assess subfloor integrity, find leak sources, replace damaged materials, and restore proper waterproofing to prevent mold, rot, and recurring failures.
High-end finishes or complex patterns
Structural or waterproofing fixes demand a professional because they address hidden damage; similarly, high-end finishes or complex tile patterns call for a contractor when you want a flawless, long-lasting result.
You’ll benefit from a pro’s skills for precision cutting, grout matching, and specialty materials. They’ll prevent costly mistakes, guarantee proper substrate prep, and deliver durable, museum-quality results that DIY efforts rarely achieve.
Large bathrooms or commercial spaces
Because scale multiplies every challenge, tackling tile work in a large bathroom or a commercial space demands a contractor’s experience and manpower.
You’ll save time and avoid costly mistakes by hiring pros who coordinate crews, guarantee consistent surface prep, use commercial-grade products, and meet safety codes.
They’ll handle traffic management, warranty expectations, and durable finishes so the result lasts under heavy use.
FAQ Common Questions About Painting Bathroom Floor Tiles
You probably have a few practical questions before you start, like how long the paint will last and whether the floor will get slippery when wet.
You’ll also want to know if painted tiles can handle shower water or steam, whether you can repaint later, and how to remove paint if you want the original tile back.
Let’s answer those common concerns so you can make an informed decision.
How long does painted tile floor last in a bathroom?
How long will painted bathroom floor tiles last? Typically, expect 3–7 years with proper prep, quality paint, and multiple clear topcoats.
High-traffic or damp bathrooms shorten lifespan; good ventilation and gentle cleaning extend it.
Touch-ups may be needed sooner on edges and grout lines.
When wear appears, you can recoat after proper scuffing and cleaning to refresh the finish.
Will painted tiles be slippery when wet?
Will painted bathroom tiles get slippery when wet? You might notice some slickness if you use smooth paints or gloss finishes.
Anti-slip additives, textured primers, or a matte, traction-enhanced topcoat reduce slipperiness. Clean spills promptly and avoid all-smooth coatings near tubs or showers.
Proper surface prep and the right topcoat let you balance appearance and safety effectively.
Can painted tile withstand shower water or steam?
Can painted bathroom tiles stand up to shower water and steam? Yes, if you prep properly and use waterproof primers, epoxy or marine-grade paints, plus a quality sealer.
Expect edges and grout to be vulnerable—seal seams and allow full curing. Avoid low-quality latex paints.
Regular maintenance and prompt repair of chips will keep the finish durable in humid, wet conditions.
Can I paint over painted tiles to change color later?
Want to change the color later? Yes — you can paint over previously painted tile, but success depends on prep and coatings.
Scuff, clean, and degrease thoroughly, then use a bonding primer designed for glossy surfaces.
Apply compatible paint and a durable sealer. Multiple layers may be needed, and adhesion tests help guarantee the new finish won’t peel or chip prematurely.
How do I remove paint from tile if I want to revert to original?
How do you strip paint from tile without damaging the surface?
Use a gentle, systematic approach: test a small area first, then try a citrus-based or alcohol paint remover for water-based paint, or a commercial stripper for tougher coats.
Scrape with a plastic scraper, scrub with a nylon brush, rinse thoroughly, and finish with mineral spirits if needed.
Seal or polish afterward.