How to Deep Clean Plank Flooring: The Method That Actually Works
You can deep clean plank flooring without damaging the finish by starting dust-free, using a manufacturer-safe, pH-neutral cleaner, and working with a barely damp microfiber mop along the grain. Pre-treat stains, avoid excess water, rinse with clear water, and dry quickly with good airflow. Spot-treat adhesives or pet stains with appropriate solvents or enzymes and buff to restore sheen. Follow manufacturer guidance for your specific plank type and continue for step-by-step techniques and troubleshooting.
Quick Answer How to Deep Clean Plank Flooring Effectively
You can deep clean plank flooring by vacuuming debris, using a manufacturer-safe cleaner with a damp mop, and spot-treating stubborn grime.
You’ll want to deep clean when you notice dullness, persistent stains, trapped grit, or a lingering odor.
If your floors feel rough underfoot or the finish looks worn, it’s time to act.
One-sentence summary of the method
Start by sweeping or vacuuming to remove loose grit. Then mop with a wood-safe cleaner and a barely damp microfiber cloth. Rinse if needed, and finish by drying immediately to prevent moisture damage.
You’ll work systematically across planks, tackle tough spots with a soft scrub pad, avoid excess water, and follow manufacturer guidance so your how to deep clean plank flooring livpristhome routine protects finish and wood integrity.
When deep cleaning is necessary (signs to look for)
After the basic sweep-and-mop routine, look for signs that call for a deeper clean: persistent dullness or film that won’t lift with a microfiber mop, sticky or greasy spots, darkened grout lines or plank seams, trapped grit causing visible scratches, or lingering odors.
If you spot any, schedule a targeted deep clean—focus on residue removal, grout/plank seams, and scratch prevention to restore finish and hygiene.
Basic Understanding What Plank Flooring Is and Why Deep Cleaning Matters
You’ll first want to know the main types of plank flooring—solid and engineered hardwood, laminate, and luxury vinyl plank—because each needs different care.
The way a plank is built and finished determines what cleaners and tools you can safely use. Common soils like dirt, grime, pet stains, and water marks respond differently depending on the floor type, so proper deep cleaning protects the surface and extends its life.
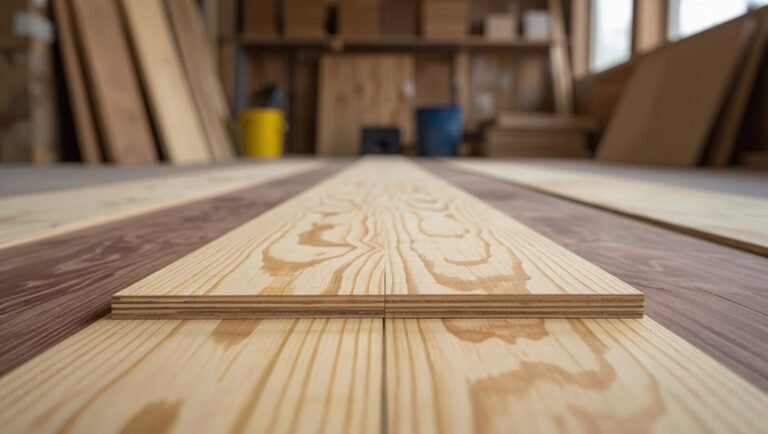
Types of plank flooring (solid hardwood, engineered hardwood, laminate, luxury vinyl plank)
Plank flooring comes in four common types—solid hardwood, engineered hardwood, laminate, and luxury vinyl plank—each with different construction, durability, and cleaning needs you should know before deep cleaning.
You’ll treat solid hardwood gently to protect the wood, engineered with moderate caution, laminate with minimal moisture, and luxury vinyl more forgiving.
Match products and techniques to the specific type.
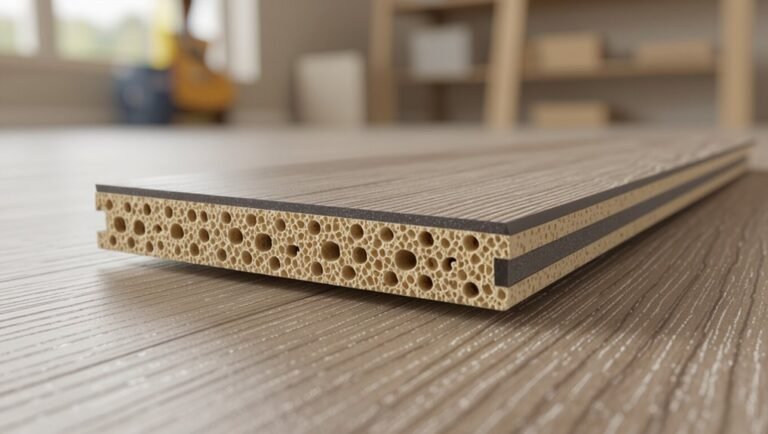
How construction and finish affect cleaning methods
Having picked the right type of plank flooring, you’ll next need to evaluate how the boards’ construction and finish change what cleaning methods will work.
Solid hardwood tolerates gentler, oil- or wax-friendly care; engineered needs moisture control but can handle light detergents.
Laminate and luxury vinyl demand low-moisture, nonabrasive cleaners and avoid waxes.
Match technique to construction and finish to prevent warping, stripping, or dulling.
Common soils and stains on plank floors (dirt, grime, pet stains, water marks)
Dirt and grit track in from outdoors, oils and spills build grime, pets leave urine and fur stains, and standing water can leave marks or raise boards—each soil type needs a different response.
You should sweep or vacuum loose debris, spot-treat grease with a pH-neutral cleaner, neutralize pet stains promptly with enzyme solutions, and dry water marks fast to prevent swelling or discoloration.
Safety and Preparation Before Deep Cleaning
Before you start, gather your tools and supplies so you won’t interrupt the job to hunt for them.
Take safety precautions—open windows for ventilation, wear PPE, and spot-test any cleaner on an inconspicuous board.
Clear the room by moving furniture, sweeping, and making small repairs to avoid trapped dirt or damage during cleaning.
Tools and supplies checklist
You’ll need a handful of tools and the right supplies to deep clean plank flooring safely and effectively: a soft-bristle broom or vacuum with a hard-floor setting, microfiber mop, bucket, pH-neutral wood or laminate cleaner, soft cloths, a flat plastic scraper, and protective gear like gloves and knee pads.
- Choose gentle, compatible cleaners.
- Prefer microfiber for streak-free drying.
- Keep a scraper for stuck debris.
Safety precautions (ventilation, PPE, spot-testing cleaners)
When you’re prepping to deep clean plank flooring, take basic safety steps like opening windows for fresh air, wearing gloves and knee pads, and testing any cleaner on a hidden spot first to avoid damage or reactions.
Also use a mask for strong fumes, eye protection, and non-slip shoes.
Follow label instructions, dilute cleaners correctly, and ventilate until odors clear.
Preparing the room (furniture removal, sweeping, spot repair)
Now that you’ve handled ventilation and PPE, clear the room so you can work efficiently and avoid accidents.
Move furniture to a staging area, protect legs with felt pads, and unplug electronics.
Sweep or vacuum thoroughly, getting debris from seams.
Inspect planks for scratches, gaps, or lifting; make quick spot repairs—fill gaps, glue loose boards, sand rough spots—before deep cleaning begins.
The Deep Cleaning Method That Actually Works Step-by-Step
Start by dry-cleaning and inspecting your plank floors—sweep or vacuum with a soft brush to lift grit.
Pre-treat stains and high-traffic spots, pick a cleaner that matches your floor type, then mop with a damp microfiber using a well-wrung technique.
Finish with a clear-water pass and microfiber pads to rinse and remove any residue.
Step 1 Dry clean and inspect (sweeping, vacuuming with soft brush)
Sweep and inspect your plank floor carefully to remove grit and spot damage before any wet cleaning.
Use a soft-bristle broom then a vacuum with a soft brush attachment, following plank grain and edges.
Check seams, corners, and under furniture for debris, scratches, or lifting.
Remove pet hair, sand, and loose dirt so wet cleaning won’t grind particles into the finish.
Step 2 Pre-treat high-traffic areas and stains
1. You’ll target spots before mopping: spot-test a mild cleaner, let it dwell, then blot—don’t rub.
For greasy or ground-in grime, loosen with a soft-bristle brush. Finish by rinsing residue quickly to protect finish.
- Test first to avoid damage.
- Use gentle agitation, not harsh scrubbing.
- Remove all residue to prevent streaks and buildup.
Step 3 Choosing the right cleaning solution by floor type
Because different plank finishes react differently to cleaners, you’ll pick a solution based on your floor type—solid hardwood, engineered wood, laminate, or vinyl—so you don’t strip the finish or leave residue. Use pH-neutral cleaners for hardwoods, mild detergents for laminates, and vinyl-safe formulas. Test first in a hidden spot.
| Floor Type | Recommended Cleaner |
|---|---|
| Solid hardwood | pH-neutral, oil-based polish |
| Engineered wood | pH-neutral, low-moisture |
| Laminate | Mild detergent, no wax |
| Vinyl | Vinyl-safe, non-abrasive |
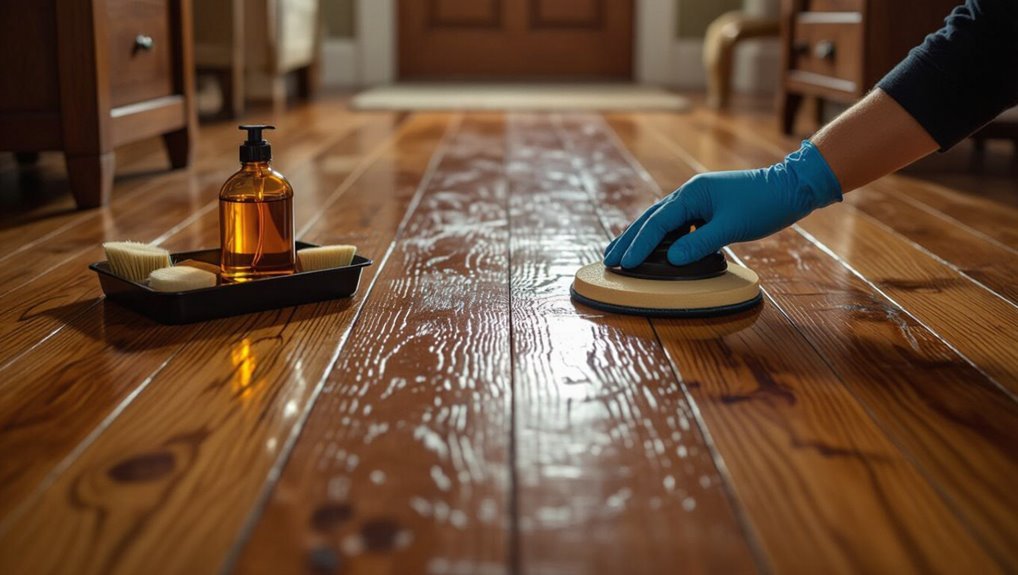
Step 4 Mopping technique for plank floors (microfiber mop, wring method)
Start with a barely damp microfiber mop and work in long, overlapping strokes along the grain of the planks so you lift dirt without forcing water into seams.
Wring the mop firmly between passes to keep moisture low. Change or rinse the pad when it soils, and tackle high-traffic zones with a second, slightly firmer pass.
Finish with dry edges to prevent pooling.
Step 5 Rinse and remove residue (clear-water pass, microfiber pads)
Do a clear-water pass with a fresh microfiber pad to lift away any cleaner residue and prevent sticky streaks—work the mop in the same long, grain-aligned strokes you used for cleaning, rinsing or swapping pads as they pick up soil so each pass leaves only water behind.
Check edges and corners with a damp microfiber cloth, and change pads when they look dull to avoid redepositing grime.
Step 6 Drying and restoring finish (airflow, buffing if applicable)
Once the floor is rinsed clean, speed up drying with strong airflow—open windows, run fans along the plank grain, and use a dehumidifier if the room feels damp—so the surface dries evenly and you avoid water spots or cupping.
After dry, inspect for streaks, restore sheen with a microfiber buff or approved finish restorer, and allow recommended cure time before replacing furniture.
Specialized Treatments and Tough Stains
When tackling specialized treatments and tough stains on your plank flooring, you’ll need different approaches for adhesive, paint, gum, water marks, pet urine, and dull finishes.
I’ll show safe removal methods and the right cleaners or products for each problem so you don’t damage the wood.
Follow these targeted steps and protocols to remove stains, neutralize odors, and restore the floor’s shine.
Removing adhesive, paint, or gum safely
Although these stubborn residues look intimidating, you can remove adhesive, paint, or gum from plank flooring without damaging the finish by choosing the right solvents and gentle techniques.
Test a solvent in an inconspicuous spot, scrape softened material with a plastic scraper, dab (don’t saturate) with solvent-soaked cloth, then clean and dry.
Finish by applying a compatible polish or protective oil.
Tackling water stains and white rings on hardwood
If water’s left sitting on your hardwood or a cold glass sweats on the surface, you’ll often see cloudy white rings or pale stains from moisture trapped in the finish; these marks don’t always mean the wood’s ruined.
Gently wipe, dry, then try a mild abrasive like baking soda paste or non‑gel toothpaste.
For deeper rings, cautiously use heat with a cloth or light sanding and refinish.
Pet urine and odor removal protocol
Water and sweat stains can often be handled with gentle cleaning, but pet urine needs faster, more targeted action because the liquid can soak into the finish and wood fibers and leave lasting odor.
Blot promptly, rinse with a wood-safe enzyme cleaner, and ventilate.
If smell persists, sand minimally to reach affected wood, apply a wood-safe odor blocker, then refinish the area.
Restoring shine on dull or worn finishes
Restoring shine on dull or worn plank finishes starts with identifying what’s causing the loss—surface grime, UV-faded topcoat, or worn-through lacquer—so you can pick the right treatment.
Clean thoroughly, then test a small area.
Use a polishing compound for surface haze, a restorative cleaner with microfiber pads for faded polyurethane, or sand and refinish when finish is compromised.
Follow manufacturer products.
Comparison Methods and Products to Use vs Avoid
You’ll want to weigh safe commercial cleaners against harsh chemicals, choosing products labeled for plank or hardwood floors to avoid damage.
Know when steam cleaning is acceptable (sealed planks, low settings) and when it can warp or lift boards.
If you try DIY mixes like diluted vinegar or mild dish soap, use proper ratios and test a hidden spot first because even gentle solutions can dull finishes or leave residues.
Safe commercial cleaners vs harsh chemicals
Although commercial cleaners can save time, you should pick products formulated for plank flooring to avoid dulling finishes or causing swelling. Choose pH-balanced, nonabrasive cleaners and test in a corner. Avoid ammonia, bleach, and oil soaps that leave residue or damage seals. Wipe spills promptly and follow manufacturer guidance.
| Safer | Avoid |
|---|---|
| pH-neutral | Bleach |
| Microfiber mop | Ammonia |
| Manufacturer-approved | Oil soap |
Steam cleaning: when it’s OK and when to avoid
When used correctly, steam cleaners can lift grime without chemicals, but you should only use them on plank floors that are rated as water-resistant and have a durable factory finish—never on solid hardwood, unsealed, or cupped boards.
Test a hidden area, use low-moisture settings, move quickly, and dry immediately.
Avoid frequent steam sessions; opt for manufacturer-approved cleaners for sensitive or older planks.
DIY solutions (vinegar, dish soap) effective mixes and risks
If you want a quick, budget-friendly clean, common DIY mixes—like diluted white vinegar or a few drops of dish soap in warm water—can lift dirt from many plank floors, but they come with limits and precautions.
You should test a hidden spot, avoid soaking seams, and skip vinegar on stone or unfinished wood to prevent damage.
- Test first
- Use minimal water
- Know material limits
Common Mistakes That Damage Plank Flooring
Don’t soak plank flooring or leave it to dry slowly, because over-wetting and trapped moisture warp boards and ruin finishes.
Avoid abrasive tools and harsh cleaners that scratch or strip the surface.
Always follow the manufacturer’s care instructions to keep warranties valid and prevent costly damage.
Over-wetting and improper drying
Although water’s fine for quick spills, over-wetting plank flooring soaks into seams and joints and can warp, cup, or delaminate the boards.
Don’t flood floors when deep cleaning; use a damp mop and wring it well. After cleaning, dry promptly with microfiber towels or fans.
Monitor humidity and ventilate the room to prevent lingering moisture that damages finish and structure.
Using abrasive tools or wrong cleaners
When you reach for a scouring pad or a harsh chemical, you’ll often do more harm than good—abrasive tools scratch the finish and wrong cleaners strip protective coatings, leaving plank flooring vulnerable to stains and moisture.
Use soft microfiber mops and pH-neutral cleaners recommended for your floor type. Test cleaners in an inconspicuous spot, rinse residues, and avoid bleach, ammonia, or oil soaps that dull or degrade finishes.
Ignoring manufacturer guidelines and warranty issues
If you skip the manufacturer’s care instructions or ignore warranty terms, you can void coverage and accelerate wear on your plank flooring.
Follow recommended cleaners, tools, and maintenance schedules. Don’t use unapproved products, harsh chemicals, or DIY fixes that alter the finish.
Keep receipts and document service to support claims. When in doubt, contact the manufacturer before attempting deep cleaning.
Prevention and Maintenance After Deep Cleaning
Now that your floors are spotless, set a simple routine—daily sweeping, weekly mopping, and a monthly check for wear—to keep grime from building up.
Use mats at entrances, felt pads on furniture, and a humidifier or dehumidifier to protect planks from scratches and moisture swings.
If finish wear or deep scratches appear, reseal or refinish; only repeat a full deep clean when dirt or discoloration returns.
Routine maintenance schedule (daily, weekly, monthly)
A simple, consistent routine keeps your freshly deep-cleaned plank floors looking their best and prevents dirt and moisture from undoing your work.
Daily: sweep or vacuum high-traffic areas and wipe spills immediately.
Weekly: damp-mop with a manufacturer-approved cleaner and inspect for damage.
Monthly: do a thorough vacuum, check seams and finish wear, and touch up small scuffs or dull spots promptly.
Protective measures (mats, felt pads, humidity control)
You’ve kept up with daily sweeping and monthly inspections, so the next step is to protect that clean finish from wear and moisture.
Use entry mats for grit, area rugs in high-traffic spots, and felt pads under furniture legs to prevent scratches.
Monitor indoor humidity with a hygrometer and keep levels around 35–55% to prevent cupping or gaps without introducing excess moisture.
When to refinish or reseal vs repeat deep clean
If your plank floors still repel water, show minimal wear, and the finish looks even, you can stick to regular deep cleaning instead of refinishing; however, when scratches, dulling, or finish loss become noticeable across large areas—or water soaks in rather than beads up—it’s time to refinish or reseal to restore protection and longevity.
Refinish for deep damage; reseal for worn finishes; clean between.
Cost, Time, and When to Call a Professional
Plan on about 1–3 hours per room for a thorough deep clean and expect costs to range from a modest DIY outlay to several hundred dollars for professional help.
If you see deep gouges, warped boards, persistent stains, or finish failure, you’ll probably need restoration or refinishing.
A pro will assess damage, give a clear estimate, and handle sanding, staining, and sealing so you don’t have to.
Estimated time per room and typical costs
While exact times and costs vary with room size and soiling, you can expect a basic deep clean for a typical 12×12 room to take about 45–90 minutes and run $75–$150 when hiring a pro; larger rooms, heavy buildup, or specialty finishes raise both time and price.
| Room size | Time / Cost |
|---|---|
| Small (8×10) | 30–60 min / $50–$100 |
| Large (15×20) | 90–180 min / $150–$300 |
Signs you need pro restoration or refinishing
When scratches, deep gouges, persistent discoloration, or cupped boards keep showing up despite your best cleaning, it’s time to contemplate professional restoration or refinishing.
Call a pro if water damage warps multiple planks, finish is worn through across traffic areas, stains penetrate the wood, or squeaks and loose boards multiply.
Expect higher costs and longer timelines than DIY, but lasting results.
What to expect from a professional service
If your floor problems go beyond cleaning, a professional service can save time and prevent costly mistakes by evaluating damage, recommending restoration or refinishing, and handling sanding, repairs, and recoating with the right materials.
Expect estimates based on scope—$300–$3,000+—and timelines from a day to several weeks.
Call a pro for structural issues, persistent stains, deep gouges, or extensive finish failure.
FAQs About Deep Cleaning Plank Flooring
You probably have a few specific questions about deep cleaning plank floors, like how often to do it and whether a steam mop or vinegar is safe.
You’ll also want to know how to handle deep scratches or gouges and which products work on oil- or wax-finished floors.
Let’s answer those concerns so you can clean confidently and avoid damage.
How often should I deep clean plank floors?
While individual household traffic and pets affect timing, plan on deep cleaning your plank floors every 3–12 months to keep finish and joints in top shape.
High-traffic areas or homes with pets may need cleaning closer to every three months; low-traffic spaces can stretch toward a yearly deep clean.
Regular light maintenance between deep cleans preserves appearance and prevents grit damage.
Can I use a steam mop on engineered hardwood or vinyl plank?
When considering a steam mop, remember that engineered hardwood and vinyl plank respond differently: vinyl is generally steam-mop safe on most modern products, but engineered hardwood can warp or delaminate if exposed to excess heat and moisture.
Check manufacturer guidelines, use low-heat settings, avoid prolonged passes, and test a hidden area first.
If in doubt, opt for a damp microfiber mop to protect finishes.
Will vinegar damage my plank flooring?
Curious whether vinegar will harm your plank flooring? You can use a diluted vinegar solution (one cup white vinegar to a gallon of water) sparingly on sealed vinyl or engineered planks to cut grease and buildup.
Avoid straight vinegar, repeated use, or untreated hardwood—acid can dull finishes and erode sealants over time.
Always spot-test and rinse with clean water afterward.
How do I remove deep scratches or gouges?
How deep is the damage and what material are your planks made of?
If it’s shallow, sand lightly, clean debris, and apply matching stain or finish.
For deeper gouges in solid wood, fill with wood filler or a color-matched epoxy, sand smooth, then refinish.
For engineered or laminate, replace affected plank if structural integrity or surface layer is compromised.
What products are safe for floors with oil or wax finishes?
Oil- and wax-finished floors need gentle, pH-neutral care, so choose products that won’t strip the finish or leave a buildup you can’t remove.
Use pH-neutral wood cleaners, diluted natural soaps formulated for waxed floors, or manufacturer-recommended maintenance oils.
Avoid ammonia, bleach, alkaline detergents, and abrasive cleaners.
Test any new product in an inconspicuous spot first and follow application and drying instructions carefully.