How to Stop Moisture Coming Through a Concrete Floor Permanently
You can stop moisture coming through a concrete floor permanently by first finding the source—groundwater, poor grading, a failed vapor barrier, plumbing leaks, or high indoor humidity—and fixing that cause. Patch cracks, restore or add an interior vapor barrier or professional-grade epoxy system, and improve exterior drainage or install a sump if needed. Small jobs you can DIY; big or structural issues need a contractor. Keep going to learn step-by-step choices and costs.
Quick Answer How to Stop Moisture Coming Through a Concrete Floor Permanently
You can permanently stop moisture with reliable fixes like installing a proper vapor barrier, improving exterior drainage, or applying a professional-grade epoxy or moisture-mitigation system.
Small jobs like sealing cracks or adding a dehumidifier you can handle yourself, but structural issues, persistent hydrostatic pressure, or failed slab membranes are situations to call a professional.
If you’re unsure after an initial inspection, get a pro to diagnose to avoid wasting time or money on temporary fixes.
Short summary of reliable permanent solutions
When moisture keeps coming through a concrete floor, the most reliable permanent fixes address the source, not just the symptoms: seal or replace a breached vapor barrier, repair slab cracks and joints, install a proper interior or exterior drainage system if groundwater is an issue, and add a tested concrete vapor barrier or slab-on-grade membrane before any new floor covering.
To stop recurring damp, use targeted repairs, drainage, and a verified membrane to fix how to stop moisture coming through concrete floor permanently.
When to call a professional vs DIY
Deciding whether to tackle moisture through a concrete floor yourself or call a pro depends on the problem’s source, your skill level, and local code requirements.
If you see widespread hydrostatic pressure, structural cracks, persistent mold, or sewer/backflow issues, hire a licensed contractor.
DIY suits small surface dampness, simple vapor barriers, or patching minor cracks—if you have proper tools, patience, and follow manufacturer instructions and local codes.
Basic Understanding What Causes Moisture Through Concrete Floors
You need to know that concrete is porous, so water moves through it by capillary action and as vapor.
Moisture can come from groundwater and hydrostatic pressure, plumbing leaks, or high indoor humidity.
If you ignore it, you’ll see stains, efflorescence, mold, and structural damage over time.
How concrete and moisture interact (capillary action, vapor transmission)
Because concrete is porous, it draws and transports water through two main processes: capillary action and vapor transmission.
You’ll see liquid rise through tiny pores (capillary action), carrying dissolved salts and increasing moisture at the surface.
You’ll also get water vapor moving from wetter to drier zones through the pore network.
Both processes depend on temperature, humidity, and pore connectivity.
Common sources of moisture (groundwater, hydrostatic pressure, leaks, humidity)
When moisture shows up in a concrete floor, it usually comes from a few predictable sources: groundwater seeping up, hydrostatic pressure forcing water through joints or cracks, plumbing or appliance leaks, and high indoor humidity vapor migrating through slab pores.
You should inspect drainage, grading, pipe integrity, and ventilation. Fixing those sources prevents recurring dampness and protects finishes and indoor air quality.
Signs and long-term risks of moisture intrusion
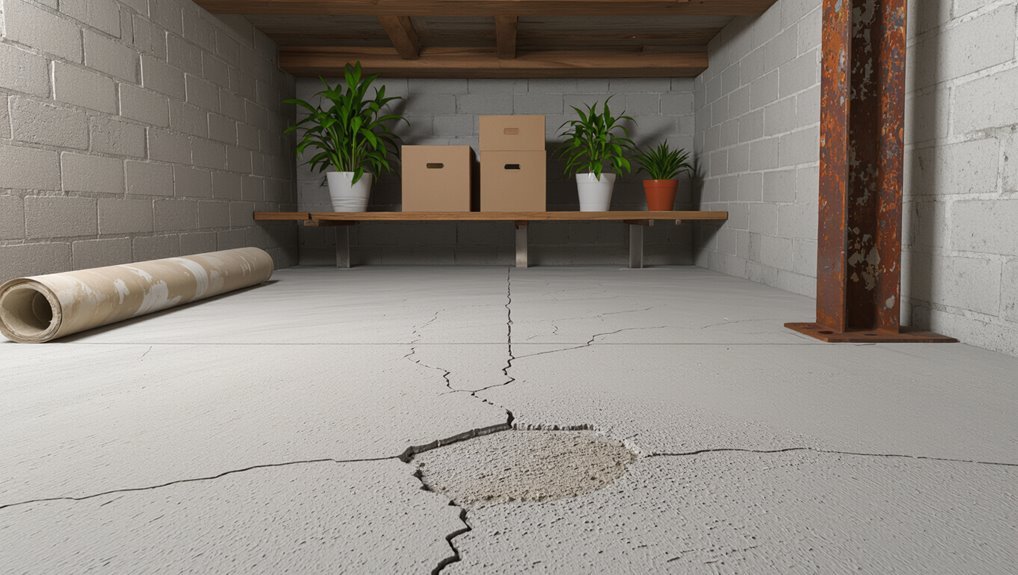
After checking drainage, grading, pipes, and ventilation, watch for clear signs that moisture’s already crossed the slab: damp spots, darkening or efflorescence on concrete, musty odors, mold growth, peeling or blistering floor coverings, and warped wood or buckling tiles.
- Structural decay accelerating rot and corrosion.
- Poor indoor air quality and health risks.
- Persistent adhesive and finish failures.
- Rising repair costs and reduced property value.
Assessing Your Situation Diagnose Type and Severity
Start by doing a visual inspection checklist—look for cracks, efflorescence, peeling coatings, and wet spots.
Then run simple tests like a plastic sheet test, a calcium chloride test, or a moisture meter to determine whether vapor, liquid water, or trapped moisture is the issue.
If tests show high readings or you suspect foundation, soil, or drainage problems, call a structural, soil, or hydrology expert.
Visual inspection checklist
Although it might seem simple, a careful visual inspection is the quickest way to diagnose concrete floor moisture issues, and you’ll want to follow a consistent checklist so you don’t miss key signs.
- Look for discoloration, efflorescence, and white powder.
- Note blistering, peeling coatings, or flaking concrete.
- Check perimeter for pooling, damp baseboards, or musty odors.
- Inspect joints, cracks, and slope toward drains or walls.
Simple tests to identify moisture type (plastic sheet test, calcium chloride test, moisture meter)
You’ll want to run a few straightforward tests to figure out whether moisture is coming from the slab, the ground below, or just surface dampness—each test gives different, actionable information:
- Plastic sheet: tape 2×2 ft plastic for 24–72 hrs; condensation = vapor drive.
- Calcium chloride: measure emission rate over 24–72 hrs for quantitative moisture.
- Moisture meter: map relative moisture across slab.
- Record and compare results to decide next steps.
When to hire a structural/soil/hydrology expert
When should you call in a structural, soil, or hydrology expert? Call one if tests show persistent high moisture, uneven slab settlement, visible cracks, mold growth, or unclear water sources.
Hire an expert when drainage issues, rising groundwater, or suspected soil contamination are possible.
They’ll diagnose root causes, recommend permanent fixes, and prevent costly remediation mistakes you might miss.
Permanent Repair Strategies Overview and Decision Guide
Choose a permanent fix based on your floor type, budget, planned use, and the moisture severity you found.
I’ll compare common approaches—like coatings, vapor barriers, drainage/under-slab repairs, and slab replacement—so you can weigh costs, disruption, and long-term effectiveness.
Use that comparison to match a solution to your priorities and risk tolerance.
Factors that determine the right solution (floor type, budget, use, severity)
Although several permanent fixes can stop moisture through a concrete floor, the right choice depends on four key factors: the floor type (slab-on-grade, suspended slab, or crawlspace), your budget, how you use the space, and how severe the moisture problem is. Assess those, then match intervention scope and cost to risk and use.
| Factor | Impact | Consideration |
|---|---|---|
| Floor type | High | Access, vents |
| Budget | Medium | DIY vs pro |
| Use/severity | High | Living vs storage |
Comparative pros and cons of permanent approaches
Because permanent fixes vary in cost, complexity, and effectiveness, you should weigh each approach against your floor type, budget, and how you use the space. Compare waterproof membranes, slab replacement, epoxy and sealers, interior drainage, and vapor barriers for durability, disruption, cost, and maintenance to pick the best fit.
| Option | Key trade-off |
|---|---|
| Membrane | Effective, moderate cost |
| Slab replace | Definitive, very disruptive |
| Epoxy/sealer | Low cost, limited lifespan |
| Interior drain | Solves heavy seepage, invasive |
| Vapor barrier | Cheap, best with new floors |
Primary Permanent Solutions (Step-by-Step)
You’ll want a clear, step-by-step plan that matches your situation and budget.
Start by choosing among interior vapor barriers, exterior waterproofing and drainage, slab crack repairs with epoxy or injections, breathable sealers, or raising the slab/adding a floating floor with integrated moisture control.
Next sections will walk you through each solution’s steps, tools, and when to hire a pro.
Solution 1 Install or repair an interior moisture barrier and vapor-proof membrane
When moisture is coming up through your slab, start by removing floor finishes and preparing the concrete so you can see and access the problem.
Clean and level the surface, then apply a compatible primer and roll out a quality vapor-barrier membrane following manufacturer best practices.
Finally, reinstall flooring that’s rated for use over a barrier to keep the system effective long-term.
When it’s appropriate
If your concrete slab is dry enough for basic prep and you need a long-term fix that doesn’t involve tearing out the floor, installing or repairing an interior moisture barrier and vapor-proof membrane is a strong option.
Use this when moisture maps, high RH tests, or localized dampness show vapor drive but no structural cracks, and when access above is feasible without major demolition.
Step 1: Remove floor finishes and prepare slab
Now that you’ve confirmed vapor drive rather than structural damage and decided to install or repair an interior moisture barrier, start by stripping the floor down to bare concrete.
Remove carpet, tile, adhesives, and trims; pry up tack strips and baseboards. Dispose materials safely.
Inspect for paint, residue, or loose concrete and mark repairs. Confirm the slab is accessible, dry, and ready for the barrier installation.
Step 2: Clean and level concrete
Clear dust, debris, loose concrete, and any remaining adhesives, then check the slab for low spots, cracks, and high ridges so you can make accurate repairs before laying the vapor barrier.
Patch cracks with appropriate concrete repair mortar, grind high ridges, and fill low spots with a self-leveling compound.
Sweep and vacuum thoroughly; verify the surface is dry and sound for membrane adhesion.
Step 3: Apply primer and lay vapor barrier membrane (materials and best practices)
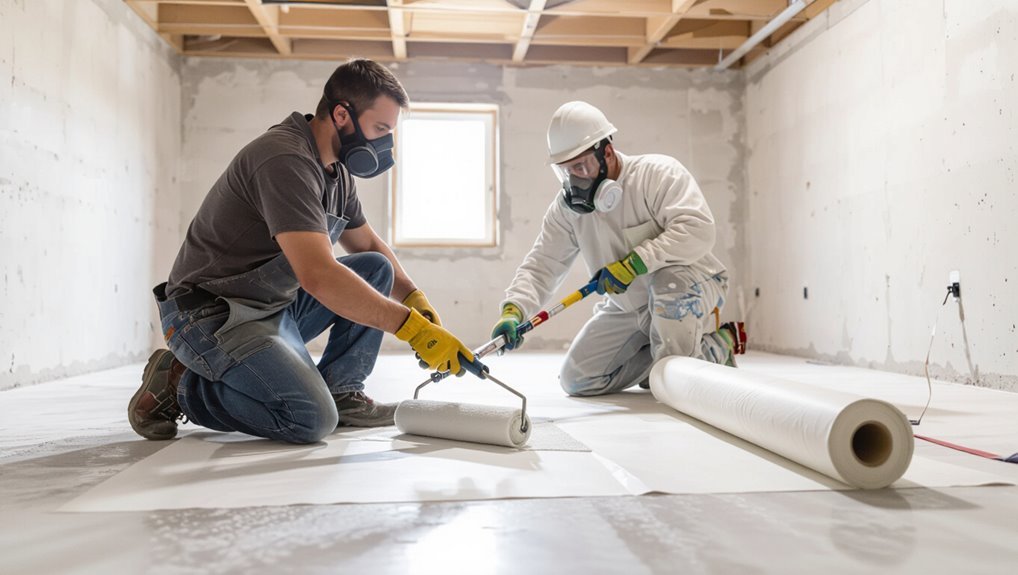
Once the slab is clean and level, apply a compatible primer to promote adhesion. Then unroll and position the vapor barrier membrane so seams overlap per the manufacturer’s specs. You’ll want to work methodically from one wall toward the exit to avoid walking on freshly primed areas.
- Select primer and membrane rated for concrete.
- Roll primer uniformly; allow tack time.
- Tape and seal overlaps with approved seam tape.
- Flash and seal perimeter to walls and penetrations.
Step 4: Reinstall flooring options compatible with barriers
Choose flooring that’s compatible with the vapor barrier and install it following both the barrier manufacturer’s guidelines and the flooring maker’s moisture limits.
Use floating floors, engineered wood with proper underlayment, tile with uncoupling membranes, or approved resilient flooring.
Maintain expansion gaps, seal perimeters where required, and test moisture after installation.
Follow warranty instructions to guarantee long-term moisture protection.
Solution 2 Exterior waterproofing and drainage (stop moisture at source)
When exterior waterproofing is appropriate, you’ll start by excavating around the foundation to inspect the footing and perimeter for cracks or drainage issues.
Next you’ll fit a drainage board, apply a waterproof membrane, and install weeping tile or a perimeter drain to channel water away.
Finally you’ll backfill and grade the soil so surface water sheds away from the foundation.
When it’s appropriate
If your basement or slab is getting water because of poor grading, clogged gutters, or hydrostatic pressure from surrounding soil, exterior waterproofing and drainage is the right permanent fix because it stops moisture before it reaches the concrete.
Choose this when water sources are external, recurring after interior repairs, or when you need long-term protection for foundation walls, crawlspaces, and landscaping-driven flow.
Step 1: Excavation and inspect footing and perimeter
Start by excavating down to the footing around the perimeter so you can inspect the foundation, drain tile position, and soil conditions directly.
Check for cracks, mortar gaps, root intrusion, and deteriorated concrete.
Note high groundwater indicators, clogged old drains, or backfilled soil issues.
Document measurements, photos, and locations for repairs.
Plan access for machinery and safety shoring before proceeding.
Step 2: Install drainage board, membrane, and weeping tile/perimeter drain
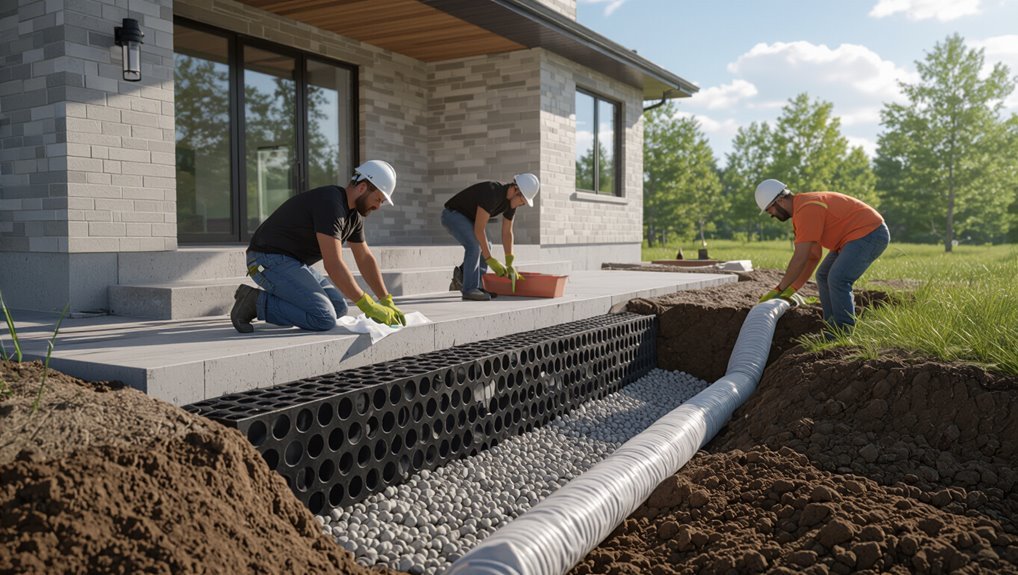
Install a continuous drainage board and waterproof membrane along the exposed foundation, then lay a new weeping tile (perimeter drain) at the footing to intercept and redirect groundwater away from the wall.
Press membrane firmly, seal joints, and route drainpipe to a sump or daylight.
Backfill with clean gravel to promote flow, and test drainage before finishing to guarantee dry conditions.
Step 3: Backfill and grade to shed water away
With the drainage membrane and new perimeter drain in place, you’ll next backfill and grade so surface water runs away from the foundation rather than pooling against it.
Compact native soil in layers, slope the grade at least 5% (6 inches over 10 feet) away from the wall, and extend downspouts and hardscape to carry runoff offsite.
Finish with mulch or turf to prevent erosion.
Solution 3 Install a cracked-slab repair and epoxy/injection systems
When you have cracks or slab movement, start by identifying their size, pattern, and whether the slab is shifting.
Next, you’ll clean the cracks thoroughly and inject polyurethane for flexible seals or epoxy for structural bonding.
Finally, seal the surface to keep moisture out and protect the repair.
When it’s appropriate
If your slab shows visible cracks that let moisture or soil gases through, a targeted cracked-slab repair with epoxy or injection systems can be the right permanent fix.
Use this when cracks penetrate full depth, allow dampness, or permit vapor intrusion despite surface membranes.
Choose injection for narrow, deep fissures and epoxy for structural bonding; consult a pro if movement or widespread cracking exists.
Step 1: Identify cracks and movement
Start by walking the slab and marking every visible crack. Then check for signs that those cracks are active—like offsets, widening, or fresh debris—so you know which need a structural repair versus a surface patch.
Note movement at doorways, control joints, and near drains. Measure gap width and map patterns; document areas with moisture staining or repeated settling for technician assessment.
Step 2: Clean, inject polyurethane or epoxy, seal surface
Prepare the area by removing all dust, loose concrete, oils, and surface contaminants so the injection material bonds fully into the crack; use a stiff brush, vacuum, and a solvent wipe where needed.
Inject polyurethane for active leaks or structural epoxy for stable cracks, following manufacturer pressure and cure times.
After cure, grind high spots, then apply a compatible surface sealer to lock out moisture.
Solution 4 Use breathable concrete sealers and moisture-mitigating coatings
When your slab still needs to release moisture but you want surface protection, breathable sealers and moisture-mitigating coatings are the right choice.
You’ll follow specific prep steps—clean, repair cracks, test moisture levels, and apply primers and coats in the recommended sequence.
Keep in mind their limits: they won’t stop hydraulic pressure or very high vapor drive, so test and choose products rated for your measured moisture emissions.
When it’s appropriate
If your concrete slabs show persistent dampness but the source isn’t a high vapor drive from below, breathable concrete sealers and moisture-mitigating coatings can be the right choice—especially when you need a long-term surface treatment that won’t trap moisture.
Use them when humidity is moderate, substrates are sound, leaks are addressed, and you want vapor permeability plus surface protection without invasive repairs or expensive vapor barrier installations.
Step-by-step application and limits
Before you apply a breathable concrete sealer or moisture-mitigating coating, make sure the slab and environment meet the conditions described above—sound substrate, fixed leaks, and moderate vapor drive—then follow each step in order to get a lasting result.
Clean and dry surface, repair cracks, profile for adhesion, apply primer if required, roll on coating in recommended coats, allow full cure, and test moisture levels; know limits: not for high vapor drive.
Solution 5 Raise slab or install floating floor with integrated moisture control
When moisture keeps coming through and surface fixes won’t work, you may need to raise the slab or install a floating floor with built-in moisture control.
You’ll want to know when each option is appropriate, the basic installation steps, and the trade-offs for cost, headroom, and long-term performance.
We’ll walk through what to expect during removal/prep, installation, and finishing so you can pick the best permanent approach.
When it’s appropriate
Although raising a slab or installing a floating floor sounds major, it’s the right choice when persistent moisture problems persist after simpler fixes, when you need to protect finished flooring, or when altering slab drainage and vapor barriers isn’t feasible.
Choose this when chronic dampness, high in-slab moisture readings, or repeated damage to finishes persist, or when you require a reliable, long-term solution without accessing below-slab systems.
Installation steps and trade-offs
Start by planning the job in detail so you know the sequence, materials, and trades required: raise the slab or lay a floating floor with its integrated moisture-control layer, decide on edge and junction details, and arrange for any structural, plumbing, or electrical changes.
Next, prep substrate, install vapor membrane or drainage layer, set sleepers or formwork, pour or fit new surface, seal joints, reinstall services, and test for moisture and level.
Supporting Approaches and Products
You’ll also want to contemplate supporting systems like sump pumps or dewatering setups and know the basics of selecting and installing them.
Interior drainage channels, trenching options, and capillary breaks (gravel, geotextile, foam board) help direct and block moisture.
Finally, pick the right tools and materials for your scope—simple DIY kits for small jobs or pro-grade supplies and contractors for full-system work.
Sump pumps and dewatering systems (selection and installation essentials)
When groundwater or a high water table threatens your slab, a properly selected sump pump and dewatering system can keep moisture from seeping through concrete and protect your space from long-term damage.
Choose pump capacity for peak inflow, pick corrosion-resistant materials, install a reliable float or electronic switch, provide backup power, size discharge piping correctly, and guarantee accessible sump access for maintenance.
Interior drainage channels and trenching options
Although slabs can look solid, interior drainage channels and trenching give you a controlled path for groundwater and condensation to exit before it soaks the concrete, directing water to a sump or discharge point.
You’ll cut shallow channels or core-drain slots near perimeter low spots, install rigid or polymer drains, slope to the sump, connect to piping, and seal joints to prevent soil migration and odors.
Capillary break materials (gravel, geotextile, foam board)
Alongside interior drains, capillary break materials stop moisture before it reaches the slab by interrupting upward water movement and providing drainage paths.
You can choose:
- Gravel — coarse layer for drainage.
- Geotextile — separates soil, prevents clogging.
- Foam board insulation — blocks capillary rise and adds R-value.
- Dimple membrane — channels water to drains and protects the slab.
Recommended tools and materials for DIY vs pro jobs
For most DIY jobs you’ll need a handful of basic items—shovels, wheelbarrow, gravel, geotextile, a vapor-barrier sheet, tape, a utility knife, and a good caulk gun—but professional crews bring specialized gear like plate compactors, gas-powered saws, laser levels, and commercial-grade pumps that speed installation and handle tougher site conditions.
- Tape measure
- Vapor barrier
- Concrete saw
- Plate compactor
Common Mistakes and Why Some Fixes Fail
You’ll often miss the mark by misdiagnosing the moisture source or picking a solution that doesn’t match the problem.
Poor installation—like skipping surface prep or improper mixing—lets moisture return even after a repair.
And be wary of products that only mask symptoms; they give temporary relief but don’t stop the underlying issue.
Mistakes during diagnosis and inappropriate solution choice
When moisture keeps returning, it’s usually because the problem was misdiagnosed or the fix didn’t match the cause; picking a quick patch—like a surface sealer for vapor drive or an interior drain for groundwater—can make things worse or hide the real issue.
- You ignore root source.
- You assume single cause.
- You pick cosmetic fixes.
- You skip testing and monitoring.
Installation errors that lead to recurrence
Although a correct diagnosis matters, sloppy or inappropriate installation is what usually brings moisture back — even good systems fail if they’re sized wrong, installed out of sequence, or left with gaps and weak seals.
You must avoid common installation errors:
- Incorrect vapor barrier placement
- Poor perimeter sealing
- Inadequate drainage routing
- Skipping substrate prep and testing
Products that offer temporary relief only
If you’re chasing quick fixes, some products will seem to work at first but only mask the problem—sealants that sit on the surface, topical coatings that trap moisture beneath, and dehumidifiers that don’t address vapor transmission all give temporary relief and let underlying issues worsen.
You’ll waste money on band-aids; instead choose vapor barriers, proper slab repairs, and proven moisture mitigation systems that fix root causes, not symptoms.
Prevention, Maintenance, and Best Practices
Start by keeping water away from the slab: check exterior grading, keep gutters clear, and maintain plantings so runoff flows downhill.
Set a routine inspection and moisture-monitoring schedule with simple checks you can do monthly and after heavy rains.
In humid seasons or where groundwater is high, increase ventilation, run dehumidifiers, and recheck perimeter drainage more often.
Exterior grading, gutters, and landscape maintenance checklist
When you control the slope of the ground, keep gutters clear, and manage plantings, you cut off the most common routes water takes toward your basement or slab.
This checklist shows the specific actions and inspection intervals to prevent moisture problems, maintain drainage systems, and protect your concrete floor over time.
- Grade soil away from foundation, 6″ over 10ft, inspect spring/fall.
- Clean gutters quarterly, guarantee downspouts discharge 5–10ft away.
- Keep plant beds 2ft from walls; use mulch sparingly.
- Repair erosion, French drains, and downspout extensions as needed.
Routine inspections and moisture monitoring schedule
Because moisture problems often begin slowly, you should set a regular inspection and monitoring routine to catch issues before they damage the concrete.
Inspect floors, joints, and perimeter monthly, checking for damp spots, efflorescence, or musty odors.
Record readings from a humidity meter or concrete moisture probe quarterly.
Act on trends: seal cracks, improve drainage, and consult a pro if moisture persists.
Seasonal tips for humid climates and high groundwater areas
If you live in a humid climate or over high groundwater, plan seasonal checks and adjustments so small moisture issues don’t become major problems: inspect seals, grading, gutters, and drainage each spring and fall.
Test slab moisture with a meter, run dehumidifiers in summer, clear downspouts before storms, and consider sump pumps or exterior drainage upgrades.
Document findings and act promptly on any rising humidity.
Cost, Timeline, and Permits
Expect a range of costs depending on the fix—simple sealers are inexpensive, slab injections and membrane systems cost more, and full slab replacement is the priciest.
You’ll also want to compare timelines and disruption: quick DIY sealers can be done in a day or two, while professional membrane installs or repairs can take several days to a week with more prep and drying time.
Finally, check local permit and building-code requirements before you start, since some structural or moisture-barrier work needs approval or inspections.
Typical cost ranges by solution type
Costs, timelines, and permit needs vary widely depending on the moisture-control method you choose, so it helps to match solutions to your budget, schedule, and local rules up front. You’ll see typical cost bands below; adjust for size, accessibility, and finishes.
| Solution | Typical cost | Permit? |
|---|---|---|
| Vapor barrier (overlay) | $1–$3/ft² | Usually no |
| Epoxy sealer | $2–$6/ft² | Sometimes |
| Drain & sump | $3,000–$10,000 | Often yes |
Expected timelines and disruption for DIY vs professional work
While DIY projects can save money, they usually take longer and disrupt your space more than hiring pros; you’ll be juggling prep, learning curves, and tool time on nights and weekends.
DIY fixes often span weeks with intermittent work and mess.
Professionals finish in days, minimize disruption, and coordinate subcontractors.
Factor in cleanup, material lead times, and inspection scheduling when comparing timelines and convenience.
Permit and code considerations to check locally
Before you start work, check local building codes and permit requirements so you don’t hit delays or fines later.
Contact your municipality to confirm permits for vapor barriers, slab repairs, drainage, or sump installations.
Ask about inspections, required contractor licensing, and documentation for warranty or resale.
Factor permit fees and inspection timelines into your budget and schedule before committing to DIY or hiring pros.
Case Studies and Scenario Examples
You’ll see three practical examples that match common problems: a small basement with minor moisture fixed from the interior, a high-groundwater property requiring exterior waterproofing and a sump system, and a concrete slab with active leaks and cracks that needs a combined approach.
For each case you’ll get the key diagnostic steps, recommended methods, and rough cost/time expectations.
Use these scenarios to compare options and decide what fits your situation.
Small basement with minor moisture budget interior fix
In a small basement with only minor moisture issues, you can often fix the problem from the interior without tearing up the slab.
First, identify sources: condensation, spills, poor ventilation. Improve airflow, add a dehumidifier, seal hairline cracks with epoxy or polyurethane, and apply a breathable vapor barrier or masonry sealer.
Monitor humidity and maintain gutters to reduce external seepage risk.
High groundwater property exterior waterproofing and sump system
When your property sits on high groundwater, exterior waterproofing combined with a properly sized sump and pump system becomes the most reliable defense against chronic seepage and hydrostatic pressure.
Case studies show that addressing the problem from the outside prevents repeated interior repairs and drastically lowers long-term costs.
You’ll excavate, install drainage membrane and perimeter drain, connect to a sump with backup power, and monitor performance to guarantee permanent dryness.
Concrete slab with active leaks and cracks combined approach
Because active leaks and visible cracks demand both immediate fixes and long-term strategies, a combined approach pairs targeted slab repairs with perimeter and interior drainage so you stop water now and prevent recurrence.
You’ll inject epoxy or polyurethane into cracks, install interior French drains or a sump, and retrofit exterior drainage where possible.
Monitor, test after storms, and schedule periodic inspections to guarantee lasting dryness.
FAQ Stopping Moisture Through a Concrete Floor
You’ll get clear answers to common concerns like whether surface sealers are enough, how to tell vapor from liquid water, and if a vapor barrier can trap mold under your flooring.
We’ll also explain typical lifespans for permanent fixes and low-cost temporary options while you plan repairs.
Read on to decide which steps fit your situation and budget.
Can I stop moisture with surface sealers alone?
Can surface sealers alone stop moisture coming up through a concrete floor?
Sealers help reduce surface dampness and staining, but they rarely stop persistent moisture rising from below.
You’ll need to assess the source and severity; for active hydrostatic or high vapor pressure, surface coatings won’t be sufficient.
Use sealers as part of a broader strategy, not as the sole fix.
How can I tell if moisture is vapor vs liquid water?
How do you tell whether the moisture on your concrete is vapor migrating up or liquid water seeping through?
Check timing, pattern and feel: vapor often appears as dampness rising evenly after humidity changes and feels cool; liquid shows localized pooling, dark stains, or active drips and persists regardless of air humidity.
Use a simple calcium chloride or relative humidity test to confirm.
Will a vapor barrier cause mold under my flooring?
If testing shows moisture is coming up from the slab rather than pooling on top, you may be thinking a vapor barrier will trap moisture and lead to mold under your flooring.
Properly installed barriers and drying measures prevent trapped moisture. You should pair a vapor barrier with subfloor ventilation, moisture-tolerant adhesives, and correct adhesive/application methods to avoid pockets where mold could grow.
How long do permanent solutions typically last?
When you choose a true permanent fix—like epoxy injection for cracks, integrated drainage systems, or a professionally applied vapor mitigation membrane—you can generally expect decades of effective performance, often 20–50 years or more depending on materials and installation quality.
Longevity hinges on correct installation, substrate preparation, and environmental conditions; routine inspections and prompt repairs extend service life and preserve moisture control.
Are there low-cost temporary fixes while planning permanent repair?
Because permanent repairs can take time to budget and schedule, you might want a few low-cost, temporary steps to reduce moisture and damage in the meantime.
Use heavy-duty polyethylene sheeting taped at seams to block vapor, run a dehumidifier to lower humidity, seal visible cracks with hydraulic cement or silicone caulk, and elevate stored items on pallets.
Monitor regularly and plan permanent fixes.