
How to Install Marble Floor Tile Without Cracking or Misaligning It
To install marble floor tile without cracking or misaligning it, start by ensuring your subfloor is flat, clean, and rigid, and use a polymer‑modified thinset for a flexible bond. Do a dry layout with spacers, back‑butter large tiles, and use a tile leveling system to prevent lippage. Cut with a wet diamond blade, grout with non‑sanded grout, and seal with a breathable penetrating sealer. Follow proper curing times and you’ll avoid most issues—keep going to get tips and fixes.
How to Install Marble Floor Tile Without Cracking or Misaligning It
Start by preparing a flat, clean subfloor and choose a flexible, polymer-modified thinset to support the marble.
Lay tiles with consistent spacers, pressing each firmly and tapping with a rubber mallet to seat them without forcing.
Keep joints straight by checking alignment frequently and grout only after the mortar has fully cured to prevent cracking.
Quick Answer Core Steps in One Paragraph
When you’re ready, prepare a flat, level substrate and waterproof or prime it as required. Then lay out a dry tile plan with spacers to guarantee consistent joints.
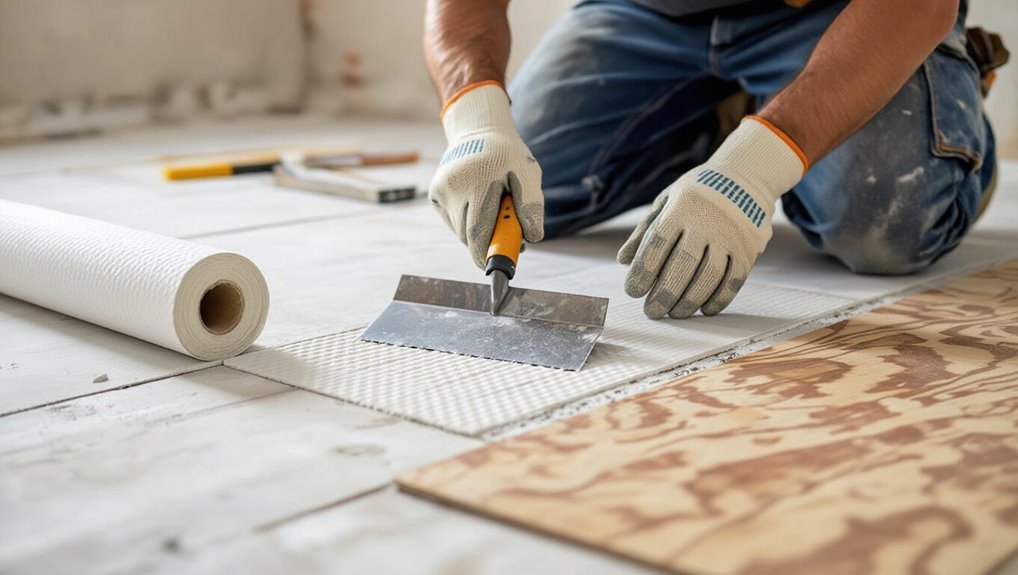
Apply a suitable polymer-modified thinset with the correct trowel notch. Back-butter large tiles, set each marble carefully using a slight twisting motion, and use a rubber mallet to seat tiles to grade.
Check alignment and level frequently with a straightedge and level, and allow proper cure time before grout—this prevents cracking and keeps tiles aligned.
You’ll follow these core steps to learn how to install marble floor tile efficiently and avoid misalignment.
Basic Understanding of Marble Tile Installation
Before you start, know that marble is natural, brittle, and sensitive to movement, which makes it prone to cracking or shifting if the substrate or installation method isn’t right.
Different marble types—like honed, polished, or veined varieties—need specific handling and adhesive choices that affect layout and joint spacing.
You’ll also want to understand key terms such as subfloor, underlayment, thinset, grout, and expansion joint so you can pick the correct materials and techniques.
What Is Marble Tile and Why It’s Prone to Cracking or Misalignment
Marble tile is a natural stone cut into flat slabs, prized for its veining and lustrous finish, but its beauty comes with vulnerabilities you should know about.
It’s dense yet brittle, so impacts or uneven substrates cause cracks. Marble also reacts to moisture and temperature shifts, and slight substrate movement or improper adhesive application will lead to misalignment and lippage if you don’t prepare and install carefully.
Types of Marble Tiles and Their Installation Implications
Types of marble tiles vary by cut, finish, and porosity, and each kind changes how you’ll handle transport, substrate prep, adhesive choice, sealing, and maintenance. Choose honed for slip resistance, polished for elegance, veined for matching, or light-porosity for less sealing. Match adhesive and sealer to type to prevent staining or stress.
| Type | Installation note |
|---|---|
| Honed | Use nonslip layout |
| Polished | Allow extra care |
| Veined | Plan pattern |
| Low porosity | Less sealing |
| High porosity | Heavy sealing |
Key Terms: Subfloor, Underlayment, Thinset, Grout, Expansion Joint
Those tile choices affect more than looks — they change how you’ll prepare and build the layers beneath the surface.
Know these terms: subfloor is the structural base; underlayment smooths and isolates; thinset bonds tile; grout fills joints and seals; expansion joint allows movement to prevent cracks.
Use correct materials and techniques so your marble stays flat, secure, and crack-free.
Tools, Materials, and Preparation
Before you start laying marble, gather a concise checklist of essential tools and materials so you won’t stop midway through the job.
You’ll also need to pick the correct thinset, adhesive, and grout for natural stone, decide whether cement board or an uncoupling membrane fits your subfloor, and account for temperature, humidity, and curing times.
Get those choices right up front and you’ll avoid costly mistakes later.
Essential Tools and Materials Checklist
1. Gather essential tools and materials before you start to prevent delays and mistakes.
You’ll need quality items to protect marble and guarantee straight, stable installation.
- Tile cutter or wet saw; rubber mallet; spacers.
- Leveling system; notched trowel; mixing bucket.
- Vacuum; sponge; protective pads and gloves.
Choosing the Right Thinset, Adhesive, and Grout for Marble
With your tools and protective gear ready, pick adhesives and grout that protect marble’s polish and structural needs.
Use a white, polymer-modified thinset to prevent staining and guarantee a strong bond.
Choose non-sanded grout for honed or polished marble to avoid scratching; use epoxy grout where moisture or stains are concerns.
Always test products on a scrap marble piece first.
Subfloor and Underlayment Options: When to Use Cement Board or Uncoupling Membrane
Choosing the right subfloor and underlayment sets the stage for a durable, crack-free marble installation.
You’ll need to assess your existing floor, moisture levels, and movement potential before picking cement board or an uncoupling membrane.
Use cement board over plywood for rigid, stable substrates; choose uncoupling membrane to isolate tile from minor movement or cracked concrete.
Install per manufacturer instructions.
Environmental Considerations: Temperature, Humidity, and Curing Time
After you’ve picked the right subfloor and underlayment, pay close attention to the jobsite environment—temperature and humidity directly affect mortar open time, adhesion, and grout curing, and they determine when you can safely walk on or seal the marble.
Work between manufacturer-recommended 50–77°F and 40–60% RH when possible, use heaters or dehumidifiers to stabilize conditions, and extend curing times in cold or humid settings.
Step-by-Step Installation Process
Now you’ll move through the installation in clear, ordered steps, starting with a careful inspection and prep of the subfloor.
You’ll lay underlayment and level surfaces, do a dry layout to plan the pattern, mix and apply thinset properly, then set each marble tile using techniques that prevent lippage and misalignment.
Follow each step methodically to guarantee a flat, stable, and visually consistent floor.
Step 1 Inspecting and Preparing the Subfloor
Step 1 is to thoroughly inspect and prepare the subfloor so your marble tile will lay flat and stay secure: remove old flooring, sweep and vacuum debris, check for soft spots or cracks, and measure for levelness with a straightedge or level.
Repair any damage, secure loose boards, and guarantee the surface is clean, dry, and structurally sound before proceeding.
Step 2 Laying Underlayment and Ensuring Flatness (Leveling Techniques)
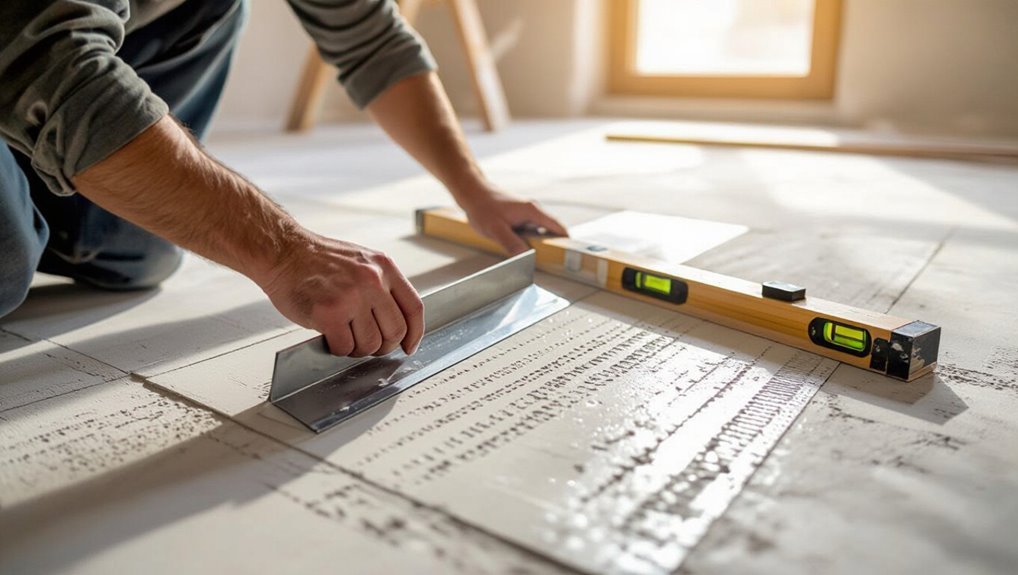
1. You’ll roll out a quality cement backer board or uncoupling membrane, cutting to fit and tapping seams tight.
Fasten per manufacturer specs, stagger joints, and seal seams with tape and thinset.
Use a long straightedge and leveling compound to fill low spots, screeding to a flat tolerance.
Check with a level and allow proper cure before tiling.
Step 3 Dry Layout and Tile Pattern Planning
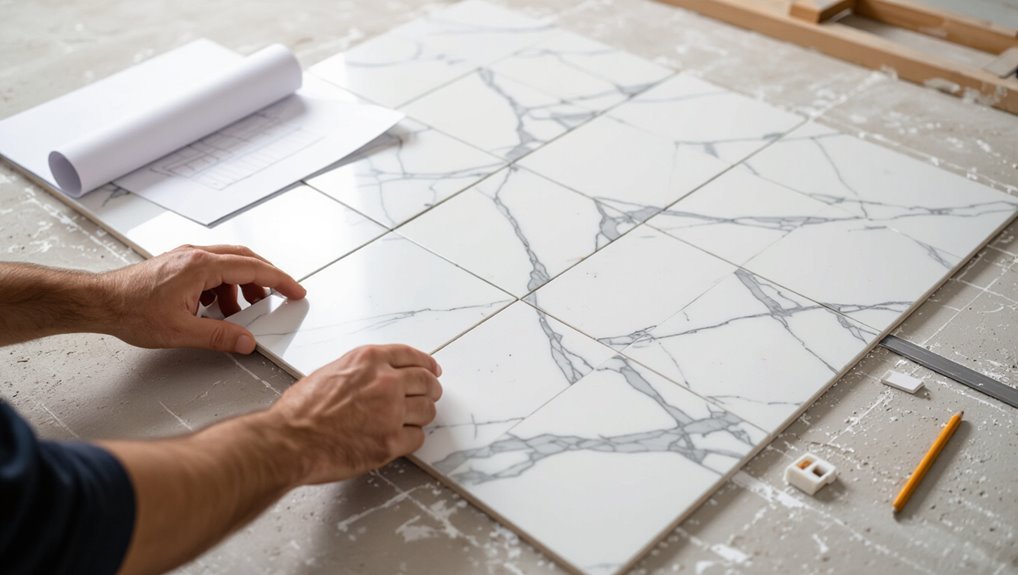
Before you set a single tile, lay out the pattern dry so you can see how full and cut tiles will fall across the room.
Work from your centerlines, dry-fitting rows toward walls to minimize tiny slivers. Rotate tiles to balance veining, mark cuts, and check shifts.
Adjust layout until you’re satisfied with symmetry and visual flow before proceeding to adhesive steps.
Step 4 Mixing and Applying Thinset Correctly
Mixing thinset correctly is essential, so gather the manufacturer’s recommended powder-to-water ratio, a clean bucket, a margin trowel, and a drill with a mixing paddle before you begin.
Measure and add water first, then powder; mix to a creamy, lump-free consistency. Let it slake per directions, remix briefly, then apply with the correct trowel notch, combing in straight lines for uniform coverage.
Step 5 Setting Marble Tiles: Techniques to Prevent Lippage and Misalignment
Now that your thinset’s ready, start setting marble tiles with steady, deliberate placements to avoid lippage and keep joints true.
Press each tile firmly, twist slightly to collapse ridges, and back-butter large tiles for full coverage.
Work from your reference lines, adjust immediately if a tile sits high or low, and remove excess adhesive before it skins to maintain clean, even surfaces.
Step 6 Spacing, Using Leveling Systems, and Checking Alignment
Once tiles are laid, focus on consistent spacing and alignment so your floor looks seamless; insert appropriate spacers, engage a tile leveling system as you go, and check each tile with a straightedge and spirit level, adjusting until all corners sit flush.
- Verify uniform grout joints and replace worn spacers.
- Tighten clip wedges to eliminate lippage.
- Recheck runs with a long level, shifting tiles before adhesive sets.
Step 7 Cutting Marble Tiles Accurately (Tools and Methods)
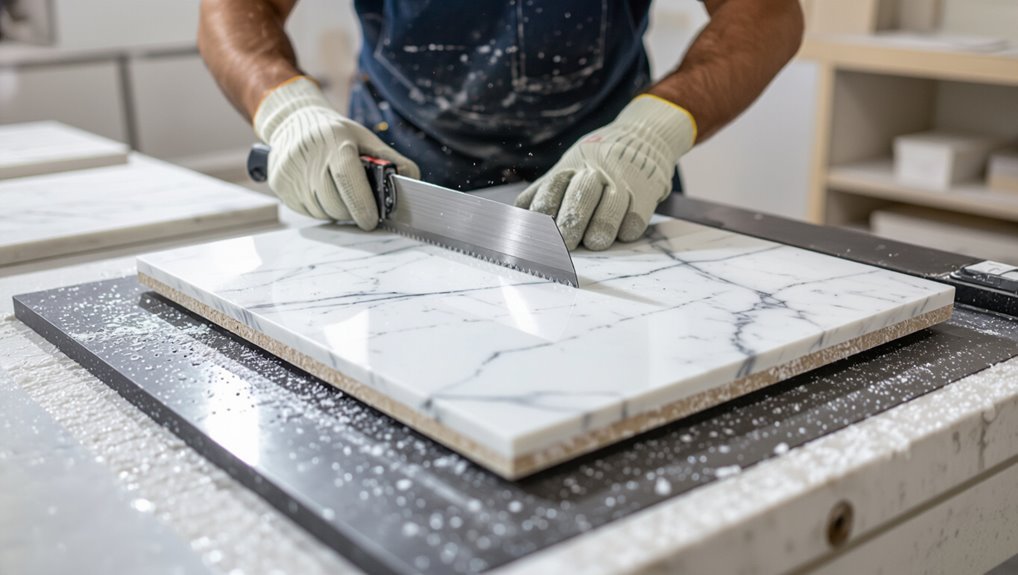
Step 7 focuses on cutting marble tiles accurately so your pieces fit tight against walls, vents, and fixtures without cracking or chipping.
Use a wet saw with a continuous-rim diamond blade for straight cuts and a handheld angle grinder for curves or notches.
Measure twice, score edges, clamp securely, and cut slowly with steady feed.
Wear PPE and keep water flowing to reduce dust and heat.
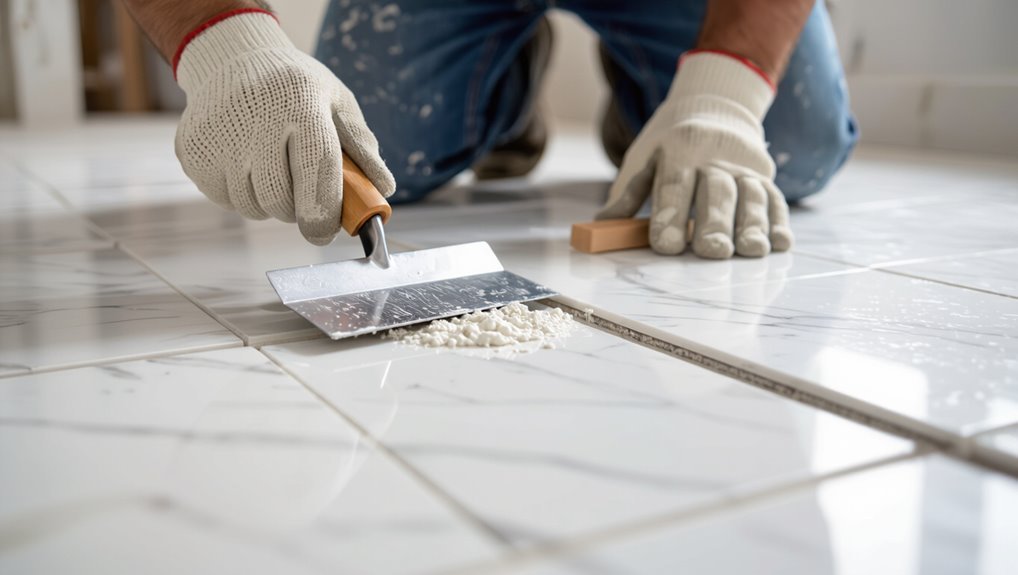
Step 8 Grouting, Sealing, and Final Cleaning
With your tiles cut and dry-fitted, you’ll move on to grouting, sealing, and final cleaning to lock everything in and give the floor its finished look.
Mix non-sanded grout compatible with marble, work joints with a rubber float, and wipe haze promptly.
After grout cures, apply a breathable penetrating sealer per directions, then buff and clean with a pH-neutral cleaner for a pristine finish.
Step 9 Post-Installation Curing, Traffic, and Maintenance Timeline
After grout and sealer have cured, you’ll follow a clear timeline for curing, initial traffic, and ongoing maintenance to protect your marble and guarantee long-term beauty.
Wait 24–48 hours before light foot traffic, 7 days for heavy traffic, and 21–28 days for full load.
Clean weekly with pH-neutral cleaner, reseal every 1–2 years, and use mats and felt pads to prevent scratches.
Troubleshooting Common Problems and How to Fix Them
When problems crop up after installation, you’ll want to identify whether they’re structural, installation-related, or cosmetic so you can choose the right fix.
We’ll cover cracked tiles, misalignment and lippage, hollow-sounding tiles from adhesion failures, and surface issues like staining, efflorescence, or uneven color.
Follow these checks and targeted repairs to restore a safe, even marble floor.
Cracked Tiles: Causes, Diagnosis, and Repair Options
Cracked marble tiles are frustrating, but you can usually identify why they failed and decide whether to repair or replace them. Common causes include substrate movement, improper adhesive or thinset, heavy impacts, and thermal stress.
Inspect cracks’ size, pattern, and surrounding grout. Small hairline cracks can be filled with epoxy or resin; replace tiles with structural damage, address substrate issues, and reseal surrounding areas.
Misaligned Tiles and Lippage: Detection and Correction Methods
Misaligned marble tiles and lippage not only look unprofessional but create tripping hazards and grout wear, so you’ll want to spot and correct them early.
Check alignment with a straightedge and level; mark high edges.
For minor lippage, use a rubbing stone or diamond screed to even edges.
For larger misalignment, remove affected tiles, clean substrate, re-level, and reset with proper spacers and mortar.
Hollow-Sounding Tiles and Adhesion Failures: How to Remediate
If your marble tiles sound hollow or pop loose underfoot, they’re signaling an adhesion problem that needs prompt attention to prevent cracking, grout failure, or bigger repairs.
Remove loose tiles, clean substrate and tile backs, and inspect for thin-set voids. Reapply appropriate polymer-modified thin-set, use back-buttering, and proper coverage.
For widespread failure, consider full lift-and-replace and correct substrate preparation before reinstalling.
Staining, Efflorescence, and Uneven Color: Solutions
When you spot discoloration, powdery white deposits, or blotchy patches on marble, quick diagnosis matters because each problem—stain, efflorescence, or inherent color variation—has a different cause and fix.
For stains, poultice with a suitable solvent; for efflorescence, dry the slab, improve drainage, and neutralize salts; for uneven color, consider honed finish, selective replacement, or professional color-matching sealers.
Preventive Strategies and Best Practices
Plan for movement with proper expansion joints and pattern layout, and handle and cut marble carefully to prevent chips and cracks.
Use a quality-control checklist before, during, and after installation to catch issues early.
Know when a pro is needed—call one for complex layouts or large jobs you’re not comfortable tackling.
Designing for Movement: Expansion Joints and Pattern Considerations

Because marble expands and contracts with temperature and humidity, you need to design for movement up front to avoid cracking, lippage, and grout failure.
Plan expansion joints at perimeters, changes, and every 8–12 feet, matching joint width to tile size.
Orient patterns to minimize long continuous runs, stagger seams to distribute movement, and use flexible sealant in joints to accommodate shifts.
Best Practices for Handling and Cutting Marble to Avoid Damage
Managing movement in your layout only helps if you handle and cut the marble without introducing chips, cracks, or micro-fractures that will show up later.
Use padded handling, lift—don’t drag—tiles, and store flat. Score and snap only thin pieces; wet-cut with a diamond blade at low speed for thick tiles.
Clamp securely, support edges, and inspect cut surfaces for hairline damage before setting.
Quality Control Checklist Before, During, and After Installation
Before you set the first tile, establish a simple, actionable quality-control checklist covering pre-installation, installation, and post-installation steps so you can catch issues early and avoid costly repairs.
- Inspect substrate flatness, moisture, and layout plan; confirm tile batch match.
- Monitor adhesive coverage, trowel size, spacing, and immediate alignment adjustments.
- Verify grout cure, clean lines, seals, and document final photos for warranty.
When to Hire a Professional vs. DIY
Wondering whether you should tackle marble tile yourself or call in a pro? Assess your skills, tools, time, and budget.
DIY fits small areas, simple patterns, steady hands, and patience.
Hire a professional for large rooms, irregular layouts, heated floors, substrate issues, or if you lack precision tools.
Professionals reduce risk of cracking, misalignment, and costly repairs—choose based on complexity and confidence.
Comparison: Adhesives, Underlayments, and Leveling Systems
You’ll compare modified and unmodified thinset to pick the right bond for marble and any substrate.
Then weigh underlayment choices—cement board, uncoupling membrane, and self-leveler—based on movement, moisture, and floor height.
Finally, consider tile leveling systems for faster flatness but added cost and setup time.
Thinset Types Compared: Modified vs. Unmodified
While both modified and unmodified thinset can bond marble tile, they perform differently depending on your substrate, moisture conditions, and whether you’re using a membrane or self-leveling underlayment. You’ll choose modified for added flexibility and stronger bond over challenging substrates; use unmodified with specific mortars or resin backers.
| Type | Strength | Best Use |
|---|---|---|
| Modified | High | Flexible substrates |
| Unmodified | Moderate | Cement-based mortars |
Underlayment Options Compared: Cement Board vs. Uncoupling Membrane vs. Self-Leveler
Because your substrate and installation goals dictate which system will perform best, you should compare cement board, uncoupling membranes, and self-leveling underlayments before laying marble. Choose cement board for rigidity, uncoupling for crack prevention over movement, and self-leveler to smooth uneven floors. Consider weight, thickness, cure time, and adhesive compatibility.
| Option | Best for |
|---|---|
| Cement board | Stable substrates |
| Uncoupling membrane | Movement-prone floors |
| Self-leveler | Uneven surfaces |
| Combination | Complex situations |
Tile Leveling Systems: Pros and Cons
When choosing marble tile systems, weigh the trade-offs between adhesives, underlayments, and leveling tools so your finished floor stays flat, durable, and crack-resistant.
- Adhesives: pick polymer-modified thinset for bond strength; avoid brittle mixes that cause cracks.
- Underlayments: use uncoupling membranes to reduce movement transfer; self-levelers smooth irregularities.
- Leveling systems: speed alignment and prevent lippage, but add cost and setup time.
Common Mistakes to Avoid
Don’t skimp on prep—if your subfloor isn’t flat you’ll get lippage and tile failure.
Make sure you use the right adhesive and grout, follow the manufacturer’s specs and include expansion joints.
Finally, don’t rush curing or walk on the floor too soon, or you’ll compromise the installation.
Preparing Insufficiently Flat Subfloors
If your subfloor isn’t flat, you’ll end up with cracked grout, loose tiles, and a job that looks unprofessional—so don’t skip a proper inspection and correction.
Check for high or low spots with a straightedge, mark deviations, and use a self-leveling compound or feathercoat to achieve required tolerances.
Remove damaged plywood, secure joists, and recheck before laying backerboard and tile to prevent future failures.
Using the Wrong Adhesive or Grout
Because marble’s natural porosity and sensitivity demand specific products, using the wrong adhesive or grout will quickly ruin your installation.
You should choose pH-neutral, non-staining grout and a recommended polymer-modified thinset or epoxy for marble.
Test compatibility on a scrap, avoid cement-based acidic additives, and follow cure times.
Wrong choices cause staining, bonds that fail, or visible discoloration—don’t skip this step.
Ignoring Manufacturer’s Specs and Expansion Joints
When you skip the manufacturer’s specifications or fail to install proper expansion joints, you’re inviting cracks, tile lifting, and voided warranties.
You must follow recommended thinset, grout, substrate prep, and movement-joint spacing. Measure and place joints at perimeter, connections, and long runs.
Use compatible sealants and fillers per specs. Document compliance to protect performance and warranties.
Rushing Curing Times or Early Foot Traffic
Skipping proper movement joints or specs is only part of the problem; rushing the curing process or allowing early foot traffic can undo all that careful work.
You must wait the full manufacturer-recommended cure time before grouting, sealing, or walking on marble. Early stress causes cracks, loosened tiles, and grout failure.
Use barriers and clear signage to enforce drying times and protect the installation.
Maintenance to Prevent Long-Term Cracking and Misalignment
Keep a routine cleaning and sealing schedule so moisture and stains don’t weaken grout or stone, and inspect seals every year.
Protect the floor from heavy loads and impacts by using furniture pads, area rugs, and cautious moving techniques.
Regularly monitor the subfloor for movement or settling and address any shifts promptly to prevent cracking and misalignment.
Routine Cleaning and Sealing Schedule
Because marble is porous and sensitive to wear, you should follow a regular cleaning and sealing schedule to prevent long-term cracking and tile misalignment.
Clean daily with a pH-neutral cleaner and soft mop, wipe spills immediately, and avoid acidic products.
Reseal every 6–12 months or sooner in high-traffic areas.
Inspect grout and joints quarterly and repair any gaps promptly to maintain stability.
Handling Heavy Loads and Impact Prevention
Distribute weight carefully and protect vulnerable areas to prevent chips, cracks, and grout failure from heavy loads and impacts.
Use felt pads under furniture, wide protective boards when moving appliances, and rubber mats in high-traffic zones.
Avoid dragging objects; lift instead.
Place weight-bearing items over joists or reinforced subfloor sections, and inspect pads and protectors regularly to maintain coverage and prevent point loads.
Monitoring and Addressing Subfloor Movement Over Time
Protecting surfaces from point loads and impacts helps, but long-term performance also depends on how the subfloor moves over time.
Inspect joints, seams, and grout annually, watching for hairline cracks or tile movement. Measure deflection and moisture regularly; fix humidity or structural causes promptly.
Reinforce or replace unstable subfloor sections, re-bond tiles where needed, and keep records to spot gradual shifts before they cause failure.
FAQ
You’ll find answers to common concerns like how long thinset needs to cure before you walk on marble and whether you can install marble over existing tile.
We’ll cover ideal grout gap sizes, whether a professional tile leveling system is worth it, and how often to seal marble floors.
If you have a specific situation, ask and I’ll give tailored guidance.
How long should thinset cure before walking on marble tiles?
How long before you can walk on newly set marble tiles depends mostly on the thinset type and job conditions; generally, wait 24 hours for standard cement-based thinset to gain initial strength.
For rapid-setting thinsets you can often walk after 2–4 hours.
Avoid heavy traffic or dragging objects for 48–72 hours, and keep grout curing times in mind before subjecting the floor to full use.
Can I install marble tiles over an existing tile floor?
Yes—you can often install marble tiles over an existing tile floor, but only if the old tiles are sound, well-bonded, level, and thoroughly cleaned; otherwise you’ll need to remove them or apply a suitable substrate before setting marble.
Inspect for loose, cracked, or hollow spots, repair or replace as needed, and use an appropriate bonding primer or modified thinset rated for tile-over-tile installations.
What gap size should I use between marble tiles to prevent cracking?
Because marble expands and shifts slightly with temperature and substrate movement, leave consistent gaps to prevent edge-to-edge stress and cracking.
For typical floor installations, use 1/8″ to 3/16″ (3–5 mm) joints for smaller tiles and 1/4″ (6 mm) for larger or irregular pieces.
Keep spacers uniform, allow grout or flexible caulk, and account for movement joints at junctions.
Is a professional tile leveling system necessary for marble?
After spacing joints correctly to allow movement, you’ll still want flat, even surfaces—especially with marble, where lippage (height differences between adjacent tiles) shows up quickly.
You don’t strictly need a professional leveling system, but using one makes achieving uniform planes much faster and reduces callbacks.
For large-format or polished marble, a leveling system is highly recommended to protect appearance and resale value.
How often should marble floors be sealed to avoid damage?
How often you should seal marble depends on foot traffic and the finish: generally reseal every 6–12 months for floors in busy areas and every 1–2 years in low-traffic rooms.
Test with water droplets: if they darken the stone, reseal now.
Use a penetrating sealer, follow manufacturer cure times, and spot-treat high-wear zones sooner to prevent staining and etching.
