How to Get Hair Dye Off a Laminate Floor Without Staining It Further
Act fast: blot up excess dye with paper towels, scrape gently with a plastic card, then wipe with a microfiber dampened in warm water and mild dish soap. For remaining color, dab isopropyl alcohol or 3% hydrogen peroxide on a cloth and blot—test an inconspicuous spot first and rinse afterward. Avoid abrasive pads, undiluted bleach, or vigorous scrubbing to prevent scratches and peeling. Follow these steps now, and you’ll find safer, more detailed options if the stain persists.
Quick Answer How to Remove Hair Dye from Laminate Floors Safely
If dye spills, you should blot it immediately with a clean cloth and warm water to prevent it soaking in.
For small fresh stains, try a single pass with a damp cloth and a mild dish soap solution—don’t scrub hard or use bleach.
Stop and call a professional if the stain won’t lift, the finish starts to dull, or you’re unsure about a stronger cleaner.
Immediate actions to take right after a spill
Act quickly: blot up excess dye with paper towels or a clean cloth without rubbing, then gently scrape off any thick globs with a plastic spatula or old credit card.
Next, dampen a cloth with warm water and mild dish soap, wring it well, and wipe the area.
Pat dry, keep traffic away, and avoid harsh scrubbing to prevent finish damage while figuring out how to get hair dye off laminate floor.
Best one-step solution for small fresh stains
One simple go-to is a mixture of equal parts mild dish soap and warm water—dab it onto the fresh stain with a soft cloth, let it sit for a minute, then gently blot until the dye lifts.
Rinse the area with a damp cloth, dry promptly, and repeat once if needed.
Avoid scrubbing hard to prevent damaging the laminate finish.
When to stop and call a professional
When DIY methods stop lifting the dye after a couple gentle attempts, it’s time to contemplate calling a professional so you don’t worsen the finish or spread the stain.
Call a pro if the dye soaks into seams, the finish dulls, you risk sanding or bleaching, or stains resist safe cleaners.
They’ll assess damage, use specialty products, and protect surrounding flooring.
Understanding the Problem Why Hair Dye Stains Laminate
You need to know what’s in hair dye—oxidizers, ammonia, and strong color pigments—that can bond to surfaces.
Laminate floors have a printed top layer over a composite core, and scratches or seams let dye reach porous material more easily.
Staining severity then depends on dye chemistry, how long it sits, heat, and the floor’s surface condition.
What hair dye is made of (common chemicals and pigments)
Because hair dye combines strong colorants with chemical helpers to penetrate hair, it’s the mix of pigments, developers, and small molecules that makes stains cling to laminate surfaces.
You’ll find permanent dyes use ammonia or substitutes plus hydrogen peroxide and oxidative pigment precursors; semi‑permanents rely on direct dyes and solvents.
Additives like surfactants, metallic salts, and conditioners deepen color and increase staining risk.
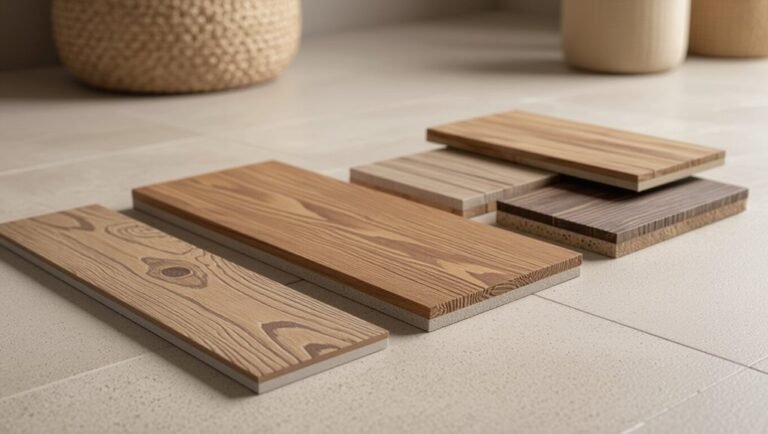
How laminate flooring is constructed and vulnerable areas
Laminate flooring layers a rigid core and decorative surface under a clear wear layer, and that sandwich explains where dye finds purchase.
You’ll note seams, beveled edges, and any scratched or worn spots expose the decorative paper or core, letting dye penetrate.
The protective wear layer resists spills, but damage or unfinished edges are your main vulnerabilities to staining and dye absorption.
Factors that affect staining severity (dye type, time, heat, porosity)
When hair dye lands on your floor, how badly it stains depends on a few key factors: the dye’s chemical makeup, how long it sits, exposure to heat, and the laminate’s porosity where the spill occurred.
Stronger permanent dyes penetrate deeper, longer contact gives molecules time to bond, heat accelerates absorption, and worn or textured laminate soaks up color faster—so act quickly and cool the area.
Safety and Preparation Before Cleaning
Before you start, put on gloves and guarantee the room is well ventilated so fumes don’t build up.
Test any cleaner on a hidden spot of the floor to make sure it won’t damage the laminate.
Gather supplies like microfiber cloths, a plastic scraper, mild cleaner, and paper towels so you’re ready to act quickly.
Personal protective equipment and ventilation
1. Wear nitrile gloves to protect skin and safety glasses for splashes; avoid cotton that soaks chemicals.
Open windows and run a fan to circulate air, and, if possible, use a mask rated for organic vapors when using solvents.
Keep children and pets out of the area.
Have paper towels and a sealed waste bag ready for contaminated materials.
Testing cleaners in an inconspicuous spot
Since laminate finishes vary, always test any cleaner or solvent in a hidden spot first—like inside a closet threshold or under a cabinet—so you can spot discoloration, dulling, or warping without ruining visible flooring.
Apply a small amount, wait the recommended time, then blot and inspect. If finish or color changes, discard that product and try a milder option until safe.
Items and tools to have on hand
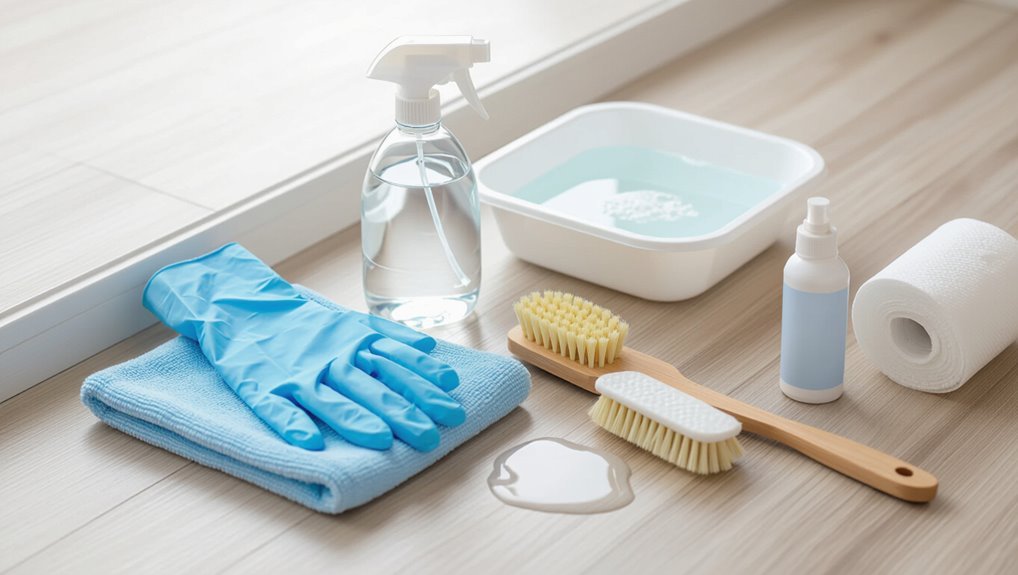
Now that you’ve tested cleaners in an out-of-sight spot and confirmed they’re safe, gather the items you’ll need so you can work quickly and carefully.
Have gloves, soft cloths, and a small plastic scraper ready. Keep cleaning solutions measured and labeled, and a towel to protect nearby flooring.
- Nitrile gloves
- Microfiber cloths
- Plastic scraper
- Mild cleaner and water
Step-by-Step Removal Methods
Start by tackling fresh spills within the first 30 minutes using gentle blotting and mild cleaners so the dye doesn’t set.
If the stain’s been sitting 30 minutes to 24 hours, you’ll need stronger solvents and more elbow grease to lift partially set color.
For stains older than 24 hours finish with targeted treatments, then rinse and care for the laminate to restore the finish.
Step 1 Tackle fresh spills (0“30 minutes)
Act fast — fresh dye is much easier to remove than dried stains.
Blot immediately with paper towels or a clean cloth; don’t rub or you’ll spread color.
Dampen a cloth with mild dish soap and warm water, blotting until transfer stops.
Rinse the area with a clean, damp cloth, then dry thoroughly to prevent water damage or residue.
Step 2 Remove partially set stains (30 minutes“24 hours)
If the dye has had more than half an hour but less than a day to set, you’ll need stronger, targeted methods than blotting.
Dampen a cloth with a mild dish soap solution and gently scrub the stain.
Try a paste of baking soda and water for stubborn spots, then rinse with a damp cloth.
Dry thoroughly to prevent swelling or damage.
Step 3 Treat set or older stains (24+ hours)
When hair dye’s been on your laminate for a day or more, it’ll need tougher, targeted treatments to lift the pigment without harming the finish; work steadily and test each method in an inconspicuous spot first.
Use a paste of baking soda and water, dab gently, then try rubbing alcohol on a microfiber cloth.
For stubborn stains, apply a diluted hydrogen peroxide spot treatment briefly, then blot.
Step 4 Final rinse and floor care after stain removal
Now you’ll rinse away any cleaning residues and restore the laminate’s finish so the floor looks uniform and won’t attract dirt.
Use a damp microfiber mop with clear water, changing water often.
Dry thoroughly with a clean microfiber cloth to prevent streaks and moisture damage.
If needed, apply a manufacturer-approved laminate cleaner sparingly.
Avoid waxes or oil-based products that can dull or stain.
Detailed Cleaning Options (Compare effectiveness and safety)
You’ll start with gentle options like warm water and dish soap, then step up to isopropyl alcohol while following precautions to protect the finish.
For tougher stains you can try hydrogen peroxide, a baking soda paste or a nonabrasive cleaner, testing each in an inconspicuous spot first.
If those fail, consider a commercial laminate-safe stain remover and always follow the product’s safety instructions.
Mild solutions: warm water + dish soap
Try a mild soap-and-water mix first—it’s the safest place to start for fresh dye on laminate.
Mix warm water with a few drops of dish soap, dampen a microfiber cloth, and gently blot—don’t scrub. Rinse the cloth often and repeat until the stain lifts.
Dry the area immediately to prevent swelling.
If residue persists, consider stronger, tested options next.
Rubbing alcohol (isopropyl) use and precautions
Reach for isopropyl rubbing alcohol when dish soap won’t budge the dye—it’s more effective at breaking down pigment without soaking the laminate.
Dampen a microfiber cloth, blot gently, and avoid scrubbing hard. Test an inconspicuous spot first. Work in small areas, rinse residue with damp cloth, and dry thoroughly.
Use gloves, verify ventilation, and keep alcohol away from heat or open flames.
Hydrogen peroxide method for tougher stains
If isopropyl alcohol doesn’t lift the dye, hydrogen peroxide can tackle tougher, set-in stains without soaking the laminate.
Apply 3% peroxide to a microfiber cloth, blot the stain gently, and let it sit for a few minutes.
Rinse with a damp cloth and dry immediately.
Test in an inconspicuous spot first to guarantee the finish isn’t affected.
Baking soda paste and gentle abrasives
One simple, low-risk option is a baking soda paste applied with a soft cloth or sponge; its mild abrasiveness helps lift dye without scratching laminate when used gently.
Mix baking soda with water to a toothpaste consistency, test a hidden spot, then rub lightly in circular motions.
Wipe residue with a damp cloth and dry. Repeat sparingly until the stain fades.
Commercial laminate-safe stain removers
After trying a gentle baking soda paste, you may want a stronger option that’s still safe for laminate: commercial laminate-safe stain removers. You’ll test small areas, follow instructions, and rinse thoroughly to avoid residue. Compare products by effectiveness, safety, and scent:
| Product | Effectiveness | Safety |
|---|---|---|
| Brand A | High | Laminate-safe |
| Brand B | Medium | Non-abrasive |
| Brand C | Low | Fragrance-free |
When bleach or strong solvents are too risky
Because bleach and strong solvents can easily dull, discolor, or warp laminate, you’ll want gentler options that still remove dye without risking the finish.
Test a hidden spot, then try diluted dish soap and warm water, rubbing with a microfiber cloth.
For stubborn spots, use isopropyl alcohol sparingly or a laminate-safe stain remover per instructions.
Rinse and dry thoroughly.
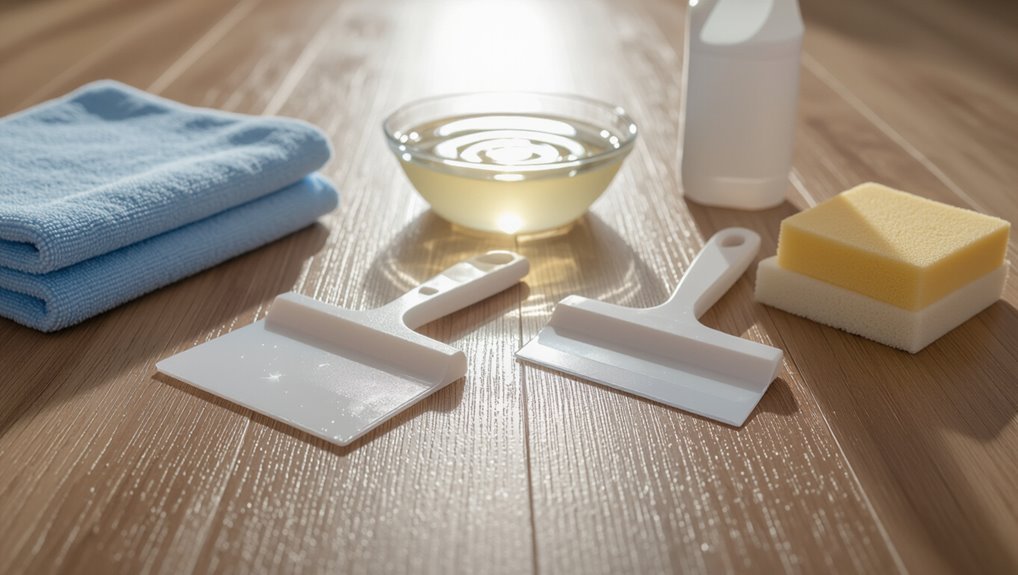
Tools and Materials What Works Best
You’ll want soft cloths or microfiber and non-abrasive sponges to lift dye without scratching the laminate.
Use plastic scrapers with gentle, controlled strokes to remove thicker deposits.
I’ll also list recommended cleaning products and safe concentrations so you can treat stains effectively without damaging the floor.
Soft cloths, microfiber, and non-abrasive sponges
Soft, lint-free cloths—especially microfiber—and non-abrasive sponges are your best first tools for lifting fresh hair dye from laminate without scratching the finish.
Dampen slightly with water or a gentle cleaner, blot outward from the stain, and avoid rubbing in circles.
Replace or rinse cloths often to prevent re-depositing dye. Use gentle pressure and work patiently for best results.
Plastic scrapers and safe scraping techniques
Grab a plastic scraper when blotting and gentle cleaning haven’t removed stubborn dye—it’s firm enough to lift dried pigment but soft enough to avoid gouging laminate.
Hold scraper at a low angle, push gently, and work in the dye’s direction. Don’t force or use metal tools.
Pause to wipe lifted color with a damp microfiber, checking finish often to prevent surface damage.
Recommended cleaning products and concentrations
Start with a mild, pH-balanced cleaner—like dish soap diluted in water (about 1 teaspoon per quart)—and a microfiber cloth to test the finish before stronger products.
If dye remains, try these, testing a hidden spot first:
- Rubbing alcohol: 70% isopropyl, dab gently.
- Hydrogen peroxide: 3%, short contact.
- Baking soda paste: 1:1 with water, scrub lightly.
- Commercial laminate cleaner: follow label.
Common Mistakes That Make Staining Worse
Don’t grab abrasive pads or steel wool — they’ll scratch the laminate and lock dye in.
Don’t pour undiluted harsh chemicals or bleach on the stain, and don’t rub vigorously; blot gently instead.
Also follow the manufacturer’s care instructions so you don’t void warranties or worsen damage.
Using abrasive pads or steel wool
Resist the urge to reach for abrasive pads or steel wool — they can strip the laminate’s protective layer and leave micro-scratches that trap dye and make stains look worse.
If you scrub with them, you’ll grind pigment into grooves and accelerate wear. Instead, use soft cloths, gentle nonabrasive cleaners, and patience.
Preserve the finish to allow safe stain removal without permanent damage.
Applying undiluted harsh chemicals or bleach
Although it may seem like stronger chemicals will speed things up, pouring undiluted cleaners or straight bleach onto laminate can strip the protective finish and cause discoloration that’s harder to fix.
You should dilute cleaners per instructions, test a hidden spot first, and use gentle, laminate-safe products.
Protect edges and wipe promptly—don’t let harsh solutions sit and eat into the surface.
Rubbing vigorously instead of blotting
If you scrub at a dye spot like you’re trying to erase it, you’ll often spread the color and grind pigment into the laminate’s protective layer; blotting instead lifts dye away without forcing it deeper.
Use a soft, absorbent cloth, press gently from edges toward the center, and replace stained cloths as needed.
Stop scrubbing—gentle, repeated blotting prevents larger, more stubborn stains.
Ignoring manufacturer care instructions
Blotting gently only gets you so far—what you do next can undo that careful work.
Ignore the laminate maker’s care instructions and you’ll void warranties or use cleaners that strip the finish. Read labels, test in an inconspicuous spot, and use recommended products or diluted solutions.
Following instructions preserves the surface and prevents discoloration from harsh chemicals or abrasive tools.
Prevention and Best Practices to Avoid Future Stains
When a spill happens, act fast: blot up excess dye, avoid scrubbing, and use a gentle cleaner suited for laminate.
Before you dye, lay down protective coverings and work over a waterproof tray or washable drop cloth to catch drips.
Keep your floors sealed and clean regularly to minimize spots setting in and make future cleanup easier.
Quick-response rules for any dye spill
Because spills can happen fast, you should act immediately and follow a few simple rules: contain the dye to prevent spreading, use only gentle, non-abrasive materials, and test any cleaner on an inconspicuous spot first.
Blot—don’t rub—lift fresh dye with a damp microfiber, work outward, swap cloths as stain fades, and stop if finish dulls.
Call pros for stubborn stains.
Protective coverings and work-area setup when dyeing hair
A simple setup can save you hours of cleanup: lay down a waterproof drop cloth or old towels, tape seams and edges with painter’s tape, and move or cover nearby furniture and rugs with plastic sheeting.
Wear gloves, an apron, and shoe covers; keep dye in a sealed tray.
Place used cotton and tools in a disposable bag and keep a damp cloth handy for immediate blots.
Regular laminate maintenance to reduce susceptibility
If you keep up with simple, regular care—sweeping or vacuuming daily and wiping spills immediately—you’ll make your laminate far less likely to stain from hair dye or other pigments.
Use a microfiber mop and pH-neutral cleaner, avoid soaking floors, and place mats in high-traffic zones.
Promptly remove drips with a damp cloth and trim pet nails to prevent surface damage that traps dye.
When to Call a Professional or Consider Replacement
If the dye won’t lift, has soaked into seams, or the laminate surface is warped or gouged, you’ll likely be facing permanent damage rather than a simple stain.
You can call a professional for deep cleaning or refinishing estimates to see if the finish can be restored.
Compare those quotes to the cost of replacing affected planks to decide whether repair or replacement is more feasible.
Signs the stain is permanent or the laminate is damaged
When repeated cleaning doesn’t fade the dye and you still see discoloration after several treatments, you’ve likely got a permanent stain or surface damage that home methods won’t fix.
Check for peeling, bubbling, deep color embedded in the wear layer, or texture changes you can feel.
If dye remains in grout lines or the protective coating is gone, plan to consult options beyond DIY repairs.
Professional cleaning and refinishing options
Call in a pro when stubborn dye won’t budge, the laminate’s wear layer is compromised, or you’re seeing peeling, bubbling, or texture changes that DIY fixes can’t safely address.
A professional can assess damage, use industrial cleaners or gentle sanding and resealing techniques appropriate for laminate, and advise whether spot refinishing will restore appearance or if full professional resurfacing is needed to prevent recurring staining.
Cost and feasibility of plank replacement vs. repair
Because laminate planks are sold and installed in sections, you can often replace just the damaged pieces rather than the whole floor.
However, you’ll want to weigh the cost, matching difficulty, and condition of surrounding boards before deciding.
Get quotes for plank replacement versus spot repair; if matching is hard or damage spreads, replacement may be cheaper long-term.
Hire a pro for tight fits.
Troubleshooting Scenarios (Case-Based)
If you spill fresh dye, act fast with a quick protocol to blot and neutralize before it sets.
If dye’s been tracked through several rooms, follow a staged cleanup plan so you don’t spread it further.
And if mixed chemicals reacted badly, know the recovery steps to undo damage and neutralize residues safely.
Fresh dye from a hair coloring session quick protocol
Act quickly when you notice fresh hair dye on your laminate floor: blot excess with a paper towel.
Then apply a small amount of gentle cleanser (dish soap or a laminate-safe cleaner) on a damp cloth and work outward from the stain to avoid spreading it.
Rinse with a clean damp cloth, dry immediately, repeat gently if needed, and stop if color won’t lift to avoid finish damage.
Dye tracked across multiple rooms staged cleanup plan
1. You’ll contain the spread: block doorways, lay down towels, and remove shoes.
Start at the newest stains, work outward toward entry points, and carry a small kit—gloves, microfiber, mild cleaner.
Blot rather than rub, rinse cloths frequently, and transfer soiled items to a laundry-safe bin.
Finish by airing rooms and inspecting for missed spots before resuming traffic.
Mixed-chemical stain treatments that reacted badly recovery steps
When different cleaners react and leave cloudy films, discoloration, or sticky residue on laminate, you’ll need a calm, stepwise recovery to avoid making it worse.
First, stop using chemicals. Blot residues with a damp microfiber, then rinse with clear water.
Test a mild dish soap solution on an inconspicuous spot. If film remains, gently buff with a white nylon pad and dry immediately.
FAQs
You probably have a few quick questions like whether dye can permanently stain laminate and if acetone or nail polish remover is safe to use.
You’ll also want to know how long to wait after cleaning before walking on the floor, whether tile or grout cleaners will help, and how to treat tint left in grout lines or seams.
I’ll answer each of these clearly so you can act fast and avoid damage.
Can hair dye permanently stain laminate floors?
Can hair dye leave a permanent mark on laminate floors? It can, but it’s not inevitable.
If dye soaks into a chipped or worn seam, or you wait too long, pigments may bond to the surface or underlying fiberboard.
Act fast: blot, clean with gentle solutions, and avoid abrasive scrubbing.
For deep or set stains, replacement of affected planks might be necessary.
Is it safe to use acetone or nail polish remover on laminate?
How safe is acetone or nail polish remover on laminate? You shouldn’t use straight acetone; it can dull or strip the wear layer and ruin finish.
If you try a non-acetone remover, test an inconspicuous spot first. Apply with a soft cloth, dab gently, and rinse immediately.
Prefer milder methods (soap, baking soda, rubbing alcohol) before solvents to protect the floor.
How long should I wait after cleaning before walking on the floor?
After cleaning, wait until the floor feels dry and any cleaning residue is gone before walking on it.
Typically that’s 10–30 minutes for light cleaning and up to an hour if you used water-heavy methods or cleaners.
Test a small spot with your hand; if it’s cool or tacky, keep it clear.
Use slippers or soft-soled shoes if you must walk sooner.
Will commercial tile/grout cleaners work on laminate?
If you need stronger stain removal than simple cleaning, be careful about reaching for commercial tile or grout cleaners for laminate floors.
Those products often contain acids or bleach that can strip the wear layer, dull finish, or warp edges. Test in an inconspicuous spot first.
Prefer pH-neutral cleaners or mild solvents recommended for laminate, and follow manufacturer guidance to avoid voiding warranties.
How can I remove color tint left in grout lines or seams?
Wondering whether that faint tint in grout lines or seam gaps will come out? You can lift pigment by gently scrubbing with a soft brush and a paste of baking soda and water, then rinsing.
For stubborn tint, dab isopropyl alcohol or diluted hydrogen peroxide, test first, and blot—don’t scrub.
If dye persists, reseal or refinish seams to restore appearance.