How to Polish Laminate Floors and Restore Their Original Shine
You can restore laminate floors’ original shine by cleaning, repairing, and polishing them carefully. Start by sweeping and vacuuming, then deep-clean greasy spots with a mild, pH-neutral solution. Fix scratches or peeling edges with a laminate repair kit or waterproof adhesive, and avoid waxes or oil soaps. Apply a water-based, laminate-safe polish sparingly with a pad, work along the grain, and buff gently for an even sheen. Keep going for step-by-step tips and troubleshooting.
How to Polish Laminate Floors and Restore Their Original Shine
You can’t truly polish laminate like real wood, but you can restore a lot of its original shine with the right cleaners and a microfiber pad.
Start with a gentle, pH-neutral cleaner and spot-treat scratches or dull areas, then buff in small sections until the finish looks even.
Expect the whole process to take 30–90 minutes depending on room size and how worn the floor is.
Can You Polish Laminate Floors?
Curious whether laminate floors can be polished to bring back their original shine? You can restore some luster, but you won’t sand and refinish like hardwood.
Learn how do you polish laminate floors using gentle cleaners, microfiber mops, and manufacturer-approved polish or restorer.
Test a small area first, avoid excess water, and follow product instructions to prevent swelling or surface damage.
Summary of Best Approach and Timeframe
Having tested a small area and chosen a manufacturer-approved restorer, start with a thorough dry sweep.
Spot-clean stains with a gentle cleaner, then apply polish sparingly using a microfiber mop in overlapping strokes.
Work one room at a time, wait recommended dry times (usually 15–60 minutes), and avoid traffic for 24 hours.
Repeat polishing every 6–12 months as needed.
Understanding Laminate Floors: What You Need to Know
Laminate flooring is a layered product with a photographic wood-look layer and a tough wear layer, not solid wood, so you’ll need different care.
It reacts differently than real wood or vinyl because it won’t refinish and can swell or peel if exposed to moisture or harsh treatments.
You can often restore surface shine with proper polishing, but deep scratches, delamination, or severe wear usually mean it’s time to replace planks.
What Laminate Flooring Is Made Of
Think of laminate flooring as a clever composite: it layers different materials to mimic wood or stone while keeping costs and maintenance low.
You’ve got a rigid core (HDF or MDF) for stability, a decorative printed layer for appearance, a protective wear layer (melamine resin) for durability, and often an underlayment for sound and moisture control.
Components combine for practical, affordable flooring.
Why Laminate Reacts Differently Than Real Wood or Vinyl
Because it’s built as a layered composite rather than solid material, laminate behaves differently than real wood or vinyl under heat, moisture, and wear.
You’ll notice its protective wear layer resists scratches but won’t sand or refinish like wood. Moisture can swell the core, and heat can delaminate layers.
Cleaning and polishing must respect these limits to avoid damaging the printed surface.
When Polishing Is Appropriate vs. When Replacement Is Needed
If your floor only shows surface wear—light scratches, dulling, or minor scuffs—you can usually restore its look with proper cleaning and a laminate-safe polish or restorer; but when you’re seeing deep gouges, peeled edges, permanent water swelling, or widespread delamination, replacement is the safer, longer-lasting choice.
You should polish when damage is cosmetic, not structural. Assess seams, swelling, and backing; replace if instability or moisture damage persists.
Tools, Materials, and Safety Precautions
Before you start, gather the right tools and equipment—microfiber mop, soft-bristle brush, bucket, and a reliable floor polisher if you plan to buff.
Choose recommended cleaning and polishing products made for laminate to avoid damage, and read labels to confirm compatibility.
Wear safety gear (gloves, knee pads) and prepare the room by clearing furniture and ensuring good ventilation.
Essential Tools and Equipment
You’ll need a handful of specific tools, materials, and safety items to polish laminate floors effectively and without damage.
Gather basics, pick gentle accessories, and protect yourself. Essentials include:
- Microfiber mop and soft pads
- Soft-bristle broom or vacuum with hard-floor setting
- Low-speed buffing pad or hand-polishing pad
- Protective gloves, knee pads, and non-slip shoes
Use items gently to avoid scratching.
Recommended Cleaning and Polishing Products
Now that you’ve gathered the right tools and safety gear, pick cleaning and polishing products that protect laminate’s wear layer while restoring shine.
Choose pH-neutral cleaners and water-based polish; avoid waxes or oil soaps. Test in a hidden spot first.
- pH-neutral laminate cleaner
- Water-based polish/sealer
- Microfiber mop and pads
- Small tester bottle for trial
Safety Gear and Room Preparation
While you gather safety gear and prep the room, make certain you’ve got the right PPE—gloves, knee pads, and eye protection—and clear the area of rugs, furniture, and trip hazards so you can work unimpeded.
Lay down protective tape on thresholds, cover vents, and guarantee good ventilation.
Keep a bucket, microfiber cloths, and nonabrasive pads within reach.
Test polish on a small hidden spot first.
Step-by-Step Polishing Process
Start by inspecting your floor for damage so you know where to focus.
Then dry-clean to remove dust and debris, follow with a wet clean for grease and stains, and treat scratches or scuffs using the appropriate repair techniques.
Finally, pick the right polish or restorer for your laminate and proceed carefully.
Step 1 Inspect and Identify Damage Areas
Before you touch any tools, walk the room and scan the laminate for scratches, chips, deep scuffs, water stains, and peeling edges so you can prioritize repairs.
Note affected zones, measure damaged plank lengths, and mark areas with painter’s tape.
Check connections, baseboards, and under cabinets for hidden damage.
Decide whether to repair, replace, or spot-treat each issue before polishing.
Step 2 Remove Dust, Dirt, and Debris (Dry Clean)
With damaged areas mapped out, clear the room so you can work uninterrupted and keep loose dirt from scratching the surface during polishing.
Vacuum with a soft-floor attachment, then sweep edges and corners with a microfiber broom.
Use a dry microfiber mop for final passes, changing cloths as they fill.
Remove grit from furniture feet and place protective pads before you proceed.
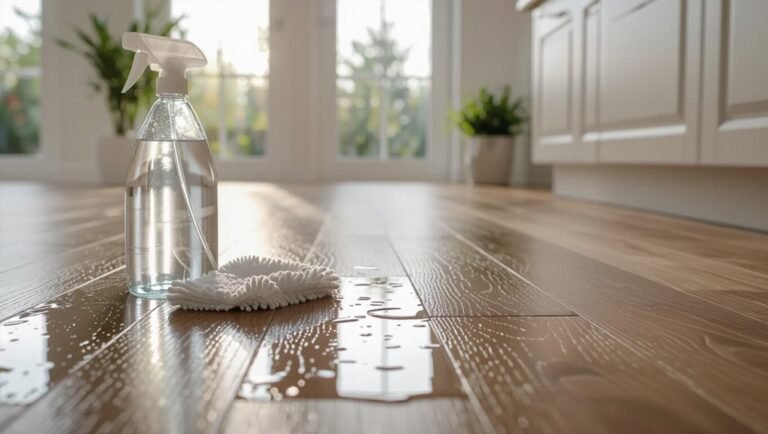
Step 3 Deep Clean Grease and Stains (Wet Clean)
When you’ve removed loose grit, it’s time to tackle grease and stubborn stains with a gentle wet clean:
Mix warm water and a few drops of mild dish soap or a laminate-approved cleaner.
Dampen a microfiber mop—don’t soak—and work small sections, rinsing frequently.
Blot sticky spots with a soft cloth.
Dry immediately to prevent swelling or streaks before moving to the next step.
Step 4 Treat Scratches and Scuffs (Repair Techniques)
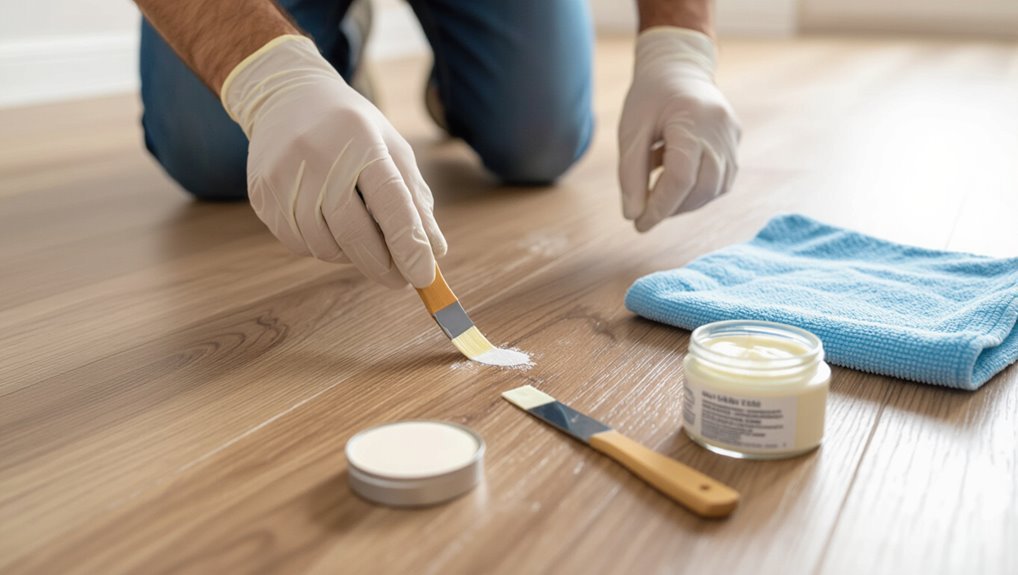
Address scratches and scuffs next by matching the damage to the right repair method: assess depth and length.
Use a laminate repair kit or color-matched wax sticks for shallow marks, blending carefully.
For deeper gouges, apply wood filler designed for laminate, sand lightly after curing, then touch up color.
Finish by buffing gently to blend repairs with surrounding finish.
Step 5 Choose the Right Polish or Restorer
Now that you’ve repaired scratches and scuffs, pick a polish or restorer that matches your laminate’s finish and condition.
Choose water-based, non-waxy formulas for durability and compatibility. Check manufacturer recommendations and test a small, hidden area for color and sheen.
Prefer products labeled safe for laminate, low-odor, and quick-drying. Buy enough for one even application; avoid oil-based cleaners.
Step 6 Apply Polish: Technique, Amount, and Tools

Start by gathering the right tools—microfiber mop or soft cloth, a low-lint applicator pad, and your tested laminate polish—so you can work quickly and evenly.
Apply a small, dime-to-quarter-sized amount to the pad, work in sections along the grain, spreading thinly and uniformly.
Don’t drench the floor; overlap passes slightly and let each section dry before walking on it.
Step 7 Buffing for Shine: Manual vs. Machine Methods

Step 7 is where you bring out the gloss—buffing removes streaks and levels the polish for an even shine, and you can do it by hand or with a machine depending on the size of the job and your comfort level.
For small areas, use a microfiber cloth and circular motions; for larger floors, rent a low-speed buffer with a soft pad, working evenly and avoiding pressure.
Step 8 Final Inspection and Additional Coats if Needed
1 final check lets you spot missed streaks, drips, or uneven areas before you call the job done.
Walk the room under varied light, feeling for rough spots and checking corners. If shine is inconsistent, apply a thin, even extra coat where needed, let it dry fully, then buff again.
Repeat only until uniform gloss and no tackiness remain.
Common Problems and Mistakes to Avoid
Watch out for products and practices that can damage laminate—over-wetting, abrasive tools, and the wrong polishes are common culprits.
If you spot streaks, swelling, or dull patches, you’ll need to stop and correct the issue before it gets worse.
Below you’ll find simple tests and fixes to recognize and remedy polishing mistakes.
Products and Practices That Can Damage Laminate
Although laminate looks tough, a few common products and habits can permanently damage its finish and seams, so you’ll want to avoid them.
Don’t use wax, oil-based cleaners, bleach, or ammonia—they leave residue and haze. Avoid rubber-backed mats, acidic spot cleaners, and dragging furniture.
Test any new product on an inconspicuous area first and follow manufacturer recommendations to prevent irreversible harm.
Over-wetting, Abrasive Tools, and Wrong Polishes
You’ve already learned what not to use on laminate; now let’s look at how certain application mistakes can do just as much harm.
Don’t over-wet seams — moisture swells cores and lifts planks.
Avoid abrasive pads or steel wool that scratch wear layers.
Skip solvent-heavy or wax polishes designed for wood; they leave residue, haze, or strip protective coatings, shortening laminate life.
How to Recognize and Fix Polishing Mistakes
When a polish job goes wrong, the signs are usually obvious: streaks, cloudy residue, sticky patches, or lifted seams.
You should stop polishing, test a small area with a damp microfiber, then remove excess product with a gentle cleaner and dry thoroughly.
For scratches or lift, sand lightly and refinish with a compatible laminate polish.
Prevent recurrence by following product instructions and using minimal moisture.
Comparison: Polishing Options and When to Use Them
You’ll want to weigh quick spray restorers against longer-lasting liquid polishes or paste waxes, and decide if a DIY trick or a commercial product fits your needs. Below is a quick comparison to help you choose based on ease, durability, and finish. Use it to match the product to the level of wear and the look you want.
| Option type | Best when… |
|---|---|
| Spray Restorers | You need a fast, light refresh and minimal effort |
| Liquid Polishes | You want moderate durability with an even sheen |
| Paste Waxes | You need maximum protection and don’t mind effort |
| DIY vs Commercial | DIY for low-cost fixes; commercial for consistent, tested results |
Spray Restorers vs. Liquid Polishes vs. Paste Waxes
Although all three products aim to restore shine, they work differently and suit different needs:
Spray restorers are quick, low-build touch-ups for light wear; liquid polishes add more protection and gloss for moderately dull floors; and paste waxes lay down the heaviest, longest-lasting finish but require more prep and effort.
Choose spray for fast upkeep, liquid for routine renewal, paste for durable, high-gloss results.
DIY Solutions vs. Commercial Products
After deciding between spray restorers, liquid polishes, and paste waxes, you’ll also need to weigh DIY solutions against commercial products to match cost, time, and results.
DIY mixes (vinegar, water, olive oil) save money but offer limited protection and uneven shine. Commercial polishes deliver consistent finish, durability, and warranties but cost more.
Choose DIY for quick touch-ups, commercial for long-term restoration.
Maintenance and Prevention: Keeping Shine Long-Term
Keep a simple daily and weekly routine—sweep or vacuum loose grit daily and mop with a manufacturer-approved cleaner weekly—to prevent buildup that dulls the finish.
Use furniture pads, area rugs in high-traffic zones, and maintain stable humidity to avoid scratches and edge warping.
Check the floor every few months and plan light touch-ups or re-application of polish as soon as you notice wear.
Daily and Weekly Care Routine
If you stick to a simple daily and weekly routine, your laminate floors will stay glossy and damage-free longer.
- Sweep or vacuum daily with a soft brush to remove grit.
- Wipe spills immediately with a damp microfiber cloth.
- Mop weekly using a manufacturer-approved cleanser, not soaking.
- Dry floors after cleaning and spot-treat scuffs with a gentle polish following product directions.
Protective Measures (Furniture Pads, Rugs, Humidity Control)
While regular cleaning preserves surface gloss, protecting your floor from daily wear is what keeps it looking new for years; use felt furniture pads, area rugs in high-traffic zones, and maintain indoor humidity around 35–55% to prevent scratches, dents, and edge lifting.
Check pads regularly, replace worn ones, use non-slip rug grippers, and avoid dragging furniture. Monitor humidity with a hygrometer.
Schedule for Re-application and Touch-ups
Because wear builds up gradually, you’ll want a simple, predictable schedule for re-applying polish and doing touch-ups so small issues don’t become big ones.
Inspect high-traffic areas monthly, spot-treat scuffs as they appear, and reapply a thin polish coat every 6–12 months depending on use.
Adjust timing after heavy activity or seasonal humidity changes to preserve shine.
Cost, Time, and When to Call a Professional
Polishing a typical room by yourself usually takes an hour or two and costs little more than cleaner and a microfiber pad, while larger jobs or specialty products raise the time and expense.
If your floor has deep scratches, lifting seams, or large areas of wear that DIY methods don’t fix, you’ll spend more and should consider professional restoration or replacement.
Call a pro when repairs are extensive, warranties might be affected, or you want a guaranteed, long-lasting result.
Typical Time Investment and Cost Estimates
Expect the whole job to take anywhere from an hour for a small room to several hours for an entire house, depending on prep needs and drying time. You’ll spend about $10–$50 on supplies for one room; pro service runs $1–$3 per sq ft. If stains persist or damage appears, consider hiring help.
| Task | Time | Cost |
|---|---|---|
| DIY small room | 1 hr | $10–$50 |
| Full house | 3–6 hrs | $100–$500 |
| Professional | varies | $1–$3/ft² |
Signs You Need Professional Restoration or Replacement
If your laminate shows deep scratches, peeling seams, persistent stains, or water damage that DIY fixes won’t touch, it’s time to contemplate professional restoration or replacement.
You should call a pro when damage covers large areas, boards swell or buckle, or repairs exceed a day’s work. Expect inspection fees, labor costs, and possible replacement estimates; get quotes before deciding.
Troubleshooting: Specific Scenarios and Fixes
You’ll often face specific problems like water rings and stains, deep scratches or peeling edges, and dull patches after moving furniture.
For each issue, you can use targeted fixes—gentle cleaners and spot treatments for stains, repair kits or edge replacement for severe damage, and buffing or re-polishing for dulled areas.
I’ll walk you through practical, step-by-step solutions so you can pick the right action for the problem you’re facing.
Removing Water Rings and Stains
How do water rings and stains form on laminate, and how can you tackle them without damaging the finish?
You’ll blot spills immediately, then clean with a mild vinegar-and-water solution or a laminate-safe cleaner.
For stubborn rings, gently rub with a microfiber cloth and a small amount of baking soda paste.
Dry thoroughly and apply a thin polish layer to restore uniform shine.
Dealing with Deep Scratches and Peeling Edges
Address deep scratches and lifting edges promptly to prevent moisture seeping in and making damage worse.
For deep gouges, clean debris, sand lightly, then fill with a laminate repair kit or matching wood filler; smooth and cure per instructions.
For peeling edges, apply a thin bead of waterproof adhesive, clamp or weigh until set, then gently buff edges for seamless appearance and protection.
Restoring Dull Areas After Moving Furniture
Moving furniture often leaves small zones where the finish looks flat or scratched; those dull spots are usually surface wear from friction or trapped dirt and can be fixed without refinishing the whole floor.
Start by cleaning with a pH-neutral laminate cleaner, then buff gently with a microfiber pad.
For persistent dullness, apply a manufacturer-approved polish sparingly and buff until the sheen matches surrounding areas.
FAQs
You probably have a few practical questions about polishing laminate, like whether a floor polisher is safe to use and how often to polish.
You’ll want clear answers on hiding deep scratches, using homemade remedies like vinegar or olive oil, and whether polishing can extend the floor’s lifespan.
Read on for straightforward guidance and tips.
Can I use a floor polisher machine on laminate?
Wondering whether a floor polisher machine is safe for laminate? You can use one, but choose a low-speed, non-abrasive model with soft pads.
Test a small, inconspicuous area first. Avoid excessive pressure, heat, or wax-based pads that can damage the wear layer.
Regular gentle buffing helps shine, but don’t overdo it—mechanical stress can cause scratches or delamination.
How often should I polish my laminate floors?
If you’ve tried a low-speed polisher as suggested, you’ll want to know how often to buff those laminate floors.
Generally, polish lightly every 2–3 months for regular traffic, and spot-buff high-use areas monthly.
Don’t overdo it—excess polishing can build residue.
Adjust frequency based on wear, pets, and dirt; clean first and use recommended products for best results.
Will polishing hide deep scratches?
Can polishing hide deep scratches on laminate floors?
Polishing can minimize light surface scuffs and blend fine abrasions, but it won’t conceal deep gouges or chips.
For significant damage, you’ll need replacement planks or filler kits designed for laminate.
Use polish to maintain finish after repairs, not as a substitute for fixing structural or deep-surface defects.
Is it safe to use homemade remedies like vinegar or olive oil?
How safe are common DIY cleaners like vinegar or olive oil on laminate floors?
You shouldn’t use undiluted vinegar regularly—its acidity can dull finish and loosen seams over time.
Olive oil and other oils leave residue that attracts dirt and creates slippery spots.
For occasional spot-cleaning, dilute vinegar heavily and dry promptly; otherwise stick to manufacturer-approved cleaners for polishing and maintenance.
Can polishing extend the life of laminate flooring?
When you polish laminate correctly, you can help protect the surface from scratches and restore some shine, but polishing won’t fix deep wear or damaged seams.
Polishing can slow visible deterioration and repel dirt, so you’ll likely delay replacement.
Pair polishing with proper cleaning, felt pads, and humidity control to truly extend longevity; treat major damage promptly, since polish isn’t a structural repair.