How to Fix a Scratch in Laminate Flooring: Quick Repairs That Work
You can usually fix laminate scratches yourself with a few simple steps: clean the area, assess depth by running a fingernail over it, then use a color-matched repair marker or wax stick for shallow blemishes and a wood filler or epoxy putty for deeper gouges. Smooth and buff the patch, seal if needed, and avoid harsh cleaners or over-sanding. Prep and color matching are key for a seamless result—keep going and you’ll find detailed techniques and tips to perfect the repair.
How to Fix a Scratch in Laminate Flooring
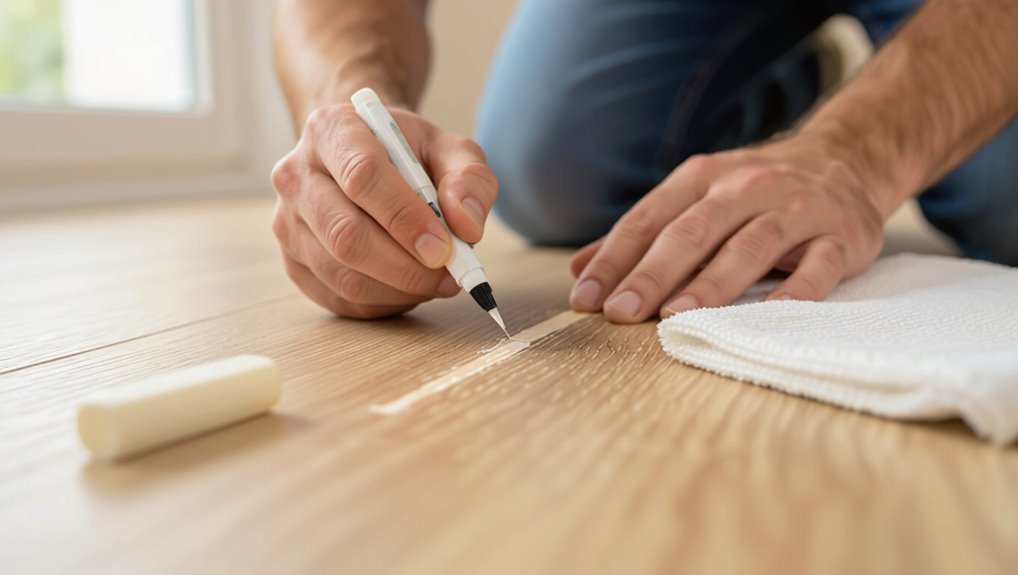
For shallow scratches, you can usually buff them out or use a matching laminate repair marker for a quick fix.
For deep gouges, you’ll need to fill the gap with a two-part wood filler or replace the affected plank.
If the damage is extensive or near seams, call a professional to assess repair versus replacement.
One-sentence fix for shallow scratches
Grab a laminate repair marker or a wax filler that matches the floor’s color, then lightly fill the shallow scratch and wipe away any excess so the repair blends with the surrounding surface.
To answer how do you fix a scratch in laminate flooring, use small strokes, let the product set, then buff gently with a soft cloth so the finish looks even and natural.
One-sentence fix for deep scratches
Address deeper gouges by cleaning the area, filling the scratch with a color-matched wood filler or epoxy putty, then smooth it flush with the laminate and seal with a clear laminate sealer so the repair is level and protected.
Let the filler cure, sand lightly with fine-grit paper, touch up color if needed, and buff gently to blend the finish so the patch is discreet and durable.
When to call a professional
If the scratch goes beyond surface finish and you can see the core layer, call a professional—this kind of damage often needs specialized materials and techniques to restore structural integrity and appearance without making it worse.
Also call a pro if multiple planks are affected, the floor has warped, DIY fixes fail, or the room is high-traffic.
They’ll assess, match materials, and guarantee a lasting repair.
Basic Understanding What Causes Scratches and Why They Matter
Laminate has a wear layer, printed design, and core, so scratches that only mar the surface are less serious than ones that cut through the coating or into the core.
You’ll commonly see damage from pets’ claws, dragged furniture, or grit and debris tracked in on shoes. Knowing whether a scratch is surface-level, through the protective coat, or into the core helps you pick the right repair method.
How laminate flooring is constructed and how scratches affect it
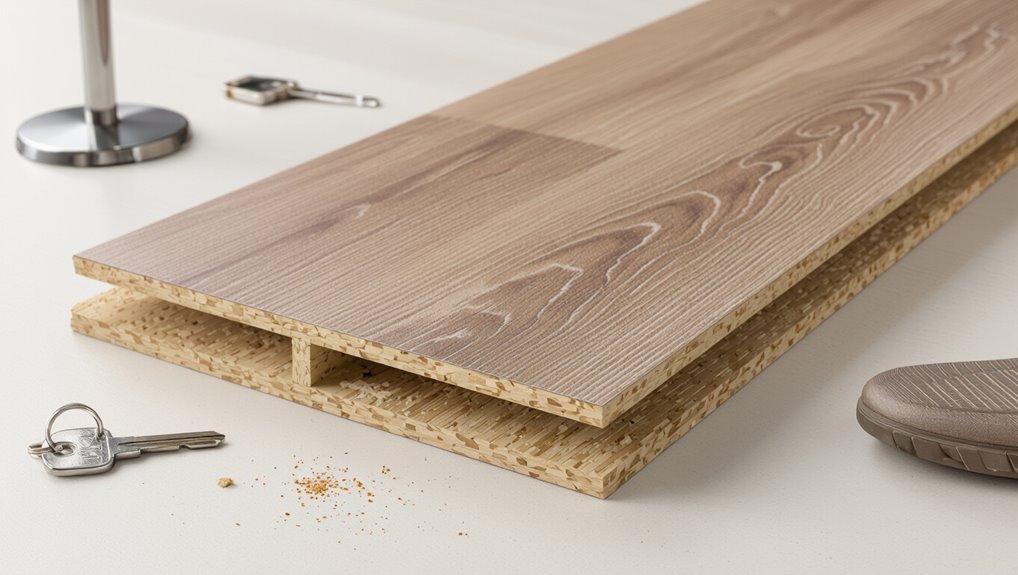
Think of laminate flooring as a multi-layer sandwich: a wear layer, a printed design layer, a core (usually high-density fiberboard), and a backing layer that stabilizes the plank.
When you scratch it, you compromise the wear layer and expose the printed layer or core. That dulls appearance, risks moisture damage, and shortens lifespan, so prompt, appropriate repairs matter to preserve function and look.
Common causes of scratches (pets, furniture, debris)
Because everyday activity puts your floors under constant stress, scratches usually come from a few predictable sources: pets’ claws, moving furniture, and abrasive debris tracked inside.
- Pets: claws and playful runs create repeated micro-scratches that worsen over time.
- Furniture: dragging chairs or shifting sofas gouges the wear layer.
- Debris: grit, sand, and small stones act like sandpaper underfoot, abrading finish and edges.
Types of scratches: surface, through-coating, core damage
Scratches fall into three practical categories you’ll want to tell apart: surface blemishes affect only the wear layer and are usually cosmetic.
Through-coating scratches cut into the printed design and may show a lighter underlayer.
Core damage penetrates the board itself, causing swelling, visible gaps, or structural failure.
You’ll assess depth, location, and spread to choose cleaning, fill, or board replacement.
Assessing the Scratch How to Examine and Classify Damage
Grab a flashlight, magnifying glass, and a few repair tools so you can inspect the scratch closely.
Run a fingernail and a coin across the mark to gauge its depth and whether the wear layer is intact.
If the damage only affects the surface finish you can usually repair it; deep gouges that expose the core often mean replacement of the plank.
Tools and materials for inspection
Before you start repairing, gather a few basic inspection tools so you can accurately assess the scratch’s depth, length, and cause.
- A bright flashlight to highlight edges and any finish disruption.
- A magnifying loupe or hand lens to inspect grain and micro-tears.
- A soft cloth and tack-free cleaning solution to remove debris without altering the surface.
Quick tests to determine depth and repairability
When you’ve cleaned the area, run a fingernail across the mark and shine your flashlight at a low angle to see whether the groove catches or the finish only shows a surface dulling.
If your nail catches, it’s likely through the wear layer and needs a more involved fix, but if it feels smooth and only looks lighter, a simple touch-up may do.
Then measure length, note width, test with wood filler sample to match color, and press a coin to check indentation resilience.
When a scratch requires replacement vs. repair
After you’ve determined whether the mark is a surface dulling or a groove that catches your nail, you can decide if repair or full replacement is the better option.
If the scratch only affects the wear layer, use fillers, markers, or buffing.
If the core is exposed, planks buckle, or multiple adjacent boards are damaged, replace the plank(s) to prevent moisture issues and uneven wear.
Materials and Tools You’ll Need for Repairs
You don’t need to run to a store for every scratch—sometimes common household items will do the trick, while other times a DIY kit or a pro-grade product is smarter.
Below are the main options you’ll consider when planning repairs:
- Household items for quick fixes
- DIY repair kits and when to use them
- Professional-grade products
Household items for quick fixes
If you’ve got a shallow scratch or scuff, you can often fix it with common household items instead of specialty kits.
Use toothpaste or baking soda paste to gently buff tiny marks, a walnut rubbed over the scratch to blend color, or a damp cloth and mild dish soap for scuffs.
Keep cotton swabs, a soft cloth, and clear nail polish for quick sealing.
DIY repair kits and when to use them
When a scratch goes beyond a quick household fix, grab a DIY laminate repair kit so you can match color, fill gouges, and seal the surface without calling a pro; most kits include putty sticks or fillers, color-matching pencils, a clear sealer, and simple applicators (scrapers, mixing sticks, and a cloth).
Use kits for visible scratches, small gouges, or worn spots—follow instructions, test colors, and work in thin layers.
Professional-grade products
Although a DIY kit can handle most minor scratches, professional-grade products give you stronger, longer-lasting results for deep gouges or high-traffic areas.
You’ll want epoxy fillers, color-matching tints, clear topcoats, and a two-part repair compound. Use fine-grit sandpaper, scraper, mixing sticks, and a heat gun or torch for curing where recommended.
These tools deliver durable, seamless finishes when applied carefully.
Step-by-Step Repairs for Shallow Surface Scratches (Quick, Low-cost)
Start by cleaning and prepping the scratched area so dirt and grit won’t worsen the mark.
Use a laminate floor cleaner and a microfiber cloth to remove residue, then try household fixes like a colored pencil, wax stick, or a drop of mineral oil following the product tips.
Finish by buffing the spot gently to blend the repair with the surrounding floor.
Step 1: Clean and prep the area
1 simple prep step makes the repair go smoothly: clear the area and give the scratch a thorough clean. You’ll remove dust, grit, and residues so touch-up materials bond well.
Then follow these quick checks:
- Sweep or vacuum debris away.
- Wipe with a damp, lint-free cloth.
- Let the surface fully dry before proceeding.
Step 2: Use a laminate floor cleaner and microfiber cloth
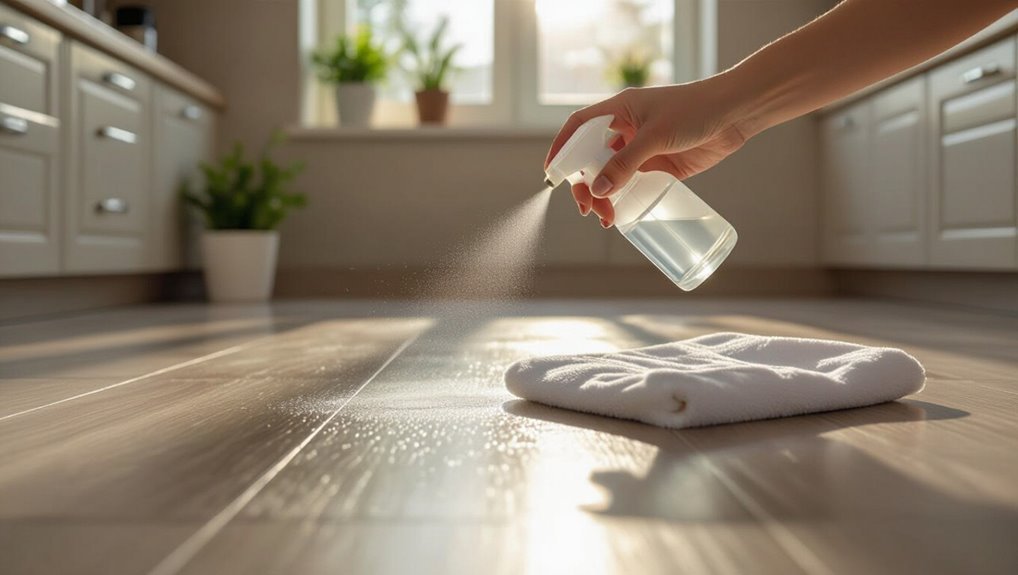
Now that the surface is clean and dry, grab a laminate floor cleaner and a soft microfiber cloth to tackle shallow scratches.
Spray lightly, never soak. Wipe along the grain, applying gentle pressure to lift grime and minimize the scratch’s visibility.
Buff dry with a fresh section of the cloth for a uniform sheen.
Repeat once if residue remains, then inspect.
Step 3: Apply household remedies (pencil, wax, mineral oil) with instructions
Reach for common household fixes—colored wax sticks, a matching pencil crayon, or a drop of mineral oil—to disguise shallow surface scratches quickly and cheaply.
Color wax into the groove, smooth excess with a plastic card. Fill thin scratches with the pencil, then blend.
For faint marks, rub a tiny mineral oil drop with a soft cloth to reduce visibility.
Test first in an inconspicuous spot.
Step 4: Buffing and finishing for a seamless look
After you’ve filled and blended the scratch, buffing and sealing the area will help it disappear into the surrounding laminate.
You’ll want to work gently and in small circles with a soft cloth or a fine abrasive pad to level the repair and restore the sheen.
Once smooth, apply a thin coat of laminate polish or furniture wax, let it dry, then buff lightly to match surrounding gloss.
Step-by-Step Repairs for Deeper Scratches and Gouges
For deeper scratches and gouges you’ll need a few careful steps to restore the surface.
Start by removing debris and cleaning the groove, then fill it with laminate repair paste or a colored wax stick.
After that level and sand lightly, allow curing time, match the color, and seal with a clear coat.
Step 1: Remove debris and clean the groove
Start by clearing loose debris from the scratch so you can see its full depth and shape.
Use a soft brush, vacuum, or compressed air, then wipe with a damp microfiber cloth and mild cleaner. Let it dry completely before proceeding.
- Brush out grit gently.
- Vacuum remaining particles.
- Wipe with a damp cloth and mild cleaner.
Step 2: Fill with laminate repair paste or colored wax stick
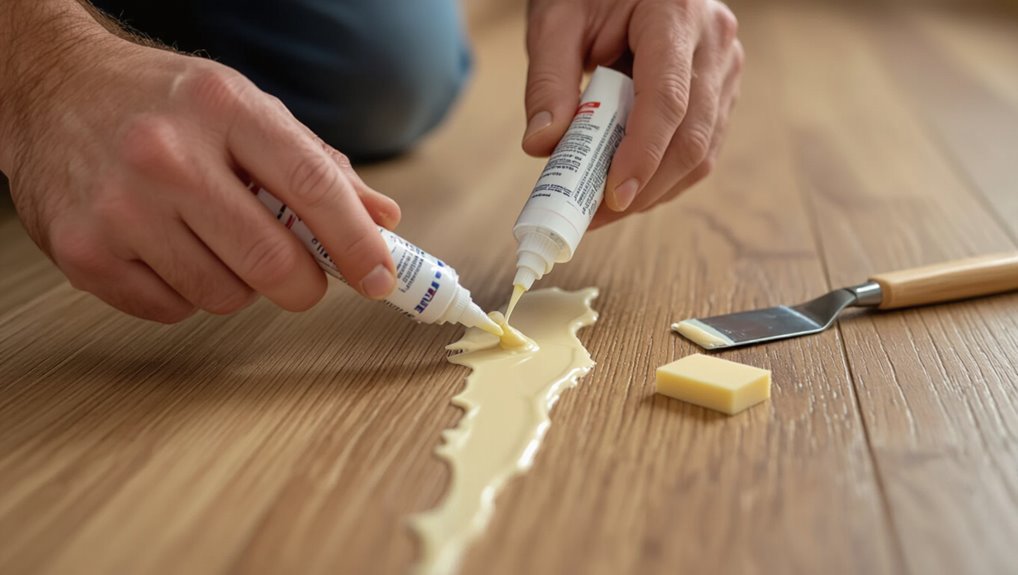
Choose a repair material that matches the depth and color of the scratch—use colored wax sticks for shallow to moderate scratches and laminate repair paste for deeper gouges—so you get a durable, nearly invisible fill.
Press wax into the groove or apply paste with a putty knife, following manufacturer color blends. Remove excess promptly and inspect color match; repeat application for full coverage.
Step 3: Leveling, sanding lightly, and curing time
Once the paste or wax has filled the scratch and you’ve wiped away the excess, level the repair so it sits flush with the surrounding laminate.
Use a straight edge or plastic scraper to remove high spots. Sand very lightly with fine-grit (400–600) sandpaper only if needed.
Allow the filler to cure per instructions—usually several hours—before proceeding to color match and seal.
Step 4: Matching color and sealing with clear coat
After the filler has fully cured, you’ll blend in color and lock the repair with a clear coat to make it invisible and durable.
Match tones using laminate repair markers or diluted acrylics, applying thin layers until the hue aligns.
Once dry, seal with a satin clear coat designed for floors.
Lightly buff after curing to restore sheen and guarantee a seamless finish.
Repairing Large or Edge Damage When to Replace Planks
If damage is deep, along an edge, or affects structural locking, you’ll likely need to replace the plank rather than patch it.
I’ll show how to remove a damaged board without harming adjacent planks, then how to fit and lock in a replacement.
Finally, you’ll learn how to finish seams and blend the new plank so the repair looks seamless.
Criteria for plank replacement vs. patching
When damage goes beyond surface scratches—like deep gouges, swelling at the edges, or split seams—you’ll usually need to replace the plank rather than try to patch it.
Choose replacement if structural integrity, moisture exposure, or visible pattern mismatch prevents a seamless repair.
Patch minor surface chips, finish scuffs, or shallow scratches when texture and color can be matched and stability remains intact.
How to remove a damaged plank without damaging others
Start by isolating the damaged plank so you can work precisely without harming the surrounding floor: remove baseboards or trim as needed, release or unclick adjacent planks if your floor’s tongue-and-groove system allows, and clear a working area wide enough to maneuver tools.
- Score and cut the damaged plank lengthwise, avoiding grooves.
- Lift cut sections gently with a pry bar.
- Clean the subfloor and check locking grooves for damage.
Installing a replacement plank and finishing seams
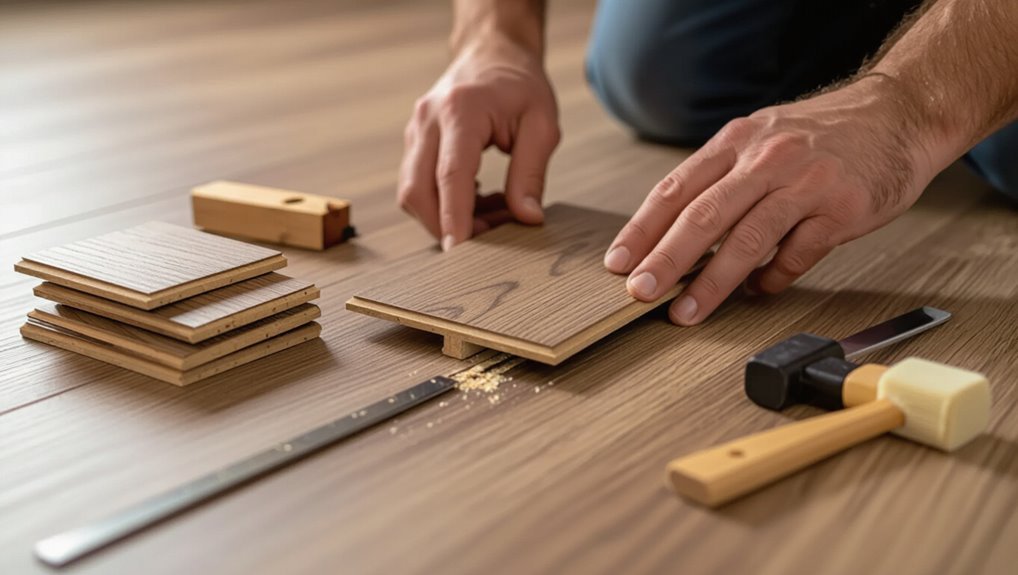
Although replacing a plank takes some patience, you can fit the new piece snugly and restore the floor’s appearance by working methodically:
dry-fit the plank, apply adhesive or locking clicks per manufacturer instructions, tap joints with a mallet and block, trim for tightness at walls, clean seams of debris, and wipe excess glue.
Finish with matching filler on micro-gaps and reinstall trim for a seamless result.
Quick Temporary Fixes While Waiting for a Full Repair
While you wait for a full repair, you can take a few quick steps to hide or lessen the scratch so it’s less noticeable.
Use rugs or rearranged furniture for immediate concealing, try DIY concealers like wax sticks or markers for small marks, but know they’re temporary and may not match perfectly.
Here are practical options to evaluate right now:
- Cover the area with a rug or move a piece of furniture over the scratch.
- Apply a laminate repair wax stick or color-matching marker for short-term camouflage.
- Clean first and test any product in an inconspicuous spot to check color and durability.
Concealing with rugs or furniture
If you need a quick, nonpermanent solution before a full repair, hide the scratch with a rug or reposition furniture to cover it; these options keep the area usable and out of sight without risking further damage.
Choose a rug size and placement that looks intentional, use felt pads under furniture to prevent new scratches, and avoid dragging heavy items over the floor.
Immediate DIY concealers and their limitations
When you need a quick fix before a proper repair, several DIY concealers can mask scratches temporarily—furniture markers, wax sticks, colored crayons, and wood-fill pencils all work to blend the damaged area with the surrounding laminate.
You’ll apply, wipe excess, and buff lightly. They hide damage short-term but wear off, may not match perfectly, and won’t fix deep gouges or protect against moisture.
Common Mistakes to Avoid When Repairing Laminate Scratches
When you fix laminate scratches, don’t soak the floor or use harsh cleaners that can warp the board.
Don’t over-sand or pick the wrong color filler, because that makes the repair obvious or damages the wear layer.
And don’t skip proper prep or sealing — a rushed job will fail sooner and look worse.
Using excessive water or harsh cleaners
Because laminate has a thin protective layer, you shouldn’t soak it or use harsh chemicals—doing so can swell the core, lift seams, and strip the finish.
Use a damp microfiber cloth and pH-neutral cleaner sparingly. Rinse and dry immediately.
For stubborn grime, test a mild detergent in an inconspicuous spot first.
Avoid abrasive pads and bleach-based products that damage the wear layer.
Over-sanding or using wrong color fillers
After you’ve learned to clean carefully, watch your repair technique: over-sanding or picking the wrong filler color can make a scratch more obvious than it was.
Don’t sand past the decorative layer—feather lightly to avoid dull spots.
Test fillers on a hidden plank to match tones and sheen.
Apply thin layers, let them cure, and blend gently to keep repairs invisible.
Skipping preparation or improper sealing
If you skip prep or skimp on sealing, your quick fix can fail fast and stand out.
Clean the area, remove dust, and roughen glossy edges so fillers bond.
Apply the correct sealant or clear coat evenly, let it cure fully, and avoid heavy traffic until set.
Proper prep and sealing guarantee repairs blend, resist moisture, and last longer.
Prevention and Best Practices to Avoid Future Scratches
To keep your laminate looking its best, start with simple protective measures like felt pads, entry mats, and regular pet nail care.
You should stick to a routine cleaning and maintenance schedule to remove grit that causes scratches.
When replacing or upgrading, pick scratch-resistant laminate and durable finishes to minimize future damage.
Protective measures: pads, mats, pet care
While you can repair scratches, preventing them is faster and cheaper, so start by protecting high-traffic areas and furniture contact points.
- Use felt pads on chair and table legs to stop dragging damage.
- Place low-profile mats at entries to catch grit without trapping moisture.
- Trim pet nails regularly and use rugs under play areas to reduce scratching.
Routine cleaning and maintenance schedule
Because regular care prevents most wear, set a simple cleaning and maintenance routine you can stick with weekly and monthly tasks.
Weekly: sweep or vacuum with a soft-brush attachment, damp-mop with manufacturer-approved cleaner, and spot-clean spills immediately.
Monthly: inspect for grit, tighten loose furniture legs, replace worn pads, and buff light scuffs with a recommended product to keep finish intact.
Choosing scratch-resistant laminate and finishes
One key step to preventing future scratches is choosing a laminate with a high AC rating and a durable wear layer, since these directly affect scratch resistance and longevity.
Pick textured surfaces that hide marks, opt for UV-cured or aluminum-oxide finishes, and choose thicker wear layers.
Add protective pads under furniture and area rugs in high-traffic zones to reduce abrasion and impact.
Cost Comparison: DIY vs Professional Repair
You can often fix small scratches yourself for minimal cost and within an hour, while hiring a pro will cost more but can save time and guarantee a match. Below is a quick comparison of typical price ranges and time estimates to help you decide. Use this to weigh upfront cost against convenience and finish quality.
| Option | Cost / Time |
|---|---|
| DIY | $5–$50 / 15–60 minutes |
| Professional | $75–$300+ / 1–4 hours |
Typical price ranges and time estimates
When weighing whether to tackle a laminate scratch yourself or hire a pro, consider both the upfront cost and the time involved: DIY repairs typically run $5–$60 in materials and take 30 minutes to a few hours, while professional fixes usually cost $75–$300 (or more for extensive work) and require a service visit plus drying or curing time.
| Option | Cost | Time |
|---|---|---|
| DIY | $5–$60 | 30 min–few hrs |
| Pro | $75–$300+ | Visit + curing |
| Factors | Severity, materials | Availability, warranty |
FAQs Common Questions About Fixing Laminate Scratches
You probably have a few practical questions about fixing laminate scratches, like whether wood filler works on laminate or if wax sticks will match your floor.
You’ll also want to know how long repairs usually last, whether it’s safe to sand laminate, and if insurance might cover the damage.
Let’s answer each one clearly so you can pick the best repair option.
Can I use wood filler on laminate flooring?
Curious if wood filler will work on laminate? You can use a non-shrinking, water-resistant wood filler for deep gouges, but it won’t bond like with real wood.
Clean the area, apply sparingly, level, and sand gently once cured. Match color with tinted filler or stain marker.
For surface scratches, consider repair kits or wax sticks instead.
Will wax sticks match my floor color exactly?
Will a wax stick match your floor color exactly? Not usually. Wax sticks come in common shades and can blend small scratches, but exact matches are rare.
Test on an inconspicuous spot first. You can layer and mix sticks to improve the match, then buff gently.
For large or highly visible damage, consider color-matched repair kits or professional help for a seamless result.
How long do repairs typically last?
How long a repair lasts depends on the method and the traffic the floor sees: simple wax or marker fixes can hold up for months under light use, while quality color-matched fillers and professional resurfacing can last several years if you avoid heavy abrasion and moisture.
You’ll get best longevity by cleaning before repair, matching color closely, and protecting high-traffic areas with rugs or pads.
Is it safe to sand laminate floors?
While you might be tempted to sand out a scratch, don’t—laminate floors have a thin wear layer and sanding will remove the printed design and protective coating, leaving you with exposed fiberboard that can’t be refinished like real wood.
Instead, use touch-up kits, wax sticks, or filler pens designed for laminate. Test color on a hidden seam and follow manufacturer guidance.
Can insurance cover laminate floor damage?
Curious whether your homeowner’s policy will pick up the cost of repairing laminate scratches? Usually it won’t cover normal wear, minor scratches, or cosmetic damage.
You might get coverage if scratches result from a covered peril—fire, vandalism, or sudden water damage—provided you meet deductibles and documentation requirements.
Check your policy, take photos, and call your insurer to confirm specifics before filing a claim.
Quick Troubleshooting Guide Problems You Might Encounter and Solutions
1 quick check can save you time and money when dealing with laminate-floor scratches: identify the scratch type—surface, shallow, or deep—then match the fix to the damage so you don’t make it worse.
- Surface: clean and buff with a nonabrasive pad.
- Shallow: use a laminate repair kit or matching marker.
- Deep: fill with epoxy or replace the plank to guarantee durability.