How to Clean Travertine Floors and Keep Their Natural Beauty
Keep travertine looking its best by sweeping or vacuuming daily, wiping spills immediately, and mopping with a pH-neutral cleaner—never vinegar, bleach, or ammonia. Use microfiber tools and felt furniture pads to prevent scratches, blot stains gently, and dry the floor after mopping. Test and apply a penetrating sealer when water stops beading, and schedule deep cleaning or professional restoration for stubborn stains or etching. Follow these steps and you’ll find more tips and techniques ahead.
How to Clean Travertine Floors and Keep Their Natural Beauty
You can protect your travertine’s look with a few best practices you can do in 60 seconds each day—sweeping with a soft broom, wiping spills immediately, and using a pH-neutral cleaner.
Know when to deep clean: schedule it if grout is dingy, stains resist spot treatment, or the surface looks dull.
Combine quick routines with periodic deep cleaning to keep the stone beautiful without effort.
Best Practices in 60 Seconds
In just a minute you can learn the core steps that keep travertine floors clean and looking natural: wipe spills promptly, sweep or vacuum daily, mop with pH-neutral cleaner, avoid vinegar or bleach, and dry thoroughly.
Use felt pads on furniture, blot stains gently, and reapply sealer per manufacturer recommendations.
These simple habits show you how clean travertine floors maintain lasting beauty.
When to Deep Clean vs. Routine Maintenance
Although regular sweeping and quick mops keep travertine looking good day to day, you’ll need a deeper clean when grout darkens, dullness builds, or stubborn stains won’t budge.
Deep clean every 6–12 months or sooner in high-traffic or damp areas. Use pH-neutral stone cleaner, soft brushes, and rinse thoroughly.
Seal after cleaning if water no longer beads to protect and simplify routine upkeep.
Understanding Travertine: What Makes It Special
Travertine is a natural limestone you’ll see in floors, countertops, and showers, prized for its warm, variegated look.
Its porosity, range of finishes, and need for sealing all affect how it handles spills and cleaning.
Because it’s softer and more porous than ceramic or porcelain, ordinary acidic or abrasive cleaners can etch or stain the surface.
What Travertine Is and Common Uses

A durable, naturally formed stone, travertine comes from mineral-rich hot springs and caves and has a warm, timeless look that many homeowners and designers love.
You’ll find it in floors, countertops, backsplashes, shower surrounds, patios, and pool decks. Its neutral tones and varied veining suit traditional and modern styles, and its slip-resistant textures make it practical for indoor and outdoor living spaces.
Natural Properties That Affect Cleaning (porosity, finish types, sealing)
Because it’s a porous, sedimentary stone formed from mineral deposits, understanding travertine’s porosity, finish options, and sealing needs is key to keeping it clean and durable.
You’ll note varying pore sizes absorb spills differently. Honed, polished, or tumbled finishes change stain resistance and slip.
Proper sealing fills pores, reduces absorption, and makes routine cleaning easier—reapply sealant per manufacturer guidance.
Why Ordinary Cleaners Can Damage Travertine
If you clean with standard household products, you can unintentionally etch, dull, or stain travertine because many contain acids, harsh detergents, or abrasive particles that attack the stone’s calcium carbonate structure and protective seal.
You should use pH-neutral cleaners, soft cloths, and gentle techniques. Avoid vinegar, bleach, citrus, and abrasive pads that strip sealers or leave permanent marks on the surface.
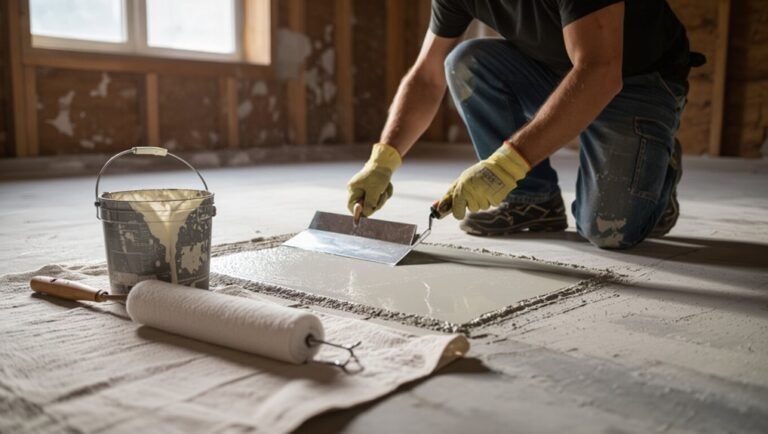
Preparation Before Cleaning
Before you start cleaning, gather the right tools and supplies—soft broom, pH-neutral cleaner, microfiber mop, and protective pads.
Always spot-test any cleaner in an inconspicuous area to make sure it won’t etch or discolor the stone.
If the floor has deep stains, cracks, or extensive wear, call a professional to avoid causing more damage.
Tools and Supplies You Should Have
Gathering the right tools and supplies makes cleaning travertine faster and protects the stone from damage.
You’ll need gentle, pH-neutral cleaner, soft microfiber mops, and non-abrasive brushes. Keep a bucket, clean towels, and a dust mop handy.
Follow this checklist:
- pH-neutral cleaner
- Microfiber mop
- Soft brush and towels
- Bucket and dust mop
How to Test a Cleaner Safely (spot test method)
When you’re preparing to clean travertine, always run a spot test with your chosen cleaner to avoid stains, etching, or sealant damage; this quick check tells you whether the product is safe for your floor.
Apply a small amount in an inconspicuous area, wait the recommended time, blot and inspect for discoloration or dulling. If fine, proceed; if not, choose another cleaner.
When to Call a Professional
If a stain, etch, or damage looks worse than a quick spot test can assess, call a professional before you attempt any deeper cleaning or sealant work; they’ll evaluate the problem, recommend safe products, and prevent costly mistakes.
You should also call if grout is crumbling, the floor feels uneven, previous repairs look poor, or DIY attempts haven’t improved the issue.
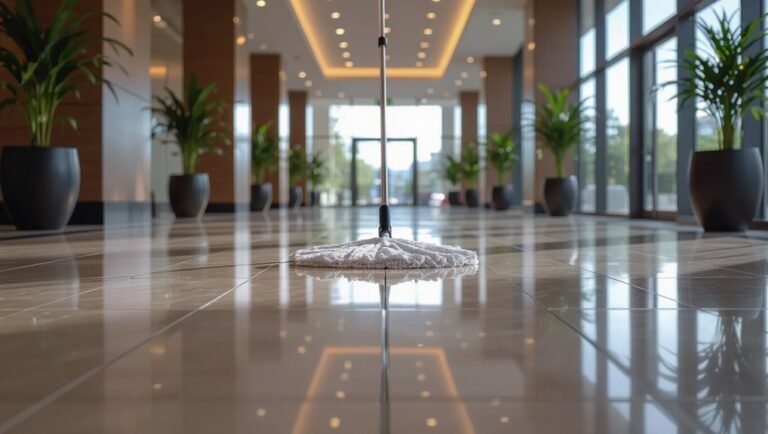
Step-by-Step Routine Cleaning (Daily/Weekly)
Start by removing dust and dry debris with a soft broom or vacuum to prevent scratching.
Then mop with a pH-neutral cleaner using the manufacturer’s mix ratio and a damp, not soaking, technique.
Finish by drying and buffing to restore sheen, and adjust frequency—daily in high-traffic areas, weekly elsewhere.
Step 1: Dusting and Dry Debris Removal
1 quick pass with the right tools keeps travertine looking sharp: grab a soft-bristle broom or a microfiber dust mop and sweep in overlapping strokes to pick up grit, pet hair, and loose debris before it scratches the stone.
Empty the dustpan or shake out the mop outdoors, check corners and under furniture, and repeat high-traffic areas daily or every few days.
Step 2: Mopping with pH-neutral solutions (mix ratios, techniques)
Grab a mop and a pH-neutral stone cleaner, then dilute the solution per the manufacturer’s directions (commonly 1–2 ounces of cleaner per gallon of warm water) to protect travertine’s finish while removing soil.
Dip and wring the mop so it’s damp, not soaked. Work in manageable sections, rinse the mop frequently, change solution when visibly dirty, and avoid acidic or abrasive products.
Step 3: Drying and Buffing to Restore Sheen
After mopping, dry the floor promptly with a clean microfiber mop or towel so water doesn’t settle into travertine’s pores.
Then buff gently in small, overlapping circles to revive the stone’s natural sheen.
Work in manageable sections, change towels when damp, and use light pressure to avoid scratching.
Finish by inspecting for streaks and repeating gentle buffing where needed.
Frequency Recommendations by Traffic Level
Because traffic levels dictate how quickly travertine shows wear and grime, tailor your daily and weekly cleaning to the room’s use:
For high-traffic areas (entry, kitchen), sweep/vacuum daily and mop with pH-neutral cleaner twice weekly;
for moderate-traffic rooms, sweep every other day and mop weekly;
for low-traffic spaces, sweep weekly and mop biweekly.
Adjust after events or spills.
How to Deep Clean Travertine Floors
When you deep clean travertine, start by identifying stains and treating each with the targeted method it needs—oil, organic, or mineral deposits require different approaches.
Then use a pH-neutral heavy cleaner with gentle agitation, followed by a thorough rinse, neutralizer if needed, and complete drying.
Consider steam cleaners or mechanical scrubbers only when appropriate: they speed work but can harm softer or unsealed travertine if used incorrectly.
Step 1: Remove Stains and Spills (stain ID and targeted methods)
1. You’ll identify stains (oil, rust, organic, dye) and treat each with targeted methods to avoid damage. Apply blotted cleaning, poultices, or mild solvent as appropriate; test first in a hidden spot. Follow up by rinsing and drying.
| Stain Type | Quick ID | Treatment |
|---|---|---|
| Oil | Dark, greasy | Blot, poultice |
| Rust | Reddish | Rust remover |
| Organic | Leaf/food | Enzyme clean |
| Dye | Bright | Solvent poultice |
Step 2: Using a pH-neutral heavy cleaner and agitation techniques
After you’ve removed stains and rinsed the area, it’s time to deep-clean the whole surface using a pH-neutral heavy cleaner formulated for natural stone; these cleaners lift embedded dirt and old residues without etching the travertine.
Dilute per label, work in small sections, and agitate with a soft-bristled brush or microfiber pad in the grout lines and textured areas. Use gentle, consistent pressure.
Step 3: Rinse, neutralize, and dry thoroughly
Flush the cleaner away with clean water, then neutralize any remaining residue so your travertine won’t be damaged or attract dirt.
Rinse several times with fresh water until suds and cleaner are gone. Apply a recommended neutralizer if needed, following label directions.
Remove excess water with a wet vacuum or microfiber mop, then dry completely with clean towels or fans to prevent stains and mineral spots.
When to use steam cleaning or mechanical scrubbers (pros and cons)
When should you consider steam cleaning or a mechanical scrubber for deep-cleaning travertine?
Use steam sparingly on sealed travertine to lift grime without chemicals, but avoid on unsealed or aged stone—heat and moisture can damage grout or sealers.
Mechanical scrubbers remove stubborn stains faster but need soft brushes and low pressure to prevent scratching.
Test a small area first.
Sealing Travertine: Why, When and How
Before you seal your travertine, you’ll want to know the different types of sealers and how each protects the stone.
I’ll show you a quick water-drop test to tell if your floor needs resealing, then give a clear step-by-step resealing process and simple maintenance tips to keep the finish lasting.
Follow these steps and you’ll prevent stains, moisture damage, and unnecessary wear.
Types of Sealers and How They Work
Because sealers form the invisible barrier that keeps stains and moisture out, it’s important you pick the right type for your travertine—penetrating (impregnating) sealers soak into the stone to repel liquids without changing the surface, while topical sealers sit on top to add shine and extra protection but can alter appearance and wear over time.
- Penetrating: natural look
- Topical: glossy finish
- Solvent vs water-based: durability tradeoff
- Breathability: prevents trapped moisture
How to Test If Your Floor Needs Resealing
How can you tell if your travertine needs resealing? Perform a simple water test: place a few drops on different tiles and grout, wait 10–15 minutes, then blot.
If water beads, the seal is good; if it soaks in or darkens the stone, resealing’s due.
Also watch for stains, dullness, or increased cleaning frequency—these signal diminished protection.
Step-by-Step Resealing Process
Start by gathering everything you need—sealant, cleaner, applicators, protective gear, and a damp mop—so you won’t scramble mid-job; then work in small, well-ventilated sections and follow the manufacturer’s directions for coverage and dry time to guarantee an even, lasting finish.
Clean thoroughly, let dry, apply thin uniform coats with a pad or roller, wait prescribed cure times, and repeat if recommended.
Maintenance After Sealing
Once your resealing is finished and the coat has cured, you’ll want a simple routine to protect that investment and keep your travertine looking its best.
Sweep or dust-mop daily, damp-mop weekly with pH-neutral cleaner, and blot spills immediately.
Use felt pads under furniture, area rugs in high-traffic zones, and avoid acidic cleaners.
Reinspect annually and reseal when water no longer beads.
Common Problems and How to Fix Them
You’ll encounter a few common issues with travertine—etching from acids, discoloration and water spots, scratches and wear, and hazy residue from cleaners.
For each problem you’ll learn how to diagnose the cause and whether you can repair it or need professional help.
Next, we’ll cover specific fixes and preventive steps so you can restore and protect your floor.
Etching from Acids: Causes and Repair Options
Although travertine gives your floors a beautiful natural look, it’s vulnerable to etching when acidic substances—like lemon juice, vinegar, or some cleaners—come into contact with the stone.
You can prevent damage by wiping spills immediately and using pH-neutral cleaners.
For light etches, buff gently with a non-abrasive pad; deeper pits need professional honing and resealing to restore surface and protection.
Discoloration and Water Spots: Diagnosis and Treatment
When hard water, minerals, cleaners, or trapped moisture interact with travertine, they can leave cloudy discoloration or telltale water spots that dull the stone’s finish.
Diagnosing the cause quickly helps you pick the right fix. Test a small area: white haze often means mineral deposits—vinegar-free descaler or poultice works; organic stains need hydrogen peroxide poultice.
Rinse, dry, then reseal if needed.
Scratches and Surface Wear: Repair vs. Replacement
After treating stains and resealing, you’ll often notice scratches or dull areas that call for a different approach.
Light surface scratches buff out with fine-grit pads and a honing powder; deeper gouges need filler or a professional grind and polish.
Match color and finish when filling.
Replace tiles only if damage breaches structural integrity or repairs would be noticeably mismatched.
Residue and Hazy Film: How to Remove It
Ever noticed a cloudy haze or sticky residue that won’t come off no matter how much you mop?
That’s often soap buildup, hard-water minerals, or improper sealers.
Rinse with distilled water, then mop with a pH-neutral stone cleaner.
For stubborn haze, use a 50/50 mix of distilled water and isopropyl alcohol on a microfiber pad.
Rinse thoroughly and re-seal if needed.
Preventive Strategies to Preserve Natural Beauty
To keep your travertine looking its best, adopt simple daily habits like using entry mats, felt pads on furniture, and wiping up spills right away.
Set a seasonal and long-term maintenance schedule for sealing and deep cleaning so small issues don’t become big problems.
Use pH-neutral, travertine-safe products and avoid acidic or abrasive cleaners that can etch the stone.
Daily Habits to Protect Travertine (mats, furniture pads, quick cleanup)
One simple habit can keep your travertine looking fresh: place durable mats at entrances, use felt pads under furniture, and wipe spills immediately.
You’ll prevent grit scratching and stains by acting fast. Follow daily steps to protect surfaces:
- Shake mats outside daily.
- Sweep or vacuum high-traffic areas.
- Wipe spills with a damp microfiber.
- Check and replace felt pads monthly.
Seasonal and Long-Term Maintenance Schedule
Seasonal and long-term care keeps travertine looking its best year after year, and you can prevent costly repairs by sticking to a simple schedule.
Quarterly: deep-clean with pH-neutral methods and inspect grout and sealant.
Annually: reseal high-traffic areas and repair chips or loose tiles.
Adjust frequency if moisture, pets, or heavy use increase wear, and document maintenance dates.
Safe Products to Use vs. Products to Avoid
Quarterly and annual maintenance routines give you a timeline, but choosing the right products will protect your travertine between visits and prevent damage that scheduling alone can’t fix. Use pH-neutral cleaners, stone sealers, microfiber mops, and warm water. Avoid acids, bleach, abrasive powders, and waxes that stain or etch.
| Safe | Avoid |
|---|---|
| pH-neutral cleaner | Vinegar/acid |
| Stone sealer | Bleach |
| Microfiber mop | Abrasive powder |
| Warm water | Wax/products with solvents |
| Stone-safe polish | Ammonia-based cleaners |
Product Recommendations and DIY Recipes
For routine care, choose pH-neutral commercial cleaners and penetrating sealers with low VOCs and clear application instructions so you don’t damage the stone.
You can also make safe DIY solutions—mild dish soap or a cup of rubbing alcohol diluted in a gallon of water—and I’ll give exact mixing steps and usage tips.
Finally, consider investing in a soft mop, microfiber pads, a natural-bristle brush, and a quality applicator for sealing to get professional results.
Recommended Commercial Cleaners and Sealers (types, features)
Cleaning products and sealers make a big difference in how your travertine looks and lasts, so choose ones formulated for natural stone rather than generic household cleaners.
Use pH-neutral cleaners and breathable penetrating sealers.
Consider these options:
- pH-neutral stone cleaner — daily gentle cleaning
- Enzymatic grout cleaner — targeted grout care
- Penetrating sealer (silane/siloxane) — long-term protection
- Topical enhancer — restores sheen without clogging pores
Safe DIY Cleaners and Mixing Instructions
After choosing the right commercial products, you may prefer making gentle, budget-friendly cleaners at home for routine care.
Mix 1/4 cup pH-neutral castile soap with a gallon of warm water for daily mopping.
For spot cleaning, combine equal parts distilled water and isopropyl alcohol.
Always test a hidden area first, apply sparingly, and never use acidic or abrasive ingredients.
Tools and Accessories Worth Investing In
A few well-chosen tools will make maintaining travertine safe, fast, and effective, so invest in quality pieces you’ll actually use.
Buy a microfiber mop, soft-bristle broom, pH-neutral stone cleaner, and non-abrasive scrub pads.
Add a squeegee for spills, felt pads for furniture, and a breathable cotton mop head.
For sealing, choose a penetrating stone sealer and applicator.
Cost, Time, and When to Hire a Professional
You’ll want to weigh the typical costs for professional cleaning and resealing against how much time you can spend on a DIY job.
DIY projects often take a weekend for most rooms, while pros can finish faster but charge based on square footage and services.
When hiring, check references, insurance, and written estimates to make sure you’re getting the right expertise and value.
Typical Costs for Professional Cleaning and Resealing
Expect to pay roughly $1.50 to $5 per square foot for professional cleaning and resealing of travertine, with full-service jobs (deep clean, stain removal, honed or polished finish, and sealing) often running $300–$1,200 depending on room size and condition.
Most pros finish a typical 300–600 sq ft job in one day, while heavily stained or repaired floors can take 2–3 days.
You’ll want quotes, warranties, and references.
Time Estimates for DIY vs. Professional Jobs
Wondering whether to tackle travertine cleaning yourself or hire a pro?
You can DIY routine cleaning and light resealing for small areas in a few hours across a weekend, including drying.
Deep cleaning, honing, or large reseal jobs take a full day or more and may exceed your tools and time.
Hire pros for speed, guaranteed results, and complex restoration.
Choosing and Vetting a Floor Care Professional
If you decide the job’s beyond your tools or time, choosing the right floor care pro matters.
Get multiple quotes, compare services and warranties, and ask for references and photos of similar travertine work.
Confirm insurance, certifications, and estimated timelines.
Expect cost variations based on restoration vs. routine cleaning.
Hire a pro when damage, sealing, or heavy restoration exceeds your skill or available time.
Frequently Asked Questions
You probably have quick questions about what cleaners and methods are safe for travertine, so let’s answer them.
You’ll learn whether vinegar, bleach, or steam are okay, how often to seal, what removes coffee, oil, or wine stains, and if polishing will change the stone’s look.
Keep these FAQs handy for everyday care and troubleshooting.
Can I use vinegar or bleach on travertine?
Why risk it? You shouldn’t use vinegar or bleach on travertine.
Acidic vinegar etches the stone and dulls the finish; bleach can discolor pores and break down sealers.
Instead, use a pH-neutral cleaner formulated for natural stone and blot spills promptly.
If unsure, test any product in an inconspicuous spot and consult your stone supplier or a professional for guidance.
How often should travertine be sealed?
How often should travertine be sealed? You should seal new travertine after installation, then reseal routinely. For floors, apply a fresh coat every 1–2 years; high-traffic or porous pieces may need sealing annually. Check by sprinkling water—if it soaks in, reseal. Use a penetrating sealer and follow manufacturer instructions for best protection and longevity.
What removes coffee, oil, or wine stains from travertine?
After sealing keeps most spills from penetrating, you’ll still want to act fast on coffee, oil, or wine to prevent stains.
Blot liquids immediately with a soft cloth; don’t rub. For oil, use a gentle stone soap or a pH-neutral degreaser.
For stubborn stains, apply a poultice made from baking soda and water, cover, let dry, then gently lift residue and rinse with clean water.
Will polishing travertine change its natural look?
Will polishing travertine noticeably change its natural look?
Polishing enhances shine and smooths surface imperfections, but it won’t alter the stone’s inherent color or veining when done correctly.
You’ll retain the natural character while gaining a glossier finish.
Choose a professional or proper-grade polish to avoid over-buffing, and test a small area first to confirm the desired sheen.
Is steam cleaning safe for all travertine finishes?
Curious if steam cleaners are safe for your travertine? You shouldn’t use steam on unsealed, honed, or filled travertine because heat and moisture can open pores, damage fillers, and strip sealers.
Low-heat steam may be okay on well-sealed, polished surfaces if manufacturer-approved, but test a hidden spot first.
When in doubt, stick to pH-neutral cleaners and professional advice.