
How to Clean Vinyl Plank Floors Without Leaving Streaks or Residue
Sweep or vacuum to remove grit, then mop with a well-wrung microfiber flat mop and a diluted pH‑neutral cleaner (or 1 cup vinegar per gallon water). Work along the plank direction, rinse with clean water if you used vinegar or a commercial solution, and dry immediately with a microfiber cloth to prevent film and streaks. Avoid wax, harsh cleaners, steam mops, and excess water. Keep up regular maintenance and you’ll learn tips for deep cleaning and stubborn residue removal.
How to Clean Vinyl Plank Floors Without Leaving Streaks or Residue
You’ll get a simple, three-step method that removes dirt and dries streak-free so your vinyl looks its best.
This guide’s for busy homeowners and pet owners who want quick, reliable results without special tools.
Follow the steps and you’ll see a clean, residue-free finish every time.
Best Method in 3 Steps
Follow three simple steps and your vinyl plank floors will come clean without streaks or sticky residue.
First, sweep or vacuum to remove grit.
Next, mop with a diluted pH-neutral cleaner and warm water—wring the mop so it’s damp, not soaking.
Finally, dry with a microfiber cloth or towel, buffing in long strokes to eliminate any remaining moisture or streaks.
Who this guide is for and expected results
Anyone with vinyl plank floors who wants a quick, reliable routine will find this guide useful.
You’ll get straightforward steps suited to busy homeowners, renters, and small businesses. Follow the method to remove dirt, prevent streaks, and avoid residue.
Expect consistently clean, matte-looking floors after each session, with tips to maintain finish and extend flooring life between deeper cleanings.
Basic Understanding of Vinyl Plank Floors
Vinyl plank flooring is a layered, waterproof material with surfaces that range from smooth to textured or embossed. You should know which type you have before cleaning.
Streaks and residue usually come from film buildup—leftover soap, hard-water minerals, wax, or damaged finish—that sits on the surface instead of coming off. Your cleaning frequency and the products you use directly affect the finish, so using the right cleaner at the right interval will help prevent buildup and protect the wear layer.
What vinyl plank flooring is and common surface types
Think of vinyl plank flooring as a practical, water-resistant alternative to wood that’s made from layered PVC and designed to mimic natural materials.
It’s durable, easy to maintain, and comes in several surface types you’ll want to know about. You’ll find smooth, embossed, and textured finishes plus matte, semi-gloss, and high-gloss coatings—each affects appearance, slip-resistance, and how dirt shows, so pick cleaning methods accordingly.
Why streaks and residue happen (film buildup, soap, hard water, wax, finish damage)
Residue and streaks form when films build up on the surface or the finish gets compromised, and they can come from several common sources you mightn’t expect.
Soap and detergent build up into a cloudy film, hard water leaves mineral deposits, old wax or polish smears, and abrasive cleaners or scrubbing can dull or damage the factory finish, making streaks more visible.
How cleaning frequency and products affect finish
Those streaks and films won’t just disappear on their own, and how often you clean plus which products you use will determine whether your floor’s finish holds up or degrades.
Clean regularly with a microfiber mop and pH-neutral cleaner to remove grit without stripping protectant.
Avoid oil soaps, waxes, and abrasive scrubs; they leave residue or dulling buildup.
Rinse and dry to prevent streaks.
Tools and Supplies You Need
Before you start cleaning, gather the right tools—microfiber mop, soft broom, bucket, and a gentle spray bottle—and pick safe cleaners like pH-neutral commercial solutions or a simple DIY mix of water and mild dish soap or vinegar in dilution.
You’ll also want a soft cloth for spot cleaning and a nonabrasive scrubber for stuck-on grime.
Avoid harsh cleaners, wax, bleach, or abrasive pads that can damage the vinyl finish.
Recommended cleaning tools
To clean vinyl plank floors effectively, you’ll want a few reliable tools: a soft-bristle broom or microfiber dust mop for daily debris, a vacuum with a hard-floor setting (no beater bar), a damp microfiber mop for regular mopping, a bucket or spray mop for solution delivery, and gentle, pH-neutral cleaners designed for vinyl.
- Microfiber mop
- Soft-bristle broom
- Vacuum (hard-floor setting)
Safe cleaning solutions and ingredients (commercial and DIY)
You’ll want cleaning solutions that remove dirt without harming the vinyl’s finish, so choose pH-neutral commercial cleaners or simple DIY mixes made from gentle ingredients.
Test any product in a hidden spot first. Use diluted solutions and microfiber mops to avoid excess water.
- 1 cup warm water + few drops mild dish soap
- 1 cup water + 1/2 cup white vinegar (occasional)
- Commercial pH-neutral cleaner per label
Products and ingredients to avoid (harsh cleaners, wax, abrasive pads)
While some cleaners promise a deep shine, avoid harsh solvents, abrasive pads, and waxes that can dull, lift, or permanently damage vinyl plank floors; instead, pick gentle, pH-neutral products and soft microfiber tools.
Don’t use anything that strips finish or leaves residue.
Avoid:
- Bleach, ammonia, or solvent-based cleaners
- Wax or oil-based polishes
- Steel wool or rough scrubbing pads
Step-by-Step Cleaning Process
Start by sweeping or vacuuming to remove grit and loose debris so you won’t scratch the planks.
Next you’ll pick a cleaner and mix it to the manufacturer’s ratio, then mop with the right mop, wring it well, and work in the plank direction to avoid streaks.
Finish by rinsing and drying promptly to prevent residue, and tackle stubborn spots with targeted stain methods as needed.
Step 1 Preparation: dusting and removing debris
Before you mop, remove loose grit and dust so you don’t grind particles into the vinyl when cleaning. Start by clearing furniture paths and picking up debris.
Then:
- Sweep or use a dust mop, working toward exits.
- Vacuum with a soft-floor setting for edges and corners.
- Spot-check for sticky residue and pre-treat with a damp microfiber cloth before mopping.
Step 2 Choosing and diluting the right cleaner
Now that dust and grit are out of the way, pick a cleaner that’s safe for vinyl plank floors and mix it correctly.
Read labels, avoid harsh chemicals, and measure precisely to prevent residue. Choose a mild pH-neutral cleaner and dilute per instructions.
Test a small area first.
- Use pH-neutral cleaner
- Follow manufacturer dilution
- Test inconspicuous spot first
Step 3 Mopping technique to avoid streaks (mop type, wringing, direction)
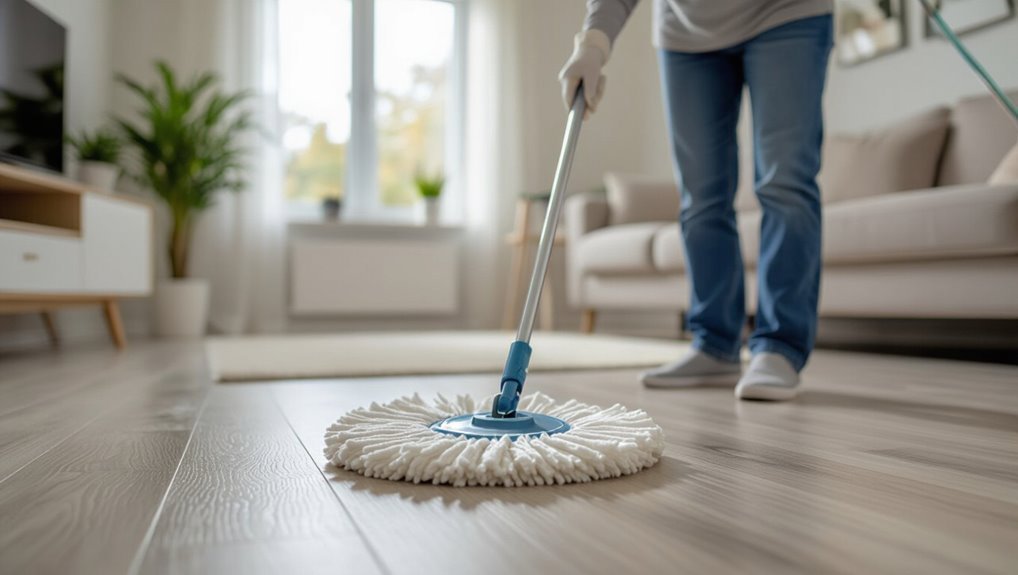
1. Choose a flat microfiber mop, not a string or sponge one. Dip, then wring thoroughly so the mop’s damp, not wet.
Mop with the grain or longest plank direction in overlapping strokes, using light pressure. Rinse the mop pad often in clean solution and wring again to avoid re-depositing dirt.
Finish each section before moving on.
Step 4 Rinsing and drying to prevent residue (tools and timing)
Although rinsing and drying might feel like extra steps, they’re essential to prevent cleaner residue and streaks on vinyl plank floors.
Rinse with clean water, change it often, and dry promptly to avoid film.
Use:
- Microfiber mop or flat cloth for rinsing
- Absorbent dry microfiber or towel for drying
Work in small sections, finishing each in under 2–3 minutes to prevent streaks.
Step 5 Spot cleaning stubborn marks (stain-specific methods)
Once you’ve rinsed and dried each area, tackle stubborn marks with targeted spot-cleaning so you don’t overwork the whole floor.
Dab spills immediately, test solutions in an inconspicuous spot, and work gently.
- Ink: apply rubbing alcohol, blot, rinse.
- Grease: use dish soap solution, scrub lightly, rinse.
- Scuffs: use a melamine sponge, rub gently, dry.
Deep Cleaning and Residue Removal
You should deep clean vinyl planks only when regular maintenance (sweeping and mopping) doesn’t remove dulling film or sticky spots.
For stubborn soap scum, oily residue, or greasy build-up, try targeted solutions like diluted vinegar, isopropyl alcohol, or a commercial degreaser, testing a small, hidden area first.
Always follow product instructions and rinse thoroughly to avoid leaving new residue.
When to deep clean vs regular maintenance
How do you know when your vinyl plank floor needs a deep clean instead of just regular maintenance?
If dirt accumulates despite weekly sweeping, high-traffic areas look dull, or visible sticky spots and ground-in grime resist routine mopping, schedule a deep clean.
Deep cleaning restores appearance and removes embedded soils; stick to regular maintenance after to prevent recurrence.
Removing stubborn film, soap scum, or oily residue
Tackle stubborn film, soap scum, or oily residue by starting with a simple test: dampen a microfiber cloth with warm water and rub a small, inconspicuous area—if grime smears or lifts, it’s surface residue you can remove with targeted cleaners; if it barely budges, you’ll need a stronger, manufacturer-safe solution and more elbow grease.
- Use a soft-bristled brush for gentle agitation
- Rinse frequently with clean water
- Dry thoroughly to prevent re-deposition
Using vinegar, alcohol, or commercial degreasers safely
If warm water and a soft brush didn’t lift the film, it’s time to step up to stronger cleaners—vinegar, isopropyl alcohol, or a commercial degreaser—but you’ll want to use them carefully to protect the vinyl finish.
Test a hidden spot, dilute vinegar (1:4), use 70% alcohol sparingly, and follow degreaser instructions.
Rinse thoroughly, dry, and ventilate to avoid residue or damage.
Comparison of Popular Cleaning Methods and Products
You’ll want to weigh DIY cleaners against commercial formulas for cost, effectiveness, and possible residue.
Consider steam mops carefully—used correctly they sanitize, but too much heat or moisture can warp planks, so follow safe-use guidelines.
Also compare microfiber, sponge, and string mops for streaking and drying time to pick what keeps your vinyl looking best.
DIY cleaners vs commercial cleaners
Curious which approach will save you time, money, and hassle: DIY cleaners or commercial products? You’ll find DIY mixes (vinegar, water, mild soap) are cheap and customizable but need testing for residue. Commercial cleaners promise streak-free formulas and convenience but cost more. Pick based on floor finish, budget, and sensitivity to scent.
| DIY | Commercial |
|---|---|
| Low cost | Convenient |
| Customizable | Formulated for vinyl |
| Test first | Consistent results |
Steam mops: pros, cons, and safe usage guidelines
DIY mixes and commercial cleaners both focus on chemical solutions for vinyl, but steam mops offer a very different approach by using heat and vapor to loosen dirt without detergents.
You’ll get fast sanitizing and minimal drying time, but high heat can warp planks or damage finish.
Use low-steam settings, test a hidden area, avoid excess moisture, and follow manufacturer recommendations.
Microfiber mop vs sponge mop vs string mop (effect on streaks)
While each mop type can clean vinyl plank floors, they’ll leave noticeably different streak patterns and finishes, so pick the one that matches your priorities:
Microfiber traps dirt, uses less water, and leaves minimal streaks when damp and rinsed often.
Sponge mops absorb spills but can smear residue and streak if overly wet.
String mops handle heavy messes but risk streaks and water pooling unless thoroughly wrung.
Common Mistakes That Cause Streaks or Damage
Don’t overload your mop with soap or concentrated cleaners, because residue will leave streaks and attract dirt.
Avoid waxes, polishes, or oil-based products that can build up or damage the wear layer.
Also skip standing water, dry promptly, and never use abrasive pads or brushes that can scratch the planks.
Overuse of soap or concentrated cleaners
If you use too much soap or a concentrated cleaner, residue builds up and leaves streaks, dullness, or a slippery film on vinyl plank floors.
Use diluted, manufacturer-approved solutions and follow label directions. Rinse or mop again with plain water to remove leftover cleaner.
Spot-test new products and avoid frequent heavy dosing—less cleaner equals clearer, safer floors and fewer long-term buildup problems.
Using wax, polish, or oil-based products
Because vinyl plank floors have a protective wear layer, you don’t need wax, polish, or oil-based products—using them can leave cloudy streaks, make the surface slippery, and attract dirt that’s hard to remove.
Don’t apply residues hoping for shine; they build up unevenly, dull the finish, and complicate maintenance.
Use manufacturer-approved cleaners and a microfiber mop for safe, streak-free care.
Excess water, improper drying, and abrasive tools
When you let too much water sit on vinyl planks, fail to dry them quickly, or scrub with abrasive tools, you’ll end up with streaks, warping, or surface scratches that shorten the floor’s life.
Wring mop heads, use damp—not wet—mopping, dry with microfiber towels or a fan, and avoid steel wool or stiff-bristled brushes to preserve finish and prevent moisture damage.
Prevention and Best Practices
Keep a simple routine maintenance schedule so dirt and spills never have time to harm your vinyl.
Use protective measures like doormats, furniture pads, and a humidifier or dehumidifier to keep conditions stable.
Also plan seasonal checks and minor repairs to preserve your floors long-term.
Routine maintenance schedule
To protect your vinyl plank floors and avoid costly repairs, set a simple routine you can stick to:
- Sweep or vacuum daily to remove grit that scratches the surface.
- Damp-mop weekly with a pH-neutral cleaner, wringing the mop until barely damp.
- Spot-clean spills immediately with a soft cloth to prevent staining and adhesive breakdown.
Stick to this schedule to keep floors clean and streak-free.
Protective measures (mats, furniture pads, humidity control)
A few simple protective measures can extend the life of your vinyl plank floors and prevent common damage.
Place low-moisture mats at entrances to trap grit, and use breathable runners in high-traffic areas.
Add felt pads under furniture legs and replace them when worn.
Maintain indoor humidity between 35–55% to minimize expansion or shrinkage and avoid placing wet potted plants directly on the floor.
Seasonal care and long-term preservation tips
You’ve already reduced wear with mats, pads, and humidity control—now focus on seasonal routines that prevent damage before it starts.
In spring and fall, deep-clean gently, inspect seams and edges, and trim pet nails.
In winter, prevent grit buildup from boots; in summer, avoid prolonged sun exposure with blinds or rugs.
Schedule annual checks and reapply manufacturer-recommended sealers when needed.
Quick Troubleshooting Guide
If your floor looks cloudy after cleaning, try step-by-step fixes like rinsing with clean water and buffing dry.
If the finish seems dull or sticky, you can restore it with a suitable vinyl polish or a mild stripping and recoat process.
Call a professional when stains, warping, or persistent residue won’t respond to these home remedies.
If floor looks cloudy after cleaning step-by-step fixes
Though cloudy residue can look like permanent damage, it’s usually fixable with a few targeted steps; first rinse with clean water and microfiber mop to remove soap buildup.
If haze remains, mix equal parts white vinegar and water, mop lightly, then rinse again. Dry with a soft towel.
For persistent cloudiness, repeat once and skip harsh cleaners to avoid surface wear.
If finish appears dull or sticky restoration options
When the finish looks dull or feels tacky, don’t panic—start by checking for residue from cleaners or wax buildup that you can remove with a gentle rinse and microfiber mop.
If residue persists, dilute a pH-neutral vinyl cleaner and spot-clean, then dry thoroughly.
For minor wear, apply a manufacturer-approved restorative polish sparingly; test first in an inconspicuous area to confirm compatibility.
When to call a professional
Before you call a pro, try simple checks—confirm the odor, swelling, deep scratches, or loose planks aren’t from surface issues you can fix yourself.
Call a professional if you notice persistent warping, water damage affecting subfloor, widespread adhesive failure, or structural gaps between planks.
Also hire help when stain or finish restoration needs sanding, replacement, or manufacturer warranty inspection.
FAQ
You probably have a few quick questions about cleaning vinyl plank floors, like whether vinegar is safe or if steam mopping will cause damage.
You’ll also want to know how often to deep clean, which mop type prevents streaks, and how to remove adhesive or wax residue without harming the finish.
Below are concise answers to each of these common concerns.
Can I use vinegar to clean vinyl plank floors?
Curious whether vinegar’s natural cleaning power is safe for vinyl plank floors? Yes — you can use a diluted solution (about 1 cup white vinegar to 1 gallon of warm water) for regular cleaning.
Don’t use undiluted vinegar or abrasive scrubbing. Rinse or mop with plain water afterward to remove any acidic residue, and spot-test first in an inconspicuous area to confirm finish compatibility.
Will steam mopping damage my vinyl planks?
Wondering if steam mops are safe for your vinyl planks?
You should avoid them for most luxury vinyl planks: high heat and moisture can warp seams, delaminate layers, or loosen adhesive.
If your floor’s manufacturer explicitly approves low-heat steam cleaning, follow their instructions and use minimal steam.
Otherwise, stick to damp mopping with recommended cleaners to protect finish and warranty.
How often should I deep clean vinyl plank flooring?
How often should you deep clean vinyl plank flooring?
Deep clean every 3–6 months, depending on traffic, pets, and spills. High-traffic or pet homes may need monthly deep cleans; low-traffic areas can wait toward six months.
Deep cleaning includes removing surface dirt, using manufacturer-approved cleaners, and addressing stubborn grime.
Regular light maintenance between deep cleans keeps floors looking their best.
What is the safest mop type to prevent streaks?
Which mop will give you streak-free vinyl plank floors? A microfiber flat mop is safest: it traps dirt, uses minimal water, and won’t scratch.
Choose a low-sheen, non-abrasive pad and wring it well to avoid excess moisture. Avoid string mops and harsh scrubbers.
For routine care, a damp microfiber mop with a gentle, pH-neutral cleaner prevents streaks and protects the finish.
How do I remove adhesive or wax residue without harming the floor?
If adhesive or wax residue’s left behind, you can remove it safely by using gentle solvents and soft tools that won’t damage the wear layer.
Test a small area first. Use citrus-based adhesive remover or isopropyl alcohol sparingly, apply with a microfiber cloth, and rub gently.
For stubborn spots, soften with warm water, scrape with a plastic scraper, then wipe dry to avoid staining.