How to Install Pergo Laminate Flooring Step by Step
You can install Pergo laminate yourself in a weekend if you’re handy: clear the room, remove trim, test moisture, and acclimate planks 48 hours. Lay underlayment perpendicular to planks, use spacers for an expansion gap, click-lock each row with a tapping block, and stagger end joints 8–12 inches. Trim last row to fit, reinstall trim, and maintain humidity 35–65%. Follow these steps and tips for a smooth job—keep going to learn detailed tricks and fixes.
Can You Install Pergo Laminate Flooring Yourself?
You can usually install Pergo laminate yourself in a weekend if you’re handy and the subfloor is in good shape.
Hire a pro if the layout is complex, the subfloor needs major repairs, or you want a guaranteed warranty and perfect finish.
We’ll outline what tasks are reasonable for DIY and when to call an expert.
One-sentence summary of feasibility and time estimate
Although it takes some patience and basic tools, you can install Pergo laminate flooring yourself in most rooms. A typical DIYer will finish a 200–400 sq ft space in a weekend (12–20 hours) once layout and acclimation are accounted for.
If you’re wondering how do I install Pergo laminate flooring, plan time for prep, simple cuts, snapping boards, and cleanup—no special skills required.
When to hire a pro vs. DIY
Whether you’re a confident DIYer or prefer leaving major projects to a pro, decide based on room complexity, your skill level, and how much time you can commit.
If the space has many cuts, stairs, or moisture issues, hire a pro.
If it’s a straightforward room, you have tools and patience, and want savings, tackle it yourself—just plan, practice, and allow extra time.
What Is Pergo Laminate Flooring and Why Choose It?
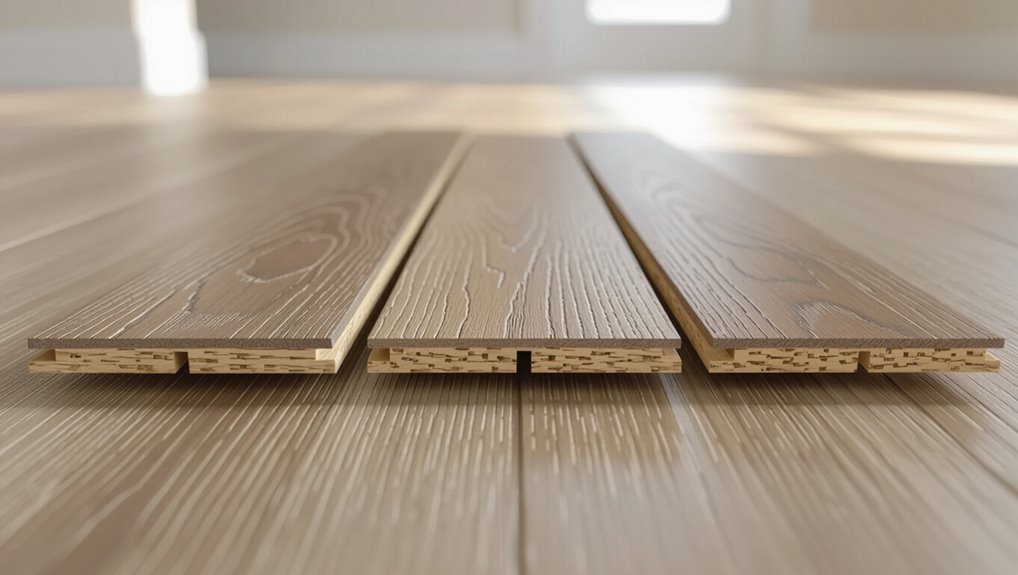
Pergo laminate is a multi-layer floor with a tough wear layer, a printed surface that mimics wood or stone, and a dense core that clicks together for floating installation.
You’ll find it durable, affordable, and relatively easy to install compared with solid hardwood.
Keep in mind it’s not waterproof in most styles and works best in living rooms, bedrooms, and hallways rather than wet areas like bathrooms.
What Pergo laminate is (construction, surface, core)
Laminate flooring like Pergo is a multi-layered product engineered for durability and easy maintenance. Understanding its construction helps you pick the right style for your home.
You’ll see a tough wear layer protecting against scratches, a high-resolution decorative print for wood or stone looks, and a rigid core—HDF or SPC—for stability and moisture resistance, with a backing layer that balances the board.
Benefits (durability, cost, installation ease)
Knowing how Pergo is built makes it easier to see why people pick it for their homes. You’ll enjoy tough wear, affordable pricing, and quick DIY installs.
Pergo gives real-world value:
- Durable wear layer resists scratches and stains.
- Lower cost than hardwood with similar looks.
- Click-lock system speeds installation and reduces labor.
Limitations and room suitability
While Pergo offers many advantages, it isn’t ideal for every space—so you should weigh its limits before committing.
You’ll avoid it in high-moisture areas unless you choose water-resistant lines; prolonged standing water can swell joints.
It’s less sound-absorbing than carpet and can feel harder underfoot.
Also check subfloor flatness and temperature extremes, since gaps or buckling may occur without proper prep.
Tools, Materials, and Preparations
Before you start, gather the required and optional tools—like a tapping block, pull bar, saw, and spacers—and the materials and consumables such as underlayment, connector strips, and trim.
Check your subfloor type, moisture levels, and flatness so you can address any issues beforehand.
Finally, calculate how many boards and extras you’ll need, allowing for a waste percentage when you order.
Required tools and optional helpful tools
You’ll want to gather the right tools and a few helpful extras before you start laying Pergo so the job goes smoothly and safely.
- Tape measure, pencil, square — for accurate layout and cuts.
- Rubber mallet, tapping block, pull bar — to secure joints without damage.
- Circular saw or jigsaw, miter box — for precise plank trimming and obstacles.
Materials and consumables (underlayment, spacers, transition strips, trim)
Because the right materials make installation easier and protect your new floor, gather quality underlayment, spacers, connector strips, and trim before you begin.
You’ll also need adhesive-free threshold strips for doorways and height changes. Match trim color to planks and buy extra spacers.
- Underlayment
- Spacers
- Threshold strips and trim
Pre-installation checks (subfloor type, moisture, flatness)
Start by confirming your subfloor type, moisture levels, and flatness so you can choose proper prep and avoid failures down the line.
- Test moisture: use a meter on concrete/wood; mitigate high readings.
- Check flatness: roll a straightedge and fill low spots over 3/16″ per 10′.
- Identify type: plywood, OSB, concrete or existing vinyl affects underlayment and fastening.
How to calculate materials and order extra (waste percentage)
When figuring materials for Pergo laminate, calculate the room area, add a waste allowance (typically 7–10% for straight runs, 10–15% for angled layouts or pattern matching), and convert to full-pack quantities so you don’t run short mid-job. Measure accurately, round up to packs, and order extra for cuts and mistakes.
| Item | Measure | Packs |
|---|---|---|
| Room sqft | ||
| Waste % | ||
| Pack coverage | ||
| Total packs | ||
| Extra packs |
Site Preparation and Acclimation
Clear the room and remove baseboards and thresholds so you can work unimpeded and get accurate measurements.
Test concrete or wood subfloors for moisture and address any issues before laying planks.
Let the Pergo boards acclimate in the installation room for the manufacturer‑recommended time and conditions to prevent gaps or buckling.
Clearing the room and removing baseboards/thresholds
Before laying any planks, remove furniture and decor so you can move freely and avoid damage; take out baseboards and thresholds carefully with a pry bar and putty knife so you preserve them for reinstallation.
Label each piece and store trim flat. Pull nails, clean the exposed edges, and check connections for level.
Keep spare screws, shims, and caulk handy for refitting later.
Moisture testing for concrete and wood subfloors
Concrete and wood subfloors need thorough moisture testing so your Pergo laminate won’t warp or delaminate after installation.
You’ll measure and address moisture before laying planks.
- Use a moisture meter: check concrete with a calcium chloride test or a relative humidity probe for accuracy.
- For wood, measure MC (moisture content) with a pin meter.
- Fix high readings before proceeding.
Acclimating Pergo planks: time and conditions
While your subfloor and room reach proper moisture levels, let the Pergo planks acclimate in the installation space for at least 48 hours (72 hours is safer for wide or exotic-look boards).
Keep them flat, unopened, and stacked no more than two pallets high, with the room temperature steady between 60–80°F (15–27°C) and relative humidity around 35–65%.
After acclimation, open boxes, mix planks from different cartons, and inspect for defects before installing.
Underlayment and Subfloor Preparation
Next you’ll pick an underlayment that matches Pergo’s recommendations for moisture control, sound reduction, and thickness.
Check the subfloor for damage and level it — repair small dips or replace larger sections so your floor sits flat.
Finally, roll out the underlayment with seams butted or overlapped per product instructions, add a vapor barrier and tape seams where required before you start laying planks.
Choosing the right underlayment for Pergo
Because underlayment affects how your Pergo performs and feels, picking the right type matters: it cushions, reduces noise, and can provide moisture protection depending on your subfloor.
Choose based on your room needs and Pergo warranty:
- Foam — economical, basic cushioning.
- Cork — superior sound dampening, eco-friendly.
- Combination vapor barrier — for moisture-prone areas; follow manufacturer specs.
Repairing and leveling subfloors (minor to major fixes)
Before you lay any underlayment, assess and fix your subfloor so your Pergo goes down flat and stays that way; small dips, squeaks, or moisture issues can turn a straightforward install into a costly repair.
- Remove loose boards, secure squeaks with screws, and replace damaged panels.
- Fill low spots with leveling compound; sand high spots.
- Test moisture; repair leaks or install a vapor barrier if needed.
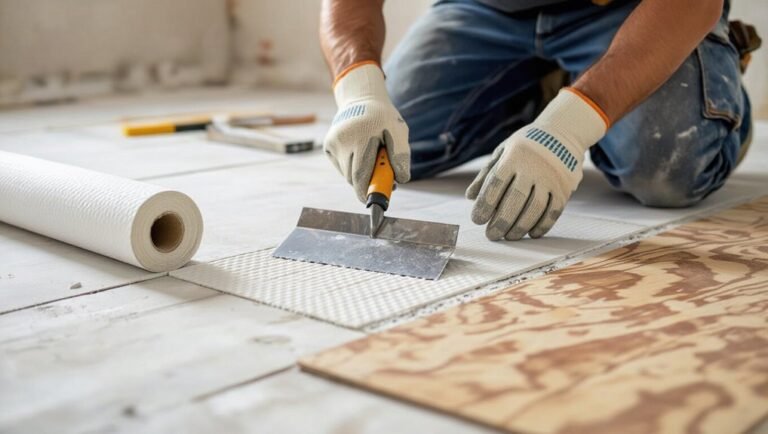
Laying underlayment correctly (seams, vapor barrier, taping)

1. Lay underlayment perpendicular to the boards’ direction, butt seams tightly without overlap unless manufacturer requires a vapor barrier.
If using a vapor barrier, overlap seams by recommended amount and tape with waterproof tape.
Run underlayment up walls slightly, trimming later.
Stagger seams from adjacent rows, smooth wrinkles, and keep underlayment clean and flat to guarantee stable, quiet flooring installation.
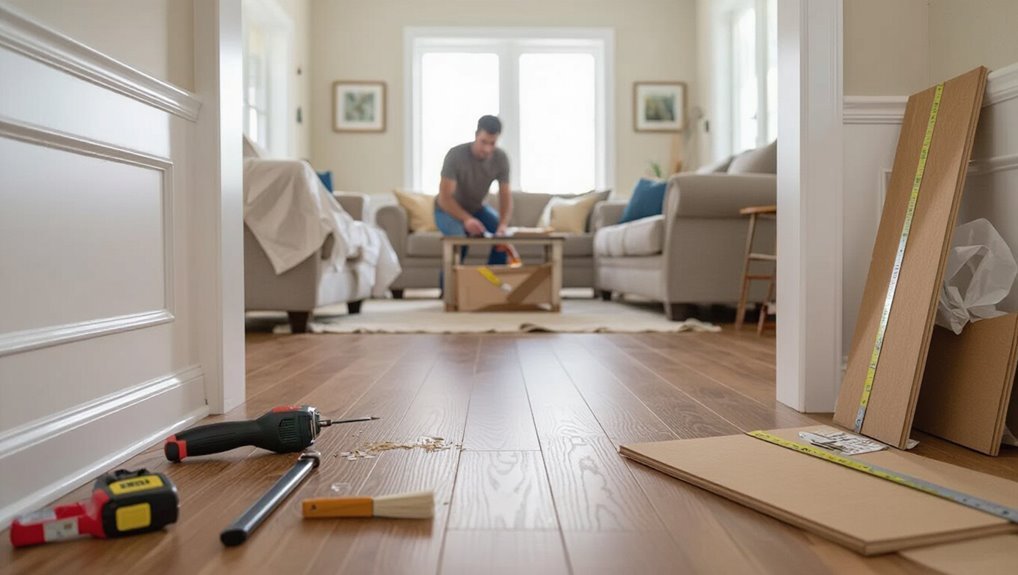
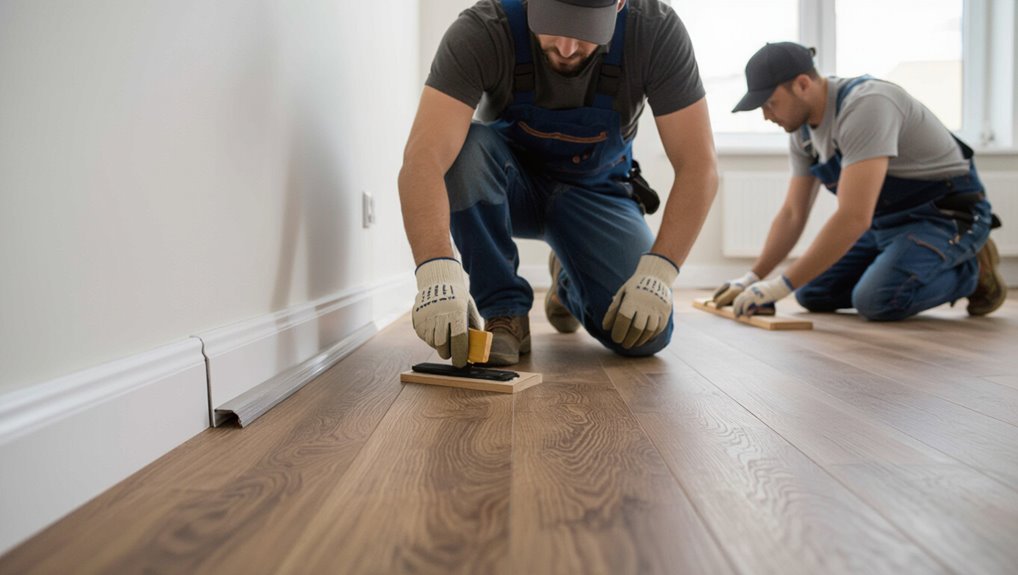
Step-by-Step Installation Process
Now you’ll follow a clear sequence: plan the layout and plank direction, measure and mark the first row, then cut planks safely with the right tools.
Install the first row keeping a proper expansion gap, and stagger joints as you continue row by row.
I’ll walk you through each step so you can work accurately and efficiently.
Step 1 Planning layout and direction of planks
Start by visualizing how the planks will run through the room, because plank direction affects appearance, perceived space, and how many cuts you’ll need.
Choose a direction that highlights light and room flow—typically parallel to the longest wall or toward a main window.
Sketch plank layout, note changes and doorways, plan expansion gaps, and identify focal areas to minimize awkward seams.
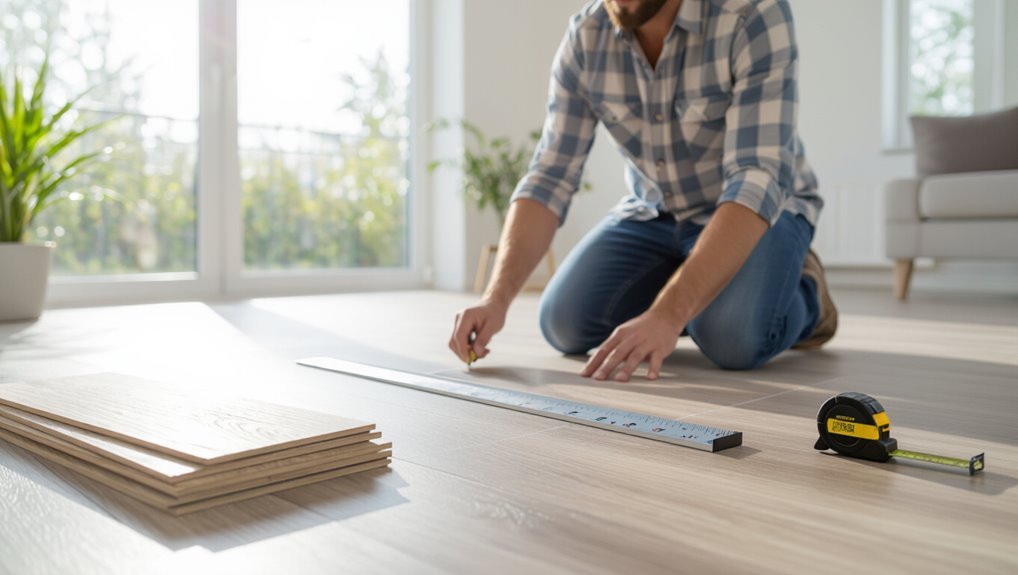
Step 2 Measuring and marking the first row
Measure twice and mark once: lay a straight chalk line or snap a guideline parallel to your starting wall, keeping the recommended expansion gap (usually 1/4″ to 3/8″) between the planks and the wall.
Align the tongue side to the line, mark plank ends for staggered joints, and check whole-row fit.
Adjust the layout so cut ends at walls are balanced and at least the minimum length.
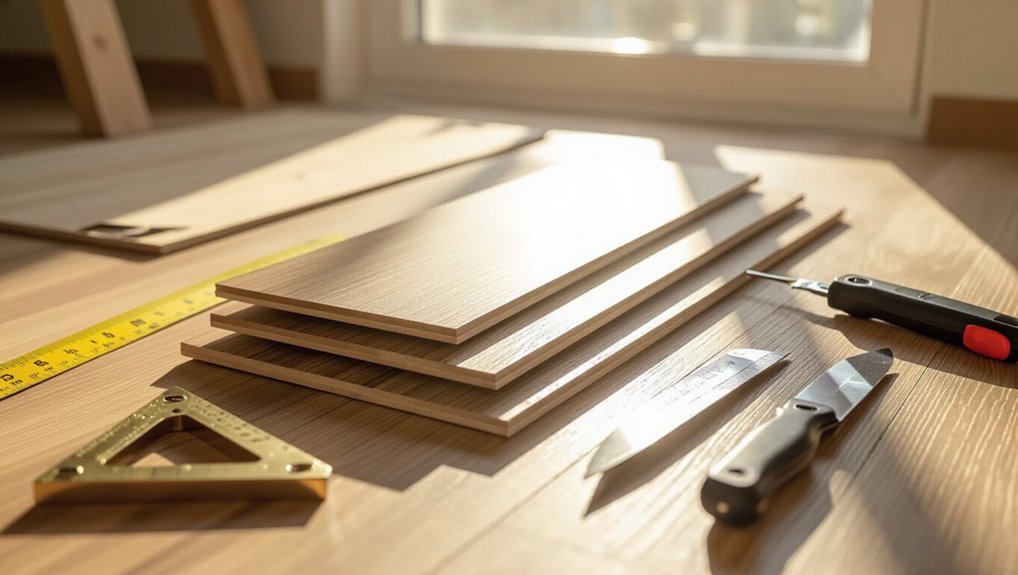
Step 3 Cutting planks safely (tools and techniques)
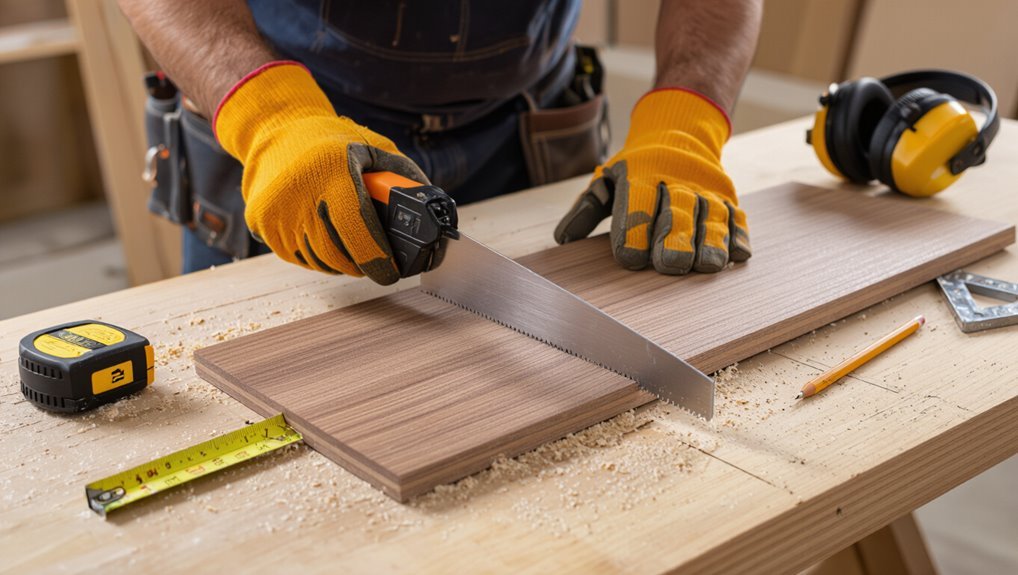
1. Gather a measuring tape, pencil, speed square, jigsaw or miter saw with fine-tooth blade, and safety gear.
Measure twice, mark cut lines on the tongue side, and clamp planks for stability.
Saw slowly to prevent chipping; score with a utility knife first for straight snaps on short pieces.
Deburr edges and check fit before proceeding.
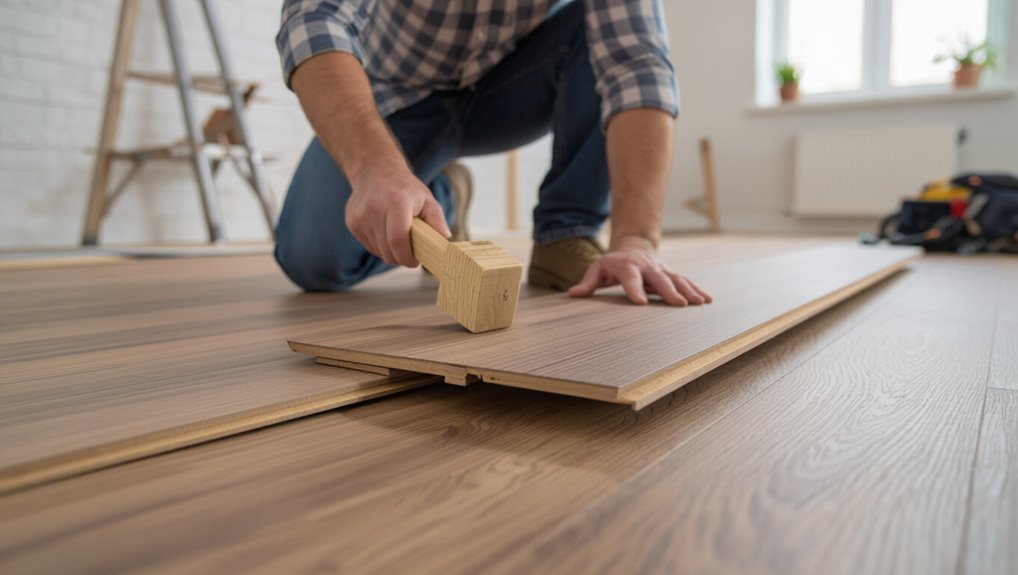
Step 4 Installing the first row and maintaining expansion gap
Before you lay the first plank, fit spacers along the wall to maintain a consistent expansion gap (usually 1/4″ to 1/2″ depending on manufacturer).
Then place the tongue side toward the wall and connect the boards end-to-end, tapping gently with a mallet and pull bar to lock seams tight while keeping the spacers in place.
Check alignment frequently, trim the final plank to fit, and remove spacers after the row is secure.
Step 5 Staggering joints and continuing installation row by row
Once you start the second row, stagger the end joints by at least 8–12 inches (or follow the manufacturer’s recommendation) so seams don’t line up.
Lock each plank into the previous row by angling and snapping the long edge, tapping gently with a mallet and pull bar as needed to keep joints tight.
Continue row by row, checking alignment, maintaining the expansion gap, and trimming last planks to fit.
Step 6 Fitting around doorways, vents, and irregular shapes
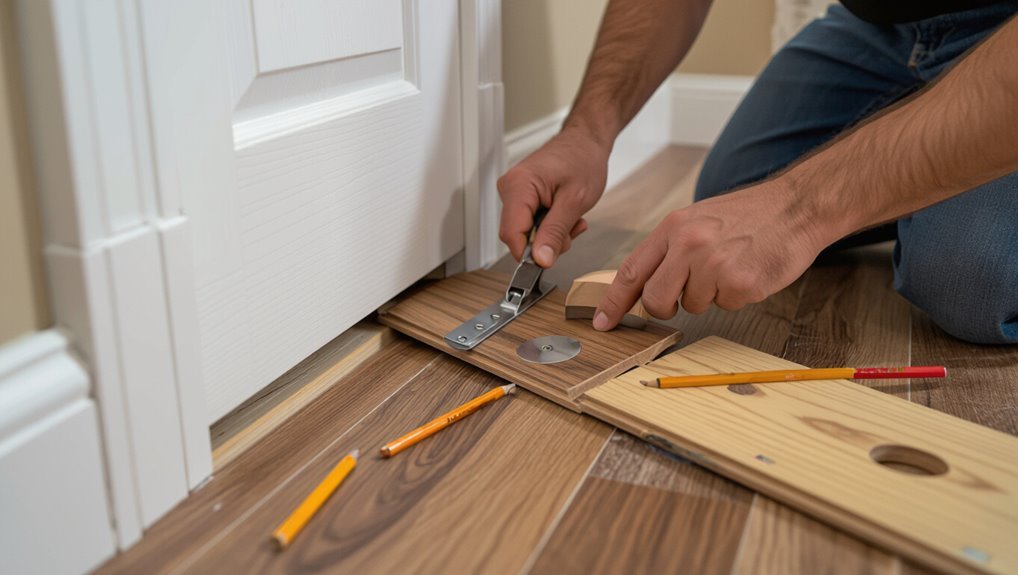
You’ll often need to cut and fit planks around doorways, vents, and odd shapes, so measure carefully, transfer those measurements to the plank, and cut with a jigsaw or multi-tool for clean, precise fits.
Remove trim if needed, dry-fit pieces, and use a coping saw for tight curves.
For vents, cut slightly undersized pieces to allow airflow and maintain expansion gaps.
Step 7 Installing the final row and removing spacers
Finish the last row by measuring carefully, cutting the planks to fit, and installing them with the tongue toward the wall so the locking edge stays intact.
Slide each piece into place, tapping gently with a pull bar for a tight fit.
Remove spacers after all planks are secure, checking gaps remain consistent.
Clean debris and inspect seams for any misalignment.
Step 8 Installing transitions, trim, and baseboards
Install the junction pieces, trim, and baseboards to give your floor a finished, professional look and to cover expansion gaps.
Measure and cut threshold strips for doorways and level changes, secure them per manufacturer instructions, and snap or screw them in place.
Nail or glue quarter-round and baseboards, leaving the required gap.
Caulk seams, touch up paint, and clean the floor.
Common Problems During Installation and How to Fix Them
You’ll likely run into a few common issues—gaps between planks, uneven seams or lippage, and clicking or loose joints—and you’ll want to know how to fix each one quickly.
Check installation alignment and underlayment first to correct gaps and lippage.
Tighten or reseat affected boards for clicking joints, and address any moisture problems immediately to prevent swelling or warping.
Below are practical troubleshooting steps and fixes for each problem.
Gaps between planks and how to correct them
1 common cause of gaps between Pergo planks is uneven subflooring or boards that weren’t fully clicked together during installation, and you can usually fix them without ripping out the floor.
First, work from the gap toward the nearest wall: release a few rows, re-seat the joints with a mallet and tapping block, add shims or underlayment where low, then re-lock rows tightly.
Uneven seams or lippage: causes and remedies
When seams don’t sit flush and one plank edge rides higher than the next, you’re dealing with lippage—an unevenness that’s both noticeable underfoot and bad for the floor’s longevity.
Causes include subfloor irregularities, improper tapping, or damaged plank edges.
Fix by checking and leveling the subfloor, replacing warped pieces, carefully re-seating joints with a pull bar, and ensuring correct expansion gaps.
Clicking or loose joints: troubleshooting
Hear that click? You’ll fix loose joints by checking plank alignment and securing profiles—re-seat panels, tap joints with a tapping block, and replace damaged pieces.
Make sure subfloor is flat and underlayment intact so boards sit evenly. Don’t force misaligned seams; release and realign rows.
Finish by inspecting edges for gaps and testing walk-over stability before trimming changes.
Dealing with moisture-related issues post-install
A click or loose seam can be fixed on the spot, but moisture problems can show up later and do more damage if you don’t act fast.
Inspect for buckling, cupping, or soft spots regularly.
Stop leaks, dry the area with fans/dehumidifiers, and remove affected planks.
Replace with acclimated, moisture-rated Pergo underlayment and maintain humidity between 35–55% to prevent recurrence.
Best Practices and Pro Tips for a Flawless Pergo Install
Plan your layout and cutting strategy to save time and keep seams straight, and handle planks gently to avoid chipping.
Leave proper expansion gaps and install correct connections now so your floor performs long-term.
Inspect joints and subfloor before finishing to document the install and protect your warranty.
Tips for speed and accuracy (layout, cutting, handling)
Because good layout and sharp cuts save you work later, start by mapping the room and planning plank runs before you open the boxes. Measure twice, mark once, and stagger end joints for strength.
Use a sharp saw and a straightedge for clean cuts. Keep planks organized by shade, handle edges gently, and work in small sections to maintain alignment and speed.
Long-term care considerations when installing (expansion space, transitions)
Once your layout and cuts are nailed down, think ahead to how the floor will behave over years of humidity changes and household traffic.
Leave proper expansion gaps at walls and around fixed objects, cover gaps with appropriate trim, and use flexible connections between rooms that accommodate movement.
Seal thresholds and entry points, and avoid rigid attachments that can restrict natural plank movement.
When to inspect and how to warranty-proof your installation
Before you cover the floor with furniture or finish trim, inspect every plank, seam, and edge so small defects or installation errors are caught while repairs are still easy and covered by warranty.
Document issues with photos, note batch numbers, and keep purchase receipts.
Follow Pergo’s installation checklist, register the product, and don’t ignore required acclimation, expansion gaps, or recommended adhesives to keep your warranty valid.
Cost, Timeframe, and Comparison Options
You’ll want to weigh typical DIY costs—materials, underlayment, and tools—against professional installation quotes to see what fits your budget.
Expect timeframes to range from a weekend for a small, experienced DIYer to several days for larger rooms or novices.
Also compare Pergo laminate to engineered hardwood and vinyl plank for durability, appearance, and long-term value before you decide.
Typical DIY cost breakdown vs. professional installation
Tackling Pergo laminate yourself can save you a sizable chunk of the budget, but you should know where those savings come from and what trade-offs you’re accepting in time and finish quality. You’ll pay for materials and tools; pros add labor and warranty. Decide if you want control or convenience.
| Emotion | DIY | Pro |
|---|---|---|
| Cost | Relief | Weight |
| Time | Investment | Relief |
| Finish | Risk | Confidence |
Time estimates for different room sizes and skill levels
If you’re weighing DIY savings against pro convenience, the next question is how long the job will take across different rooms and skill levels.
You’ll finish faster with experience; pros move quicker and cleanly.
Estimate times:
- Small room (100 sq ft): DIY 4–8 hrs, pro 2–4 hrs.
- Medium (200 sq ft): DIY 8–16 hrs, pro 4–6 hrs.
- Large/complex: DIY 1–3 days, pro 6–10 hrs.
Comparison: Pergo laminate vs. engineered hardwood vs. vinyl plank
While costs, installation time, and durability differ, choosing between Pergo laminate, engineered hardwood, and vinyl plank comes down to your priorities—budget, appearance, and how the floor will be used. You’ll find Pergo is cost-effective and quick, engineered hardwood looks premium but takes longer, and vinyl handles moisture best.
| Option | Cost | Timeframe |
|---|---|---|
| Pergo laminate | Low | Fast |
| Engineered hardwood | High | Moderate |
Mistakes to Avoid
Don’t skip acclimating your Pergo or testing for moisture — that’s a quick way to get buckling or warping.
Check that the subfloor is flat and use the correct underlayment, and always leave the recommended expansion gaps around the room.
Also use the proper tools and Pergo-approved adhesives or connectors instead of improvising with the wrong products.
Skipping acclimation or moisture testing
Because Pergo and subfloors expand and contract with humidity, skipping acclimation or moisture testing can lead to warped boards, gaps, or premature failure.
You should let unopened flooring sit in the installation room 48–72 hours and use a moisture meter on subfloor and plank samples.
Address high moisture with vapor barriers or correct remediation before installation to protect your warranty and guarantee a stable floor.
Ignoring subfloor flatness and underlayment requirements
If you skip checking subfloor flatness or ignore the underlayment specs, you’ll end up with visible dips, hollow spots, and premature wear that the click-lock system can’t hide.
You should level imperfections, repair squeaks, and choose the correct vapor barrier and foam underlayment Pergo recommends.
Proper preparation prevents noise, instability, and board damage, ensuring a durable, professional-looking installation.
Failing to leave adequate expansion gaps
Even after you’ve leveled the subfloor and picked the right underlayment, you still have to allow the laminated planks room to move.
If you skimp on expansion gaps at walls, doorways, or around pipes, the floor can buckle, buckle seams, or pop loose as humidity and temperature change.
Follow Pergo’s gap recommendations and use spacers to maintain consistent clearances during installation.
Using wrong tools or adhesives for Pergo systems
Choose the right tools and adhesives from the start—using the wrong saw, tapping block, or glue can damage Pergo’s click-lock joints, void warranties, and turn a straightforward install into a costly fix.
Use Pergo-approved cleaner, spacers, and tapping tools. Don’t substitute heavy-duty adhesives or silicone; they’ll prevent proper locking and complicate repairs.
Follow manufacturer tool and adhesive recommendations.
FAQ Frequently Asked Questions
You probably have a few quick questions about Pergo installation, so let’s answer the essentials.
We’ll cover whether you can lay it over existing flooring, the required expansion gap, when underlayment is needed, suitability for bathrooms or basements, and how to replace a damaged plank.
Read on for clear, practical answers you can use on your project.
Can Pergo be installed over existing flooring?
Wondering if you can install Pergo over your current floor? Yes—Pergo can often go over existing hard, flat surfaces like vinyl, tile, or wood.
You’ll need a smooth, level, dry subfloor and no loose or cushioned layers. Remove trims, check connections, and use recommended underlayment.
Don’t install over carpet or damaged, uneven surfaces; prep thoroughly for a durable result.
How much expansion gap is required for Pergo laminate?
How much room should you leave at the edges when installing Pergo laminate?
You should leave a 1/4 inch to 1/2 inch (6–12 mm) gap around walls, door frames and fixed objects for standard rooms.
For installations over larger areas or with significant temperature/humidity changes, follow Pergo’s specific guidelines—sometimes a 3/4 inch gap is recommended at long runs or changes.
Is underlayment always necessary with Pergo?
Those edge gaps help accommodate movement, but you’ll also want to contemplate whether underlayment is necessary for your Pergo installation.
You’ll usually need underlayment for moisture barrier, sound reduction, and minor subfloor leveling. Some Pergo lines include attached underlayment, so check the product.
If your subfloor is perfectly flat and dry and the planks have built-in backing, you might skip it.
Can I install Pergo in bathrooms or basements?
If you’re thinking of putting Pergo in a bathroom or basement, you can in many cases—but you’ll need to pick the right product and take moisture-control steps first.
Choose Pergo XP or other water-resistant lines, guarantee subfloor is dry and level, install recommended underlayment and vapor barrier, and maintain ventilation.
Avoid standing water and follow manufacturer moisture limits for warranty compliance.
How do I repair a damaged plank after installation?
Repairing a damaged Pergo plank is straightforward if you act quickly and use the right tools—start by identifying whether the plank can be patched or must be replaced.
Then gather a replacement plank (or matching repair kit), a tapping block, pull bar, utility knife, chisel, and adhesive if required.
Remove surrounding planks if needed, cut out the damaged piece, fit the new plank, glue or click it in, and finish by cleaning seams and leveling connections.