How to Remove Laminate Flooring Without Breaking the Planks
You can remove click‑lock laminate without breaking planks by working from an edge, removing baseboards and border strips, then gently disengaging joints row by row with a pry bar, tapping block, and rubber mallet. Support both ends of each plank as you lift and stack them flat with spacers. For glued spots, use low heat or solvent and a thin putty knife to ease seams. Keep pieces organized and labeled, and continue for tips on tricky sections and storage.
Can You Remove Laminate Flooring Without Breaking the Planks?
You can often remove laminate without breaking the planks if it was floated rather than glued.
Start by locating and releasing the edge or a connector piece, then gently unclick rows with a pry bar or puller to keep boards intact.
If the flooring was glued or the tongues are damaged, expect to sacrifice some planks.
Direct, concise summary of feasibility and main approaches
Although some sections come up easily, removing laminate without breaking the planks is possible but depends on how the floor was installed and its condition.
You can pry apart click-lock boards, cut glued sections near seams, or remove trim and start at an edge.
Ask how do I remove laminate flooring if unsure; use proper tools, patience, and gentle leverage to preserve most planks.
Basic Understanding What Is Laminate Flooring and How It’s Installed
Before you start removing boards, you should know what laminate is and how it’s installed so you can take it apart correctly.
Laminate comes in floating types like click-lock or glued seams, and fully glued-down sheets, each requiring different removal steps.
Also check for underlayment, threshold strips, and baseboards that may be holding the planks in place.
Types of laminate (floating, glued, click-lock, glued-down)
When you’re planning to remove laminate, it helps to know the main types—floating (including click-lock), glued, and glued-down—because each comes out differently and needs different tools and prep.
Floating click-lock lifts by disengaging joints; panels often come up intact.
Glued laminate bonds to substrate and may need solvent, heat, or scrapers.
Glued-down is toughest and might require heavy-duty removal methods.
Common installation components (underlayment, transition strips, baseboards)
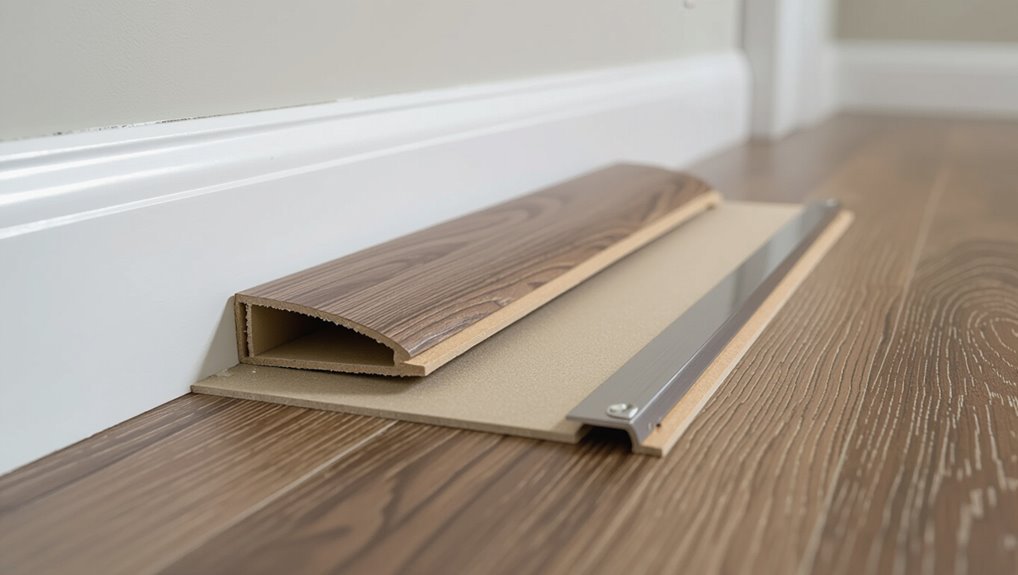
Knowing the type of laminate you’ve got helps, but you’ll also need to spot the parts that hold a floor together: underlayment, threshold strips, and baseboards.
You’ll remove baseboards with a pry bar to free plank ends, lift thresholds where they cover joints, and roll back thin or foam underlayment to expose subfloor.
Label pieces for reuse and avoid damaging adjacent trim.
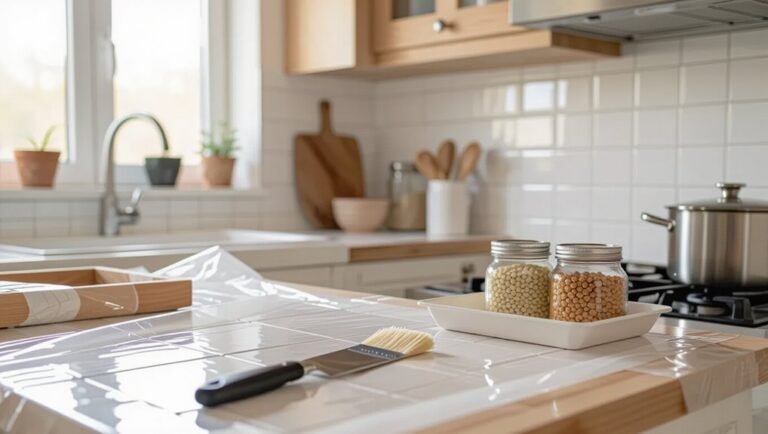
Tools and Materials You’ll Need
Before you start, gather the essential tools like a pry bar, hammer, utility knife, and a pair of pliers so you can remove boards and trim efficiently.
You’ll also want optional items such as a circular saw or oscillating tool for cutting stubborn sections, plus protective gear—gloves, safety glasses, and a dust mask—to keep yourself safe.
Having everything on hand saves time and prevents stops halfway through the job.
Essential tools list
If you want the job done cleanly and safely, gather a few basic tools and a couple specialty items before you start removing laminate flooring.
You’ll need sturdy, precise tools to lift planks without damage.
- Pry bar, rubber mallet, and tapping block.
- Utility knife, putty knife, and pull bar.
- Measuring tape, pencil, and small hammer.
Helpful optional tools and protective gear
Besides the basics, a few optional tools and proper protective gear will make the job faster and keep you safe—think knee pads, safety glasses, gloves, a dust mask, a shop vacuum, and a reciprocating saw or oscillating multi-tool for stubborn sections.
- Knee pads — protect knees during long work.
- Dust mask & glasses — prevent inhalation and eye injury.
- Shop vacuum — controls dust and debris.
Preparatory Steps Before Removal
Before you start pulling up boards, assess the floor type and any visible damage so you know what to expect.
Clear the room by removing furniture, appliances, and fixtures, and protect adjacent areas with drop cloths or tape.
Do basic safety checks—turn off nearby electrical circuits, watch for nails, and check for moisture before you begin.
Assessing the floor type and damage
While you might be keen to start ripping up boards, take a moment to identify the laminate type and the extent of damage so you can plan removal safely and efficiently.
Check for click-lock versus glued edges, water stains, warping, or delamination.
Note subfloor condition where visible and map damaged zones. That lets you choose tools, salvageable planks, and an efficient sequence.
Clearing the room and protecting adjacent areas
Start by emptying the room completely and removing furniture, curtains, and loose fixtures so you have unobstructed access to the floor you’ll be taking up.
Tape plastic or rosin paper over doorways and vents, seal gaps with painter’s tape, and lay drop cloths in adjacent rooms.
Protect baseboards and thresholds with cardboard strips to prevent dings while you work.
Removing furniture, appliances, and fixtures
Clear the space by moving all furniture, appliances, and fixtures out of the room or to the center and covering them—this gives you room to work and prevents damage when panels start coming up.
Disconnect and label cords, empty drawers and shelves, and remove lightweight items.
For large items, enlist help or use sliders.
Keep removed hardware and small parts in labeled bags.
Safety checks (electrical outlets, nails, moisture)
Before you begin prying up boards, check electrical outlets, exposed nails, and signs of moisture so you won’t create hazards or hidden damage—turn off power to the room at the breaker, tap down or remove any protruding fasteners, and inspect for stains, soft spots, or mildew that indicate subfloor issues.
Wear gloves and eye protection, use a moisture meter, mark damp areas, and plan repairs before removal.
Step-by-Step Removal Process (Non-Destructive)
Start by carefully removing baseboards and threshold strips so you can access the edges without damaging trim.
Find a practical starting point—usually the nearest wall or an access panel—and tap to loosen the first row, releasing click-lock joints as you go.
Then work the planks out sequentially, disengaging them without bending or snapping and gently handling any glued or stuck pieces.
Step 1 Remove baseboards and transition strips carefully
Pry off the baseboards and changeover strips gently to preserve them for reuse; you’ll need a putty knife to protect the wall or threshold and a pry bar to lever the pieces away without cracking the molding.
Work slowly along the run, prying a little at a time, removing nails or adhesive remnants, labeling sections as you go so reinstallation is straightforward and neat.
Step 2 Locate starting point: nearest wall or access panel
Choose a clear starting point along the nearest wall or an existing access panel so you can work toward the room’s exit and keep removed planks organized.
Inspect for loose or cut planks, seams, and underlayment edges. Pick a corner with easy access and minimal obstacles.
Plan a removal path that lets you stack planks in order and avoid crossing finished areas.
Step 3 Loosen the first row: tapping, unlocking click-lock joints
Once you’ve picked your starting corner, loosen the first row by tapping each plank toward the seam with a mallet and a scrap of wood to protect the edge.
Then lift the tongue from the groove to release the click-lock joints so planks come free without damage.
Work along the row, easing each connection; don’t pry or twist.
Keep tools aligned to avoid chipping edges.
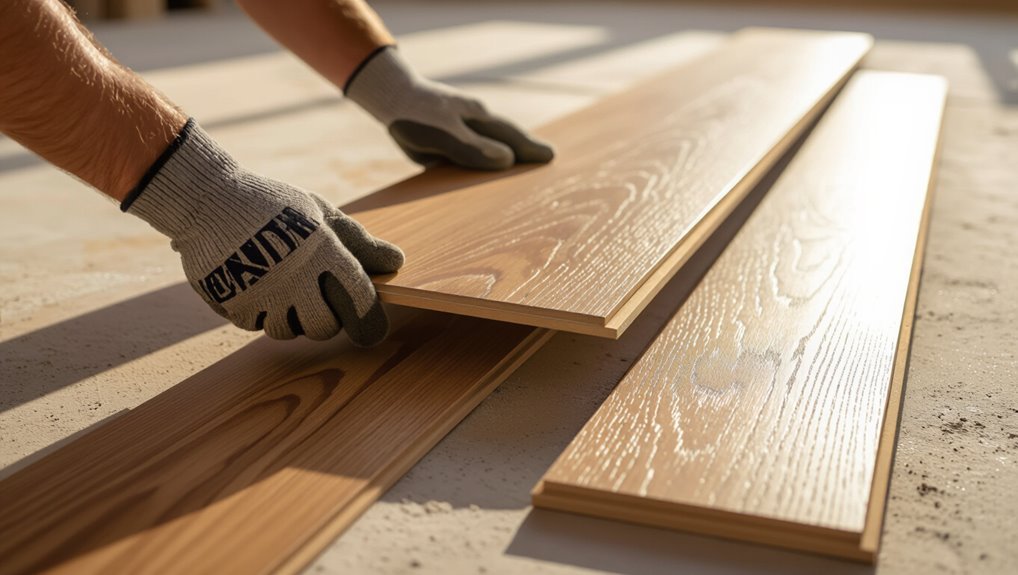
Step 4 Sequentially disengage planks without bending or snapping
Work methodically along the row, lifting each plank at the tongue end and sliding it gently out of the groove so you don’t force bends or stress the locking edges.
Keep the plank flat, support both ends, and move steadily toward the cut end.
Use a pry bar only at seams, avoid twisting, and set removed pieces aside in order to prevent damage and simplify reinstallation.
Step 5 Handling glued or stuck planks gently
If a plank’s stuck or glued down, don’t yank or pry aggressively; instead, soften the adhesive and release it gently so you preserve the tongues and grooves.
Use a heat gun on low or an adhesive solvent sparingly, test a hidden area first, then slide a thin spatula or putty knife under the seam, working gradually until the plank lifts without twisting or cracking.
Step 6 Managing butt joints, end caps, and stair nosing
Start at visible changes where butt joints meet end caps and stair nosing, and take your time to free each piece without forcing it.
Use a thin pry bar and putty knife to gently separate joints, working along seams. Unscrew or pop off end caps, easing adhesive spots with heat.
For stair nosing, release fasteners first, then wiggle and lift gradually to avoid chipping edges.
Step 7 Lifting and stacking planks for reuse or storage
Now that end caps and stair nosing are released, lift each plank carefully from the open seam, supporting both ends to prevent bending the click-lock profile.
Stack planks flat, alternating orientation to keep edges aligned. Wipe debris, label stacks by room and row, and place spacers between layers.
Store in a dry, climate-controlled area on a raised pallet to avoid warping.
Techniques for Specific Installation Types
You’ll use different techniques depending on how the laminate was installed: for floating click-lock floors you’ll disengage joints and slide boards apart, while glued panels often need solvents, heat, or mechanical prying to separate them.
When laminate is fastened to the subfloor with staples or nails, you’ll focus on removing those fasteners carefully to avoid damage.
In the next sections I’ll show specific tools and step sequences for each method.
Floating/click-lock systems unlocking joints and sliding techniques
When dealing with floating or click-lock laminate, you’ll release panels by working the joints rather than prying up whole boards—this protects the locking mechanisms and speeds removal.
Start at an edge, lift the short end slightly, tilt to disengage the profile, then slide panels apart along the seam.
Use a tapping block and gentle pressure to avoid chipping edges and keep planks reusable.
Glued laminate solvent, heating, and mechanical separation methods
For glued laminate you’ll need different tactics than for floating floors: solvents, heat, and mechanical separation each have pros and cons depending on the adhesive and substrate.
Test a solvent in an inconspicuous spot, use a heat gun to soften adhesive, and pry carefully with a floor scraper or pry bar.
Work slowly to preserve planks and avoid damaging the subfloor or finish.
Laminate over subfloor with staples/nails removing fasteners without damage
If glued planks gave you grief, removing staple- or nail-fastened laminate is usually cleaner and faster but still needs care to avoid splitting planks or gouging the subfloor. Use a flat pry bar, pull staples with pliers or an extractor, lift gently along seams, and tap boards free with a rubber mallet to preserve edges.
| Tool | Action | Tip |
|---|---|---|
| Pry bar | Leverage under seam | Use thin shim |
| Pliers | Pull staples | Grip close to base |
| Staple extractor | Remove fasteners | Work slowly |
| Rubber mallet | Tap joints | Protect face |
| Utility knife | Cut underlayment | Avoid subfloor |
Troubleshooting Common Problems During Removal
If planks split when you lift them, check whether you were prying at the wrong angle or the boards are old and brittle. Use a pry bar with a shim or cut through the tongue to remove them cleanly.
For damaged locking profiles, decide between repairing sections with matching connectors or replacing whole planks to restore fit and stability.
When stubborn adhesive stays on plank edges, soften it with a heat gun or appropriate solvent and scrape gently to avoid damaging surrounding boards.
Planks that split when lifted causes and fixes
When planks split as you lift them, it’s usually because the boards were brittle, improperly installed, or got water-damaged—so you’ll want to diagnose the cause before continuing.
Check for moisture stains, swollen joints, or glued seams.
Use a pry bar gently from the tongue side, cut along damaged seams with a utility knife, and remove broken pieces carefully to avoid further splits.
Damaged locking profiles repair or replacement options
Inspect the locking profiles closely before you remove more planks: damaged tongues or grooves can prevent clean disassembly and will dictate whether you repair, splice, or replace sections.
If damage is minor, you can smooth splinters, glue and clamp joints, or add a thin shim.
For irreparable profiles, cut out affected boards and replace full rows or use splice pieces matching profile and thickness.
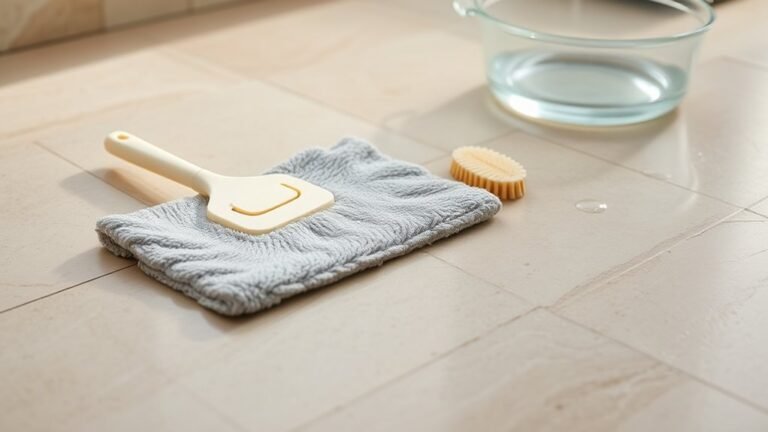
Stubborn adhesive residues on plank edges safe cleaning methods
As you pull up planks, you’ll often find stubborn adhesive beads clinging to edges and locking profiles; removing them safely prevents surface damage and speeds reinstallation or disposal.
Use a plastic scraper and gentle heat from a hairdryer to soften glue, then wipe with a cloth dampened in mild citrus solvent or rubbing alcohol.
Test inconspicuously, work slowly, and avoid metal tools.
Mistakes to Avoid
Don’t force planks or pry at awkward angles, or you’ll damage the boards and the subfloor.
Take off thresholds and trim first so planks come out cleanly.
Label and store planks as you remove them if you plan to reinstall them later.
Forcing planks or prying at wrong angles
Forcing planks or prying at the wrong angle can split tongues, chip edges, and warp the boards, so take your time and work with the joints rather than against them.
Use a flat pry bar near seams, lift gently at the locking point, and alternate sides to relieve tension.
If a plank resists, back up, reseat adjacent boards, and try again to avoid damage.
Skipping removal of transitions and trims
If you leave shifts and trims in place, they’ll block access to locking edges and can tear or crack boards when you try to pry them up.
Don’t skip removing connections, quarter-rounds, or thresholds first. Use proper tools to loosen fasteners and gently lift trim away.
That gives full access to seams so you can disengage planks cleanly without forcing or damaging edges.
Neglecting to label and store planks for reinstallation
When you skip labeling and storing planks, you’ll make reinstallation harder than it needs to be—boards may not fit, grain and wear patterns can mismatch, and you’ll waste time trying to sort pieces by sight.
Label each plank and stack them by row and direction, keep fasteners and trims together, and store boards flat in a dry place so reinstalling is quick, accurate, and stress-free.
Best Practices for Preserving Planks for Reuse
When you pull up planks, label each row and note the orientation so they go back in exactly where they came from.
Stack them flat with padding between layers and keep them in a climate-controlled space to prevent warping.
Inspect each plank for chips or loose edges and make minor repairs before reinstalling.
Labeling rows and plank orientation
Start by numbering each row and marking the orientation of every plank as you remove them so you can reinstall them in their original positions; this preserves matching grain, wear patterns, and tight seams.
Use a pencil or removable label at one end, note left/right face up, and record sequence on a simple sketch.
Keep labels readable and consistent for faster, accurate reinstallation.
Proper stacking, padding, and climate-controlled storage
After you’ve numbered and labeled the planks, stack them flat in the same order to keep matching faces together and prevent warping.
Place clean felt or foam sheets between layers, avoid direct floor contact with spacers under the stack, and cover with breathable cloth.
Store horizontally in a climate-controlled area with stable temperature and humidity to maintain flatness and avoid cupping or edge separation.
Inspecting and repairing minor damage before reuse
Because some wear is inevitable, you should carefully inspect each plank for chips, dents, separation at the joints, and surface scratches before rehanging them.
Repair small chips with matching wood filler, sand lightly, and touch up with stain or paint.
Glue or clamp separated joints, check locking profiles for damage, and discard planks with structural compromise to guarantee a stable, uniform installation.
When to Call a Professional
If the floor is glued down, warped extensively, or the subfloor looks damaged, you’ll want a pro to handle removal.
Expect contractors to assess structural issues, remove materials safely, and dispose of waste properly.
They’ll also provide estimates for repair or replacement so you can decide the next steps.
Indicators that professional help is warranted
When you spot extensive damage, hidden structural issues, or complexities beyond basic plank removal, call a professional—doing so can save time, money, and prevent further problems.
You should also hire pros if you find mold, warped subflooring, extensive adhesive residue, or uneven joists.
If you lack tools, confidence, or insurance coverage for potential damage, get help to avoid costly mistakes.
What to expect from professional removal services
Once you hire professionals, expect them to assess the job, remove the laminate and underlayment efficiently, and inspect the subfloor for damage or mold before leaving the site ready for repair or new flooring.
You’ll get clear timelines, cost estimates, and cleanup. You’ll also benefit from safer handling of adhesives and waste.
- Timeline and quote
- Subfloor assessment
- Cleanup and disposal
Cost and Time Estimates
Expect a DIY non-destructive removal to take a few hours for a small room and most of a day for larger spaces, depending on how easily the planks come up.
If you hire pros, labor and disposal drive the price, while renting tools or buying pry bars and a floor scraper adds a predictable DIY cost.
Factor in room size, subfloor condition, and whether baseboards or trim need work when estimating time and budget.
Typical time per room for DIY non-destructive removal
A typical non-destructive DIY removal of laminate flooring takes about 2–6 hours for a standard 12×12-foot room, depending on how careful you are, the number of obstacles (trim, thresholds, built-ins), and whether the planks are glued or floating.
Plan for the lower end if the floor floats with loose joints, and the higher end if you need to remove baseboard or pry up glued edges.
If you work steadily, expect 3–4 hours for average rooms; allow extra time for careful unfastening, labeling planks, and clearing workspaces.
Cost factors if hiring professionals or renting tools
Several key factors will drive the cost when you hire pros or rent tools for laminate removal: labor rates and minimums, disposal fees, whether the installer must remove trim or thresholds, equipment rental (floor scrapers, pry bars, nail pullers), and any repair or subfloor prep needed afterward.
| Item | Typical Cost | Notes |
|---|---|---|
| Labor | $100–$300/hr | Varies by market |
| Rental | $20–$80/day | Tools plus deposits |
| Disposal | $50–$200 | Dumpster or haul-away |
| Repairs | $100–$1,000+ | Subfloor patches, leveling |
FAQs
You’ll likely have a few practical questions after estimating cost and time, like whether you can remove and reuse planks or how to handle glued pieces without harming the underlayment.
You’ll also want to know about disposal rules and whether slightly damaged boards are still worth saving.
Below we’ll answer those common FAQs so you can decide your next steps.
Can I remove laminate flooring and reinstall it elsewhere?
Curious if you can lift laminate planks and use them again? Yes—you can reuse planks if you remove them carefully, keep tongues and grooves intact, and label rows for reinstallation.
Inspect each plank for wear, swelling, or damage; discard compromised pieces. Store planks flat in a dry, temperature-controlled space.
Reinstall onto a suitable, level subfloor with fresh underlayment as needed.
Will underlayment or subfloor be damaged during careful removal?
If you lift and label planks carefully, you’ll also want to protect the underlayment and subfloor during removal.
Work slowly, pry near seams, and lift straight up to avoid tearing the underlayment.
Lay a thin protective board or cardboard where you walk.
Staples or adhesive spots can be eased with a putty knife; minor scuffs are common but repairable with filler or a light sanding.
How do I remove glued laminate without damaging the plank?
Start by evaluating how the laminate is glued: soft adhesives and thin-set come off much easier than strong construction adhesives, and knowing which you’re dealing with lets you pick the gentlest method to preserve planks.
Use heat or adhesive solvent for soft glue, pry gently with a thin pry bar under a seam, and work slowly.
For thin-set, score and lift with a floor scraper.
Are there environmental or disposal considerations for removed laminate?
Once you’ve carefully pried up glued or thin-set laminate, think about what to do with the removed material and any adhesive waste—laminate isn’t always landfill-friendly.
You should check local disposal rules, separate recyclable underlayment or metal trims, and bag contaminated pieces. Avoid burning or illegal dumping.
Consider donating intact planks, using them for projects, or hiring a waste hauler who handles construction debris and adhesives.
What if planks are already slightly damaged can they still be reused?
While minor nicks, surface scratches, or slightly worn edges don’t automatically rule out reuse, you’ll need to assess each plank for structural soundness and fit.
Check for delamination, deep gouges, or warped sections that compromise locking joints. Replace planks with damaged tongues or grooves.
You can use trimmed pieces for connectors or closets, but prioritize intact planks for visible areas.