Can You Install Hardwood Floors Over Tile? What the Pros Say
Yes — you can often install hardwood over tile if the tile’s level, firmly bonded, and the subfloor is dry. Engineered hardwood with a floating or glue-down method is usually best; solid hardwood can work but raises floor height more. You’ll need to clean, level, and possibly profile the tile, pick appropriate underlayment and adhesives, and allow acclimation. Watch for door clearance and moisture risks. Keep going to get step-by-step checks, pros’ tips, and when to call a contractor.
Can You Install Hardwood Floors Over Tile? Quick Answer
Yes—you can often install hardwood over tile, but whether you should depends on the tile condition and the method you pick.
It’s a good idea when the tile is level, well-bonded, and you use a proper underlayment or floating-system to prevent movement.
Skip it if the tile is loose, uneven, or on a subfloor prone to moisture, because that will cause problems down the line.
Direct short answer for homeowners
Wondering if you can install hardwood over existing tile? Yes—you often can, but it depends on tile condition, subfloor level, and the hardwood type.
You’ll likely need underlayment, leveling, or a plywood layer, and some installers prefer floating engineered hardwood.
Get a pro inspection to confirm tile adhesion and floor height before committing, so you avoid unevenness, squeaks, or warranty issues.
When it’s a good idea and when it’s not
If the tile is level, firmly bonded, and the floor height works with doors and thresholds, installing hardwood over it can be a smart shortcut that saves demo time and dust;
but if tiles are loose, uneven, or sitting on a raised mortar bed, you’ll likely face extra prep or should remove them to avoid future movement, squeaks, or installation failures.
You can keep tile when stable, flat, and compatible.
Understanding the Basics: Hardwood and Tile Compatibility
You’ll want to understand how hardwood and tile differ in material, movement, and thickness before deciding to install over tile.
Choose engineered hardwood for better stability and thinner profiles, while solid hardwood often needs extra preparation.
Also inspect the tile type and condition—ceramic or porcelain, cracks, and unevenness all affect feasibility.
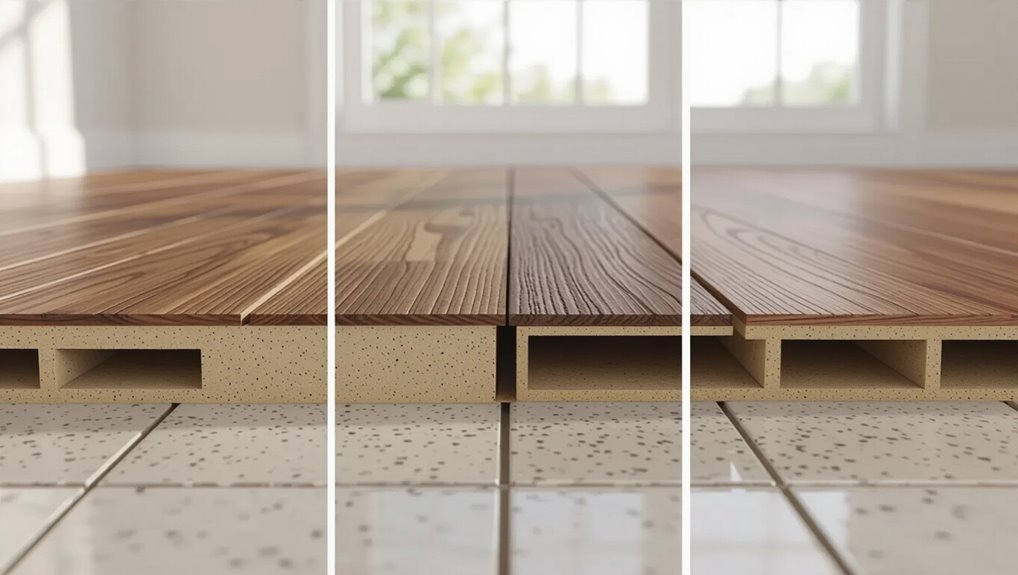
How hardwood flooring and tile differ (materials, movement, thickness)
Materials, movement, and thickness make hardwood and tile fundamentally different flooring systems, so you’ll need to account for each when planning an install over tile.
Tile is rigid, dimensionally stable, and often thicker; hardwood is flexible, expands and contracts with humidity, and varies in thickness by species and construction.
You’ll plan for changes, underlayment, and movement gaps to prevent buckling or uneven surfaces.
Types of hardwood flooring suitable for installation over tile (engineered vs. solid)
When deciding whether to install hardwood over tile, choose engineered boards for most situations because they tolerate moisture and temperature changes better and can be floated or glued over existing tile.
Solid hardwood is still an option but usually requires a more involved installation—like furring strips or a plywood subfloor—to accommodate movement and thickness differences.
You’ll prefer engineered for basements, radiant heat, and simpler installs; choose solid only when refinishing longevity matters.
Tile types and conditions that affect feasibility (ceramic, porcelain, cracked, uneven)
Choosing engineered over solid makes installation easier in many cases, but the existing tile’s type and condition still dictate whether you can lay hardwood over it.
Ceramic and porcelain are fine if firmly bonded and level. Cracked, loose, or lippage-ridden tile requires repair or removal.
Porcelain’s density may need stronger adhesives; textured tiles need smoothing.
Inspect, repair, or level before proceeding.
Pros and Cons of Installing Hardwood Over Tile
You can save time and money by laying hardwood over existing tile, since you’ll skip demolition and disposal costs.
However, you’ll need to watch for adhesion problems, moisture risks, and issues with floor height and thresholds.
We’ll weigh these pros and cons so you can decide if the shortcut’s worth it.
Advantages (time savings, cost avoidance, less demolition)
Because you skip a full tear-out, installing hardwood over existing tile can save a surprising amount of time and money while reducing dust and disruption in your home.
- Faster project timeline — no demolition phase.
- Lower labor costs — less crew time required.
- Reduced disposal fees — you avoid hauling debris.
- Minimized living disruption — less noise, dust, and temporary relocation.
Disadvantages and long-term risks (adhesion issues, moisture, height/threshold problems)
While installing hardwood over tile can save time and money, it brings several downsides you should weigh carefully.
- Adhesion failures: tiles can prevent proper bonding, causing gaps and squeaks.
- Moisture risk: trapped moisture under hardwood leads to warping or mold.
- Height issues: raised floor can break thresholds and door clearances.
- Repair complexity: fixing problems often requires removing both new floor and tile.
Assessment Checklist: Is Your Tile a Good Candidate?
Before you commit, check the basics: make sure the tile and subfloor are level and solid with minimal deflection.
You’ll also want to test for moisture and plan for the added thickness so doors and thresholds clear properly.
Inspect grout and surface condition for bonding or leveling needs.
These quick checks will tell you whether installing hardwood over the tile is feasible or if prep work is required.
Structural and subfloor checks (levelness, soundness, deflection)
Start by inspecting the subfloor’s structure: you’ll need a level, solid surface with minimal bounce or deflection to support hardwood properly.
Check for sagging, loose tiles, or hollow spots by walking and using a straightedge; measure variance—industry tolerance is usually 3/16″ over 10 feet.
Repair or reinforce joists, replace damaged underlayment, and guarantee rigid attachment before proceeding.
Moisture and vapor considerations (testing methods)
Because moisture trapped under or through tile can wreck hardwood, you need to test and evaluate vapor conditions before installing; measure moisture with a calibrated hygrometer, calcium chloride test, or in-situ relative humidity probe, and perform spot checks across the room.
Inspect grout and substrate for cracks or efflorescence. If results exceed species or adhesive limits, remediate with vapor barrier, moisture mitigation, or choose engineered wood.
Thickness and transition/door clearance planning
One key thing you’ll check is whether the combined height of the new hardwood, underlayment, and any leveling material will clear door swings and line up with adjacent floor surfaces; measure door clearances, sill heights, and threshold profiles.
Account for junction strips, hardwood thickness options, and possible trimming or planing of doors.
Confirm final height matches neighboring rooms to avoid awkward steps.
Existing grout and surface condition evaluation
After you’ve checked heights and door clearances, turn your attention to the tile itself—its grout lines, adhesion, and surface profile will determine whether you can lay hardwood directly over it or need to remove the tile.
Inspect grout depth and stability; deep or crumbling grout needs repair or leveling.
Probe tiles for loose ones, note lippage, and measure overall flatness to decide on underlayment or removal.
Main Installation Options and Step-by-Step Overviews
Now that you’ve checked your tile, let’s look at three main ways to install hardwood over it: floating engineered planks, glue-down engineered planks, or adding plywood/cement backer as a new subfloor.
I’ll give a concise step-by-step overview for each method so you can compare prep, tools, and pros/cons. That way you can pick the approach that fits your skill level and room conditions.
Option 1 Floating engineered hardwood over tile
If you’re thinking about floating engineered hardwood over existing tile, here’s the straightforward sequence you’ll follow to get a stable, attractive result:
- Prep and clean the tile surface.
- Choose and install the right underlayment.
- Acclimate the boards and perform the floating installation.
- Add finishing touches and connections.
Follow these steps carefully and you’ll avoid common issues like unevenness or gaps.
Step 1: Prep and cleaning of tile surface
Start by removing all loose debris, grease, and any remaining grout haze from the tile—your floating floor’s performance depends on a clean, level substrate.
Scrub with a mild degreaser, rinse thoroughly, and let dry.
Check for high or low spots; fill chips and loose tiles with a leveling compound.
Vacuum and tack-cloth the surface before proceeding to underlayment.
Step 2: Underlayment selection and installation
Because floating engineered hardwood needs a stable, slightly cushioned base, you’ll pick an underlayment that offers moisture protection, sound reduction, and minor subfloor leveling.
Choose an appropriate foam, cork, or combination vapor-barrier product rated for floating floors.
Roll out perpendicular to plank direction, butt seams tightly, tape as recommended, and trim at walls.
Verify a continuous, flat layer before installing the flooring.
Step 3: Acclimation and floating installation process
When you’re ready to install, let the engineered planks acclimate in the room for at least 48–72 hours so they reach equilibrium with the indoor humidity and temperature; this minimizes gaps or cupping after you float the floor over the tile.
Begin by rolling out the underlayment, then click-lock or tongue-and-groove the boards per manufacturer spacing. Stagger joints and check for level as you progress.
Step 4: Finishing touches and transitions
After the planks are laid and you’ve checked for squareness and gaps, focus on clean finishing and smooth shifts to make the job look professional; you’ll trim the perimeter, install baseboards or shoe molding, and fit transition strips where the hardwood meets tile, carpet, or another floor surface.
Caulk gaps, install quarter round where needed, and make certain transitions allow movement while matching height and finish.
Option 2 Glue-down engineered hardwood over tile
If you’re considering glue-down engineered hardwood over tile, you’ll want to follow a clear sequence to get a lasting bond.
Follow these steps:
- Tile profiling/sanding or primer application
- Adhesive selection and troweling technique
- Board placement and rolling
- Curing time and post-install checks.
You’ll see how each step affects adhesion and final performance.
Step 1: Tile profiling/sanding or primer application
Start by profiling the tile surface so the adhesive can grab properly; you’ll either sand the glazed finish to roughen it or apply a bonding primer designed for nonporous substrates.
Clean thoroughly, remove grout haze, and vacuum dust.
If sanding, use a diamond cup or sanding pad and wear a respirator.
Allow primer to cure per manufacturer directions before proceeding to adhesive application.
Step 2: Adhesive selection and troweling technique
When you’re ready to glue down engineered hardwood over tile, choose a high-quality urethane or MS polymer flooring adhesive formulated for nonporous substrates and follow the manufacturer’s open time and trowel-size recommendations.
Using the wrong adhesive or an undersized trowel will compromise bond strength and lead to hollow spots.
Apply adhesive in consistent ridges with the specified notched trowel, maintain working time, and comb in straight lines for full coverage.
Step 3: Board placement and rolling
Lay the first row of engineered boards along your longest, straightest wall, keeping the tongue facing the wall and leaving the recommended expansion gap; press each board firmly into the adhesive and tap the joints with a dead-blow hammer and scrap block to confirm full contact and tight seams.
Stagger end joints at least 6–8 inches, cut boards to fit, then roll the floor with a 75–100 lb. flooring roller to secure complete adhesive contact.
Step 4: Curing time and post-install checks
With the boards rolled and seams checked, give the adhesive the full curing time recommended by the manufacturer before walking on the floor or moving furniture back in.
During cure, keep temperature and humidity steady.
After curing, inspect seams, changes, and edges for adhesion gaps or ridges.
Trim any excess adhesive, re-roll weak spots, and reinstall trim and thresholds only once the bond is fully set.
Option 3 Installing plywood or cement backer over tile as a subfloor
If you’re raising a new subfloor over tile, you’ll follow three main steps to get a stable, level base before laying hardwood.
Start by addressing fastening methods and height management, add a moisture barrier and underlayment, then install your hardwood (solid or engineered) on the new subfloor.
Picture the process as a checklist:
- Fastening methods and height management
- Moisture barrier and underlayment
- Installing hardwood on new subfloor
- Final trim and connections
Step 1: Fastening methods and height management
Before you screw down a plywood or cement backer over existing tile, plan how you’ll fasten the new subfloor and manage the added height so doors, thresholds, and connections work properly.
Choose screw types and lengths to penetrate tile and thin-set into the slab without cracking tile.
Shim or trim door jambs, adjust thresholds, and check connections to adjacent floors for smooth, code-compliant clearance.
Step 2: Moisture barrier and underlayment
After fastening your backer and handling door and threshold clearance, address moisture and underlayment to protect the plywood or cement board and give the hardwood a stable, even surface.
Install a continuous polyethylene or vapor-retarder for moisture control, taping seams.
Then lay a suitable underlayment—felt, cork, or rosin paper—fastened or loose per manufacturer instructions to reduce vapor transmission and cushion the hardwood.
Step 3: Installing hardwood (solid or engineered) on new subfloor
Begin laying your hardwood by working from a straight reference line and treating the plywood or cement backer as your finished subfloor.
Stagger end joints, maintain proper expansion gaps, and fasten solid hardwood with nails or staples into the plywood.
For engineered planks, glue, float, or nail per manufacturer instructions.
Trim door jambs, check alignment frequently, and sand/finish if installing unfinished boards.
Comparison: Floating vs. Glue-Down vs. Subfloor Method
When you’re choosing how to install hardwood over tile, weigh the floating, glue-down, and subfloor methods by durability, sound transmission, installation complexity, and cost; each approach trades off ease for performance, so pick the one that matches your skill level, budget, and the condition of the existing tile. You’ll prefer floating for DIY, glue-down for stability, subfloor for longevity.
| Method | Pros | Cons |
|---|---|---|
| Floating | Quick, reversible | More noise |
| Glue-down | Stable, thin profile | Harder to remove |
| Subfloor | Best performance | Most labor |
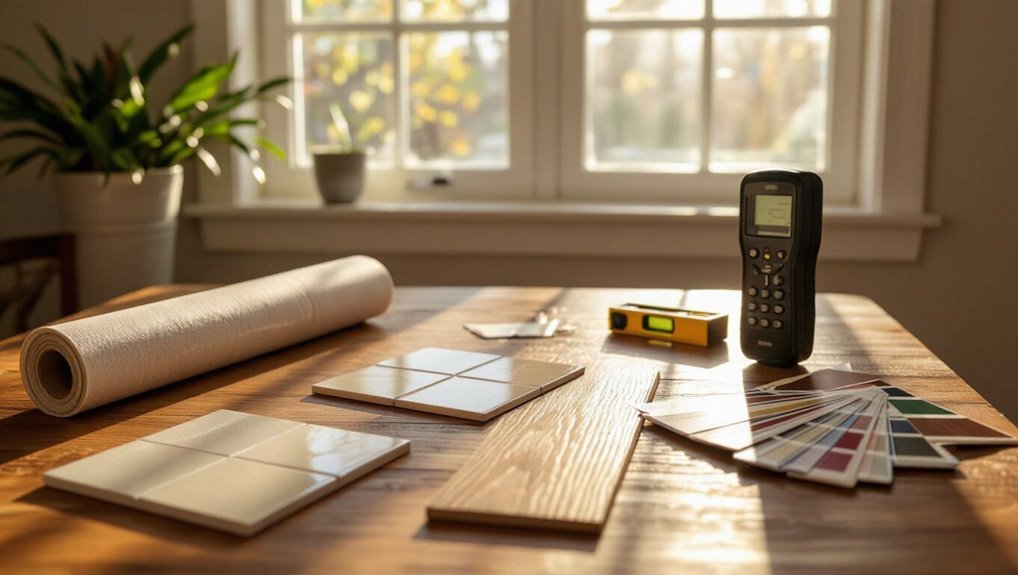
Tools, Materials, and Costs
Before you start, you’ll need to gather the essential tools—saws, nailers or a tapping block, spacers, and safety gear—so the job goes smoothly.
You’ll also pick materials like hardwood planks, the right adhesive or underlayment for your method, and matching trim to finish edges.
Finally, factor in costs for materials, labor, and site prep, since species, installation type, and tile condition all affect the price.
Essential tools and equipment
Tackling hardwood over tile calls for the right tools and materials so you can work efficiently and avoid costly mistakes; you’ll need cutting tools (a miter saw or circular saw with a fine-blade), a pry bar and scraper for tile removal or preparation, a moisture barrier and underlayment, adhesive or a suitable floating-floor system, spacers, a tapping block and pull bar, a pneumatic or manual flooring nailer, and personal protective equipment.
Expect to spend anywhere from a few hundred dollars for basic DIY tools to $1,500+ if you rent/procure professional-grade equipment.
- Cutting and measuring tools
- Tile prep and removal tools
- Installation aids (spacers, tapping block)
- Fastening tools and PPE
Recommended materials, adhesives, underlayments, and trim
Choosing the right materials makes the difference between a durable, attractive hardwood floor and one that fails prematurely; you’ll want hardwood engineered for stability, a quality underlayment or moisture barrier suited to tile substrates, and adhesives or a floating-system recommended by the flooring manufacturer.
Choose high-quality urethane or MS polymer adhesive, a dense cork or foam underlayment with vapor control, and coordinating connector strips and quarter round trim.
Cost estimates and factors that affect price
Now that you’ve picked materials and underlayments, you’ll want a clear picture of the costs involved before starting the job.
Expect hardwood prices to vary by species and grade, plus underlayment, adhesives, and trim. Labor rises with prep, tile removal, or leveling.
Ask contractors for itemized estimates, factor in waste (5–10%), permits, and contingency for surprises to avoid budget overruns.
Common Problems and Mistakes to Avoid
Don’t skip moisture checks—excess dampness can make boards cup or buckle.
Make sure the tile is flat and the subfloor is rigid, and don’t use the wrong adhesive or ignore acclimation.
Plan shifts and thresholds correctly so you don’t end up with gaps or trip hazards.
Failure to address moisture and resulting cupping or buckling
If you skip evaluating moisture levels before installing hardwood over tile, you risk boards cupping or buckling as trapped or migrating moisture forces the wood to swell and then dry unevenly.
Test substrate and tile with a reliable moisture meter, allow acclimation, install proper vapor barrier or underlayment, and address leaks or high humidity.
Otherwise gaps, warping, and costly repairs follow.
Ignoring uneven tile or poor subfloor rigidity
Because uneven tile or a weak subfloor can undermine the whole job, you should never assume the surface is ready for hardwood; low spots, high ridges, or flexing underfoot will cause loose boards, squeaks, and premature failure.
You need to level tile, repair or reinforce joists, and install a proper underlayment. Skipping these steps guarantees callbacks and shortened floor life.
Using wrong adhesive or skipping acclimation
When you skip acclimating hardwood or grab the wrong adhesive, you’re practically inviting gaps, buckling, and adhesive failure—issues that show up long after the install.
You should let planks equalize to room humidity and temperature, choose adhesives rated for tile-to-wood bonding, follow manufacturer trowel and open time specs, and test a small area.
Don’t rush; moisture and adhesive mismatches ruin finishes.
Improper transition and threshold planning
Though you might focus on the planks themselves, poor planning for alterations and thresholds can undo a clean hardwood-over-tile job, creating trip hazards, visible gaps, and uneven expansion joints.
You should measure connections, choose compatible threshold profiles, and account for height differences. Neglecting proper expansion gaps or mismatched materials forces costly fixes, sanding, or replacement—so plan connections before installation.
Best Practices and Pro Tips from Pros
Before you start, pros will run specific pre-install inspections and moisture tests so you know the tile, subfloor, and adhesives are suitable.
Expect clear guidance on managing height differences and trimming doors or jambs to preserve proper clearances.
Once installed, follow their maintenance tips—regular cleaning, humidity control, and periodic checks—to keep hardwood over tile looking and performing its best.
Pre-install inspections and tests professionals perform
If you’re planning to lay hardwood over tile, pros start with a thorough inspection and a handful of quick tests to confirm the substrate is suitable and stable.
You’ll check tile adhesion, levelness, and moisture with a straightedge and moisture meter, test for hollow tiles or loose grout, inspect subfloor type, and confirm flatness tolerances.
These steps prevent failures and guide prep choices.
How to manage height differences and door clearances
When you’re installing hardwood over tile, managing the finished floor height and door clearances becomes one of the most critical tasks.
Plan for changes, door trimming, and threshold solutions up front so you don’t end up with sticking doors or awkward step-ups.
Measure jambs, subtract clearance for door swing (typically 3/8″–1/2″), choose tapered thresholds or reducers, and prep for trimming or rehanging doors as needed.
Long-term maintenance tips for hardwood over tile installations
Although hardwood over tile gives you durability and style, it also demands a maintenance routine that protects both the wood and the substrate beneath; follow proven practices to keep boards stable, finishes intact, and changes watertight.
Clean spills promptly, use pH-neutral cleaners, maintain humidity between 35–55%, inspect seams and junctions yearly, reseal or refinish when wear appears, and replace damaged planks quickly.
When to Hire a Pro vs. DIY
If your tile is uneven, has moisture issues, or needs large substrate repairs, you’ll want a pro who can handle those complexities.
Ask contractors about their experience with tile-to-hardwood installs, timeline, and whether they pull permits.
Watch for clear warranties, proof of insurance, and hesitancy to provide references as red flags.
Complexity factors that warrant professional installation
Because installing hardwood over tile can hide tricky issues and demand precise techniques, you’ll want to contemplate professional help for more complex jobs.
Hire a pro if tile is uneven, mortar is loose, subfloor moisture is uncertain, changes or thresholds are numerous, or radiant heat systems exist.
Pros handle leveling, moisture mitigation, proper fastening and warranty concerns so your floor performs long-term.
Questions to ask a flooring contractor
Those complexity signals are also the moments when you should start vetting contractors instead of planning a DIY weekend.
Ask about their experience with tile-to-hardwood conversions, licensing and insurance, and timeline.
Request references and photos of similar jobs. Clarify who handles subfloor prep, moisture testing, and unexpected repairs.
Get a detailed written estimate and payment schedule before you sign.
Red flags and guarantees/warranties to request
When should you walk away or call in a pro? Spot these red flags: uneven or loose tile, moisture issues, adhesive contamination, or suspect subfloor integrity.
Don’t DIY if structural repair or leveling’s needed. Ask contractors for written guarantees on adhesion, moisture mitigation, and finish, plus a warranty covering materials and labor.
Get timelines and cleanup terms in writing.
Visual Guide and Resources
You’ll find photos and clear diagrams showing each installation method so you can compare surface prep, underlayment, and fastening steps at a glance.
Use the printable checklist to assess your tile condition, subfloor flatness, and moisture before you start.
Refer to the visuals and checklist together to decide whether you can proceed or need a pro.
Photos and diagrams of each installation method
Photos and diagrams make it easy to compare the three main installation methods—floating, glue-down, and nail-down—so you can quickly see how each handles substrate prep, alterations, and height differences over tile.
Use labeled images showing underlayment, adhesive paths, fastener locations, and boundary trims. Annotated close-ups highlight moisture barriers, edge clearance, and required tools so you can pick the right approach.
Checklist printable for pre-install assessment
Before you start demo or ordering materials, use a one-page pre-install checklist to confirm the room’s suitability and avoid costly delays.
Include substrate flatness, tile adhesion, moisture readings, height changes, door clearances, underlayment needs, heating system compatibility, and any structural or electrical concerns.
Print it, tick each item, photograph issues, and bring the checklist to your installer for faster, safer decisions.
FAQ
You probably have a few quick questions before deciding whether to install hardwood over tile, like whether solid hardwood can go directly on tile and how the extra height will affect door clearances.
You’ll also want to know if it changes resale value, whether radiant heat is compatible, and how long before the new floor can be refinished.
I’ll answer each clearly so you can make an informed choice.
Can I install solid hardwood directly over tile?
Can you install solid hardwood directly over existing tile? You usually shouldn’t.
Solid hardwood needs a stable, flat subfloor and can’t tolerate the moisture and movement risks tile creates.
You’ll likely need to remove tile or install a plywood subfloor over it, adding height and changes.
Consider engineered hardwood as a better over-tile option if removal isn’t feasible.
Will installing hardwood over tile affect home resale value?
How will installing hardwood over existing tile impact your home’s resale value? It can boost appeal if done professionally, matching style and ensuring stable substrate.
Buyers value continuous, attractive flooring; hidden issues or uneven shifts can hurt offers. Disclose installation details, use reputable contractors, and choose timeless wood tones to maximize resale prospects and avoid surprises during inspections.
How much additional floor height will installing over tile add?
Curious about the added height?
Installing hardwood over tile typically raises floor height by the combined thickness of the underlayment, adhesive, and the hardwood itself—usually 3/8″ to 3/4″ for engineered planks or 3/4″ to 1″ for solid hardwood with underlayment.
Expect thresholds, door clearances, and connections to need adjustment; plan for trim and possible door trimming.
Can radiantly heated floors be installed with hardwood over tile?
If you’ve raised your floor to accommodate hardwood over tile, you’ll also want to assess whether a radiant heating system will work with that buildup.
Many homeowners do pair radiant heat with hardwood, but there are specific restrictions and installation methods to follow.
You can use hydronic or electric systems if you follow manufacturer temp limits, use engineered planks, add an appropriate subfloor/insulation, and allow movement gaps.
How long does it take before new hardwood over tile can be refinished?
Wondering when you can refinish new hardwood installed over tile?
You should wait until the adhesive, finish, and any sealers fully cure — typically 7–30 days depending on product instructions and humidity.
For glue-down planks, follow manufacturer cure times; for floating floors, wait at least a week.
Always test a small area or consult the installer before sanding or recoating.