How to Install Tile Edge Trim for a Clean and Finished Look
You can get clean, chip‑resistant tile edges by picking trim that matches your tile and prepping carefully: measure, dry‑fit, and miter corners for flush joints. Cut trim to suit tile thickness, clean the substrate, apply adhesive, then press the trim and set tiles against it using spacers to keep grout gaps even. Grout up to the profile, seal joints after curing, and finish with silicone where needed — continue for tips on tools, cuts, and common fixes.
How to Install Tile Edge Trim for a Clean and Finished Look
When you want crisp, protected edges—like on countertops, shower niches, or exposed tile ends—you’ll use trim to finish the job and prevent chipping.
I’ll give you a quick answer on when and why to choose edge trim and a visual summary of the simple install steps.
Follow the photos and tips to match profile, measure, cut, set, and grout for a clean, professional look.
Quick Answer When and Why to Use Tile Edge Trim
Need a clean, finished edge on your tile installation? You should use tile edge trim whenever exposed edges, junctions, or countertop fronts need protection and a polished look.
Trim prevents chipping, hides uneven cuts, and creates smooth junctions to other surfaces.
If you’re learning how to install tile edge trim, choose matching profiles and materials for durability and aesthetic cohesion.
Visual Summary of the Process
Before you start, picture the whole sequence: measure and cut the trim, dry-fit pieces, spread thinset, set the trim so the tile sits flush, grout any gaps, and finish with a bead of sealant where needed.
Now, work methodically: mark lines, cut accurately, test-fit, apply adhesive, press trim firmly, wipe excess, let cure, then grout and seal.
Take brief photos to document alignment.
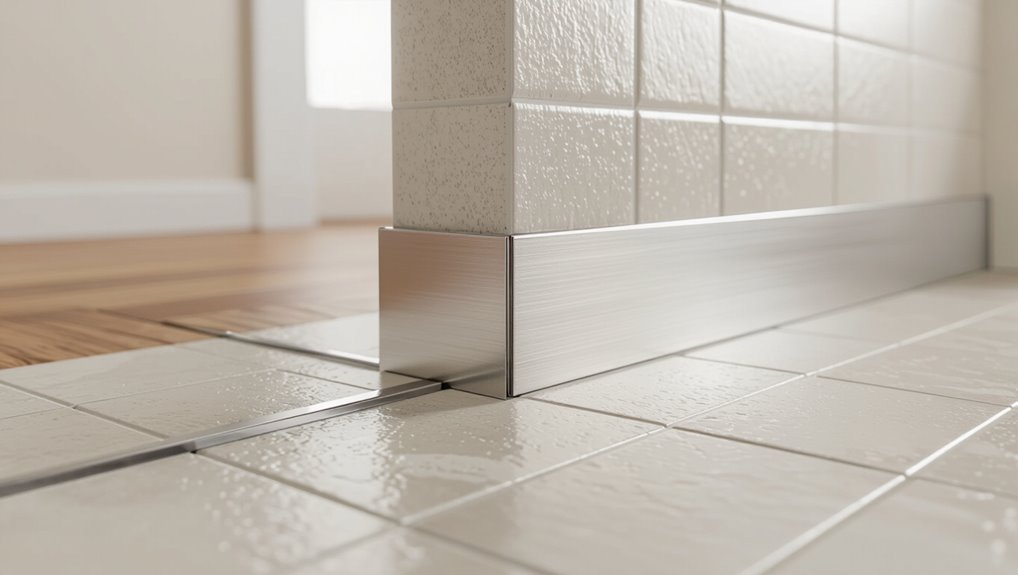
What Tile Edge Trim Is and Why It Matters
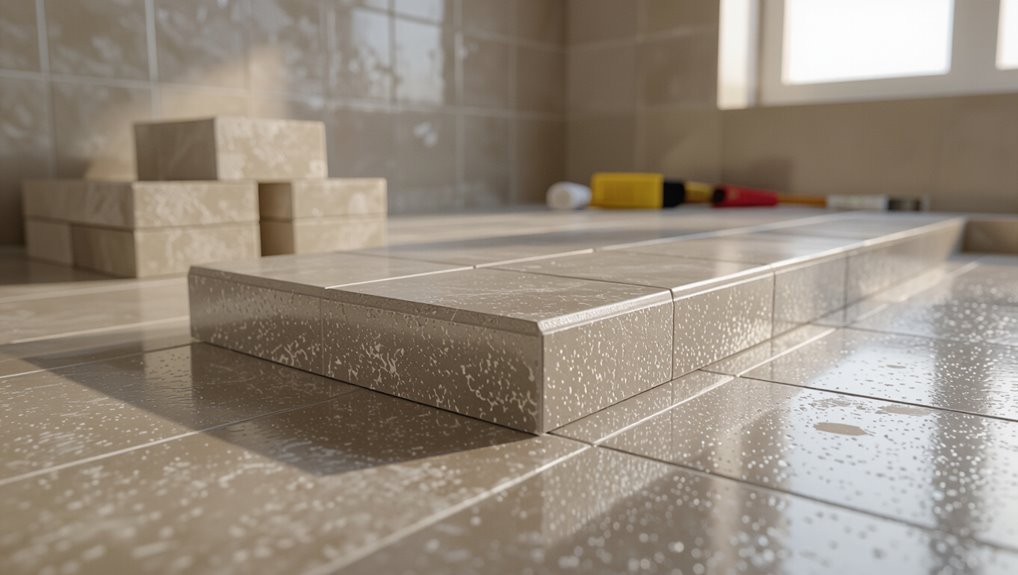
Tile edge trim is a narrow profile you install along exposed tile edges, commonly made from aluminum, PVC, stainless steel, or brass.
It protects edges from chipping, improves the finished look, and helps keep water out in wet areas.
You’ll use trim on corners, junctions, steps, and anywhere tiles end for a neat, durable finish.
Definition and Common Materials (aluminum, PVC, stainless steel, brass)
Edge trim is the slim profile you install where a tiled surface meets exposed edges—stair noses, countertops, and wall edges—to protect, finish, and sometimes accent the installation.
You’ll find trims in aluminum (lightweight, anodized finishes), PVC (budget, flexible), stainless steel (durable, modern), and brass (decorative, patina over time).
Choose material by appearance, rigidity, and installation method.
Benefits: Protection, Aesthetics, and Water Resistance
When you finish a tiled surface with a proper trim, you’ll protect exposed edges from chipping, give the installation a clean finished look, and help keep water from seeping into vulnerable joints.
Trim also hides imperfect cuts, provides a visual boundary that elevates design, and creates a durable sealed edge that resists mold and moisture, extending the life and appearance of your work.
Where to Use Trim: Corners, Transitions, Steps, Wet Areas
Because exposed cut edges and junctions are vulnerable to damage and water, you’ll want trim wherever tile meets a different plane or environment: external corners, wall-to-floor shifts, stair nosings, and wet zones like showers and tub surrounds.
Use metal or PVC trims on exposed edges, Schluter-style profiles for changes, bullnose for steps, and sealed profiles in wet areas to protect, finish, and simplify maintenance.
Choosing the Right Tile Edge Trim
You’ll want trim that matches your tile’s thickness and complements its style so edges sit flush and look intentional.
Pick a profile—square, L-shape, rounded, Schluter, or decorative—based on the look and where the edge will be used.
Measure each exposed edge and add about 10% for cuts and waste to estimate how much trim you’ll need.
Matching Trim to Tile Thickness and Style
If your trim doesn’t match the tile’s thickness and style, seams will look sloppy and edges can chip—so pick trim that sits flush and complements the tile’s profile. Measure thickness, test fit, and choose finish and color that blend or contrast intentionally. Use solid backing for thin tiles and wider lips for thicker tiles.
| Tile thickness | Trim fit |
|---|---|
| Thin (≤6mm) | Low-profile |
| Medium (7–10mm) | Standard lip |
| Thick (≥11mm) | Deep channel |
Types of Profiles and Their Uses (square, L-shape, rounded, Schluter, decorative)
Profiles determine both the look and function of your trim, so pick one that fits the tile edge, traffic, and style of the room.
Choose square for modern, crisp edges; L-shape for exposed sides; rounded for softer shifts and safety; Schluter for concealed, waterproofed edges and easy installation; decorative profiles add pattern or metal accents to complement your design.
How to Measure and Estimate Quantity
Wondering how much trim you’ll actually need for your project? Measure each exposed tile edge length, add corners and junctions, then total linear feet. Buy 10% extra for cuts and mistakes.
- Measure all exposed edges.
- Count inside/outside corners.
- Add junctions and thresholds.
- Add 10% waste and round up to standard trim lengths.
Tools and Materials Needed
Before you start, gather the essential tools—tile cutter, notched trowel, level, miter saw, and adhesive gun—to keep the job accurate and efficient.
Stock up on materials and consumables like the trim itself, adhesive, grout, screws, and silicone.
Don’t forget safety gear and prep supplies such as gloves, eye protection, and cleaning rags.
Essential Tools (tile cutter, notched trowel, level, miter saw, adhesive gun)
You’ll need a few reliable tools to install tile edge trim correctly: a tile cutter for clean tile edges, a notched trowel to spread adhesive evenly, a level to keep trim straight, a miter saw for precise trim cuts, and an adhesive gun for cartridges—each guarantees a professional, lasting result.
You’ll also want safety gear, a tape measure, and a pencil for accurate layout and protection.
Materials and Consumables (trim, adhesive, grout, screws, silicone)
Materials matter as much as technique: pick trim profiles that match your tile and edge conditions, a quality tile adhesive rated for your substrate and tile type, grout that suits the joint width and location (sanded for wide joints, unsanded for narrow or polished edges), corrosion-resistant screws or anchors for fastening metal trims, and a neutral-cure silicone for flexible, waterproof sealing at junctions.
Choose trim material (PVC, aluminum, brass) to match durability and finish.
Use appropriate adhesive consistency; keep grout color consistent with tile.
Store silicone in cool place; test-fit trims before final fixing.
Safety Gear and Preparation Supplies
A sturdy pair of gloves, eye protection, and a dust mask are essentials you should have on hand before you cut or set trim.
Prepare a clean workspace, measure accurately, and keep first aid nearby. Use proper footwear and ventilation, and check tools for damage.
- Measuring tape
- Safety glasses
- Work gloves
- Utility knife
Preparation Before Installation
Before you start, check the substrate for flatness, damage, or loose material and make any repairs so the trim will sit flush.
Cut and dry-fit each trim piece to the edges and corners to confirm measurements and fit.
Clean the surface thoroughly and snap your layout lines so you’ll have a straight guide during installation.
Inspecting and Preparing the Substrate
Start by closely inspecting the substrate for flatness, cleanliness, and stability so you can correct issues that would shorten the edge trim’s life or ruin the finish.
Remove dust, grease, and loose material; fill low spots with appropriate patching compound; guarantee high spots are sanded or ground down.
Verify substrate is dry and compatible with your adhesive before proceeding.
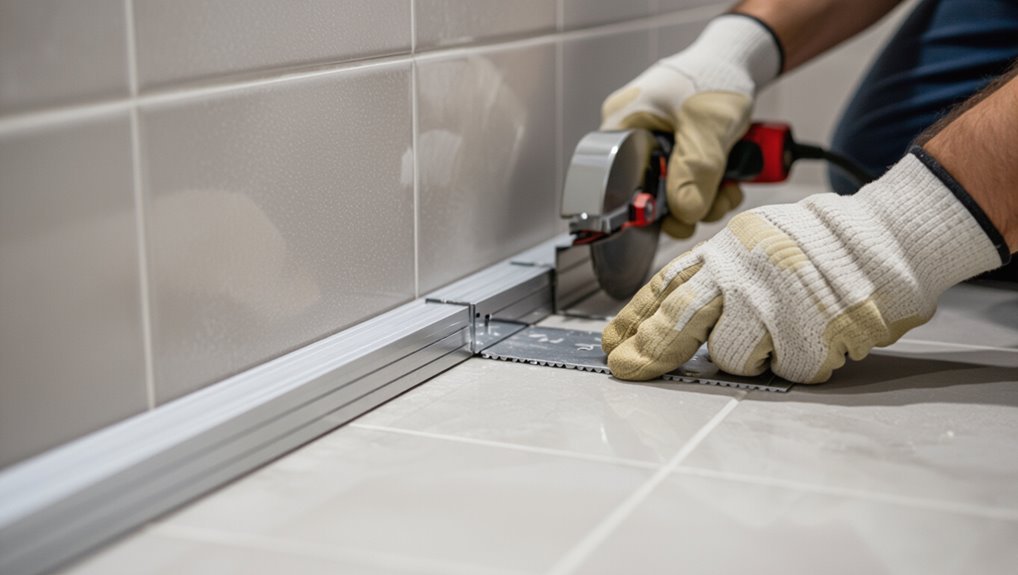
Cutting and Dry-Fitting Trim Pieces
Now that your substrate is prepped and sound, measure and mark each trim run so you can cut pieces that fit snugly.
Use a miter saw or hacksaw with a guide for straight, clean cuts. Dry-fit every length and corner, checking miters and butt joints.
Adjust cuts for tile thickness and substrate variations, ensuring consistent gaps for grout or caulk before final installation.
Surface Cleaning and Marking Layout Lines
A clean, clearly marked substrate makes the rest of the installation faster and far less error-prone.
You’ll remove dust, old adhesive, and grease, then let surfaces dry.
Use a straightedge and pencil or chalk line to mark trim positions and tile edges, checking levels and alignments before setting anything.
- Clean and degrease
- Dry and inspect
- Snap chalk lines
- Verify level and spacing
Step-by-Step Installation Guide
Now you’ll follow a clear sequence: cut and miter corners, apply adhesive or fasteners, and set the first row of tiles against the trim.
Hold and secure the trim while the tiles cure, then grout up to the trim and finish the edges for a clean look.
I’ll walk you through each step so you can complete the installation confidently.
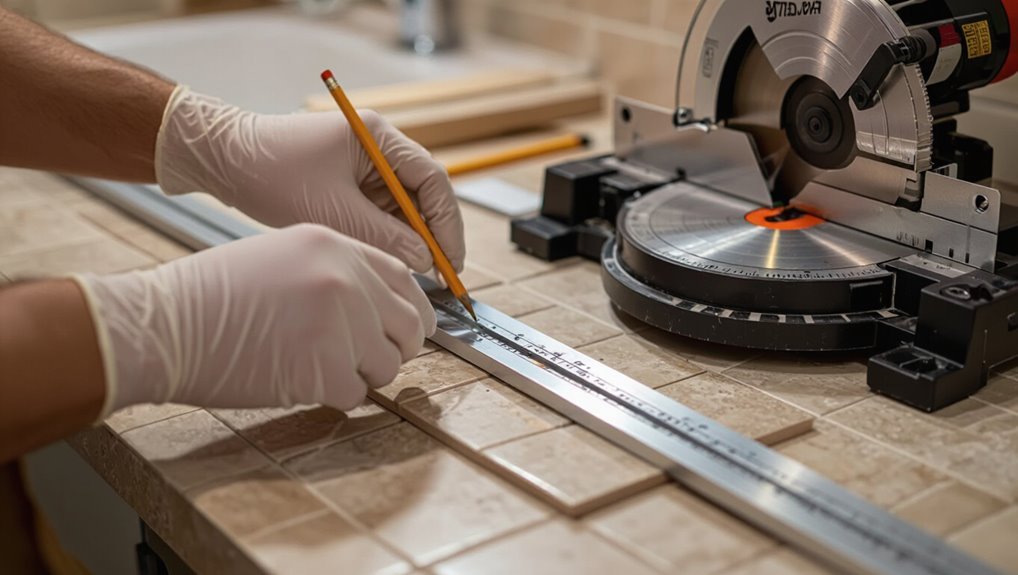
Step 1 Cutting and Mitering Trim for Corners
Start by measuring each corner carefully so your trims meet cleanly and sit flush against the tile edges.
Mark trim lengths, account for wall irregularities, then cut with a fine-tooth hacksaw or miter saw. Set the blade at 45° for inside or outside corners, test-fit pieces, and file any burrs.
Repeat for opposite corners, ensuring consistent joint gaps for a tight, professional look.
Step 2 Applying Adhesive or Fastening the Trim
Apply adhesive or fasten the trim carefully to guarantee a secure, straight edge that complements your tile work.
Choose a thin-set or construction adhesive compatible with your trim material. Spread evenly, then press the trim into place, checking alignment with a level.
For mechanical fasteners, predrill and countersink where needed. Wipe excess adhesive immediately and let cure per manufacturer instructions.
Step 3 Setting the First Row of Tiles Against the Trim
With the trim secured and adhesive cured, set the first row of tiles firmly against it so you create a straight, even edge.
Press each tile into mortar, maintain consistent grout gaps with spacers, and check alignment frequently with a level.
Cut edge tiles to fit the trim profile, clean excess mortar from the trim, and recheck straightness before the mortar sets.
Step 4 Securing Trim During Tile Setting and Drying
Hold the trim steady as you set tiles and while the mortar cures to keep the edge straight and flush.
Use low-profile clips or temporary wedges to maintain alignment, checking level and plumb frequently.
Remove excess mortar that squeezes into the trim channel before it hardens.
Leave supports in place until the manufacturer’s recommended cure time has passed to avoid movement or lippage.
Step 5 Grouting Up to the Trim and Finishing Edges
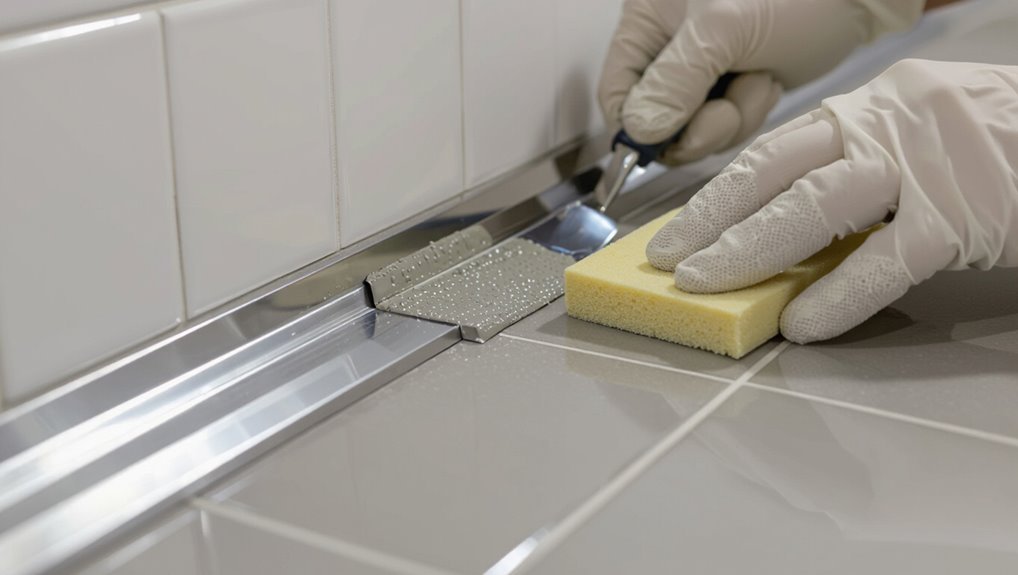
Once the mortar has set and your supports are removed, you’ll grout up to the trim, taking care not to overload the channel.
Use a rubber float to press grout firmly into joints, keeping the float at a low angle to avoid pushing grout into the trim’s recess.
Wipe excess with a damp sponge, shaping grout lines flush with the trim for a neat changeover.
Step 6 Sealing Joints and Cleaning Excess Grout
Now it’s time to seal the joints and remove any grout residue so your trim stays watertight and looks clean; start by ensuring the grout has cured per the manufacturer’s directions before applying sealant.
Mask nearby surfaces, run a continuous bead of silicone or appropriate sealant along the trim joints, smooth with a wet finger or tool, then wipe haze with a damp sponge and let cure.
Special Scenarios and Adjustments
You’ll run into cases that need tweaks—bending trim for curves, blending trims between different floor coverings, or matching trims to tiles of varying thickness.
Plan for outdoor or wet areas by choosing corrosion- and freeze-thaw–resistant materials and adjusting fastenings and sealant.
Below we’ll cover practical techniques for each situation so you can finish cleanly and durably.
Installing Trim on Curved or Irregular Surfaces
When you’re working with curved or irregular surfaces, standard straight-edge trim won’t fit without modification, so you’ll need to adapt your approach and trim pieces to follow the contour.
Score trim backing lightly, heat flexible vinyl or metal trims to shape, use adhesive or small screws where allowed, and fasten in short segments.
Finish gaps with flexible caulk for a clean, continuous line.
Transitioning Between Different Floor Coverings
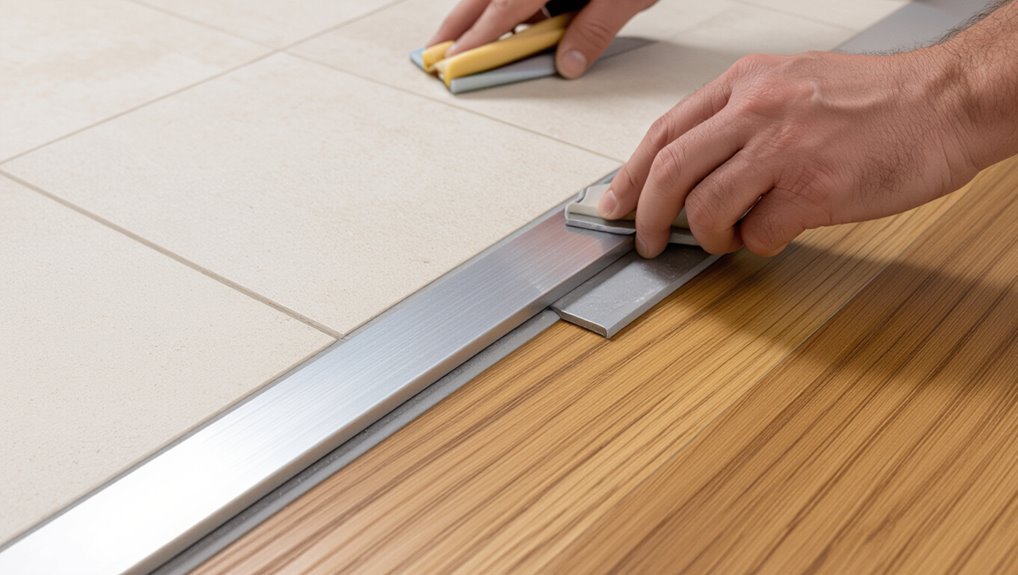
If you’re joining tile to another floor covering—like hardwood, laminate, vinyl, or carpet—you’ll need trims that account for height differences, movement, and visual flow; choose profiles that bridge gaps, protect edges, and match the materials’ expansion needs.
Measure connections, pick reducer or threshold profiles, secure anchors to stable substrate, allow movement gaps, and finish with silicone or matching caulk for a neat, durable junction.
Dealing with Thick or Thin Tile Variations
Sometimes you’ll face tiles that are much thicker or thinner than adjoining materials, and that affects which edge trims and installation methods will work.
Measure thicknesses, choose trim profiles with adjustable lips or reducer pieces, and plan substrate build-up or tapering under thin tiles.
Use solid adhesive fills or tapered underlayment to level differences so trims sit flush and edges stay protected and neat.
Outdoor or Wet Area Considerations (freeze-thaw, corrosion resistance)
Because outdoor and wet environments expose tile edges to moisture, temperature swings, and chemicals, you’ll need trims and installation methods that resist corrosion, tolerate freeze–thaw cycles, and maintain seals over time.
Choose stainless steel, anodized aluminum, or PVC trims rated for exterior use.
Use flexible, mold‑resistant sealant, backer rod for expansion joints, and proper drainage to prevent trapped water and freeze damage.
Common Mistakes and How to Avoid Them
Watch for a few common mistakes that can ruin your edge trim: misaligned heights, the wrong adhesive or fasteners, sloppy miter cuts with visible seams, and not allowing proper cure time.
Measure and dry-fit pieces before applying adhesive so tile and trim sit flush.
Use the recommended adhesive and give it full cure time to avoid movement or gaps.
Misaligning Trim and Tile Heights
If the trim and tile aren’t set to the same height, you’ll end up with visible lips or gaps that trap dirt and create trip hazards.
Check tile thickness before cutting trim, dry-fit pieces, and use shims or thinset to level tiles.
Adjust trim profile or select matching trim depth.
Recheck with a straightedge so connections stay flush and safe.
Using the Wrong Adhesive or Fasteners
Once your trim and tile sit flush, the next big mistake is picking the wrong adhesive or fasteners—doing so can let trim pull away, tiles loosen, or coatings fail.
Use manufacturer-recommended thinset or adhesive compatible with tile and trim material, and corrosion-resistant screws or anchors where needed.
Test bond on a scrap, follow cure times, and avoid generic glues that won’t flex or grip properly.
Poor Miter Cuts and Visible Seams
Because trim meets at angles, poor miter cuts and sloppy seams are one of the most obvious flaws you’ll notice in a finished job.
You can avoid gaps by measuring twice, cutting slowly with a sharp blade, dry-fitting pieces, and sanding tiny imperfections. Tidy seams create a professional look.
- Measure twice
- Use sharp tools
- Dry-fit pieces
- Sand and adjust
Failing to Allow Proper Cure Time
When you rush the job and skip the recommended cure times, adhesives and sealants won’t reach full strength and trim can shift, stain, or fail later on.
Let everything cure per manufacturer instructions—usually 24–72 hours. Keep the area dry, avoid traffic, and don’t stress joints.
Patience prevents rework, gaps, and mold. Plan sequencing so trims are the last step before light use.
Best Practices and Pro Tips
Before you cut or glue anything, plan your layout carefully and buy a little extra trim so you can match profiles and replace mistakes.
I’ll show how to get invisible seams and smooth corners with simple cuts and careful alignment.
Finally, you’ll learn quick maintenance tips to keep the trim looking new for years.
Planning Layout and Buying Extra Trim
Start by mapping the full runs and corners where trim will sit. Then add at least 10–15% extra for mistakes, cuts, and future repairs.
Measure each wall and edge, note direction changes, and mark join locations.
Buy matching profiles and fasteners, keeping spare end caps and corner pieces.
Label pieces per location so installation stays efficient and predictable.
Achieving Invisible Seams and Smooth Corners
With your layout set and labeled pieces ready, focus on making seams disappear and corners run smooth for a professional finish.
Cut trims slightly long, dry-fit, then trim precisely. Use a matching grout or color-matched caulk sparingly for micro-gaps.
Mill small bevels on join faces for tighter mating. Clamp or tape while adhesive cures, and clean excess immediately for seamless results.
Maintenance Tips to Keep Trim Looking New
While regular cleaning keeps trims vibrant, a few simple habits prevent wear and discoloration over time.
- Wipe with mild soap and water weekly to remove grime.
- Dry immediately to avoid water spots and corrosion.
- Re-seal grout edges yearly to block moisture.
- Inspect for chips or loose trim quarterly and repair promptly to prevent further damage.
Tools and Materials Comparison Table
Now you’ll compare tools and materials side-by-side so you can pick what fits your project and budget.
You’ll see which trim profiles and finishes give good value for tight budgets and which premium options justify the extra cost.
Use the table to match application—wet areas, corners, or shifts—to the best budget or premium choice.
Best Trim Choices by Application (budget vs. premium)
Because different areas and budgets demand different priorities, choosing the right tile edge trim comes down to matching performance, appearance, and cost to the job. You’ll pick PVC for wet, budget spots; aluminum for durability and mid-range looks; and stainless or brass for premium, high-traffic areas.
| Application | Budget | Premium |
|---|---|---|
| Wet areas | PVC | Stainless |
| Living spaces | Aluminum | Brass |
Troubleshooting Guide
If your trim comes loose or pops out, you’ll learn the quick fixes to secure it without redoing the whole job.
I’ll show how to repair cracked or chipped trim pieces and when you can swap them out without re-tiling.
You’ll also get simple steps to tackle corrosion or discoloration so your edges look clean and consistent.
Fixing Loose or Popped Trim
Start by evaluating why the trim has come loose or popped away from the tile—common causes are adhesive failure, insufficient grout coverage, movement in the substrate, or impact.
Remove loose trim, clean adhesive and debris, and dry the area.
Reapply appropriate adhesive or construction-grade caulk, press trim firmly, and support until set.
Re-grout edges and check for continued movement before finishing.
Repairing Damaged Trim Without Re-tiling
When a trim profile is dented, scratched, or cracked but the surrounding tile is sound, you can often fix it without tearing out the installation; this section walks you through evaluating the damage, selecting the right patching method, and making repairs that blend with the existing trim.
Inspect, clean, and decide: small dents use filler or epoxy, hairline cracks get adhesive and clamp, larger damage may need section replacement.
Addressing Corrosion or Discoloration
Because metal trims live in wet, high-traffic areas, they can develop rust, verdigris, or staining that undermines their appearance and performance; you’ll want to diagnose the cause before choosing a fix.
Inspect for galvanic corrosion, hard-water deposits, or surface finish failure.
Clean with appropriate cleaners, neutralize salts, sand lightly, then apply corrosion inhibitor or touch-up paint.
Replace severely pitted trim.
Frequently Asked Questions
Got questions? You’ll find answers on installing trim after tiles are set, matching trim height for varying tile thicknesses, whether to use silicone or grout for joints, cutting metal trim cleanly without pro tools, and using trim on natural stone.
Read on for quick, practical solutions to each.
Can I install tile edge trim after tiles are already set?
Wondering if you can add tile edge trim after your tiles are already set? Yes—you can, but preparation matters.
Clean grout lines, remove loose grout, and make certain edges are dry. Use adhesive-rated trim fixed with thinset or construction adhesive against the tile face and substrate.
Caulk joints where needed and allow proper cure time. Trim retrofits work well for most finished installations.
How do I match trim height when tiles vary slightly in thickness?
If your tiles vary in thickness, you can still get a clean, level trim by building up or shaving the surrounding surface so the trim sits flush with the highest tiles; use thinset shims, paper shims, or a leveling compound under thinner tiles, or sand down high spots before setting trim.
Check with a straightedge and adjust trim profile or backer as needed.
Is silicone or grout better for sealing trim joints?
Which works better for sealing trim joints—silicone or grout—depends on where the trim is and how much movement it’ll see.
Use silicone for corners, edges next to showers, or areas with thermal or structural movement because it stays flexible and waterproof.
Use grout for static, interior joints where you want a uniform appearance with the tile; grout’s rigidity matches tiled surfaces.
How do I cut metal trim cleanly without professional tools?
Want a straight, burr-free cut without renting a chop saw? Use a hacksaw with a fine-tooth blade or a metal-cutting circular saw blade.
Clamp the trim to a workbench, and score the cut line with a utility knife or metal scribe. Cut slowly, support both sides, then deburr with a file or fine sandpaper.
Wear eye protection and gloves.
Can I use trim on natural stone tiles?
Can you use trim on natural stone tiles? Yes — you can, but choose profiles and materials that suit stone’s thickness, texture, and porosity.
Use stainless steel, brass, or stone-compatible aluminum, and avoid adhesives that stain.
Test fit and finish on scrap, seal stone before installing trim, and rely on mechanical fastening or recommended adhesives to prevent movement and water infiltration over time.