How to Seal Laminate Flooring for Long-Lasting Protection
You should seal laminate only when edges, seams or finishes are damaged or in moisture-prone areas like bathrooms and kitchens. Use a compatible surface sealer or edge guard—acrylic for easy use, urethane for heavy wear—and follow manufacturer instructions. Prep by cleaning, fixing gaps, and testing a small area. Apply evenly, allow full cure, and protect with mats and pads. Reinspect annually and recoat as needed; keep going for details on products, steps, and costs.
Quick Answer Should You Seal Laminate Flooring and When to Do It
You generally don’t need to seal factory-finished laminate, but you should if the surface is unfinished, damaged, or in a moisture-prone area.
Seal immediately after installing unfinished planks, repairing deep scratches or cuts, or when laying laminate in basements, bathrooms, or laundry rooms. Doing so protects the core from swelling and extends the floor’s lifespan.
One-sentence recommendation
Although laminate already has a protective wear layer, you should only seal it when it’s damaged, installed in a high-moisture area, or when seams are showing gaps that let water in.
If you decide to act, learn how do you seal laminate flooring correctly: clean, dry, use a compatible seam sealant or polyurethane edge coat, and follow manufacturer instructions to avoid trapping moisture or voiding warranties.
Situations that call for sealing immediately
When laminate shows visible damage, sits in a bathroom, laundry room, or other high-moisture spot, or has gaps at the seams that let water in, seal it right away to stop further swelling and delamination.
You should also act promptly if:
- spills recur or cleaning leaves dark stains
- pet accidents happen often
- junction strips separate and expose edges
Basic Understanding What Sealing Means for Laminate Flooring
Laminate flooring is a composite of fiberboard topped with a printed decorative layer and a protective wear layer, so sealing it isn’t the same as finishing solid wood and you won’t be treating raw grain.
You can use compatible surface sealants or edge guards made for laminate, but you should avoid products that trap moisture or damage the wear layer.
Sealing can add scratch and spill resistance at the edges and seams, yet it won’t restore water resistance to inner core damage or change the flooring’s structural limits.
What laminate flooring is made of and why sealing differs from wood
Think of laminate flooring as a layered composite: a high-resolution printed image of wood or stone sits atop a clear protective wear layer, bonded to a dense fiberboard core and a backing layer for stability.
You shouldn’t treat it like solid wood—there’s no porous grain to absorb traditional sealers, and adding the wrong product can trap moisture or damage the wear layer, so you’ll use different protection strategies.
Types of sealants compatible with laminate
Because laminate doesn’t absorb sealers like solid wood, you’ll rely on surface-compatible products that protect rather than penetrate.
Choose finishes designed for laminates and guarantee compatibility with the factory wear layer. Common options include:
- Acrylic topical sealers: clear, water-based, easy to apply.
- Urethane coatings: durable, chemical-resistant.
- Wax-based maintenance products: temporary shine and water beading.
Benefits and limitations of sealing laminate
When you seal laminate, you’re adding a surface layer that boosts resistance to scratches, stains, and moisture while keeping the floor’s original look.
However, sealing won’t turn laminate into solid wood or fix underlying damage, so expectations should stay realistic.
You’ll extend wear life, simplify cleaning, and deter minor water intrusion, but you’ll still need proper maintenance and prompt repair for deep gouges or persistent moisture.
When You Should and Should Not Seal Laminate
You should consider sealing laminate in moisture-prone areas like bathrooms, kitchens, and entryways to add extra protection against spills and humidity.
Don’t seal if it would void the manufacturer’s warranty or interfere with a floating floor’s ability to expand and contract.
Weigh the benefits in high-risk rooms against the risks where the flooring’s design or warranty advises against it.
Ideal conditions and room types for sealing (bathrooms, kitchens, entryways)
If your laminate sits in a low-moisture, temperature-stable room like a living area or bedroom, sealing is usually unnecessary and can even trap moisture; however, for kitchens, entryways, or bathrooms where spills, tracked-in water, or humidity are common, applying a sealant along seams and edges helps protect the core and extend the floor’s life.
Seal high-traffic zones, near sinks, doors, and thresholds.
When sealing is unnecessary or risky (warranties, floating floors)
Kitchens and bathrooms often need extra protection, but sealing isn’t always a good idea—especially with floating laminate or when your warranty forbids it.
If your floor floats, sealing edges can trap moisture and impede expansion, causing buckling.
Check warranty and manufacturer guidance; some finishes void coverage if altered.
Skip sealers when advised, rely on proper installation, maintenance, and prompt spill cleanup instead.
How to Seal Laminate Flooring Step-by-Step Guide
Before you start, gather the right tools and safety gear, inspect the floor for damage, and make any necessary repairs.
Clean and degrease the surface thoroughly so sealants like water‑based polyurethane, wipes, silicone, or topical products can bond properly.
Follow the manufacturer’s drying, curing, and recoat schedules for each sealant type to guarantee a durable finish.
Preparation: tools, materials, and safety
Get everything clean, organized, and within reach so you can work efficiently and safely—start by gathering the tools (utility knife, caulk gun, pull bar, spacers, microfiber cloths), materials (laminate sealer or water-based polyurethane recommended for laminate, painter’s tape, trim or connection strips, floor cleaner), and basic safety gear (gloves, eye protection, knee pads, and a respirator or mask if the sealer has strong fumes).
- Verify product compatibility and dry times.
- Arrange tools for easy access and waste containment.
- Wear PPE, ventilate the area, and keep children/pets away.
Surface inspection and repairs before sealing
With your tools laid out and safety gear on, inspect the laminate closely for gaps, loose boards, lifting edges, deep scratches, or water damage that could compromise the sealer.
Repair or replace damaged planks, tighten fasteners, and sand rough edges. Check seams for gaps and fill as needed.
- Replace warped or swollen boards
- Fill seams with appropriate filler
- Secure loose edges and junctions
Cleaning and degreasing the floor best practices
1. You should remove dust and grit first with a broom or vacuum, then mop using a pH-neutral cleaner diluted per label instructions.
For grease, apply a mild degreaser on a microfiber cloth, rub gently, and rinse with clean water.
Dry thoroughly to prevent moisture damage.
Avoid abrasive scrubbers, waxes, or oil-based cleaners that leave residue before sealing.
Applying different sealant types (water-based polyurethane, polyurethane wipes, silicone, topical sealers)
Because different sealants bond and behave differently, you’ll want to choose and apply the right type—water-based polyurethane, wipe-on polyurethane, silicone, or a topical sealer—based on your laminate’s wear, traffic, and the look you want.
Apply thin, even coats, following manufacturer directions.
Consider:
- Water-based for clarity and low odor.
- Wipe-on for small repairs and thin films.
- Silicone/topical for flexible edge protection.
Drying, curing times, and recoat schedules
Although drying and curing often get used interchangeably, they’re different stages you need to account for: you’ll wait surface-dry, recoat, then full-cure. Follow manufacturer times, keep ventilation, and avoid traffic until cured. Emotions: relief, patience, pride.
| Stage | Wait | Feeling |
|---|---|---|
| Surface-dry | 1–2 hours | Hope |
| Recoat | 4–8 hours | Patience |
| Full-cure | 24–72 hours | Pride |
Finishing touches and reinstalling trim or transition strips
Finish by reinstalling trim and junction strips to give your sealed laminate a clean, professional look and protect edges from moisture and wear.
Confirm baseboards and thresholds are dry, align pieces snugly, and use finishing nails or adhesive as recommended.
Check connections for level and gap consistency, trim any excess, and wipe away dust.
Inspect seals and touch up edges for durable, neat results.
Comparison of Sealing Options and Their Pros/Cons
Now you’ll compare water-based and oil-based sealants, noting differences in drying time, odor, and durability.
You’ll also weigh brush/roller, spray, and wipe-on application methods for coverage and ease.
Finally, you’ll look at whether to hire a pro or tackle it as a DIY project based on cost, finish quality, and skill level.
Water-based vs oil-based sealants
When you’re choosing a sealant for laminate flooring, the main decision usually comes down to water-based versus oil-based products, each with distinct performance, drying, and maintenance trade-offs. You’ll prefer water-based for quick dry, low odor, and easy cleanup; pick oil-based for tougher wear and richer sheen but longer cure and stronger fumes.
| Water-based | Oil-based |
|---|---|
| Fast dry | Durable |
| Low odor | Glossy |
| Easy clean | Longer cure |
Brush/roller vs spray vs wipe-on application methods
Although each method can protect your laminate, the way you apply the sealant affects coverage, appearance, and cleanup. You’ll choose brush/roller for control, spray for speed and even coats, or wipe-on for quick touch-ups. Consider finish, overspray risk, drying time, and cleanup when deciding.
| Method | Best for |
|---|---|
| Brush/Roller | Control, edges |
| Spray | Large areas |
| Wipe-on | Touch-ups |
Professional sealing vs DIY cost and quality comparison
Curious whether to hire a pro or tackle sealing your laminate yourself? You’ll save money DIY but risk uneven finish and warranty issues; pros charge more yet deliver consistent, durable results fast. Consider time, skill, and product choice before deciding.
| Option | Trade-off |
|---|---|
| DIY | Lower cost, variable quality |
| Professional | Higher cost, reliable finish |
Common Problems and Mistakes to Avoid
Watch out for mistakes that can damage laminate, like overusing abrasive cleaners or applying incompatible sealants.
If you get streaks, bubbling, or peeling, you’ll need to troubleshoot quickly to prevent further harm.
I’ll also explain how to remove a bad seal and redo the finish safely.
Mistakes that damage laminate (overuse of abrasive cleaners, incompatible sealants)
If you use the wrong products or scrub too hard, you can void warranties and ruin the protective wear layer on laminate floors.
Don’t overuse abrasive cleaners, scouring pads, or steel wool. Avoid oil-based or solvent sealants not rated for laminate.
Test any product on a hidden seam first. Follow manufacturer guidance—otherwise you’ll cause scratches, clouding, or delamination that’s costly to fix.
Troubleshooting common issues (streaks, bubbling, peeling)
Mistakes like using abrasive cleaners or the wrong sealants often show up later as streaks, bubbling, or peeling.
So you’ll want to know how to recognize and fix these problems quickly. Check for residue, uneven application, or trapped moisture.
Test small areas, blot—don’t scrub—loose film, and improve ventilation during drying.
Address source issues before recoating to prevent recurrence.
How to remove or redo a bad seal
Start by evaluating the damage to decide whether you need to remove the old seal or can simply sand and recoat. Small surface blemishes often respond to light sanding and cleaning, but widespread bubbling, peeling, or trapped moisture usually means you’ll have to strip the finish completely.
Remove with a solvent or floor stripper, sand smooth, clean thoroughly, then apply a compatible sealer in thin, even coats.
Maintenance and Long-Term Protection Strategies
After sealing your laminate, stick to a gentle cleaning routine—sweeping and a damp microfiber mop—to protect the finish.
Use entry mats, furniture pads, and a dehumidifier or humidifier as needed to prevent scratches and moisture damage.
Check the seal annually and reapply or change strategies if you see wear, peeling, or recurring water issues.
Cleaning routine after sealing
Once you’ve sealed your laminate, keep up a simple cleaning routine to preserve the finish and prevent wear. You’ll dry-sweep daily, damp-mop weekly with a pH-neutral cleaner, and spot-clean spills immediately.
Follow these steps:
- Use a soft broom or microfiber dust mop to remove grit.
- Wring mop until just damp; avoid puddles.
- Blot spills with a soft cloth promptly.
Preventive measures (mats, humidity control, furniture pads)
Three simple habits will go farther than occasional touch-ups: use entrance mats and area rugs to trap grit, control indoor humidity to prevent warping, and fit furniture with soft pads to avoid scratches.
You’ll prolong laminate life by reducing abrasion and moisture stress. Combine these practical steps:
- Place low-profile mats at doors
- Maintain 35–55% indoor humidity
- Attach felt pads to furniture legs
When to reapply sealant or switch strategies
If you notice wear, discoloration, or water beading poorly, it’s time to reassess your sealing approach; inspect high-traffic areas and seams every 6–12 months.
Reapply a compatible sealant when protection fades, or switch to stronger products or surface coatings if damage recurs.
Improve preventive habits—mats, humidity control, furniture pads—and consult pros for extensive swelling or delamination.
Cost, Time, and Tools Checklist
Before you start, know how long the job will take and what you’ll need—estimate hours based on room size and whether you’re working solo or with help.
Compare typical cost ranges for DIY supplies versus hiring a pro so you can budget accurately.
Finally, make a checklist of essential tools and materials (sealant, applicators, cleaners, tape, and safety gear) to avoid interruptions.
Estimated time and labor by room size
Estimate time and labor by room size to plan costs, gather the right tools, and set a realistic schedule. For small rooms (under 100 sq ft) expect 1–2 hours; medium (100–300) 3–5 hours; large (300+ ) 6+ hours. You’ll need sealant, applicator, tack cloth, gloves, and ventilation. Plan cleanup and drying between coats.
| Room Size | Estimated Time |
|---|---|
| Small | 1–2 hrs |
| Medium | 3–5 hrs |
Typical cost ranges for DIY vs professional service
For most homeowners, deciding between a DIY seal and hiring a pro comes down to budget, time, and the floor’s condition: doing it yourself usually costs $20–$150 for materials and takes a few hours to a day, while professional services typically run $1–$3 per square foot (sometimes more for prep or repairs) and save you time and risk.
| Option | Typical Cost | Time |
|---|---|---|
| DIY | $20–$150 | Hours–1 day |
| Pro | $1–$3/ft² | Few hours–1 day |
| Extras | Prep/repairs add cost | Varies |
Essential tools and materials checklist
When you’re ready to seal laminate, gather the right tools and materials so the job goes smoothly and you don’t have to stop mid-project to run to the store.
You’ll need quality supplies, estimate time, and factor costs. Prioritize ventilation and proper cleanup.
Essentials:
- Sealer (laminate-safe) and primer
- Applicator pad, foam roller, painter’s tape
- Drop cloths, gloves, respirator, and cleaning supplies
Frequently Asked Questions
You’ve probably got questions about warranty impact, waterproofing, lifespan, refinishing, and the best sealants for wet areas.
We’ll answer whether sealing voids warranties, how much water protection you can expect, how long seals last, if sealed laminate can be sanded or refinished, and which products work best in high-moisture rooms.
Read on for clear, practical answers.
Can you seal laminate flooring without voiding the warranty?
Wondering whether sealing your laminate will void the warranty? You should check the manufacturer’s warranty terms before applying any sealant.
Some warranties allow topical treatments from approved products or installers; others prohibit alterations that change surface properties.
Keep receipts, follow recommended products, and contact customer support for approval.
If unsure, get written confirmation to avoid risking coverage.
Will sealing make laminate waterproof?
Can sealing laminate make it waterproof? Not completely.
Sealing adds a moisture-resistant layer that helps repel spills and slows water absorption at seams, but laminate core and joints can still swell if exposed to standing water or prolonged dampness.
You should treat sealing as added protection, not a waterproof guarantee—clean up spills quickly and use water-safe junctions and mats to reduce risk.
How long does a laminate seal last?
How long will a laminate seal protect your floor? It typically lasts several years—often three to seven—depending on traffic, moisture exposure, and product quality.
You’ll get longer life with proper cleaning, entry mats, and avoiding harsh cleaners. Inspect periodically for wear or lifting; recoat or touch up high-use areas sooner.
Proper application initially also extends protection.
Can you refinish or sand sealed laminate?
Yes—you generally can’t sand or refinish sealed laminate the way you’d hardwood, because laminate has a thin, printed wear layer over a composite core that won’t take sanding or re-staining.
Instead, you’ll need to repair surface damage with touch-up kits, replace damaged planks, or apply a compatible surface coating as a temporary fix.
You should test any coating on a scrap plank first.
What is the best sealant for high-moisture rooms?
Wondering which sealant holds up best in bathrooms and laundry areas?
You’ll want a waterproof, flexible sealant—100% silicone or a marine-grade polyurethane. They resist steam, spills, and movement at joints.
Apply to seams, thresholds, and around fixtures after cleaning and drying. Reapply every few years or sooner if you see gaps.
Test compatibility on a scrap before full application.
Visual Guide and Before/After Examples
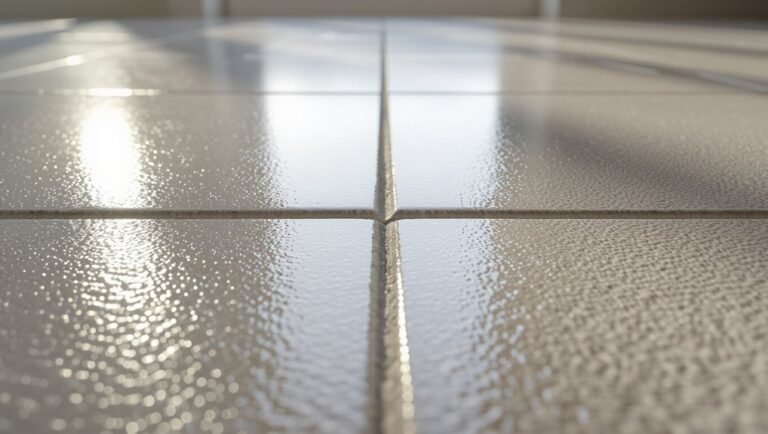
1 clear set of photos will show you what to expect at each stage of sealing laminate flooring: a clean, prepped surface; taped edges and applied sealer; and the finished, protected floor.
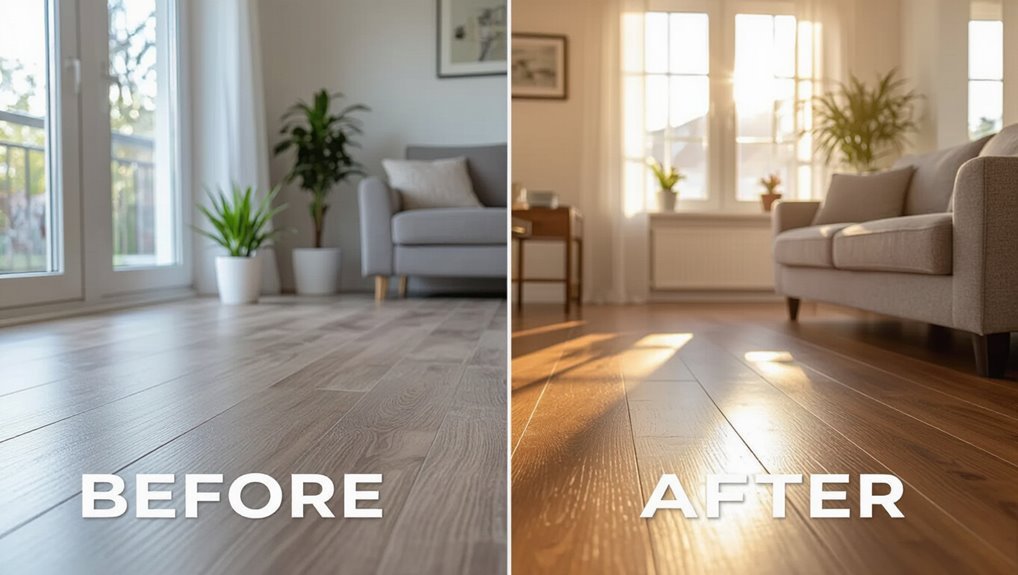
Use close-ups of seams to show penetration, sweeping shots for overall sheen, and side-by-side before/after images to highlight stain resistance.
Label stages and note drying times for quick reference.