
Does Vinyl Flooring Need to Acclimate Before Installation?
Yes — you should acclimate most vinyl flooring before installation to stabilize temperature and humidity and prevent warping, gaps, or adhesive failure. Let unopened boxes or unpacked planks sit in the installation room under working HVAC for the manufacturer’s recommended 24–72 hours, monitor temperature and humidity, and follow moisture-testing and placement instructions. Skipping acclimation often voids warranties and causes problems like buckling or uneven seams, and you’ll find practical steps and tips if you keep going.
Does Vinyl Flooring Need to Acclimate Before Installation? Quick Answer
Yes — most vinyl needs some acclimation, and you’ll want to follow the manufacturer’s recommended time.
It’s essential when the planks or sheets will face big temperature or humidity differences from the storage area, and optional for stable indoor conditions.
If you’re unsure, err on the side of acclimating to prevent warping or gaps.
Direct short answer for homeowners and installers
Most vinyl flooring does need to acclimate—give it at least 48 hours (and up to 72 for larger runs or plank products) in the room where it will be installed so the material can reach the same temperature and humidity as the subfloor.
For homeowners and installers: yes, acclimation matters.
Bring materials into the room, stack boxes flat, and maintain job-site conditions to prevent gaps, buckling, or adhesive failure.
When acclimation is essential vs optional
When the room’s temperature and humidity are close to normal living conditions, you can often install vinyl without a long acclimation period; however, you should always acclimate when the material has been stored in extreme cold or heat, when you’re installing large runs or planks, or when the manufacturer’s instructions require it.
If conditions are stable and runs are short, you can skip extra time, but follow guidelines for warranties.
What Acclimation Means for Vinyl Flooring
Acclimation means you let flooring sit in the installation space so it reaches the room’s temperature and humidity before you install it.
Vinyl expands or contracts with heat and moisture, so proper acclimation helps prevent gaps, buckling, or warping.
Different types—LVP, vinyl tile, and sheet vinyl—can react differently and often need slightly different acclimation times and methods.
Definition of acclimation in flooring context
Because vinyl responds to temperature and moisture, letting it sit in the installation space before you lay it down guarantees the planks or sheets will perform as planned.
Acclimation means you leave flooring unpacked in the room for a specified time so it reaches the room’s stable temperature and humidity. That reduces dimensional changes, helps adhesives bond, and minimizes gaps or buckling after installation.
How vinyl reacts to temperature and humidity
If you leave vinyl in a room that swings between hot and cold or goes from dry to humid, the material will expand, contract, or cup until it settles to those conditions.
You should let it reach stable temperature and moisture levels before installing so seams align, adhesives bond, and planks sit flat.
Rapid shifts cause gaps, buckling, or adhesive failure—preventable with proper acclimation.
Differences between luxury vinyl plank (LVP), vinyl tile, and sheet vinyl
When you’re preparing different types of vinyl for installation, their construction affects how long and under what conditions they need to settle: luxury vinyl planks (LVP) and vinyl tiles, which are thicker and often rigid, usually need less time to stabilize than flexible sheet vinyl.
However, each can react differently to temperature and humidity changes. You should acclimate sheets longer, allow boxed LVP/tile to flatten, and monitor humidity.
Why Acclimation Matters: Risks of Skipping It
If you skip acclimation, you’ll often face common problems like buckling, gaps, and adhesive failures that make installation harder.
Those issues can hurt long-term performance and may void your warranty if the manufacturer requires acclimation.
Later you’ll see visual examples—cupping, seams opening, and uneven boards—that show why it’s worth the wait.
Common installation problems caused by unacclimated vinyl
Because vinyl keeps expanding and contracting with temperature and humidity changes, skipping acclimation can lead to visible and costly problems after installation.
You’ll see gaps, buckling, and uneven seams as boards shift. Adhesive failures and telegraphing of subfloor imperfections become more likely.
You’ll also face increased repair time and material waste, so acclimation prevents these common, avoidable installation issues.
Long-term performance and warranty implications
While skipping acclimation might save time up front, it raises serious long-term risks for performance and warranty coverage that you’ll want to avoid.
Installers and manufacturers expect proper acclimation; skipping it can void warranties, reduce longevity, and lead to costly repairs.
You’ll face accelerated wear, edge lifting, and moisture-related failures that manufacturers may refuse to cover if acclimation guidelines weren’t followed.
Visual examples of issues
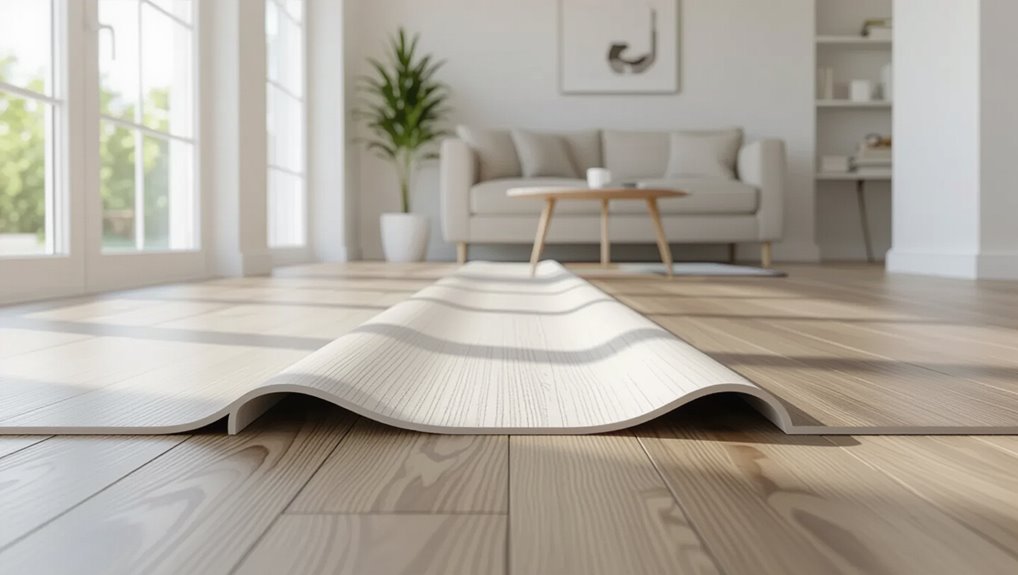
Picture a row of planks with curled edges, gaps along the seams, and swollen joints — these are common visible signs you’ll see when vinyl wasn’t properly acclimated.
You’ll notice buckling, peaking at doorways, uneven changes, and color shifts where sunlight hit.
These flaws don’t just look bad; they signal dimensional instability that shortens lifespan and can void warranties if installers didn’t follow acclimation guidelines.
When Vinyl Flooring Does and Does Not Need Acclimation
When deciding if your vinyl needs acclimation, consider whether you’re working on new construction or a renovation, since new builds often have more variable moisture and temperature.
Also factor in your climate and season, plus the subfloor type—concrete, wood, and radiant-heated floors affect how much acclimation is required.
Finally, always check the manufacturer’s label and instructions, because their recommendations override general guidance.
New construction vs renovation scenarios
If your project is new construction, you’ll usually have more control over temperature and humidity, so new vinyl often needs little or no acclimation.
In renovation jobs, though, existing indoor conditions, subfloor type, and exposure to exterior walls can create microclimates that make acclimation essential.
You should assess subfloor moisture, heating systems, and room use; when in doubt, allow acclimation to prevent buckling or gaps.
Climate and seasonal considerations
Because vinyl expands and contracts with temperature and humidity, you should factor seasonal conditions into your acclimation plan.
If you install during stable indoor climates—moderate humidity and temperature—you can shorten acclimation.
In extreme cold, heat, or humid seasons, allow longer acclimation and control indoor conditions with HVAC or dehumidifiers.
Monitor conditions and delay installation if you can’t maintain recommended ranges.
Subfloor types and their impact on acclimation needs
Although different subfloors interact with vinyl in various ways, your acclimation needs largely depend on the material beneath the planks.
Concrete and moisture-prone substrates often require longer acclimation and moisture testing before installation.
Plywood, OSB, and existing resilient floors usually need less time but still must be dry and level.
Raised or cushioned subfloors can affect expansion space and bonding, too.
Manufacturer-specific recommendations and labels
Some manufacturers require specific acclimation times and labeling—always check the product instructions before you buy or install. You should follow labeled requirements; some floors need 24–72 hours, others none. Ignoring labels can void warranties. Use the table below to note requirements, temperature, and warranty effects.
| Requirement | Time | Warranty |
|---|---|---|
| Label A | 48h | Valid |
| Label B | None | Conditional |
Step-by-Step Acclimation Process (How-To)
Before you start installation, check the manufacturer’s guidelines and warranty requirements so you know any specific acclimation rules.
Prepare the room by controlling temperature and humidity, then unbox and arrange planks or tiles to allow airflow around them.
Follow recommended timeframes for your vinyl type and perform final checks—moisture testing and temperature readings—before you lay the floor.
Step 1: Check manufacturer guidelines and warranty requirements
When you’re preparing to acclimate vinyl planks, start by reading the manufacturer’s installation instructions and warranty terms so you know the required room temperature, humidity range, acceptable subfloor conditions, and any acclimation time they mandate.
Follow those specs exactly—deviations can void warranty.
Note required flooring orientation, changeover and adhesive recommendations, and any prohibited subfloor materials to guarantee compliant, long-lasting installation.
Step 2: Prepare the room (temperature, humidity control)
Although acclimation starts with the flooring out of the boxes, you’ll need to get the room stable first by setting and maintaining the temperature and humidity the manufacturer specifies.
Close windows, run HVAC or portable heaters/coolers, and use humidifiers or dehumidifiers to hit target ranges.
Monitor conditions with a reliable thermometer and hygrometer for at least 48–72 hours before installation.
Step 3: Unbox and arrange planks/tiles for airflow
Now that the room’s climate is steady, you can bring the boxes in and open them.
Unstack a few cartons at a time, spreading planks or tiles flat with edges slightly separated. Create gaps for cross-ventilation and leave boards face-up to equalize.
Keep them off direct sunlight and away from heat sources, rotating bundles occasionally so all pieces receive similar airflow.
Step 4: Recommended acclimation timeframes for different vinyl types
Aim for specific acclimation windows based on the vinyl type you’re installing: rigid-core planks usually need 24–48 hours.
Luxury vinyl tile (LVT) and standard vinyl planks often require 48–72 hours.
Sheet vinyl or glue-down products may need up to 72 hours or more—always check the manufacturer’s guidelines and adjust for extreme temperature or humidity conditions.
You’ll monitor conditions and extend times when rooms are unusually cold or damp.
Step 5: Final checks before installation (moisture testing, temperature readings)
Before you lay a single plank, run final checks to confirm the subfloor and room conditions meet the manufacturer’s specs: perform a moisture test (calcium chloride or in-situ relative humidity), measure surface and ambient temperatures, and verify humidity levels with a hygrometer.
Then act on issues immediately to prevent failures. Follow these urgent steps:
- Test moisture.
- Record temps.
- Check humidity.
- Reassess subfloor.
Tools and Measurements for Proper Acclimation
You’ll need thermometers and hygrometers to monitor room temperature and relative humidity, aiming for about 60–80°F (15–27°C) and 30–50% RH while the planks acclimate.
Use a moisture meter to check subfloor and plank moisture — test multiple spots and only proceed if readings are within the manufacturer’s limits.
I’ll give a simple installer checklist next so you can verify tools, target ranges, and measurement spots before installation.
Thermometers and hygrometers: what to measure and target ranges
Accuracy matters when acclimating vinyl flooring: you’ll need both a reliable thermometer and a hygrometer to measure room temperature and relative humidity, because the board dimensions and adhesive performance respond to small environmental changes.
Aim for 60–80°F (15–27°C) and 30–50% RH as general targets.
Monitor conditions for 48–72 hours before and during installation, adjusting HVAC or humidifiers as needed.
Moisture meters and when to use them
Thermometers and hygrometers tell you what the air is doing, but moisture meters show what’s happening in the subfloor and the vinyl itself, and you should check both.
Use a pin meter for concrete or plywood to read internal moisture; use a non‑penetrating meter for finished vinyl.
Test several spots, compare to manufacturer limits, and address high readings before installing.
Simple checklist for installers
Start with a simple checklist of tools and measurements so you don’t miss any acclimation steps: a reliable tape measure, straightedge, pin and non‑penetrating moisture meters, a thermometer and hygrometer, a leveled work surface or laser level, and the manufacturer’s recommended acclimation time and temperature/humidity limits.
- Gather tools
- Verify readings
- Record conditions
- Confirm limits before installing
Common Mistakes and How to Avoid Them
Don’t just trust the calendar—monitor temperature and humidity while your planks acclimate so you’re sure conditions are right.
Don’t leave them in an unconditioned garage or skip moisture and subfloor temperature checks, and never install immediately after delivery without confirming stable readings.
Following those simple checks will prevent warping, gaps, and adhesive failure.
Mistake 1: Relying only on time without monitoring conditions
Although waiting the recommended acclimation time is important, relying on the clock alone can leave you with warped or gapped vinyl once it’s installed.
You should track temperature and humidity during acclimation, check multiple planks for stability, and adjust timing if conditions vary.
Use a reliable thermometer/hygrometer and document readings so you install only when materials match the room environment.
Mistake 2: Acclimating in an unconditioned space
Tracking temperature and humidity is only part of the equation—you also need to acclimate vinyl where the room conditions match where it will be installed.
Don’t leave planks in an unconditioned garage or attic; extreme swings skew moisture content and dimensional stability.
Bring materials into the actual installation space, run HVAC if needed, and wait until readings stabilize to prevent gaps, buckling, or uneven seams.
Mistake 3: Ignoring subfloor moisture and temperature
Because the subfloor sets the stage for your vinyl, you can’t overlook its moisture and temperature—the wrong conditions will ruin even perfectly acclimated planks.
Test moisture with a meter and measure surface temperature; confirm both meet manufacturer specs. Don’t install over damp or cold substrates.
Remediate issues with drying, vapor barriers, or heating before laying flooring to prevent warping, adhesive failure, or mold.
Mistake 4: Installing immediately after delivery
If you start installing vinyl the moment it arrives, you risk problems from boards that haven’t had time to acclimate to the room’s temperature and humidity; always let the material sit unopened for the manufacturer’s recommended period so it adjusts and lays flat.
You’ll avoid gaps, buckling, and wasted time by waiting.
Consider these immediate reactions:
- Frustration
- Regret
- Extra cost
- Delay
Best Practices and Tips for Smooth Installation
Before you lay a single plank, follow product-specific acclimation timelines—luxury vinyl, SPC, and sheet vinyl each need different times to stabilize.
Account for climate (longer in cold, careful moisture control in humid areas), coordinate acclimation windows with other trades so HVAC and flooring timelines match, and keep a simple log with temperatures, humidity, and photos to protect your warranty.
These small steps cut installation problems and preserve your coverage.
Ideal acclimation timelines by vinyl product type
Different vinyl types need different acclimation times to perform well, and following the right schedule prevents gapping, buckling, or adhesive failure.
Rigid core (WPC/SPC) usually needs 24–48 hours. Luxury vinyl planks and tiles typically require 48–72 hours. Glue-down vinyl often needs 72 hours for adhesive compatibility. Peel-and-stick often needs 24–48 hours.
Always follow manufacturer guidelines and check room and product temperatures.
Climate-specific tips (cold climates, humid climates)
When you’re installing vinyl in extreme climates, you’ll need to adjust acclimation, moisture control, and adhesive choices to prevent warping, gapping, or adhesive failure.
In cold areas, keep indoor temps steady above manufacturer minimums and allow longer acclimation.
In humid zones, control substrate moisture with vapor barriers, use humidity-tolerant adhesives, and shorten exposure before locking or bonding to avoid cupping and mold.
Coordinating acclimation with other trades on-site
Because acclimation affects and is affected by every trade working on-site, you’ll need a clear schedule and communication plan so vinyl planks reach and stay at the manufacturer’s recommended temperature and humidity before installation.
Coordinate HVAC startup, painting, and concrete curing timelines, restrict heavy dust or moisture-producing work nearby, and assign a single contact to confirm conditions, timing, and access for installers.
How to document acclimation for warranty protection
Coordinating acclimation with other trades is only half the job; you also need to prove it happened the right way to protect your warranty.
You should record conditions, timing, and responsible parties, then store proof securely. Follow this checklist to avoid disputes and sleepless nights:
- Date/time stamped photos
- Temperature/humidity logs
- Signed acclimation form
- Supplier receipt and batch numbers
Alternatives and Exceptions
If you’re using a floating floor or factory-stabilized planks, acclimation time can be cut back compared with loose-lay or glued systems.
Look for pre-attached underlayment to speed installation and improve sound and comfort.
Be aware quick-install methods save time but often trade off long-term repairability and moisture tolerance.
When floating installations reduce acclimation needs
When you choose a floating installation, you can often skip lengthy acclimation because the planks or tiles aren’t glued or bonded to the subfloor and can move slightly with ambient humidity.
That said, manufacturers still set minimum acclimation guidelines and you should confirm those before installing.
Even so, allow short-term site conditioning—temperature and humidity within recommended ranges—to prevent immediate gapping or cupping after you lock the floor in place.
Pre-attached underlayment and factory-stabilized products
Many vinyl plank and tile lines now come with pre-attached underlayment or factory-stabilized cores, so you can skip adding a separate underpad and get more consistent dimensional stability right out of the box.
You’ll often need less acclimation time, follow manufacturer specs, and still control subfloor moisture and temperature. These products simplify installation but don’t eliminate basic site-prep requirements.
Quick-install methods and their trade-offs
Because speed often matters on tight schedules, quick-install vinyl options—like click-lock floating planks, peel-and-stick tiles, and loose-lay systems—let you finish a floor far faster than traditional glue-down or full-spread installations.
You’ll save time and often cost, but accept trade-offs: reduced long-term stability, louder joints, potential moisture sensitivity, and limited suitability for uneven subfloors.
Follow manufacturer limits and plan for repairs.
Cost, Time, and Project Planning Considerations
When planning your installation, remember that acclimation time for vinyl affects the overall timeline and can’t be rushed.
Skipping proper acclimation might save time upfront but can increase labor and repair costs later.
Schedule acclimation during quieter project phases and book installers with buffer days to minimize delays.
How acclimation affects project timeline
If you skip proper acclimation, you’ll likely face delays, added costs, and scheduling headaches because vinyl planks must reach equilibrium with the room’s temperature and humidity before installation.
Plan at least 48–72 hours for standard products, longer for large temperature or humidity swings.
Build that window into your timeline, coordinate deliveries, and avoid last-minute work that forces redoing seams or waiting for adhesive to cure.
Labor and cost implications of proper vs skipped acclimation
Skip proper acclimation and you’ll pay for it in time and money: installers will need to redo seams, wait out extra curing, or return for repairs, which raises labor hours and pushes your project past its deadline.
You’ll face higher contractor charges, replacement material costs, and warranty issues.
Proper acclimation adds predictable scheduling and modest upfront cost, avoiding costly callbacks and lost productivity.
Scheduling tips to minimize delays
Because delays often cascade, build a schedule that buffers critical steps—delivery, acclimation, subfloor prep, and final inspections—so one hold-up doesn’t stop the whole project.
Prioritize realistic lead times, lock in contractor windows, and sequence tasks to allow overlap where safe.
Communicate deadlines, confirm material arrival, and plan contingency days to handle unforeseen moisture, repairs, or inspection setbacks without derailing completion.
FAQs
You’ll want clear answers to common acclimation questions before you start.
How long to acclimate, whether heaters or dehumidifiers can help, and whether peel-and-stick products need time to settle are all worth asking.
You’ll also need guidance if you can’t control climate at the site and to know what acclimation can — and can’t — prevent.
How long should vinyl flooring acclimate before installation?
How long should vinyl flooring acclimate before installation?
You should let vinyl planks or sheets sit in the installation room for 48 to 72 hours under normal living conditions.
Peel-and-stick or rigid core may need the shorter end; flexible luxury vinyl often benefits from the full 72 hours.
Keep boxes closed and on the floor, away from direct sunlight or vents.
Can I speed up acclimation with heaters or dehumidifiers?
Yes—you can speed up acclimation, but you should do it carefully.
Use gentle, consistent heat (not direct heaters) and a dehumidifier to stabilize temperature and humidity to the manufacturer’s recommended range.
Avoid rapid swings, high heat, or blowers that dry edges unevenly.
Monitor conditions with a thermometer and hygrometer, and only accelerate when you can maintain steady, controlled conditions.
Does peel-and-stick vinyl need acclimation?
Wondering if peel-and-stick vinyl needs acclimation? Generally, yes—manufacturers usually recommend letting sheets or tiles sit in the installation room 24–48 hours.
That stabilizes size and adhesive performance. Shorter acclimation risks gaps, buckling, or poor bonding, especially with temperature swings.
Follow product instructions: they override general advice and guarantee warranty compliance.
What if I can’t control humidity or temperature before installation?
Can’t control humidity or temperature before installing peel-and-stick vinyl? You can still install, but take precautions: choose products rated for variable conditions, allow extra expansion gaps, stagger seams, and avoid high-moisture areas.
Use moisture-resistant adhesives and monitor indoor conditions after installation. Plan for potential movement and keep flooring warranty and manufacturer recommendations in mind to reduce risk.
Will acclimation prevent all expansion or contraction problems?
Although acclimation helps a lot, it won’t eliminate every expansion or contraction issue. You should still leave proper expansion gaps, follow manufacturer spacing and installation methods, and maintain stable indoor climate afterward.
Acclimation reduces risk but can’t control extreme humidity swings, direct sunlight, or improper subfloor prep. Plan for movement and inspect periodically to catch and fix issues early.
