How to Install a Heated Bathroom Floor Under Any Type of Tile
You can install heated floors under any tile by choosing electric mats for small bathrooms or hydronic tubing for larger areas, measuring the room, and prepping the subfloor (concrete, plywood, or backerboard). Insulate beneath the system, lay out and test heating elements, secure cables or pipes, connect to the thermostat or manifold, then apply thinset and tile. Follow electrical and plumbing codes, use compatible adhesives, and avoid common layout mistakes—keep going and you’ll get the full step-by-step.
How to Install a Heated Bathroom Floor Under Any Type of Tile
You can install either electric mats or hydronic tubing under any type of tile, but each system has different installation steps and performance.
Electric systems are simpler and great for smaller rooms, while hydronic systems suit larger areas or whole-house heating.
We’ll compare when to pick one over the other and what to watch for during tile installation.
Quick Answer Can You Install Electric or Hydronic Heating Under Tile?
Wondering whether electric or hydronic systems work under tile? Yes — both do, and you can learn how to install heated bathroom floor systems safely.
Consider these quick points:
- Electric mats are thin and simple to retrofit
- Hydronic needs tubing and a boiler or pump
- Both require proper insulation
- Use thinset compatible with heating
- Follow local codes and manufacturer instructions
When to Choose Electric vs Hydronic Systems
Although both electric and hydronic systems will warm tile effectively, choosing between them comes down to your bathroom size, budget, installation complexity, and long-term energy goals. You’ll pick electric for small bathrooms, fast installation, and lower upfront cost. Choose hydronic for large areas, high efficiency, and integration with home heating.
| Feature | Electric | Hydronic |
|---|---|---|
| Best size | Small | Large |
| Cost | Low upfront | Higher upfront |
| Efficiency | Moderate | High |
Basic Understanding What Is Floor Heating and Why Use It Under Tile?
You’ll learn the three main in-floor systems—electric mats or cables, hydronic tubing, and self-regulating heaters—and how each one works under tile.
Heated tile adds immediate comfort, can cut energy use when sized correctly, and even boosts resale appeal.
I’ll also cover which tile types—ceramic, porcelain, natural stone, and mosaics—are best suited for these systems.
Types of In-Floor Heating Systems (Electric, Hydronic, Self-Regulating)
When you’re picking a heated floor for a bathroom, you’ll choose between electric systems, hydronic (water-based) systems, and self-regulating mats—each works well under tile but suits different budgets, installation scopes, and performance needs.
- Electric cable or mat: easy retrofit, low profile.
- Hydronic: efficient for large areas, needs boiler.
- Self-regulating: varies output, safer wiring.
- Controls: thermostats vary.
- Installation: DIY vs pro.
Benefits of Heated Floors Under Tile (comfort, efficiency, resale)
After choosing the right system—electric, hydronic, or self-regulating—you’ll notice why tile and in-floor heating are such a good match: tile conducts and holds heat, giving you steady, even warmth underfoot that a radiator or baseboard can’t match.
You’ll enjoy:
- Immediate underfoot comfort
- Lower heating bills from zoned use
- Reduced drafts and cold spots
- Faster bathroom warm-up
- Strong resale appeal
Common Tile Types and Compatibility (ceramic, porcelain, natural stone, mosaic)
Because tile transfers heat so well, most common types—ceramic, porcelain, natural stone, and mosaic—work with in-floor systems, but each has quirks you’ll want to reflect on.
- Ceramic: lightweight, fast heating, affordable.
- Porcelain: dense, slower to heat, very durable.
- Natural stone: high thermal mass, needs stable temps.
- Mosaic: thin, great heat transfer, lots of grout.
- Adhesives: choose flexible, heat-rated products.
Pre-Installation Assessment and Planning
Before you start, measure the bathroom and calculate the heat load so the system will match the room size and tile type.
Check your subfloor—concrete, plywood, or cement backerboard—and confirm it meets structural and radiant-ready requirements, plus any electrical or plumbing constraints and permits.
Finally, pick a heating system and thermostat rated for tile that fits your layout and wiring options.
Measuring the Bathroom and Calculating Heat Load
To get your heated floor working efficiently, start by measuring the room and calculating the heat load so you know what system size and layout you’ll need.
Measure length, width, and subtract non-heated areas (cabinets, fixtures). Calculate square footage, insulation values, window and exterior wall surface areas.
Use a heat-loss calculator or consult manufacturer charts to determine wattage per square foot and circuit requirements.
Subfloor Types and Structural Requirements (concrete, plywood, cement backerboard, radiant-ready)
Now that you’ve measured the room and worked out the heat load, check what lies beneath your finished floor: the subfloor type and structural condition determine which heated-floor systems will work and how they’ll be installed.
Inspect concrete for level and moisture, make certain plywood is stiff and screw-secured, confirm cement backerboard is properly fastened, and verify the floor is radiant-ready or reinforced to meet load and deflection limits.
Electrical and Plumbing Considerations and Permits
1 essential step is to map out electrical and plumbing conditions for your heated floor so you can plan permits, circuit capacity, and routing before any work begins.
Check breaker availability, load calculations, and GFCI requirements; locate water lines, drains, and access panels to avoid conflicts.
Contact local building departments for permit rules, inspections, and licensed electrician/plumber requirements before you start.
Choosing the Right Heating System and Thermostat for Tile
Picking the right heating system and thermostat for tile starts with matching your bathroom’s size, subfloor type, and usage patterns to the available technologies—electric mats or loose-wire systems for thin-set tile, and hydronic tubing for larger or whole-house installations.
Next, choose a thermostat that offers accurate floor sensing, programmable schedules, and the required electrical compatibility.
Assess insulation, calculate wattage needs, confirm circuit capacity, and pick a user-friendly thermostat with floor probe support.
Tools, Materials, and Safety Preparations
Before you start, gather the right tools—cutters, trowels, a multimeter, and a float—and lay out a materials checklist including heating mats or cables, thinset, uncoupling membrane, backerboard, and grout.
Verify each heating element’s resistance with the multimeter and make sure you have enough thinset and backerboard for full coverage.
Shut off and lock out the circuit feeding the bathroom and follow basic PPE and worksite safety practices before you begin.
Tools Required (cutters, trowels, multimeter, float)
You’ll need a small set of reliable tools to get the heated-floor job done safely and accurately: tile cutters or wet saw for precise cuts, notched and margin trowels for thinset, a grout float, and a quality multimeter to test cable/mat continuity and resistance.
Also pack a utility knife, tape measure, chalk line, and a stiff bristle brush for surface prep and cleanup.
Materials Checklist (heating mats/cables, thinset, uncoupling membrane, backerboard, grout)
Gather the right materials so your heated-floor install goes smoothly and meets code: heating mats or loose cables sized to your layout, a polymer-modified thinset compatible with the heating system, an uncoupling membrane or crack isolation product, cement backerboard (if your subfloor requires it), and grout rated for your tile and floor type.
- Heating mat or cable kit
- Polymer-modified thinset
- Uncoupling membrane
- Cement backerboard
- Tile-compatible grout
Safety Precautions and Temporary Power Isolation
When you work on an electrical floor-heating system, treat power like the primary hazard and isolate the circuit at the breaker before touching any wiring or mats; lock out and tag the breaker to prevent accidental re-energizing.
Verify with a non-contact tester, then a multimeter.
Wear insulated gloves, eye protection, and kneepads.
Keep the work area dry, clear, and well-lit.
Don’t bypass safety devices.
Step-by-Step Installation Process Electric Heating Under Tile
You’ll start by preparing and leveling the subfloor, then install an uncoupling membrane or cement backerboard to protect the tile assembly.
Next you’ll lay out and test the heating mat or cable, paying attention to spacing and sensor placement before securing and electrically connecting the system with a proper junction box and thermostat probe.
Finally you’ll apply thinset and set the tile over the heating elements, ensuring the mortar fully embeds the wires or mat.
Step 1 Prepare and Level the Subfloor
Step 1 focuses on making the subfloor flat, clean, and structurally sound so your electric heating system and tile adhere properly.
Remove old flooring, nails, and debris. Repair joists, squeaks, and loose boards.
Fill low spots with a self-leveling compound and sand high areas.
Verify the surface is dry, rigid, and within flatness tolerances specified by tile and heating manufacturers before proceeding.
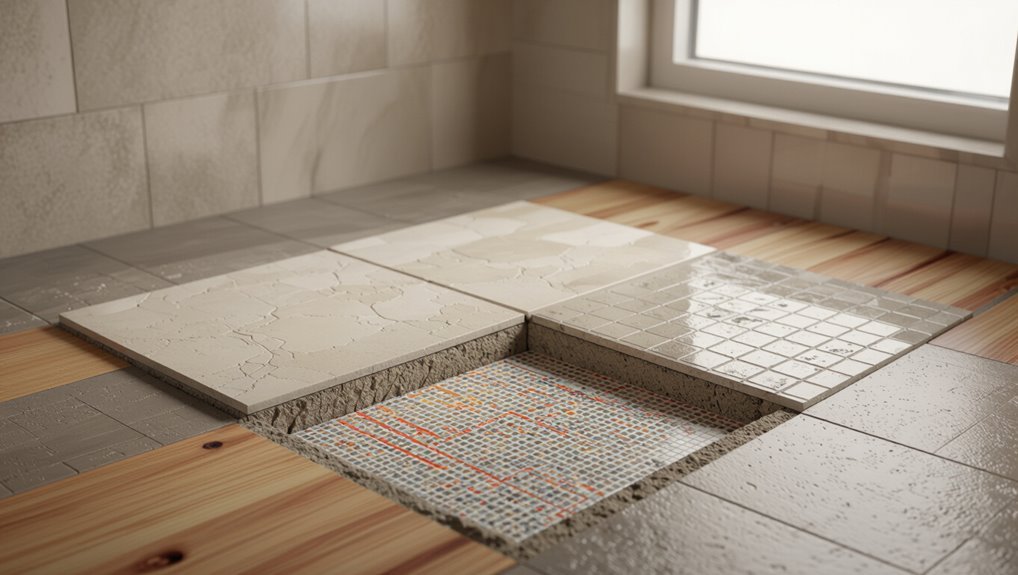
Step 2 Install Uncoupling Membrane or Cement Backerboard
2 options exist for preparing the substrate under your electric mat: a polymer uncoupling membrane or cement backerboard—choose the one that matches your floor type and tile/heating manufacturer requirements.
For membrane, thinset-bond it to the leveled subfloor and roll seams per instructions.
For backerboard, screw and tape joints, fill with thinset, and confirm a flat, clean surface before proceeding to the heating components.
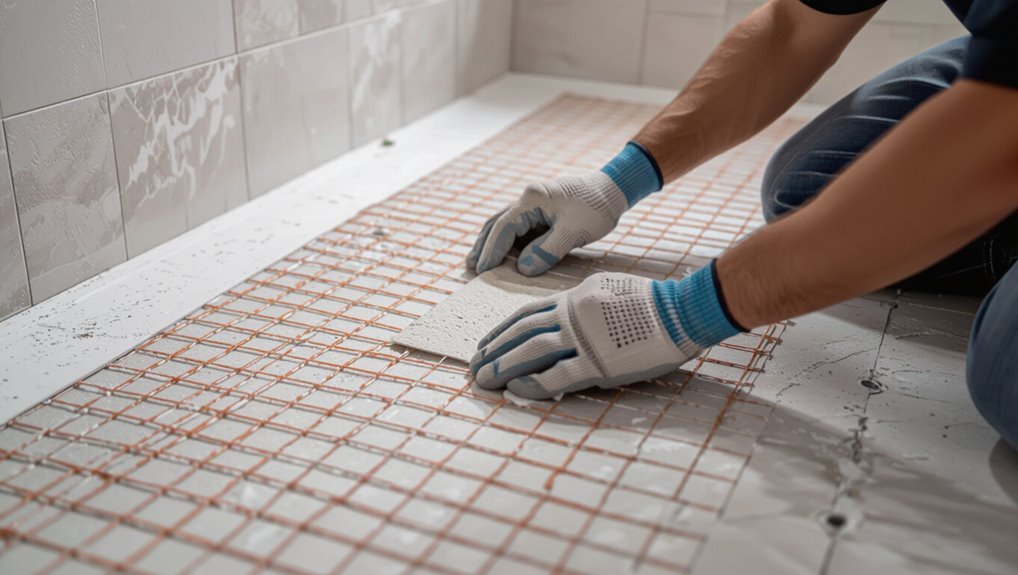
Step 3 Lay Out and Test the Heating Mat/Cable (spacing, sensor placement)
3 things matter most when you lay out and test the heating mat or cable: correct spacing to match the wattage and tile type, precise placement of the floor sensor, and a full continuity/insulation resistance test before embedding the system.
Measure and mark spacing, cut and turn mat per instructions, position sensor in conduit near center of heated area, then test resistance and insulation values against manufacturer specs.
Step 4 Secure and Electrically Connect the Heating System (junction box, thermostat probe)
Now secure the heating mat or cable to the subfloor and make the electrical connections: fasten the mat per the manufacturer’s method (tape, staples, or adhesive) without damaging the heating element.
Route the thermostat probe into its conduit and position it at the specified depth and location, and bring the supply conductors into the junction box so you can complete the wiring.
Then mount the junction box, connect ground, neutral, and live per diagram, and secure strain relief.
Step 5 Apply Thinset and Set Tile Over Heating Elements
With the heating mat secured and the thermostat probe and supply conductors in place, you’re ready to embed the system in thinset and lay your tile.
Apply a manufacturer-approved thinset with a notched trowel, fully covering cables or mat without gouging. Press tiles firmly, using spacers and a level. Keep probe access clear.
Clean excess thinset from tile surfaces as you go.
Step 6 Grout, Cure Times, and Final Thermostat Setup
Once your tiles are set and the thinset has firmed, you can grout, allow proper cure times, and finish the thermostat hookup so the system runs safely and reliably.
- Grout joints, wipe excess, and let dry per grout instructions.
- Wait recommended cure (thinset/grout) before power.
- Connect thermostat per manufacturer wiring diagram.
- Program temperature limits and schedule.
- Test floor sensor and run initial warm-up cycle while monitoring.
Step-by-Step Installation Process Hydronic Heating Under Tile
First, you’ll plan the loop layout and position the manifold so runs are efficient and accessible.
Then you’ll install insulation and lay the piping (staple-up, embed in screed, or use prefabricated panels), pressure-test the lines, and fit the manifold controls.
Finally, pour or place the leveling screed, tile over the hydronic system, and commission the floor for regular use.
Step 1 Design Loop Layout and Manifold Placement
Begin by mapping the room on paper, marking fixtures, cabinet footprints, and the door swing so you can plan efficient loop runs and place the manifold where it’s accessible yet out of the way.
Zone loops to minimize length and balance heat, avoid crossing under fixed cabinets, allow service access, size loops for 30–50 ft each, and pick manifold location near existing plumbing and an electrical outlet.
Step 2 Install Insulation and Piping (staple-up, embed in screed, or prefabricated panels)
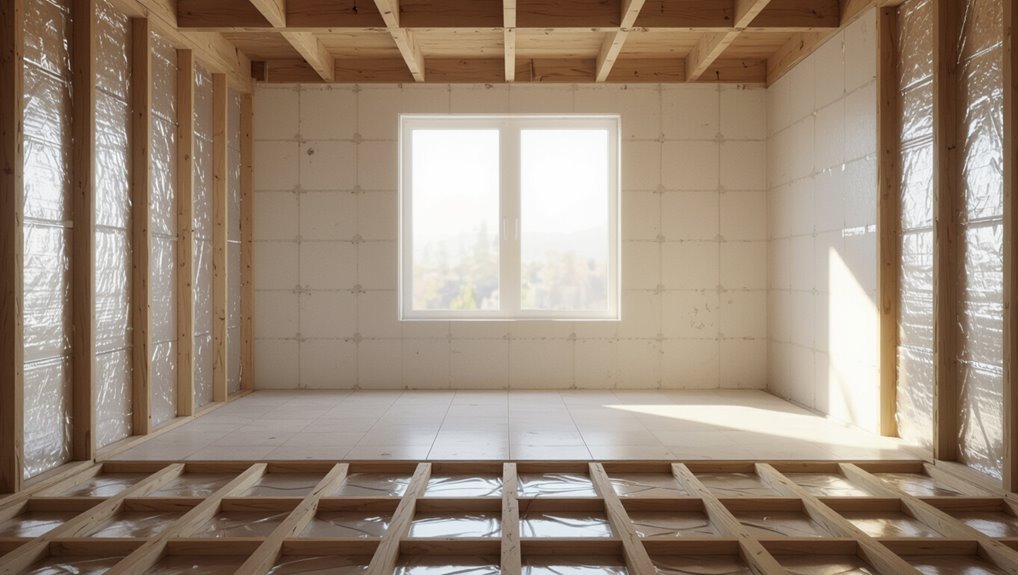
Now you’ll install the thermal layer and lay out the tubing, choosing among staple-up, screed embedment, or prefabricated panel methods based on your subfloor, height constraints, and finish floor.
Lay rigid foam or insulation boards, secure pipes per the chosen method, maintain recommended spacing and curve radii, fasten tubing to prevent movement, and mark loops for the manifold.
Verify proper vapor barrier if required.
Step 3 Pressure Test Piping and Install Manifold Controls
Pressure-test the tubing and set up the manifold controls before you cover the system so you catch leaks and confirm flow paths.
Fill lines with water, pressurize to the specified test pressure, and watch for drops.
Mount the manifold, install flow meters, balancing valves, and isolation valves.
Connect supply and return, label circuits, and verify pump operation and thermostat wiring before proceeding.
Step 4 Pour or Install Floor Covering and Leveling Screed
Before you cover the tubing, make sure the system is still pressurized and the manifold is labeled.
Then choose the appropriate screed or thinset for your subfloor and tile type.
Mix and pour or trowel the selected material to encapsulate tubing, maintain specified cover depth, and level to slope.
Cure per manufacturer specs, protect from traffic, and recheck pressure before proceeding.
Step 5 Tile Installation Over Hydronic System and Commissioning
Begin laying tile only after the screed or thinset has fully cured, the system’s pressure has been rechecked, and the manifold labeling is confirmed so you won’t need to disturb the floor later.
Use appropriate adhesive, maintain joint spacing, and avoid penetrating tubing.
Once grout cures, perform final pressure and leak checks, slowly heat the system per manufacturer ramp-up to cure adhesives, then confirm thermostat and zone operation.
Tile-Specific Installation Considerations
When choosing tile for a heated floor, you’ll need to contemplate how thin ceramic or porcelain tiles transfer heat differently than thick natural stone and pick an adhesive rated for the substrate and temperature.
If you’re using small mosaic sheets, plan for an uncoupling membrane or proper embedment to prevent grout cracking and guarantee even heat distribution.
Also account for expansion joints, expected movement, and your tile layout pattern to avoid stress lines and maintain long-term performance.
Thin Tiles vs Thick Natural Stone Adhesive and Heat Transfer Differences
Although both thin porcelain tiles and thick natural stone can look great over electric floor heating, they require different adhesives and affect heat transfer differently.
You’ll use flexible, polymer-modified thinset for porcelain and heavier, high-bond mortar for dense stone.
Thin tiles heat faster with less thermal mass; thick stone stores heat longer but responds slower.
Match adhesive choice to tile density and manufacturer specs.
Small Mosaic Sheets and Uncoupling Requirements
Porcelain and natural stone choices also change how you handle small mosaic sheets and whether you need an uncoupling membrane.
With porcelain on mesh back, you can often bond directly over proper thinset.
For natural stone mosaics, use an uncoupling membrane when substrate movement or moisture risk exists.
Always follow manufacturer specs, use suitable thinset for mosaic size, and prevent grout joint telegraphing.
Expansion Joints, Movement, and Tile Layout Patterns
Because floors expand and contract with temperature and moisture changes, you need to plan expansion joints, movement accommodation, and tile layout before you set any tiles.
Mark control joints at perimeters, doorways, and long runs; follow manufacturer spacing for heated mats.
Stagger patterns to minimize lippage, allow grout and adhesive movement, and use flexible sealants at junctions to prevent cracking.
Common Mistakes and How to Avoid Them
Don’t rush the prep: you’ll want a solid, level subfloor before laying any heating elements.
Make sure the mats or cables are spaced correctly and never overlap, and don’t skip electrical or plumbing inspections and tests.
Finally, use thinset and grout rated for heated floors so your installation lasts.
Mistake 1 Insufficient Subfloor Preparation
If you skip proper subfloor preparation, your heated floor can fail prematurely or perform unevenly.
You must remove old adhesive, level dips, and repair soft spots before installing membrane or heating.
Verify the subfloor is rigid, clean, dry, and flat within manufacturer tolerances.
Use cement backer board or self-leveling compound where needed and secure seams to prevent movement under tile.
Mistake 2 Incorrect Heating Element Spacing or Overlapping
Once your subfloor is solid and flat, pay close attention to how you lay out the heating cables or mats—spacing them too far apart will leave cold spots, while overlapping creates hot spots and can damage the element.
Measure and mark layout lines, maintain manufacturer-recommended spacing, secure mats without stretching, and trim only where allowed.
Double-check coverage to avoid gaps or overlaps before embedding in thinset.
Mistake 3 Skipping Electrical/Plumbing Inspections or Tests
Because electrical and plumbing work under a heated floor directly affects safety and performance, you should never skip inspections or tests—doing so risks shock, fire, leaks, or a ruined heating system.
Always schedule licensed electrician and plumber inspections, verify ground-fault protection, pressure-test plumbing runs, and document results.
Don’t proceed until issues are fixed; inspections prevent costly, dangerous rework.
Mistake 4 Using Incompatible Thinset or Grout for Heated Floors
After you’ve verified wiring and plumbing integrity, the next common pitfall is using the wrong thinset or grout over the heating elements.
You should choose flexible, polymer-modified thinset and a grout rated for radiant heat to prevent cracking, delamination, and poor heat transfer.
Follow manufacturer specs, avoid cement-only mixes, and test a small area if unsure to guarantee adhesion and thermal performance.
Best Practices, Tips, and Maintenance
To keep your heated floor efficient and reliable, focus on proper insulation and smart thermostat programming.
You’ll want a seasonal and long-term maintenance checklist to catch issues early and prevent cold spots.
If you do run into problems—like uneven heating, thermostat errors, or cable damage—follow targeted troubleshooting steps and call a pro when readings or repairs are beyond your tools.
Best Practices for Maximizing Heat Efficiency (insulation, thermostat programming)
When you pair proper insulation with smart thermostat programming, your heated floor will deliver steady warmth without wasting energy.
Use these tips to maximize efficiency and comfort:
- Insulate under the heating mat to cut heat loss.
- Seal gaps around the perimeter.
- Set a weekly temperature schedule.
- Use adaptive or learning thermostat modes.
- Lower overnight temps slightly to save energy.
Seasonal and Long-Term Maintenance Checklist
Although you won’t need to fuss with your heated floor every week, you should run a seasonal and long-term maintenance checklist to keep it reliable and efficient; a few simple inspections and timing-based tasks will catch small issues before they become expensive repairs.
Quarterly: test thermostat scheduling, inspect visible wiring and controls, verify floor temperature consistency.
Annually: check insulation, update firmware, schedule professional electrical inspection.
Troubleshooting Common Issues (cold spots, thermostat errors, cable damage)
If you spot a cold patch, see strange thermostat behavior, or suspect cable damage, start with a calm, methodical check so you don’t make the problem worse.
Turn power off, inspect the thermostat wiring and settings, test floor continuity with a multimeter, and scan for loose tiles or adhesive gaps.
Call a certified technician for cable repairs or if resistance readings are abnormal.
Cost, Timeline, and When to Hire a Pro
Expect different price tags and payback if you DIY versus hiring pros, and weigh that against energy savings and home value.
Your timeline will depend on system type—electric mats typically install in a day, while hydronic setups can take days to weeks.
Call an electrician for wiring or a plumber for hydronic work if you’re unsure, uncomfortable, or need permits.
Typical Cost Range (DIY vs Professional) and ROI Considerations
Costs for a heated bathroom floor vary widely depending on whether you DIY or hire a pro: expect to pay roughly $80–$300 for materials and supplies for an electric mat DIY job in a small bathroom, versus $800–$2,500+ for professional electric installations, and $1,500–$6,000+ for hydronic systems installed by a contractor.
| Option | DIY | Pro |
|---|---|---|
| Electric | $80–$300 | $800–$2,500+ |
| Hydronic | N/A | $1,500–$6,000+ |
Project Timeline by System Type
When planning your heated-floor project, decide early whether you’ll tackle an electric mat yourself or hire a pro for an electric or hydronic system, since that choice largely determines price, timeline, and the trades you’ll need.
DIY electric mats often finish in a day or two. Pro-installed electric systems take a couple days; hydronic installs span several days to weeks.
Budget more time for tile curing.
When to Call an Electrician or Plumber
If you’ve decided on a system and sketched a timeline, now’s the time to figure out whether to call an electrician or a plumber—and when.
You’ll hire an electrician for wiring, thermostat install, and new circuit needs; expect $300–$900 and a few hours to a day.
Call a plumber for hydronic hookups, manifolds, or supply changes; expect $400–$1,200 and a day or two.
Frequently Asked Questions
You probably have a few practical questions before you start, like whether you can retrofit under existing tile and how long the floor takes to feel warm.
You’ll also want to know if heating will harm tile or adhesives, how to pick a compatible thermostat/controller, and whether it’s energy efficient in a small bathroom.
Read on for clear, concise answers to those common concerns.
Can you install heated floors under existing tile?
Curious whether you can add heated floors without ripping out your existing tile? Yes — in many cases you can.
Low-profile electric mats or thin wet-system heating cables can be installed over the subfloor and covered with a thin layer of self-leveling compound before retiling.
Alternatively, you can place thin heating mats directly atop existing tile with a new thinset and tile overlay.
How long until heated floors reach comfortable temperature?
How quickly will heated floors warm up?
It depends on system type, tile thickness, and subfloor. Electric mats heat faster—often 15–30 minutes to feel warm and 30–60 minutes to reach comfort.
Hydronic systems take longer, typically 30–60 minutes to notice warmth and 1–2 hours to stabilize.
Heavy stone or thick mortar slows response; thinner tile and direct-contact mats heat quickest.
Will heated floors damage tile or adhesives over time?
Although heated floors raise temperatures beneath your tile, they won’t automatically damage tile or adhesives if you use the right materials and follow proper installation practices.
Choose heat-rated thinset or flexible adhesive, movement-capable grout, and tiles rated for thermal cycling.
Maintain moderate surface temperatures, avoid overheating, and follow manufacturer specs.
Proper bonding, expansion joints, and gradual temperature changes prevent long-term failure.
How do I find a compatible thermostat and controller?
Want a thermostat that actually works with your new heated floor? Choose one rated for floor warming, compatible with your system type (electric mat or hydronic), and supporting the correct voltage and load.
Look for built-in floor sensors, programmable schedules, and GFCI or relay protection.
Verify manufacturer compatibility lists, read installer guides, and consult an electrician if wiring or load questions remain.
Are heated floors energy efficient in small bathrooms?
Curious whether heated floors will actually save energy in a small bathroom? Yes—because you’re warming a compact space, radiant heat reaches comfort faster and runs intermittently, lowering overall consumption versus whole-room heating.
Use a programmable thermostat and proper insulation to maximize efficiency. Expect modest energy use increases offset by reduced radiator runtime and greater comfort, especially during short, frequent bathroom visits.