
How to Fix a Cracked Ceramic Tile Without Replacing the Whole Floor
You can often fix a cracked ceramic tile without redoing the whole floor by evaluating the damage, then choosing a repair: fill hairline cracks with two-part epoxy or ceramic filler and sand smooth; touch up chips with matching paint or glaze pens; for loose or through-cracks remove the tile, repair or replace damaged backer, and reset with thinset and grout. Use PPE, allow proper cure times, and match colors carefully — keep going to learn step-by-step methods and tips.
Can You Fix a Cracked Ceramic Tile Without Replacing the Whole Floor?
You can often repair a cracked ceramic tile without ripping out the whole floor.
Small hairline cracks are usually fixed with epoxy or filler, while shattered tiles or ones with structural damage may need individual tile replacement.
Choose grout and sealant repairs for cosmetic issues, epoxy for moderate cracks, and full tile replacement when the tile is unstable or the damage is extensive.
Short summary of repair options and when each is appropriate
If the damage’s limited to a hairline crack or a chipped corner, you can often repair the tile without redoing the whole floor; options range from simple cosmetic fixes like epoxy fillers and touch-up paint to more involved partial replacements that swap out only the damaged tile.
You’ll choose based on severity, location, and budget.
How to fix cracked ceramic tile:
- Epoxy/repair filler for hairlines
- Touch-up paint for small chips
- Grind and seal for superficial damage
- Replace single tile for structural cracks
Understanding Ceramic Tile Cracks Causes and When Repair Is Feasible
Start by looking at what caused the crack—impact, shifting substrate, grout failures, or installation mistakes—to figure out how serious it is.
You’ll also want to identify the crack type (hairline, through-crack, spidering, or a chip) so you can assess repair options.
Minor hairlines and chips can often be repaired, but through-cracks, widespread spidering, or damage from structural movement usually mean replacement is the safer bet.
Common causes of cracked ceramic tiles (impact, substrate movement, grout issues, installation defects)
Cracks in ceramic tile usually trace back to a few predictable causes—direct impact, movement in the substrate, poor grout practices, or installation defects—and knowing which one you’re facing helps decide whether repair’s practical or you’ll need a replacement.
- Impact: dropped heavy objects cause localized breaks.
- Substrate movement: shifting or settling stresses tiles.
- Grout issues: voids or rigid grout transfer force.
- Installation defects: inadequate adhesive or poor back-buttering.
Types of cracks and damage assessment (hairline, through-crack, spidering, chip)
When you’re evaluating damage, focus on the crack’s pattern and depth because those details tell you whether a simple repair will work or if the tile needs replacing.
You’ll inspect for type, extent, and substrate movement.
Check these common patterns:
- Hairline: fine surface fracture, often repairable
- Through-crack: full thickness, structural concern
- Spidering: radiating fissures around impact
- Chip: missing piece, cosmetic fixable
When you must replace vs. when you can repair
After you’ve identified the crack type and checked for substrate movement, decide whether repair will hold or the tile must be replaced.
You can repair when damage is cosmetic or a single hairline, grout is sound, substrate is stable, and matching tile is unavailable.
Replace when structural cracks, loose tiles, moisture damage, or repeated failures occur.
- Cosmetic/hairline: repair
- Structural: replace
- Loose tile: replace
- Stable substrate: repair
Safety, Tools, and Materials You’ll Need
Before you start, make sure you’ve got the right PPE and a cleared, well-lit workspace to avoid dust and injury.
You’ll need basic tools and supplies like epoxy or filler, a putty knife, and grout for surface repairs.
For deeper or structural fixes, plan on a hammer and chisel, replacement tile, thinset mortar, and a notched trowel.
Personal protective equipment and workspace prep
Although the repair itself is straightforward, you’ll need the right safety gear and tools to keep the job clean and accident-free.
Prepare by clearing the area, protecting adjacent tiles, and ensuring good lighting and ventilation.
- Safety glasses and gloves
- Dust mask or respirator
- Knee pads or cushion
- Drop cloths and tape
Essential tools and materials for surface repairs
You’ll need a handful of reliable tools and the right materials to get surface repairs done neatly and lastingly.
Gather safety glasses, gloves, and a dust mask, plus these basics:
- Epoxy or two-part ceramic filler
- Fine-grit sandpaper (220–400)
- Plastic scraper or putty knife
- Small paintbrush or toothpick for cleanup
Keep materials clean and work steadily for best results.
Tools and materials for deeper or structural repairs
Deeper or structural tile repairs demand stronger materials and sturdier tools than surface fixes, so gather everything that protects you and lets you work precisely: safety goggles, heavy-duty gloves, a respirator for dust and solvents, a set of masonry chisels and a hammer, an oscillating multi-tool or angle grinder with a diamond or carbide blade, a high-strength epoxy or polymer-modified thinset mortar, backing material (mesh or cement board), stainless-steel screws or anchors, and buckets, mixing paddles, and clean water for prep and cleanup.
- Protective gear: goggles, gloves, respirator
- Cutting tools: grinder, chisels, blades
- Structural supplies: backer board, screws, mortar
- Mixing & cleanup: buckets, paddles, water
Step-by-Step Repairs Surface and Cosmetic Fixes (Quick, Non-Structural)
Start by cleaning the cracked area and inspecting it closely so you know whether it’s only surface damage.
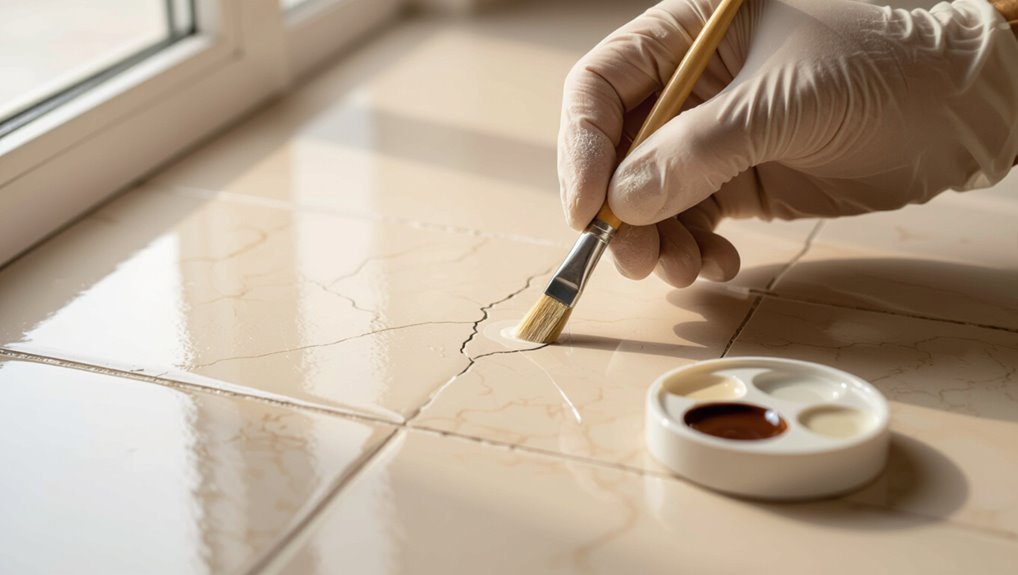
For hairline cracks, you’ll fill them with clear epoxy or acrylic caulk, then sand and shape the repair until it’s smooth.
Finish by color-matching the spot and sealing it for a seamless, durable look.
Step 1: Clean and inspect the damaged area
1. You’ll remove loose debris, dirt, and grout around the crack using a soft brush and vacuum.
Wipe the surface with rubbing alcohol or a mild degreaser so adhesives bond properly.
Inspect for hairline vs. structural cracks, check if the tile rocks or the substrate is damaged, and note grout gaps.
Take photos to document condition before proceeding.
Step 2: Fill hairline cracks with clear epoxy or acrylic caulk
For small, non-structural hairline cracks, fill them with clear epoxy or paintable acrylic caulk to restore appearance and keep moisture out.
Wipe the crack clean and dry, apply a thin bead from a cartridge or syringe, and press caulk into the fissure.
Smooth the surface with a damp finger or tool, remove excess, and allow full cure per product instructions before light use.
Step 3: Sand, shape, and polish the repaired surface
Grab a few grits of sandpaper and a soft cloth—once the filler’s fully cured you’ll sand it flush with the tile, shape any uneven areas, and finish by polishing so the repair blends with the surrounding surface.
Start with coarse, progress to fine grit, keep sanding strokes light and even, remove dust, refine edges with a scraper if needed, then buff until smooth.
Step 4: Color-match and seal for a seamless finish
Once the patched area is smooth and buffed to match the tile’s profile, you’ll move on to color-matching and sealing so the repair disappears visually and stands up to wear.
Choose epoxy or acrylic touch-up paints that match glaze, test on scrap, then apply thin layers, letting each dry.
Finish with a clear, non-yellowing sealer for durability and blend edges feathered into surrounding glaze.
Step-by-Step Structural Repairs Fixing Through-Cracks and Loose Tiles
Before you start, remove the grout around the damaged tile and test whether it’s stable so you know if a full structural repair is needed.
If the tile’s loose or cracked through, carefully remove it without harming adjacent tiles, then inspect and fix any substrate or underlayment issues.
Finally, reinstall the tile or use a patch if you can’t match it exactly, then regrout and seal to restore the floor’s integrity.
Step 1: Remove grout surrounding the tile and test tile stability
Start by removing the grout around the cracked tile so you can assess whether the tile itself is loose or whether the crack goes through the substrate.
Use a grout saw or rotary tool, working gently to avoid adjacent joints.
Once exposed, press the tile center and edges; if it rocks or gives, it’s loose.
If it’s firmly bonded, the crack likely extends below and needs structural repair.
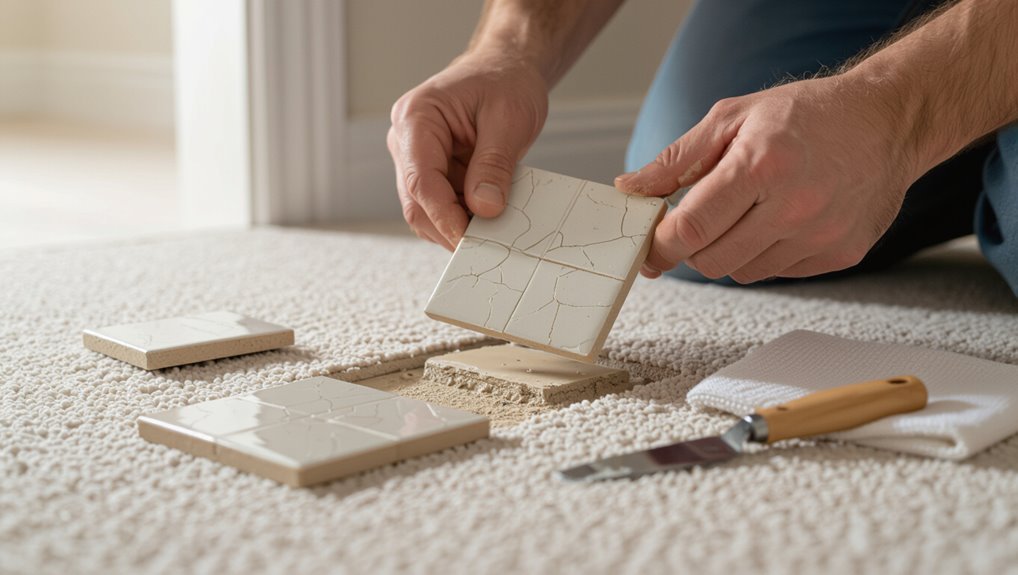
Step 2: Remove the cracked tile safely without damaging adjacent tiles
After you’ve cleared the grout and confirmed the tile’s condition, remove the cracked piece carefully to protect surrounding tiles and the substrate.
Score the tile into smaller sections with a utility knife, then tap gently with a hammer and chisel starting from the center.
Lift fragments with pliers, sweep debris, and avoid prying against adjacent tiles.
Wear goggles and a dust mask.
Step 3: Inspect and repair substrate or underlayment problems
Lift the broken tile area and inspect the substrate carefully for cracks, soft spots, or adhesive failure—these issues commonly cause through-cracks and loose tiles and must be fixed before you install a replacement.
If plywood is delaminated or cement backerboard crumbles, remove damaged sections, secure joists, add proper backerboard or patch mortar, and guarantee a flat, stable surface before proceeding.
Step 4: Reinstall tile or use a patch method if exact match unavailable
Once the substrate is solid and flat, you can reinstall the original tile or choose a patch solution if you can’t match it exactly.
For original tiles, spread thinset evenly, press tile, and use spacers.
If no match, cut a decorative insert or install a slightly larger accent tile, trimming surrounding grout lines for a clean fit.
Allow mortar to cure before walking.
Step 5: Regrout and seal to restore floor integrity

When the tile’s set and the mortar’s cured, regrouting and sealing will lock everything in place and protect the repair from moisture and dirt.
Mix grout to match joints, force it in with a rubber float, then wipe excess with a damp sponge.
After grout cures, apply a penetrating sealer appropriate for tile and grout to repel stains and strengthen the repair.
Alternative Repair Options When Matching Tile Is Not Available
If you can’t find a matching tile, you can get creative with decorative inlays, tile inserts, or mosaic repair patches to turn a flaw into a feature.
You can also use paint, glaze touch-ups, or faux finishing to blend or disguise the crack for a low-cost fix.
Finally, consider swapping in a tile from an inconspicuous spot (like a closet or under an appliance) and weigh the pros and cons of visibility versus preserving the main area.
Decorative inlay, tile inserts, or mosaic repair patches
One smart alternative is to cover the damage with a decorative inlay, tile insert, or mosaic repair patch that both hides the crack and adds visual interest to the floor or wall.
You can choose pre-made inserts or assemble small mosaic pieces, secure them with adhesive and grout, and seal edges. This creates a deliberate accent while avoiding full tile replacement.
Paint, glaze touch-ups, and faux finish techniques
Although matching factory glaze can be impossible, you can often conceal chips and cracks with paint, glaze touch-ups, or faux finishes that mimic the original look.
Clean and sand the area, apply ceramic primer, then thin layers of enamel or touch-up glaze.
Blend edges, texture, and sheen to match surrounding tiles. Seal with clear coat for durability and easy cleaning.
Using a replacement from inconspicuous area (closet, under appliance) pros and cons
When matching factory tiles isn’t possible, you can salvage an identical piece from an inconspicuous spot—like inside a closet or under an appliance—to restore visible areas.
You’ll gain original color, texture, and glaze, but risk exposing another area and need careful removal and grout matching.
- Pros: perfect match
- Pros: no custom order
- Cons: creates a new gap
- Cons: removal can damage surrounding tiles
Comparison of Repair Methods Cost, Durability, Time, and Skill Required
You’ll weigh quick cosmetic fixes, full tile replacement, and substrate repair based on cost, durability, time, and the skill each demands.
Quick fixes save money and time but won’t last as long, while full replacement gives the best finish and longevity at higher cost and effort.
Substrate repair takes the most time and skill but prevents recurring cracks and is the most durable.
Quick cosmetic vs. full tile replacement vs. substrate repair
If you want to fix a cracked ceramic tile, you can choose a quick cosmetic patch, a full tile replacement, or a substrate repair—each differs in cost, durability, time, and skill required. You’ll pick based on budget, longevity, disruption, and confidence with tools.
| Method | When to choose |
|---|---|
| Cosmetic patch | Minor crack, low cost |
| Substrate repair | Repeated failures, structural issues |
Common Mistakes to Avoid During Tile Repair
Don’t grab any adhesive or filler without confirming it’s rated for ceramic and for the job’s conditions.
Check for substrate damage before you patch, because a bad base will make repairs fail.
Take time to match color and finish so the repair blends instead of standing out.
Using wrong adhesives or fillers
Because adhesives and fillers bond the repair to the rest of the tile and substrate, choosing the wrong product will doom the fix from the start.
Pick a filler rated for ceramic and indoor floors; avoid flexible caulk or non-structural spackle.
Match adhesive type to substrate (mortar for thinset, epoxy for high-stress areas).
Follow cure times and manufacturer’s instructions for lasting adhesion.
Ignoring underlying substrate damage
When you patch a cracked tile without checking the substrate, you’re just masking a deeper problem that’ll reappear once the repair is stressed.
You should lift surrounding tiles if necessary, inspect for loose mortar, rot, or movement, and fix structural issues first.
Otherwise adhesives and fillers will fail, causing new cracks and wasted effort — address the base before cosmetic fixes.
Poor color-matching and finishing errors
Color consistency matters more than most DIYers realize: if your patch doesn’t match the surrounding tiles, the repair will grab the eye even if it’s structurally sound.
You should test colors, blend edges, and finish grout uniformly.
Common fixes to avoid:
- Don’t use mismatched glaze or paint.
- Avoid glossy patches next to matte tiles.
- Feather edges for seamless connection.
- Match grout color precisely.
Prevention and Best Practices to Avoid Future Cracks
To prevent new cracks, you’ll want to start with a properly prepared substrate and include movement joints where the floor or wall can flex.
Choose the right tile and install it with correct techniques and adhesives for the job.
Keep grout sealed, control temperature and moisture, and inspect regularly to catch issues early.
Proper substrate preparation and movement joints
Because tiles only perform as well as the surface beneath them, you’ll prevent many cracks by preparing the substrate correctly and installing movement joints where needed.
You should level, clean, and repair subfloor irregularities, use appropriate underlayment or cement board, and follow manufacturer guidance for adhesives.
Place movement joints at junctions, long runs, and around fixed objects to accommodate settlement and thermal expansion.
Correct tile selection and installation techniques
Choose tiles and installation methods that match the room’s use and movement demands so the assembly can flex without cracking.
Pick tile size, body (porcelain vs. ceramic), and thickness suited to traffic and substrate.
Use appropriate adhesives, correct trowel notch, full-bed buttering for large tiles, and proper spacing.
Guarantee skilled leveling and avoid rigid fixes that transfer stress to tiles.
Maintenance tips: grout care, temperature and moisture control
Once your tiles are properly selected and installed, maintain the surrounding materials and environment to keep that integrity intact. You should care for grout, control moisture, and stabilize temperature to prevent cracks.
Follow simple habits:
- Seal grout annually to block water.
- Repair gaps or cracks promptly.
- Use rugs in high-traffic or sun-exposed areas.
- Keep indoor humidity steady with ventilation or a dehumidifier.
Estimated Time and Cost Guide for Typical Repairs
You’ll see a big difference in cost and time between cosmetic fixes and structural repairs: simple grout or epoxy touch-ups often take under an hour and cost a few dollars to a couple dozen, while replacing a tile or fixing a cracked subfloor can take several hours to a day and cost considerably more.
Factor in materials, labor (if you hire someone), and any waste or disposal fees when estimating price.
I’ll outline typical time ranges and a clear cost breakdown so you can budget the right approach.
Cost breakdown for cosmetic vs. structural repairs
How much will repairing a cracked ceramic tile actually cost you?
For cosmetic fixes—filler, touch-up paint, sealant—you’ll typically spend $10–$60 in materials and under an hour of DIY time.
Structural repairs—partial tile replacement, underlayment or adhesive fixes, professional labor—run $100–$400+ depending on access and damage.
Factor in matching tiles and disposal for accurate budgeting.
Typical time required for each repair type
Time estimates depend on the repair’s scope: simple cosmetic fixes like filling and sealing usually take 15–60 minutes.
Partial tile replacements about 1–3 hours, and more involved structural repairs—removing adjacent tiles, replacing underlayment, or reinstalling large sections—can span half a day to a full day (or longer if a pro is scheduled).
Plan for cleanup, grout curing, and unexpected delays when budgeting time.
When to Call a Professional Signs You Need Expert Help
If you see widespread cracking, signs of substrate failure, or moisture under tiles, you should call a professional—those problems often need structural fixes, not just a patch.
A pro will inspect the substrate, check for water damage, and pinpoint the root cause.
Expect a clear repair quote that outlines necessary repairs, timeline, and costs.
Structural substrate failure, widespread cracking, or moisture issues
When you notice multiple tiles cracking, sagging floors, or persistent damp that won’t dry, those are clear signs the problem goes beyond a simple patch.
You’ll need a pro to assess substrate failure, rot, or hidden leaks.
Don’t ignore movement, widespread grout loss, or rising moisture—these can damage structure and mold.
Call an expert before repairs worsen.
What to expect from a professional inspection and repair quote
Because a professional inspection digs beneath the surface, you’ll get a clear diagnosis and a detailed repair quote that outlines scope, costs, and timeline.
Expect the inspector to assess substrate, grout, and surrounding tiles, recommend repair methods (patch, replace, or stabilize), provide material and labor estimates, warranty terms, and a projected start-to-finish schedule so you can compare bids and plan accordingly.
FAQ Quick Answers to Common Questions
You’ll find quick answers here to common questions like how long a repair lasts and whether epoxy’s okay for a floor crack.
You’ll also learn if repairs will be obvious, when it’s safe to walk on a fixed tile, and how to match grout and glaze colors.
If something needs more than a DIY fix, you’ll know when to call a pro.
How long will a repair last?
How long a repair lasts depends on the damage, materials, and how you maintain it; a well-done patch on a surface chip can hold for many years, while a repaired tile with structural cracks or ongoing moisture issues may fail within months.
You’ll get the best longevity by using appropriate adhesives, ensuring a clean, dry substrate, and avoiding heavy impacts or constant water exposure.
Can I use epoxy to fill a crack on a floor tile?
If your repaired tile held up for a while but now shows a visible crack—or you’re dealing with a new hairline split—epoxy can be a good option for floor tiles in many cases.
You can fill narrow cracks, bond fragments, and sand or color-match once cured. Choose a flexible, two-part epoxy, follow prep and curing steps, and avoid heavy traffic for 24–48 hours.
Will repaired tiles show obvious signs of repair?
Wondering whether the repair will be obvious? If you match filler color, texture, and glaze, repairs can be subtle.
Small hairline fixes are often barely noticeable from a normal distance. Larger chips or mismatched glaze will stand out unless you refinish or repaint.
Skilled touch-ups and careful buffing minimize visibility, but perfect invisibility isn’t guaranteed on heavily patterned or glossy tiles.
Can I walk on a repaired tile immediately?
Matching color and texture helps the repair blend in, but you also need to think about cure time before walking on the tile.
Epoxy or adhesive usually sets in minutes but needs 24–72 hours for full strength; thinset and grout often require 24–48 hours. Use manufacturer instructions.
Keep traffic off longer for heavy loads. Test gently after minimum cure to avoid stressing the repair.
How do I match grout and glaze color to existing tiles?
How do you get grout and glaze to blend seamlessly with your existing tiles?
Start by cleaning a sample area and comparing grout color swatches in natural light.
Mix small test batches, tinting grout or glaze incrementally until it matches.
Use feathered application for glaze shifts and seal grout to unify sheen.
Record mixes for future touch-ups and cure before final inspection.