Does Laminate Flooring Need to Acclimate Before Installation?
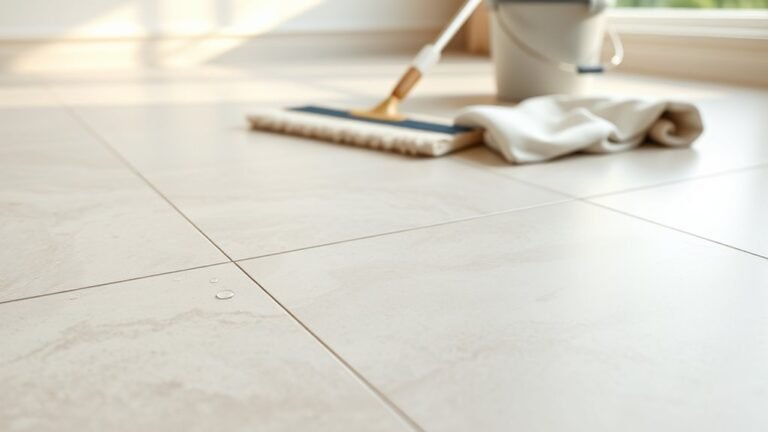
Yes — you should acclimate laminate before installation to stabilize its moisture and temperature and avoid gaps, buckling, or warping. Move unopened boxes into the installation room for 48–72 hours, keep the space conditioned at about 60–80°F and 30–50% RH, and use a hygrometer and moisture meter to confirm conditions. Skipping this step can void warranties and cause costly repairs, so follow manufacturer guidance closely and keep records; continue for detailed steps and tips.
Quick Answer Does Laminate Flooring Need to Acclimate?
Yes — in most cases you should let laminate flooring acclimate before installation.
You’ll need acclimation when the flooring moves from a different climate, season, or storage condition that could change its moisture content; it’s optional if the planks were stored in the installation space long enough and conditions are stable.
Follow the manufacturer’s recommended time to avoid gaps or buckling.
Direct short answer
Although laminate is less sensitive than solid hardwood, you should let it acclimate so it performs well; generally, give it 48–72 hours in the room where it’ll be installed.
Yes—you’ll want to answer does laminate flooring have to acclimate: brief exposure to room temperature and humidity helps prevent gaps or buckling.
Unpack boxes, lay planks flat, and keep conditions stable.
When acclimation is essential vs optional
When you need to decide whether acclimation is essential or optional, consider the installation environment and the product type: if humidity or temperature swings are significant, or the laminate is thick, engineered, or unfinished, acclimate for 48–72 hours.
If climate is stable, plank specs say no, and you’re installing over conditioned subfloors, acclimation is often optional.
What Acclimation Means for Laminate Flooring
Acclimation means letting your laminate flooring sit in the room where it will be installed so its moisture content and temperature match the environment.
Unlike solid or engineered wood, laminate has a composite core and a wear layer, so it reacts differently to humidity and temperature changes.
You’ll want to monitor room temperature and relative humidity during acclimation because those factors determine how the boards expand or contract.
Definition of acclimation in flooring context
Think of acclimation as letting your laminate get comfortable with its new home before you install it: you’ll open the boxes and let the planks sit in the room where they’ll be laid so their moisture content and temperature match the environment.
Acclimation means stabilizing plank dimensions and moisture levels to reduce warping, gapping, or buckling after installation.
Follow manufacturer time and conditions.
How laminate differs from solid wood and engineered wood
Now that you know acclimation means stabilizing planks to room conditions, it helps to understand how laminate behaves differently from solid hardwood and engineered wood.
You’ll find laminate is a composite with a moisture-resistant core and printed wear layer, so it’s less prone to seasonal movement than solid wood and doesn’t require the same moisture-based acclimation as multi-layer engineered planks.
Environmental factors that affect laminate (temperature, humidity)
Because laminate has a moisture-resistant core and a thin wear layer, temperature and humidity still matter for how it performs in your home.
You should store and install boards in conditions matching normal living levels—about 60–80°F (16–27°C) and 30–50% RH.
Large swings cause expansion, contraction, gaps, or buckling.
Control HVAC and avoid wet areas to keep flooring stable.
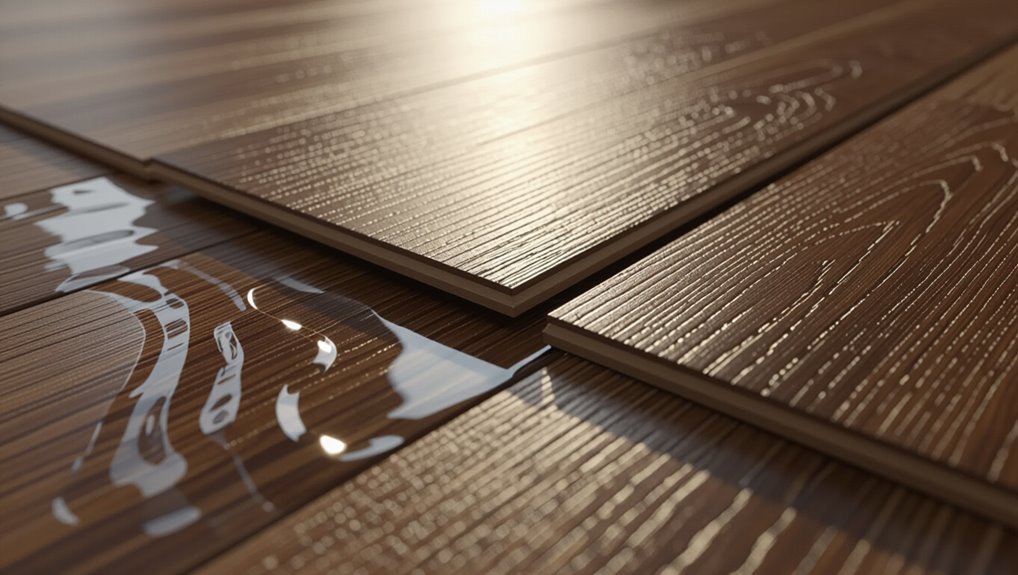
Why Acclimation Matters Risks of Skipping It
If you skip acclimation, your laminate can buckle, gap, cup, or warp as it absorbs or releases moisture.
Those failures not only look bad but can shorten the floor’s lifespan and void warranties.
Below are visual examples and common failure modes so you can spot and prevent these problems.
Common problems: buckling, gaps, cupping, warping
When you skip proper acclimation, your laminate floor can quickly show it: boards may buckle and cup, gaps can appear between planks, and entire sections can warp as the material absorbs or releases moisture and shifts temperature.
You’ll face noisy, uneven surfaces, trip hazards, and visible seams. Fixing these issues often means ripping out affected boards and reinstalling after correct acclimation, which costs time and money.
Long-term performance and warranty implications
Although proper acclimation may feel like an extra step, it directly affects how your laminate performs over years and whether manufacturers honor their warranties.
If you skip acclimation, boards can shift or delaminate as humidity changes, and manufacturers may deny claims citing improper installation.
Follow recommended temperature and moisture guidelines, document conditions, and retain paperwork to protect performance and warranty coverage.
Visual examples and failure modes
Having documented conditions and followed manufacturer guidelines, you’ll also want to see what can go wrong when acclimation is skipped.
Gaps open as boards shrink, cupping or buckling occurs with moisture expansion, and seams lift or grind under traffic.
Finish wear concentrates on raised edges, and improper locking can cause clicks, squeaks, or full plank failure—costly, visible problems you can prevent by acclimating first.
When to Acclimate Laminate Flooring Key Scenarios
When you’re planning an install, consider whether it’s new construction or a remodel since fresh builds and occupied homes can have very different moisture profiles.
Also factor in the season — summer heat and humidity and winter dryness affect how long boards need to adjust.
Finally, acclimate whenever boards come from a different climate, storage condition, or you’re in an extreme-humidity zone.
New construction vs remodel
If your project is new construction, you’ll usually have more control over humidity and temperature during installation than in a remodel.
So acclimation can be scheduled earlier and under more predictable conditions.
In remodels, you often have to account for existing HVAC, seasonal moisture from uncovered areas, and variable indoor climates that can make acclimation trickier.
In new builds, acclimate after HVAC runs; in remodels, test moisture and wait longer.
Seasonal considerations (summer vs winter installs)
Because summer and winter drive very different indoor humidity and temperature patterns, you’ll need to adjust acclimation timing and methods to match the season.
In summer, shorten acclimation if HVAC runs constantly; keep boards dry and ventilated to prevent expansion.
In winter, allow longer acclimation with humidity controls and gradual temperature increases to prevent gaps and contraction after installation.
Geographic/climatic zones and extreme humidity areas
Seasonal advice gives you a baseline, but local climate and extreme humidity levels determine how long and under what conditions you should acclimate laminate.
In coastal, tropical, or desert regions, humidity swings and salt air demand longer acclimation and tighter moisture control.
You should monitor indoor relative humidity, aim for stable 35–55%, and delay installation until boards match on-site conditions to prevent warping.
Flooring delivered from different climates or storage conditions
When laminate arrives from a different climate or has sat in varied storage conditions, you’ll need to acclimate it until its moisture content and dimensions match the room where it’ll be installed.
Unpack boxes, spread boards flat in the installation space, and keep them off exterior walls and direct sunlight.
Check moisture levels and temperature daily; wait until readings stabilize before installing.
How to Properly Acclimate Laminate Flooring Step-by-Step Guide
Before you start installation, you’ll inspect the delivery and packaging for damage and note the product type.
Then you’ll store the boxes in the installation room with proper spacing and stacking while keeping temperature and relative humidity within the manufacturer’s recommended ranges.
Finally, you’ll follow the specified acclimation duration for your product and verify conditions with moisture and temperature readings using the right tools and target values.
Step 1: Inspect delivery and packaging
1. When your laminate arrives, inspect each box for damage, moisture, or crushed corners before signing.
Check delivery temperature—extreme heat or cold can affect boards.
Verify SKU, plank count, and batch numbers against your order to avoid mismatches.
Note any visible defects and photograph them for claims.
Report problems immediately so replacements arrive before acclimation begins.
Step 2: Store boxes in installation room spacing and stacking
After you’ve documented any delivery issues, move the unopened boxes into the room where they’ll be installed and arrange them for proper spacing and stacking.
Leave gaps between stacks to promote air circulation and avoid tight wall contact.
Stack boxes flat, alternating layers for stability, and don’t overstack—follow manufacturer height limits.
Keep them off damp floors using pallets or boards.
Step 3: Maintain room conditions (temperature and RH ranges)
Step 3 is about keeping the room at steady temperature and relative humidity so the boards acclimate without warping or gapping; aim for 60–80°F (15–27°C) and 30–50% RH, and maintain those conditions for at least 48–72 hours (or the manufacturer’s recommended time) while the boxes stay closed.
Use a thermostat and hygrometer, avoid direct sunlight, and limit HVAC swings during acclimation.
Step 4: Recommended acclimation duration by product type and manufacturer
Now you’ll match acclimation time to the specific product and manufacturer instructions, since different laminate types—and even different brands—have varying moisture tolerances and recommended exposure times; follow the label or technical data sheet.
But as a general rule expect 48–72 hours for most residential laminates, 72+ hours for thicker or engineered options, and longer (up to a week) when installing over concrete or in high-moisture climates.
Check label specifics; record start and end times.
Step 5: Measuring moisture and temperature (tools and target readings)
With acclimation time set, you’ll need to measure the room and material conditions so the flooring reaches the manufacturer’s specified moisture and temperature ranges.
- Use a digital hygrometer for room relative humidity.
- Use a calibrated moisture meter for subfloor and planks.
- Measure temperature with a digital probe; target typically 60–80°F (15–27°C).
- Record multiple readings across the area and compare to manufacturer specs.
Step 6: What to do if readings are out of range
If your moisture, humidity, or temperature readings fall outside the manufacturer’s specified range, don’t install the flooring—correct the conditions first so the planks won’t warp, swell, or gap later.
Pause installation, identify the source (moisture leaks, high humidity, cold concrete), fix it, then dry and retest.
Consider dehumidifiers, heaters, moisture barriers, or delaying until levels stabilize within specs.
Alternatives and Exceptions When You Might Not Need Full Acclimation
You don’t always need a long acclimation period—some laminates with pre-attached underlayment or click-lock systems tolerate quicker installs.
Short-install windows specified by the manufacturer can also let you proceed sooner if you follow their guidance.
Just remember concrete subfloors and radiant-heat installations have special rules that may still require careful conditioning or testing.
Pre-attached underlayment or click-lock systems
Although many installers still insist on full acclimation, pre-attached underlayment and click-lock laminate systems can reduce the time and strictness of that process because they’re designed to float and tolerate small moisture and dimensional changes; you’ll still want to check manufacturer guidance and room conditions before skipping or shortening acclimation.
These systems stabilize installation, simplify subfloor issues, and often allow quicker install without extensive acclimation.
Short-install windows and manufacturer guidance
Those pre-attached underlayments and click-lock designs can let you shorten acclimation, but manufacturers often spell out specific short-install windows and conditions you’ll have to meet.
Check the product literature for allowed exposure times, maximum humidity and temperature ranges, and required subfloor prep.
Follow their checklist: installing within the window, monitoring site conditions, and keeping any warranty-required documentation to guarantee coverage if issues arise.
Installing over concrete or radiant heat: special rules
When installing laminate over concrete or radiant-heat systems, you’ll need to follow special rules because moisture and temperature swings can quickly damage the floor or void the warranty.
Test concrete moisture, install an appropriate vapor barrier, and guarantee the slab is within manufacturer temperature limits.
With radiant heat, confirm compatibility, keep surface temperatures steady, and follow expansion gap and adhesive guidelines to protect the flooring.
Tools, Materials, and Tests for Acclimation
You’ll want a few reliable tools on hand—hygrometers to track relative humidity, moisture meters for the subfloor and planks, and infrared thermometers to check surface temperatures.
Use rubber mats, spacers, and ventilated storage racks or stacks to keep boards off damp surfaces and allow airflow.
Check and log readings daily during acclimation (or more often if conditions change) so you can spot trends and document that the flooring met recommended conditions before installation.
Hygrometers, moisture meters, and infrared thermometers
A few compact tools will tell you whether your subfloor and the room air are ready for laminate: hygrometers measure relative humidity, moisture meters check wood moisture content, and infrared thermometers spot cold or wet patches on surfaces.
- Use a hygrometer to monitor RH for several days.
- Test plank ends and subfloor with a moisture meter.
- Scan for temperature anomalies with an infrared thermometer.
- Compare readings to manufacturer specs before installing.
Using mats, spacers, and ventilated storage
Although acclimation starts with measurements, using mats, spacers, and ventilated storage gives you a controlled physical environment that speeds equalization and prevents warping.
Lay planks flat on breathable mats, stack with spacers every few inches to allow airflow, and keep stacks off concrete with pallets.
Rotate bundles periodically and avoid covering them tightly so moisture migrates evenly before installation.
Recommended monitoring frequency and documentation
Thermometer and hygrometer readings should be taken and recorded at set intervals so you can spot trends and act before planks swell or gap.
Check conditions twice daily for the first three days, then daily until installation. Log date, time, temperature, relative humidity, and any HVAC events.
Keep records with the flooring batch info and share them with installers or inspectors for accountability.
Common Installation Mistakes Related to Acclimation
Don’t install the planks immediately after delivery; you’ll often need to let them sit so they reach room conditions.
Read and follow the manufacturer’s instructions and warranty requirements, and make sure the room is conditioned to the specified temperature and humidity before and during installation.
Also be careful interpreting moisture meter readings—wrong technique or wrong device can mislead your decisions.
Installing immediately after delivery
If you start installing laminate flooring right after it arrives, you’re likely scheduling problems for yourself—new planks need time to reach the room’s temperature and humidity so they won’t expand or contract later.
Don’t rush; leave boxes closed but opened for ventilation per product guidance, spread planks flat, and let them rest on the subfloor. This prevents gaps, buckling, and noisy seams.
Ignoring manufacturer instructions or warranty requirements
While it might seem quicker to skip the fine print, ignoring manufacturer acclimation instructions or warranty requirements can cost you time and money—warranties often hinge on specific temperature, humidity, and acclimation periods.
Installers who don’t follow them risk voiding coverage and creating avoidable floor failures. Always read and follow instructions, document conditions, and confirm installers adhere to requirements to protect your warranty and investment.
Inadequate room conditioning before and during installation
Because laminate reacts to temperature and moisture, you need to condition the room to the manufacturer’s specified range before and during acclimation and installation.
Keep HVAC running, stabilize humidity with a dehumidifier or humidifier, and avoid opening doors or windows that shift conditions.
Don’t store flooring in an unconditioned garage or basement; maintain consistent conditions until the installation is fully complete.
Misinterpreting moisture meter readings
When you rely on moisture meter readings without understanding their limits, you can make wrong decisions that lead to cupping, buckling, or premature gaps.
You should verify readings with the manufacturer’s recommended methods, test multiple spots, and consider substrate type.
Don’t assume a single number guarantees safety—interpret results, account for relative humidity, and delay installation if readings conflict or environmental control is inadequate.
Best Practices and Pro Tips
Before you start, run through a concise checklist to confirm room conditions, materials, and tools are ready.
Talk with your supplier or the manufacturer for any product-specific acclimation windows and recommendations, and plan how to handle tight schedules or rush jobs without skipping steps.
After installation, keep monitoring humidity and temperature and follow simple maintenance steps to protect the flooring.
Checklist before installation
1 simple checklist keeps your laminate acclimation process error-free: confirm room temperature and humidity are within manufacturer specs, open and spread cartons for at least 48 hours, inspect planks for defects, and plan jobsite blocking and underlayment layout.
- Measure and log temperature/humidity daily.
- Stagger board exposure when spreading cartons.
- Reject or set aside defective planks immediately.
- Pre-cut connections and test-fit underlayment.
Communication with supplier and manufacturer for product-specific guidance
Because manufacturers and suppliers set the tolerances and installation rules, you should contact them early to get product-specific acclimation guidance, acceptable temperature/humidity ranges, and any special handling or rejection criteria.
Ask about recommended acclimation duration, documentation they require, warranty implications for noncompliance, and approved tools or adhesives.
Record responses and keep contact info handy for installer questions or disputes.
Managing acclimation in tight schedules or rush jobs
Having the manufacturer’s guidance on file helps when schedules tighten, but you still need practical ways to meet acclimation requirements without derailing a job.
Prioritize quick-start measures: open boxes onsite, stack panels to maximize airflow, use climate control to reach target temperature and humidity, and log readings.
If time’s critical, consult the manufacturer for approved expedited protocols before installing.
Post-installation monitoring and maintenance tips
Keep monitoring your new laminate floor regularly to catch moisture, movement, or wear before they become costly problems.
Check seams, junctions, and under cabinets monthly for gaps or buckling.
Wipe spills immediately, use pads under furniture, and maintain humidity between 35–55%.
Address scratches and loose boards promptly.
Schedule annual inspections to prolong life and protect warranty.
Comparison: Acclimation Guidelines by Flooring Type and Brand
When you compare acclimation needs, laminate typically requires less time than engineered wood, which in turn settles faster than solid hardwood.
Manufacturers often give specific windows—laminate brands may say 24–48 hours, engineered floors 48–72 hours, and solid hardwood up to a week or more depending on thickness and moisture.
Always check the maker’s instructions for exact times and ambient conditions before you install.
Laminate vs engineered wood vs solid hardwood
Different flooring types need different acclimation approaches, so you’ll want to match the method to whether you have laminate, engineered wood, or solid hardwood. You should follow manufacturer and site conditions: laminate often needs minimal acclimation, engineered tolerates moderate changes, solid hardwood requires the most control. Choose acclimation time based on material sensitivity and local humidity.
| Type | Typical sensitivity |
|---|---|
| Laminate | Low |
| Engineered | Medium |
| Solid hardwood | High |
Typical manufacturer recommendations (examples)
Because manufacturers vary in materials and testing, you’ll see different acclimation windows and conditions across brands, so always check product-specific instructions before installing.
Some laminate makers require no acclimation, others 24–48 hours. Engineered often needs 48–72 hours; solid hardwood usually asks for 3–7 days.
Conditions often specify indoor temperature 60–80°F and 30–50% relative humidity.
FAQ
You probably have a few practical questions about acclimation, like how long it needs to sit and what temperature and humidity are required.
You’ll also want to know if garages or basements are acceptable, how to confirm the boards are ready, and whether acclimating affects your warranty.
Below are clear answers to those common concerns.
How long should laminate acclimate before installation?
Before you install laminate, let it acclimate in the room where it’ll be laid for 48 to 72 hours so the planks can adjust to the local temperature and humidity.
For unusual climates or long storage, extend acclimation to a week. Keep unopened boxes flat and staggered.
Check manufacturer guidelines and don’t rush—proper acclimation reduces gaps, buckling, and warranty issues after installation.
What temperature and humidity should the room be during acclimation?
Having the planks sit in the installation room is only the first step; you also need to match the room’s climate to real living conditions so the flooring won’t move after it’s laid.
Keep temperature between 60–80°F (15–27°C) and relative humidity around 30–50%.
Run HVAC or a humidifier/dehumidifier as needed for 48–72 hours before and during acclimation to stabilize conditions.
Can I acclimate laminate in a garage or basement?
Wondering if a garage or basement will work for acclimating your laminate? You can use them only if they maintain stable temperature and humidity matching the installation area.
Avoid uninsulated, damp, or fluctuating spaces. Elevate cartons off concrete, keep them closed but slightly vented, and monitor conditions with a thermometer/hygrometer.
If conditions don’t match the room, acclimate elsewhere to prevent issues.
How do I know if my laminate has acclimated properly?
If your garage or basement met the room’s temperature and humidity, you’ve given the planks a good start — now confirm they’ve truly acclimated before you install.
Check that planks lay flat, show no warping or cupping, and match room humidity (use a hygrometer).
Measure plank moisture with a manufacturer-approved meter; readings within specified range mean you’re ready to install.
Will acclimation void or satisfy warranty requirements?
Does acclimating your laminate affect the warranty?
Usually, manufacturers require proper acclimation to keep warranties valid. You should follow their specified time, temperature, and humidity ranges; failing to do so can void coverage for warping, gaps, or cupping.
Keep documented proof—installation notes and photos—and retain manufacturer instructions and receipts to support any future warranty claim.