How to Remove Paint From Ceramic Tiles Without Scratching the Surface
Start by identifying the paint type and protect surrounding surfaces; you’ll want gloves, goggles, and good ventilation. Try warm soapy water and a plastic scraper for fresh latex; use rubbing alcohol, isopropyl or citrus remover for dried water‑based paint; for oil‑based or enamel use mineral spirits or a commercial remover made for glazed tile. Use a hair dryer or low heat to soften stubborn spots, a plastic scraper to lift, then rinse and neutralize. Keep going and you’ll find step‑by‑step tips and precautions.
How to Remove Paint from Ceramic Tiles Without Scratching the Surface
You want fast, safe ways to lift paint without scratching the glaze, so start with gentle, nonabrasive methods.
Try common solutions like warm soapy water, rubbing alcohol, or a plastic scraper before moving to stronger cleaners.
If the stain won’t budge or the tile is valuable, call a pro rather than risking damage with DIY experiments.
Quick Answer Safe, Effective Methods at a Glance
Anyone tackling paint on ceramic tiles can remove it without scraping or damaging the glaze by using gentle, tested methods like warm soapy water, a plastic scraper, rubbing alcohol, or a citrus-based remover—always testing in an inconspicuous spot first.
You might wonder how do you remove paint from ceramic tiles? Try these calm, confident steps:
- Soapy soak
- Plastic scrape
- Alcohol wipe
- Citrus dab
When to Call a Professional vs. DIY Considerations
If the paint covers only a small spot and the glaze looks intact, you can usually tackle the job yourself with mild cleaners and a plastic scraper.
But if paint is widespread, stubborn, or near grout and fixtures, consider a pro who’ll prevent scratches and chemical damage.
You should call a professional when stain removal risks tile or grout damage, involves harsh solvents, or if you’re unsure about techniques.
Understanding Paint on Ceramic Tiles
To remove paint effectively, you’ll first need to understand why it sticks to ceramic tiles and which type you’re dealing with.
Paints can be latex, oil-based, enamel, or spray formulas, and each responds differently to cleaners and solvents.
Also consider the tile’s finish and nearby grout—glossy tiles shed paint more easily, while porous grout soaks it up and makes cleanup harder.
Why Paint Adheres to Ceramic Tiles
Paint sticks to ceramic tiles because its binders form a thin film that grips into microscopic pores and irregularities on the glazed or unglazed surface.
When you prep the tile—cleaning, scuffing, or using a primer—you increase those contact points and chemical adhesion.
You’ll also find that surface energy, residual contaminants, and temperature affect wetting and curing, so proper prep and timing determine how firmly paint bonds to tile.
Types of Paint You Might Find on Tiles (Latex, Oil-based, Enamel, Spray Paint)
Knowing how and why paint grabs onto tile helps when you identify what’s on your surface, because different formulations behave and come off differently. You’ll meet latex (water-based, softens with water), oil-based (strong bond, needs solvent), enamel (durable, often baked), and spray paint (thin, penetrates grout lines). Use the right remover.
| Paint Type | Removal Tip |
|---|---|
| Latex | Water/soap, gentle scraper |
| Oil-based | Mineral spirits |
| Enamel | Chemical stripper |
| Spray | Paint thinner |
How Tile Finish and Grout Affect Removal Difficulty
Because glossy, matte, and textured glazes grab paint differently, the tile’s finish changes how easily you can lift stains and drips.
You’ll find glossy tiles release paint with solvents and gentle scraping while matte or textured surfaces trap splatters, needing longer soaking and soft brushes.
Grout soaks paint and stains quickly; sealant or careful steam cleaning protects edges and speeds removal.
Safety and Preparation Protecting Tile and Yourself
Before you start, make sure you’ve got the right personal protective equipment and good ventilation so fumes and dust don’t put you at risk.
Gather the tools, cleaners, and materials you’ll need—scrapers, soft cloths, a mild solvent, and a plastic bucket—so the job goes smoothly.
Always test any cleaner on a small, hidden tile area first to check for damage or discoloration.
Personal Protective Equipment and Ventilation
While you’ll want to get straight to scraping and soaking, put on proper personal protective equipment and ventilate the space first:
wear chemical-resistant gloves, safety goggles or a face shield, and a respirator rated for organic vapors if you’re using solvents, and open windows or run a fan to keep fumes from building up.
- Protect hands
- Shield eyes
- Breathe safely
- Move air
Tools, Cleaners, and Materials You’ll Need
Once you’ve protected yourself and the room, gather a few key tools and cleaners so you can remove paint without damaging the tile:
- Soft plastic scrapers and nylon scrub pads — gentle but effective.
- Mild citrus or soy-based remover — less harsh, smells better.
- Microfiber cloths and warm water — for rinsing and finishing.
- Painter’s tape and plastic sheeting — protect grout and surrounding surfaces.
How to Test Cleaners Safely on a Small Area
Now that you’ve gathered your tools and protected the area, test any cleaner on a small, inconspicuous patch of tile and grout to make sure it won’t cause discoloration or damage.
Apply a tiny amount, wait the manufacturer’s recommended time, then blot and inspect. If safe, proceed; if you see dulling, staining, or softened grout, rinse thoroughly and choose a milder product.
Step-by-Step Paint Removal Methods (From Gentle to Stronger)
Start with the least aggressive options and work up only as needed so you don’t damage the tile.
Begin by scraping gently, then try soap, warm water, and microfiber cloths for fresh spots before moving to isopropyl alcohol or acetone for water-based paints.
If those don’t work, test mineral spirits or paint thinner for oil-based paints and finally use a commercial paint remover formulated safe for ceramic.
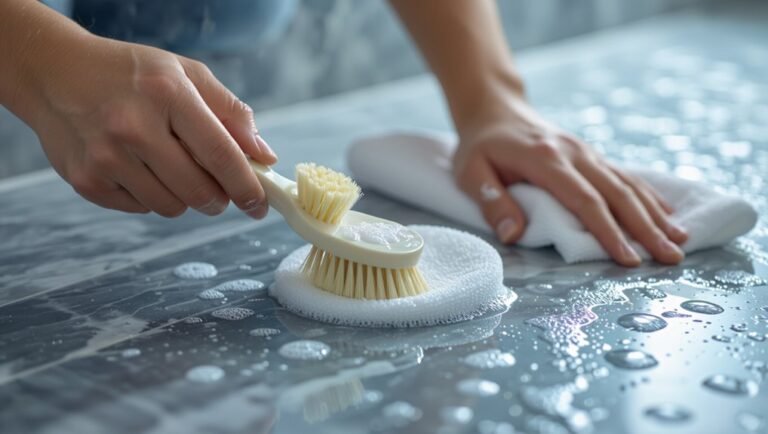
Step 1 Start with Gentle Mechanical Removal
Begin by testing how much paint will come off with simple, nonabrasive tools—you’ll save time and prevent damage.
Gently scrape with a plastic putty knife or credit card at a low angle, lifting softened flakes. Use a wooden stick for grout lines and a soft-bristled brush to dislodge particles.
Work slowly, check progress, and stop if you see surface abrasion.
Step 2 Soap, Warm Water, and Microfiber Cloths for Fresh Paint
If the paint is still wet or only recently dried, grab warm water, a mild dish soap, and a microfiber cloth—these are your safest first-line tools.
Dampen the cloth, apply gentle circular motions, and avoid scrubbing hard. Rinse the cloth frequently and change water when soiled.
Dry the tile to check removal. Repeat once more before moving to stronger methods if residue remains.
Step 3 Using Isopropyl Alcohol or Acetone for Water-Based Paints
While soap and water handle most fresh spills, you’ll reach for isopropyl alcohol or acetone when water-based paint has started to dry. These solvents dissolve the binders so you can lift softened paint without damaging glazed ceramic.
Apply a small amount to a cloth, blot gently, let it sit briefly, then wipe. Rinse thoroughly and ventilate the area.
Step 4 Using Mineral Spirits or Paint Thinner for Oil-Based Paints
Reach for mineral spirits or paint thinner when oil-based paint has set and soaps, alcohol, or acetone won’t budge it; these solvents break down the oil binders so you can scrape or wipe the softened paint from glazed ceramic without etching the surface.
Ventilate, wear gloves, test a hidden spot, apply with a soft cloth, let sit briefly, then gently lift paint with a plastic scraper.
Step 5 Applying Commercial Paint Removers Safe for Ceramic
After mineral spirits or paint thinner have loosened stubborn oil-based paint, you may still need a product designed specifically for ceramics to remove remaining stains or thicker layers.
Choose a non-abrasive, pH-balanced remover labeled safe for ceramic. Test in an inconspicuous spot, follow manufacturer’s dwell time, wipe residue with a soft cloth, rinse thoroughly, and ventilate the area to avoid inhaling fumes.
Step 6 Heat Gun or Hair Dryer Technique (Temperature Control)
Warm the paint with controlled heat to soften it for easier scraping—use a heat gun on its low setting or a hair dryer held several inches away to prevent glaze damage.
Move heat continuously, avoid lingering on grout, and test a hidden tile first.
Once tacky, peel or gently lift with a plastic scraper.
Cool and clean residue with mild detergent; ventilate while working.
Step 7 Poultice Methods for Stubborn, Thin Film Paint
If heat and gentle scraping didn’t lift a thin, stubborn paint film, a poultice can pull dissolved paint out of the tile surface without aggressive scraping.
Mix an absorbent (talc, baking soda, or kaolin) with a mild solvent or detergent into a paste, spread over the stain, cover with plastic, and let it dwell.
Peel after drying and repeat if traces remain.
Step 8 Final Cleaning, Neutralizing Residues, and Rinsing
Finish by thoroughly cleaning and neutralizing the tile so no solvent, alkaline cleaner, or paint residue remains to cause staining or damage.
You’ll rinse, neutralize, and inspect carefully to restore finish and safety.
- Rinse with warm water to remove loose residues.
- Neutralize alkaline cleaners with diluted vinegar.
- Wipe with a microfiber cloth.
- Dry and inspect for missed spots; repeat if needed.
Tools and Products Compared Effectiveness and Tile Safety
Now you’ll compare common manual tools like plastic scrapers, angled razor blades, and nylon scrub pads with chemical solvents such as alcohol, acetone, mineral spirits, and commercial removers.
You’ll also weigh heat, chemical, and abrasive approaches so you can match effectiveness with tile safety.
This comparison will help you pick the least risky method that still removes the paint.
Manual Tools (Plastic Scrapers, Razor Blades at Angle, Nylon Scrub Pads)
Reach for manual tools first when working on small paint spots or delicate grout lines: plastic scrapers, razor blades held at a low angle, and nylon scrub pads each offer a balance of effectiveness and tile safety you’ll want to contemplate.
Use plastic scrapers for softened paint, razor blades very shallowly for glazed tiles, and nylon pads with gentle pressure to lift residue without abrading the surface.
Chemical Solvents (Alcohol, Acetone, Mineral Spirits, Commercial Removers)
When scraping won’t do the job, try a solvent—but pick one that matches the paint type and your tile’s finish.
Test alcohol for latex, acetone for small oil-based spots, mineral spirits for thicker oils, and commercial removers for stubborn layers.
Always patch-test, ventilate, wear gloves, and avoid prolonged contact to prevent glaze dulling or grout damage.
Heat vs. Chemical vs. Abrasive Pros and Cons Table
If solvents don’t fully remove the paint or you’re worried about glaze damage from prolonged chemical exposure, compare heat, chemical, and abrasive options side by side to pick the safest, most effective method for your tile.
| Method | Effectiveness | Tile Safety |
|---|---|---|
| Heat gun | High for latex | Moderate (watch glaze) |
| Solvents | Moderate–high | Variable (test first) |
| Abrasive pads | Quick for spots | Low (risk scratches) |
Common Problems and How to Avoid Damaging Tiles
When you remove paint from ceramic tiles you’ll want to watch for common problems like scratches, etching, and grout damage.
Use gentle, non-abrasive tools and targeted protection for grout to prevent harm, and test any cleaner on a hidden spot first.
If the tile finish looks dull or discolored afterward, follow safe restoration steps—like polishing with a recommended product or contacting a professional—rather than scrubbing harder.
Risk: Scratches and Etching Prevention Techniques
Because ceramic glaze can be thin and brittle, you’ll need to avoid abrasive tools and harsh chemicals that can scratch or etch the surface.
Use plastic scrapers, soft microfiber cloths, and mild solvents tested in an inconspicuous spot. Work gently, keep the area wet to loosen paint, and change tools at the first sign of staining.
Stop and reassess rather than forcing removal.
Risk: Grout Damage Targeted Protection and Repair Tips
Although grout looks sturdy, it’s porous and can easily stain, crumble, or loosen during paint removal.
So you should shield it before you start and handle it gently if repairs become necessary. Tape edges, mask with painter’s tape and plastic, and use gentle tools and mild cleaners.
If grout chips, regrout small sections, cure fully, and seal to prevent future damage.
What to Do if Tile Finish Becomes Dull or Discolored
If your tile finish looks dull or has discoloration after paint removal, act quickly to restore its appearance and avoid further damage.
Use a mild, pH-neutral cleaner and soft cloth to test a small area. Don’t scrub harshly or use abrasive powders.
For persistent haze, apply a commercial tile polish or restorer per instructions.
Reseal grout if needed to prevent staining.
Prevention and Best Practices
Before you start painting nearby, cover tiles with drop cloths or painter’s tape and remove grout-sensitive items to prevent splatters.
Clean as you go and immediately wipe any drips with the right solvent so paint doesn’t set.
Keep tiles looking clean long-term with regular sweeping, mopping, and quick spot checks after projects.
How to Protect Tiles Before Painting Nearby Surfaces
When you’re painting nearby walls or trim, take a few simple protective steps so ceramic tiles stay clean and undamaged.
Cover tiles with low-tack painter’s tape along grout lines, then lay down plastic sheeting or rosin paper, taping edges securely.
Use drop cloths for excess paint, keep a damp cloth handy for drips, and work deliberately to minimize splatter and accidental contact.
Proper Cleanup During and After Painting Projects
Because paint drips and dust can undo careful prep, you should clean as you go—wiping up spills immediately, replacing soiled drop cloths, and keeping cleaning supplies within reach—so small mistakes never become big stains.
- Feel relieved: tackle messes now.
- Stay proud: preserve pristine grout.
- Avoid panic: remove spots while wet.
- Save time: prevent stubborn buildup later.
Routine Maintenance to Keep Tiles Paint-Free
If you want to keep paint off your ceramic tiles, adopt a few simple habits—wipe up drips immediately, cover nearby surfaces with secure drop cloths, and use painter’s tape to seal edges so splatters never reach grout lines.
Regularly sweep and mop to remove dust that attracts paint, store cans sealed and upright, and inspect work areas afterward to catch stray spots while they’re wet.
Troubleshooting Scenarios (Case-Based Guidance)
When paint lands on your tiles, the strategy changes depending on whether it’s a fresh drip or fully cured—act fast for wet spots but plan for stronger removers on old paint.
You’ll also handle painted tile surfaces differently than paint on grout, and small spots need different tools and disposal than large areas.
Below you’ll get clear, case-based steps for each situation so you can pick the right method and avoid damage.
Fresh Drips vs. Dried, Cured Paint Different Approaches
Although fresh drips and fully cured paint both stain ceramic, they call for different tools and techniques, so you’ll save time by diagnosing the paint’s age before you start.
If paint is wet, blot and lift with a damp cloth and mild detergent, then rinse.
For dried, use a plastic scraper, solvent appropriate to the paint type, and test in an inconspicuous spot first.
Painted Tile vs. Paint on Grout Lines Specialized Steps
Because tiles and grout react differently to paint and cleaners, you’ll need distinct techniques for each surface to avoid damage.
For glazed tile, use a plastic scraper, mild solvent, and gentle pads to lift paint without abrasion.
For grout, test a small area, use a soft brush with diluted cleaner or poultice, rinse thoroughly, and reseal if the grout weakens or discolors.
Small Spots vs. Large Areas Time, Tools, and Disposal Considerations
If you’re dealing with a few small paint spots, you’ll need far less time and simpler tools than for an entire painted floor.
But large-area removal changes everything—from the amount of solvent and the type of equipment to how you dispose of waste.
For spots, use a gentle scraper, cotton rag, and minimal solvent.
For large areas, rent a floor stripper, buy bulk solvent, and follow hazardous-waste rules.
Frequently Asked Questions
You’re probably wondering about safe tools and chemicals, like whether a razor blade will scratch tiles or which solvent won’t harm colored or glazed surfaces.
You’ll also want to know how long to wait after using chemicals before sealing grout, whether heat guns can crack tiles, and the best way to remove paint from textured or unglazed ceramic.
Below are clear, practical answers to those common concerns.
Can I use a razor blade on ceramic tile without scratching it?
Wondering whether a razor blade will scratch ceramic tile? You can use a single-edge razor on smooth, glazed tile at a very shallow angle, keeping the blade clean and flat.
Test a small inconspicuous spot first. Don’t press hard or use on textured, matte, or unglazed tiles—those are far more likely to scratch.
Replace dull blades promptly.
What solvent is safest for colored or glazed tiles?
Which solvent should you reach for on colored or glazed tiles?
You’ll want a mild, non-acidic option: isopropyl alcohol (70–90%) or a citrus-based solvent.
Test a hidden spot first. Apply sparingly, let it soften paint, then wipe with a soft cloth.
Avoid acetone or strong alkalis—those can dull glazes or strip color.
How long should I wait after using chemicals before sealing grout?
How long should you wait after using cleaners before sealing grout?
Wait until grout is completely dry and residue-free—typically 24 to 72 hours depending on cleaner type, ventilation, and humidity.
Rinse thoroughly with clean water, let grout cure, then perform a tack test.
If no moisture or cleaner smell remains and grout absorbs sealant evenly, you’re ready to apply the sealer.
Will heat guns crack or damage ceramic tiles?
Can a heat gun damage ceramic tiles? Yes — excessive heat can crack glaze, loosen adhesive, or cause thermal shock on colder tiles.
If you use a heat gun, keep temperature low, hold it several inches away, move constantly, and test a small inconspicuous area first.
Don’t concentrate heat on grout lines or edges where tiles are more vulnerable. Use caution and patience.
How do I remove paint from textured or unglazed ceramic tiles?
If you’ve decided against using a heat gun on textured or unglazed tiles, you’ll need different tactics because those surfaces hold paint in crevices and lack a protective glaze.
Start by softening with a mild solvent (test in an inconspicuous spot), gently scrub with a nylon brush, and use plastic scrapers.
Repeat solvent applications, rinse thoroughly, and consider a poultice for stubborn spots to avoid abrasion.