
How to Make Dull Ceramic Tile Shine Again Without Refinishing
You can make dull ceramic tile shine again without refinishing by removing surface film, polishing, and protecting the finish. Start by sweeping, mopping with warm water and a few drops of dish soap, then treat mineral haze with diluted vinegar or a descaler and rinse well. Scrub stains with a baking soda paste and a soft nylon pad, dry and buff with a microfiber cloth or low-speed buffer, and apply a suitable protectant; keep a simple maintenance routine and you’ll learn easy tips to maintain shine longer.
How to Make Dull Ceramic Tile Shine Again Without Refinishing
If your ceramic tile looks dull, you can often restore shine quickly with the right fast methods—mopping with a pH-neutral cleaner, spot-cleaning grime, or using a tile-safe polish.
Choose cleaning when buildup and film are the problem, polishing for light, even dullness, and spot repairs when scratches or chips are localized.
I’ll show simple steps and when each approach makes the most sense so you can pick the quickest fix.
Quick Answer Fast methods that work now
Start by giving the floor a quick sweep and mop to remove loose dirt, then tackle spots with a simple mix of warm water and a few drops of dish soap—this immediate cleaning often restores most of the shine without any refinishing.
For stubborn haze, scrub grout and tile with a microfiber pad and vinegar solution. Rinse, dry, and buff with a dry cloth to finish how to make dull ceramic tile shine.
When to choose cleaning vs. polishing vs. spot repairs
Now that you’ve handled surface dirt and common haze, decide whether you need routine cleaning, light polishing, or spot repairs based on the problem’s cause and location.
Clean when grime, soap scum, or dull residue covers most tiles.
Polish for widespread mild etching or lost sheen.
Do spot repairs for cracked glaze, deep scratches, or isolated stains that won’t lift with cleaners.
Basic Understanding: Why Ceramic Tile Gets Dull
You’ll want to tell the difference between a removable surface film—like soap scum, hard-water deposits, and grime—and actual wear that abrades the glaze.
Different tile finishes (glossy, satin, matte) reflect light differently, so what looks dull on one may be normal for another.
Over time grit, mineral buildup, and breaking-down sealants all reduce shine by scratching, coating, or chemically altering the surface.
Surface film vs. wear explaining causes of dullness
When your ceramic tile looks dull, it’s usually either a surface film—dirt, soap scum, or residues that sit on top—or actual wear, where the glaze has been scratched, abraded, or chemically etched.
Distinguishing the two matters because films can be removed, while wear may be permanent and needs repair or refinishing.
You’ll test by cleaning a small area; if shine returns, it was film, not wear.
Types of ceramic tile finishes and how they affect shine
Because different glazes and surface treatments reflect light in different ways, the type of finish your tile has is a major factor in how glossy it looks and how easily that gloss can be restored. You’ll spot glazed, matte, semi-gloss, and textured tiles; each needs different cleaning care to revive shine without refinishing.
| Finish | Look | Care tip |
|---|---|---|
| Glazed | Shiny | Gentle cleaner |
| Matte | Flat | Mild polishing |
| Textured | Diffuse | Brush clean |
| Semi-gloss | Soft sheen | Wipe and buff |
How grit, soap scum, hard water, and sealant breakdown contribute
Although tiles start bright, everyday buildup from grit, soap scum, hard water minerals, and failing sealant quickly masks their shine.
You track gritty particles that scratch finishes, film from soaps that scatters light, and mineral deposits that etch surfaces.
When sealant breaks down, contaminants penetrate pores, making dulling permanent unless you strip, clean, and reseal to restore reflectivity and protection.
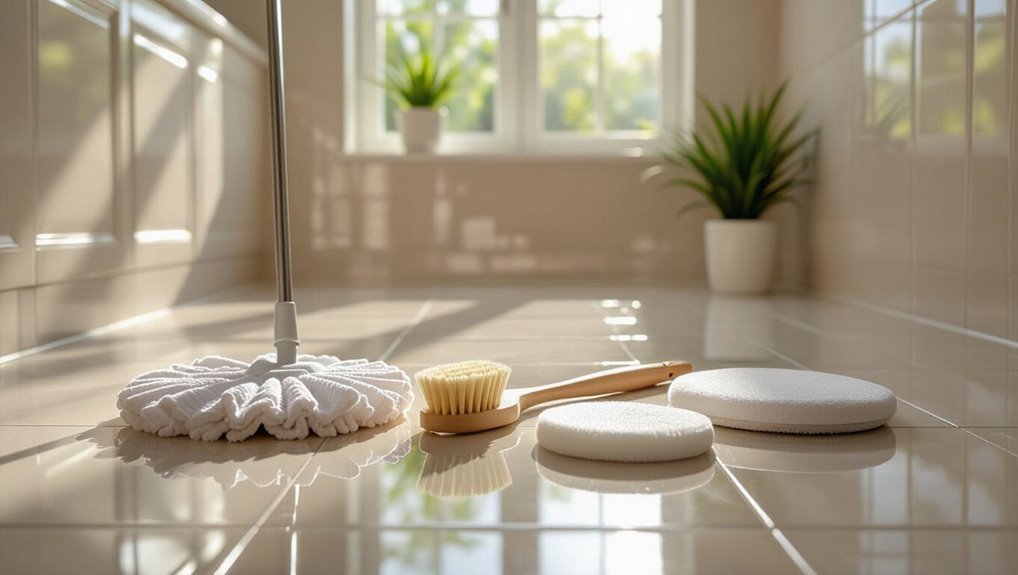
Safety, Tools, and Materials You’ll Need
Before you start, make sure you protect yourself with gloves, open windows for ventilation, and do a small test patch to avoid damage.
Gather a microfiber mop, scrub brush, nylon pad, and buffing pad plus cleaners like a pH-neutral solution, vinegar or baking soda, and a degreaser for tough spots.
If you want extra shine, consider stone/tile polish, spray wax, or a microfiber bonnet for buffing.
Safety precautions (gloves, ventilation, test patch)
When you’re getting ready to restore tile shine, protect yourself and your space: wear chemical-resistant gloves, open windows or run a fan for ventilation, and always try any cleaner or polish on a small, inconspicuous patch first to check for discoloration or damage.
Keep pets and children away, read product labels for hazards and dilution, and dispose of rags and residues safely per instructions.
Recommended tools (microfiber mop, scrub brush, nylon pad, buffing pad)
Now that you’ve covered safety basics and test patches, gather the right tools to make the job easier and protect your tile.
Use a microfiber mop for gentle daily cleaning, a stiff but nonabrasive scrub brush for grout and edges, a soft nylon pad for spot scrubbing, and a buffing pad attached to a low-speed polisher to restore luster without damaging glaze.
Effective cleaning products (pH-neutral cleaners, vinegar, baking soda, commercial degreasers)
1 simple rule will help you pick cleaners: match the product to your tile type and the soil you’re removing.
Use pH-neutral cleaners for regular maintenance, diluted vinegar for mineral deposits on glazed ceramic (avoid on natural stone), baking soda paste for stubborn grout stains, and targeted commercial degreasers for kitchen grease.
Always spot-test, rinse thoroughly, and wear gloves.
Optional polishing products (stone/tile polish, spray wax, microfiber bonnet)
After cleaning, you might want a final boost to enhance shine and protect the surface—this is where optional polishing products come in.
Use stone/tile polish or spray wax sparingly, testing a hidden spot first. Apply with a microfiber bonnet or soft cloth, buffing in circular motions.
Wear gloves, guarantee good ventilation, and follow manufacturer directions to avoid buildup or hazing.
Step-by-Step: Restore Shine Without Refinishing
Start by clearing the area and testing a small patch so you know what works on your tile.
Sweep or vacuum loose dirt, then degrease soap scum with a chosen cleaner or simple homemade solution.
Finish by scrubbing grout and edges and using vinegar or a descaler to lift hard-water and mineral buildup.
Step 1 Prepare the area and test a small patch
Before you wet a mop or bring out cleaners, clear the room and remove rugs, furniture, and breakables so you can work safely and see the whole floor.
Next, pick an inconspicuous corner and apply your chosen cleaner to a small patch.
Wait the recommended time, wipe dry, and inspect for color change, residue, or damage before treating the entire surface.
Step 2 Remove loose dirt and debris (sweeping, vacuuming)
Sweep or vacuum thoroughly to remove loose grit and dust that can dull tile and scratch grout when you mop.
Work toward walls and corners, using a soft-brush broom or vacuum with a hard-floor attachment.
Pay special attention to grout lines and under furniture edges.
Empty the vacuum or shake out the dustpan frequently so you’re not redepositing debris onto clean tile.
Step 3 Degrease and dissolve soap scum (recipes and product options)
Tackle grease and soap scum next, since they trap grime and dull tile even after sweeping; a mix of hot water and a mild degreaser or a simple vinegar solution will loosen buildup so you can wipe it away without harsh scrubbing.
- Use 1 cup vinegar to 1 gallon hot water for light scum.
- Try a pH-neutral degreaser for sealed tile.
- Spot-test commercial cleaners before full use.
Step 4 Deep clean grout lines and edges (tools and techniques)
Once grout and edges are clean, your tile will look years fresher. So focus on those narrow lines with the right tools and technique.
Use a stiff nylon brush, old toothbrush, or grout brush with a grout cleaner or baking soda paste. Scrub edges gently, rinse frequently, and vacuum or wipe away residue.
Seal grout after it’s fully dry to protect results.
Step 5 Remove hard water stains and mineral buildup (vinegar soak, descalers)
If mineral deposits or cloudy rings are dulling your tile, you can dissolve them without sanding or refinishing by using a vinegar soak or a commercial descaler.
Test a small area first, then apply diluted white vinegar (1:1) or a manufacturer-recommended descaler. Let it sit 10–20 minutes, rinse thoroughly, and dry.
Repeat for stubborn buildup, ventilating the area.
Step 6 Gentle scrubbing and stain removal (baking soda paste, nylon pads)
After rinsing away vinegar or a descaler, it’s time to gently scrub remaining stains and cloudy spots so the glaze can shine through.
Make a baking soda paste, apply to stains, and let it sit a few minutes.
Use a soft nylon pad or nonabrasive brush, scrub in small circles, avoid steel wool, and reapply paste for stubborn marks until the tile looks clean.
Step 7 Rinse thoroughly and dry to prevent water spots
Grab a clean bucket and plenty of fresh water, because thorough rinsing is the key to removing cleaning residue that dulls tile.
Rinse in sections, changing water when it gets cloudy, and use a microfiber mop or soft cloth to lift suds.
Finally, dry immediately with a clean towel or microfiber cloth to prevent water spots and streaks, working toward uniform, streak-free shine.
Step 8 Polishing and burnishing for added shine (methods for manual and machine buffing)
Once the tiles are spotless and dry, you’re ready to boost their gloss with polishing and burnishing.
For small areas, use a microfiber cloth and a circular motion or a soft buffing pad.
For larger floors, rent a low-speed floor buffer with a white or red pad.
Work in overlapping passes, keep pads clean, and check shine frequently until even.
Step 9 Apply surface protectant or silicone polish if appropriate
Decide whether a surface protectant or silicone polish suits your tiles by checking the manufacturer’s recommendations and the tile type; glazed ceramic usually accepts topical polishes, while unglazed or textured tiles may not.
If appropriate, apply a thin, even coat with a microfiber cloth or applicator, working small areas. Let dry fully, buff lightly, and avoid slippery residues—reapply sparingly as needed.
Targeted Solutions for Common Problems
You’ll tackle specific fixes for common issues like dull gloss on high-traffic floors and whether a maintenance routine can bring it back.
We’ll sort out cloudy looks on glazed tiles by distinguishing simple cleaning from stubborn residue removal, and explain when etching or chemical damage means the shine can’t be fully restored.
Finally, you’ll learn grout cleaning and sealing techniques to stop darkened grout from dulling surrounding tile.
Dull gloss on high-traffic floors maintenance routine
Because high-traffic areas wear faster, you’ll need a simple, consistent maintenance routine to restore and keep tile gloss from fading.
Sweep or vacuum daily, mop weekly with a pH-neutral cleaner, and dry promptly to prevent dulling.
Use protective pads, entry mats, and avoid harsh cleaners or waxes.
Reapply a water-based tile polish every few months to maintain shine.
Cloudy appearance on glazed tiles cleaning vs. residue removal
When glazed tiles look cloudy, it’s usually either dirt and film sitting on the surface or a stubborn residue from cleaners and hard water — and the fix differs depending on which you’ve got.
Start by wet-mopping with a neutral pH cleaner and microfiber.
If cloudiness persists, use a diluted vinegar or commercial residue remover, scrub gently, rinse thoroughly, then dry to restore shine.
Etching or chemical damage when shine can’t be fully restored
If cleaning and residue removal don’t bring back the gloss, the tile may be etched or chemically damaged rather than simply dirty.
You’ll notice a dull, frosted look or uneven shine.
Minor etching can sometimes be minimized with a polishing compound or fine abrasive pad on porcelain; deeper chemical damage often needs professional glazing or replacement.
Test first in an inconspicuous spot.
Grout that darkens or dulls surrounding tile grout cleaning and sealing
Though grout’s porous nature makes it prone to staining and discoloration, you can bring back contrast and prevent it from dulling surrounding tile by cleaning and sealing it correctly.
Scrub grout with a pH-neutral cleaner or a dilute bleach solution for mold, rinse thoroughly, let dry, then apply a penetrating grout sealer.
Reapply annually and address spills promptly to keep tile looking bright.
Products Compared: Home Remedies vs. Commercial Cleaners
You can often restore shine with simple DIY mixes like vinegar or baking soda, which are cheap and gentle but can be less effective on heavy buildup or sealed grout.
Commercial cleaners and polishes usually work faster and target specific problems, though you’ll want to check labels for acid content and ventilation needs.
Below we’ll compare common homemade remedies with top store-bought options and note when each is safest and most effective.
DIY solutions pros and cons
When deciding between home remedies and commercial cleaners, weigh immediate cost savings against long-term effectiveness and potential risks. You’ll save money with vinegar, baking soda, or olive oil but face limited shine and possible residue. Commercial products cost more, deliver faster results, and may contain harsh chemicals.
| Option | Cost | Risk |
|---|---|---|
| Home remedies | Low | Mild |
| Commercial | Higher | Chemical |
Top commercial cleaners and polishes (use cases and cautions)
Because heavy-duty polishing and swift results matter for many homeowners, commercial tile cleaners and polishes are worth a close look: they’re formulated to cut grease, lift mineral buildup, and restore shine faster than most DIY mixes, but they can be harsher on grout, natural stone, or sealed surfaces if misused.
- Use: degreasers for kitchens; caution: test first.
- Use: descalers for mineral buildup; caution: avoid acid-sensitive stone.
- Use: spray polishes for quick gloss; caution: can leave residue.
Mistakes to Avoid
Don’t use abrasive cleaners or rough tools that can scratch the glaze, and avoid acidic solutions on sensitive or unglazed tiles.
Don’t over-polish or mix incompatible products, and always do a small test patch first.
Follow the manufacturer’s guidance to prevent costly mistakes.
Abrasive cleaners and tools that scratch glaze
If you reach for steel wool, scouring powders, or harsh chemical scrubs thinking they’ll blast away stains, you’ll likely strip the tile’s glaze instead.
Don’t use abrasive pads, metal brushes, or gritty cleaners; they leave micro-scratches that dull shine and trap dirt.
Choose nonabrasive cleaners and soft microfiber or sponge tools.
Test any product in an inconspicuous spot first.
Using acidic solutions on sensitive tiles
When you pour vinegar, lemon juice, or other acidic cleaners onto sensitive tiles like marble, limestone, or some glazed ceramics, the acid can etch and dull the surface, leaving permanent marks that no amount of polishing will fix.
Don’t use acidic solutions; test cleaners on an inconspicuous spot first, follow manufacturer guidance, and choose pH-neutral products to protect shine and avoid irreversible damage.
Over-polishing or applying incompatible products
After avoiding acids on sensitive stone, you’ll still need to be careful about how you finish and maintain the surface.
Don’t over-polish—too much abrasion dulls glazes and creates uneven sheen. Avoid waxes, sealers, or cleaners not labeled for your tile; they can haze, attract dirt, or damage grout.
Use recommended products sparingly and follow proper application to preserve shine.
Skipping test patches and ignoring manufacturer guidance
Because every tile and finish reacts differently, you shouldn’t skip doing a small test patch before applying cleaners, polishes, or sealers to the whole surface.
Test first, follow manufacturer instructions, and note warnings about dilution, dwell time, or protective coatings. Ignoring guidance risks discoloration, surface etching, or voiding warranties.
A brief trial saves time, money, and frustration.
Maintenance Plan: Keep Your Ceramic Tile Shiny Long-Term
Set up a simple maintenance plan that includes a daily quick wipe and a weekly mop checklist to stop grime before it builds up.
Add a monthly deeper-clean routine, note when to reapply sealants or re-polish, and adjust care for high-traffic or moisture-prone areas.
Stick to the schedule and you’ll keep your ceramic tile shining longer with minimal effort.
Daily and weekly cleaning checklist
Keep a simple daily and weekly routine to prevent grime from building up and to preserve your tile’s shine.
You’ll save effort and avoid dulling residues by sticking to short, consistent tasks.
- Sweep or vacuum daily to remove grit that scratches glaze.
- Mop weekly with a pH-neutral cleaner, using minimal water.
- Spot-clean spills immediately with a microfiber cloth and mild cleaner.
Monthly deeper-clean routine
When you do a monthly deep clean, tackle grout, edges, and any dull spots so your tiles stay glossy between thorough renovations; scrub grout with a brush and a pH-neutral cleaner, rinse thoroughly, and dry to prevent residue.
Use a soft-bristled brush for corners, a microfiber mop for surface polish, and spot-treat stains.
Inspect for damage and clear buildup around fixtures.
When to reapply protectants or re-polish
Although ceramic tile itself is durable, the protective sealers and polish finishes wear down with foot traffic and cleaning.
You should reapply them based on visible wear and a predictable schedule rather than guessing.
Check quarterly for dull patches or water beading loss; reapply thin coats every 6–12 months for moderate use, sooner if wear appears.
Keep records to stay consistent.
Tips for high-traffic and moisture-prone areas
Because high-traffic and moisture-prone areas wear finishes faster, you’ll need a targeted maintenance plan that combines more frequent cleaning, protective products, and quick spot care.
Mop with pH-neutral cleaner twice weekly, blot spills immediately, and use microfiber for grit removal.
Apply commercial tile sealant or surface protector quarterly, place mats at entrances, and rotate rugs to reduce wear and trap moisture.
Cost and Time Estimates
You’ll want to know how long each restoration method takes and what it costs before you start.
Quick DIY cleans can take an hour or two and cost only a few dollars for cleaners, while deeper repairs or professional polishing can take a day or more and run from a couple hundred to over a thousand dollars.
Below we’ll compare typical timeframes and budget ranges so you can pick the right option for your needs.
Typical time required for each restoration method
When planning a tile restoration, estimate time per method so you can schedule work and compare costs:
Light cleaning with vinegar or mild detergent takes 30–60 minutes for a single bathroom;
deep scrubbing or grout cleaning runs 1–3 hours depending on area;
polishing with a buffing pad needs 1–2 hours;
applying sealers or restorers requires drying time, often 2–4 hours between coats.
Estimated costs for DIY vs. professional help
Now that you’ve planned time for each restoration step, it helps to compare costs so you can decide whether to tackle the job yourself or hire a pro. You’ll save on labor but buy supplies; pros cost more yet guarantee results. Weigh budget, time, and stress to choose confidently.
| Option | Typical Cost | Emotional Weight |
|---|---|---|
| DIY | $15–$80 | Empowering |
| Pro | $150–$600+ | Relieving |
| Hybrid | $50–$200 | Balanced |
Frequently Asked Questions
You’ve probably got quick questions like whether vinegar is safe for your tiles or if polishing will wear the glaze.
You’ll also want to know how often to buff, whether grout cleaning improves overall shine, and when to call a pro or consider refinishing.
Below are clear, practical answers to each.
Can I use vinegar on all ceramic tiles?
Curious if vinegar’s safe for every ceramic tile? You can use diluted white vinegar on most glazed ceramic tiles to remove grime and hard water deposits.
Avoid vinegar on unglazed, natural stone, or acid-sensitive tiles—it can etch or dull them. Test a small, hidden area first.
Rinse thoroughly and neutralize with water to prevent residue.
Will polishing wear off the glaze over time?
Although regular polishing can gradually thin a factory glaze if you use abrasive pads or harsh compounds, gentle polishing with non-abrasive products and a soft cloth won’t wear it off in normal home maintenance.
You should avoid heavy-duty scrubbing, gritty powders, or aggressive mechanical polishers.
Spot-test new products, follow manufacturer care instructions, and stop if you notice dulling or micro-scratches forming.
How often should I buff or polish ceramic tile?
How often should you buff or polish ceramic tile really depends on foot traffic and finish—lightly trafficked rooms usually need polishing every 3–6 months, while high-traffic areas benefit from monthly or biweekly touch-ups.
Check shine monthly, spot-treat scuffs as they appear, and adjust frequency if you notice dulling.
Use gentle pads and suitable polish to avoid buildup and preserve the glaze.
Can grout cleaning restore overall tile shine?
Polishing tile helps the surface shine, but dirty grout can still make a floor look dull; cleaning the grout often restores much of the perceived brightness by removing dark lines and stains that break up the tile’s reflection.
You can boost overall appearance by scrubbing grout with a brush and appropriate cleaner, rinsing thoroughly, and sealing grout to prevent rapid re-staining and maintain that refreshed look.
When should I call a professional or consider refinishing?
When should you call a pro or opt for refinishing?
Call a professional if stains, cracks, deep etching, or worn glazing resist home treatments, if tiles are loose or subfloor issues exist, or if uneven color and finish cover large areas.
Pros can assess structural problems, match finishes, or recommend full refinishing when restoration won’t achieve durable, consistent results.