What Size Tile Works Best for a Small Bathroom Floor?
For a small bathroom, you’ll usually want medium-format tiles — around 12×12 inches — because they balance scale, grout lines, and visual flow. They cut down on busy grout patterns that make a tiny room feel cluttered, while still being easy to handle and install with fewer awkward cuts. Porcelain or ceramic in a matte finish gives durability and slip resistance. Keep grout narrow and matched to tile for continuity, and keep going to see layout and pattern tips that help maximize space.
Quick Answer Best Tile Size for a Small Bathroom Floor
Go with medium-format tiles—like 8×8 to 12×12 inches—for a small bathroom because they balance scale and grout line visibility.
You’ll get fewer grout lines than with tiny mosaics and less visual disruption than with very large slabs.
In short, choose something in that range for a clean, spacious look that’s easy to install and maintain.
Direct recommendation with short rationale
If you want the most versatile choice, pick 12-inch by 12-inch tiles for a small bathroom floor.
They balance scale, grout lines, and visual continuity so the room feels larger. You’ll get easier installation, fewer cuts, and good slip resistance options.
For what size tile for a small bathroom floor, 12×12 is practical, affordable, and visually pleasing without overwhelming the space.
One-sentence summary for homeowners and renovators
Looking for a quick answer? You’ll usually want smaller-format tiles—think 8×8 to 12×24 inches or small mosaics—because they create less visual clutter, allow flexible layout around fixtures, and improve traction;
choose lighter colors and narrow grout lines to make the room feel larger, and pick a slip-resistant finish for safety while keeping installation practical and cost-effective.
Understanding Tile Size Basics
Tile size means the actual dimensions and shape of each piece plus how many grout lines you’ll see across the floor.
Choosing larger or smaller tiles can make the room feel roomier or busier, so you’ll want to match scale to your square footage and sight lines.
Also consider material and format—ceramic, porcelain, stone, or mosaic each lay and wear differently and affect grout width and visual flow.
What “tile size” means (dimensions, shape, grout lines)
Size refers to more than just the length of a single piece — it means the tile’s dimensions (length and width), its shape (square, rectangular, hexagonal, etc.), and how those pieces relate to each other through grout lines and patterning.
You’ll consider module size, edge finish, and grout width because they determine layout flexibility, cutting needs, and installation complexity for your small bathroom floor.
How tile size affects visual perception of space
When you pick larger tiles with fewer grout lines, your small bathroom will read as more open and less busy, while smaller tiles or intricate patterns can make the floor feel denser and visually cluttered.
You can use tile direction, grout color, and scale contrast to guide sightlines, lengthen perceived room dimensions, or create focal points without overwhelming the space.
Material and format considerations (ceramic, porcelain, stone, mosaic)
Beyond layout and grout choices, the material and format you pick determine how a floor performs, feels underfoot, and reads at scale.
Choose porcelain or ceramic for durability and easy maintenance; select matte finishes to reduce slips.
Natural stone adds texture but needs sealing and can visually busy small rooms.
Mosaic or small-format tiles offer pattern control and better slip resistance in wet zones.
How to Choose Tile Size Step-by-Step Guide
Start by measuring your bathroom and sketching sightlines so you know how tile size will read in the space.
Then weigh layout patterns, grout lines, and how tiles relate to the shower, vanity, door swings, slopes, and changes.
Finish by testing samples at eye level in different light to confirm the look before you buy.
Step 1: Measure your bathroom and calculate sightlines
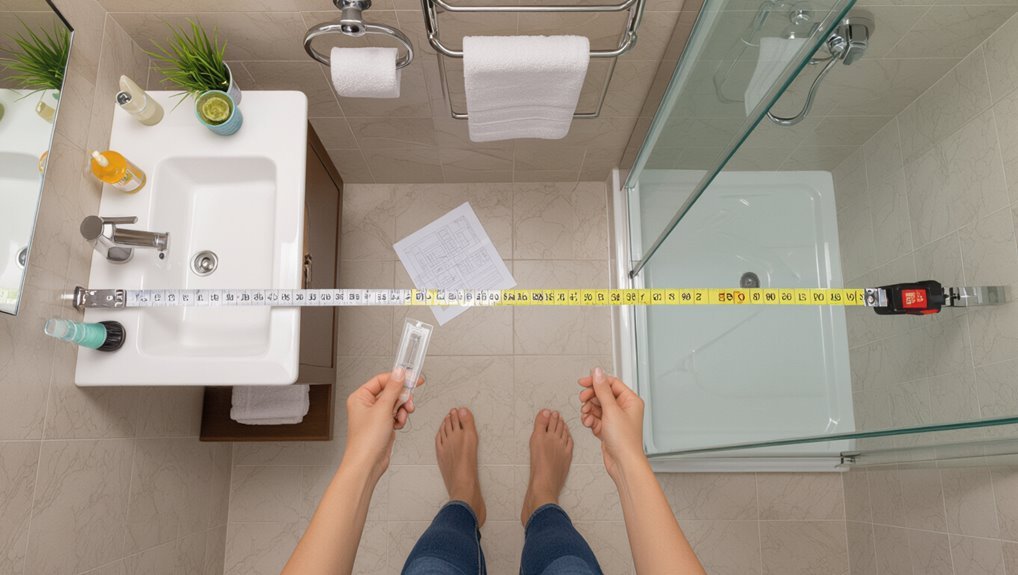
Step 1 is to measure your bathroom and map sightlines so you can choose tile proportions that actually flatter the space.
Measure length and width, note door swings, fixtures, and focal walls.
Sketch a scaled plan, mark sightlines from entrances and mirrors, then test tile sizes on the plan or with paper templates to see which proportions lead the eye and avoid awkward cuts.
Step 2: Consider layout patterns and grout line impact
When you pick tile size, think about the pattern you want and how grout lines will read at eye level — both shape perception and visual clutter depend on them.
Choose larger tiles and minimal grout for a cleaner, expanded feel; smaller tiles or mosaics add texture but can busy the room.
Run patterns parallel to sightlines to lengthen or widen the space.
Step 3: Match tile size to bathroom features (shower, vanity, fixtures)
After thinking about patterns and grout, you’ll want to match tile size to the room’s key features so everything looks and performs right.
Choose smaller tiles or mosaics for shower floors for slip resistance and curved drains.
Use larger tiles under a floating vanity to reduce visible grout.
Coordinate tile scale with fixture widths so cuts stay minimal and visual flow remains calm.
Step 4: Account for slope, door swings, and transitions
Because floor slope, door swings, and threshold changes how tiles meet and move, you should plan tile size and layout around them early on.
Check slopes to keep grout lines consistent and avoid tiny cut pieces at low spots. Measure door clearances so tiles don’t obstruct swings.
Choose tile sizes that simplify connections to adjoining floors and allow clean threshold cuts.
Step 5: Test samples in different light and at eye level
Once you’ve planned for slopes, door swings, and thresholds, bring tile samples into the actual bathroom and view them at eye level and in different lighting.
Observe color shifts under daylight, warm bulbs, and at night. Hold grout samples too.
Walk around, squat, and check reflections on mirrors. This reveals scale, pattern repetition, and how seams read from typical viewpoints before you commit.
Recommended Tile Sizes and When to Use Them
When choosing tile for a small bathroom, you’ll weigh small-format mosaics (1–4″) for grip and pattern against their more grout-heavy look and installation time.
Medium tiles (6–12″) balance fewer grout lines with easier layout, while large-format slabs (12×24″+) make the room feel bigger but may need more careful subfloor prep.
Consider long rectangular planks or subway tiles for directionality—lay them lengthwise or in a staggered/herringbone pattern to visually elongate the space.
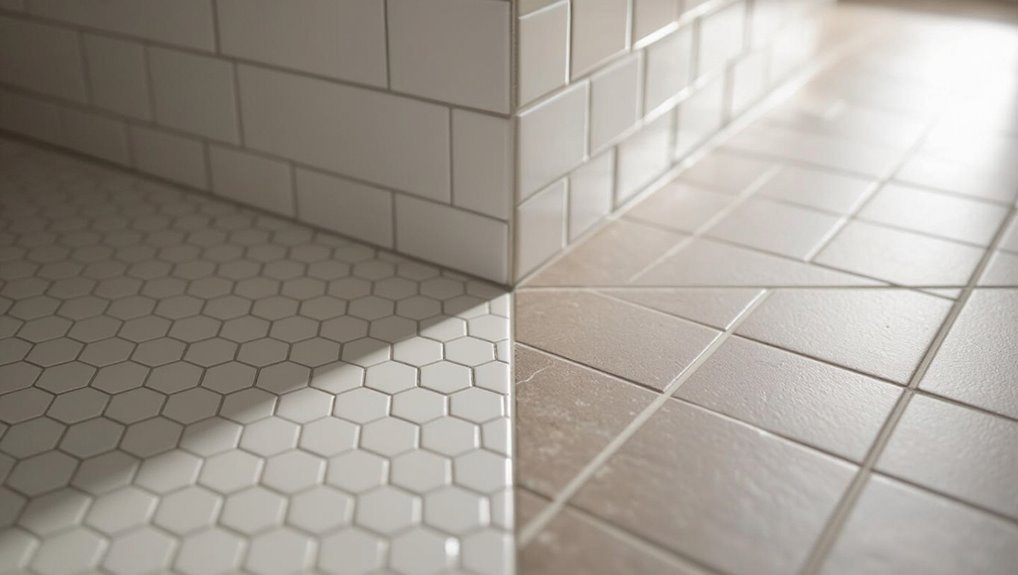
Small-format tiles (mosaics, 1“4 inches) pros and cons
Small-format tiles—think mosaics and tiles around 1–4 inches—offer a lot of design flexibility for small bathrooms, letting you create patterns, define zones, and add grip on wet floors. You’ll enjoy detail and slip resistance but face more grout maintenance and longer installation.
| Pro | Con | Best use |
|---|---|---|
| Pattern detail | More grout | Accent floor |
| Grip | Longer install | Shower floor |
Medium-format tiles (6“12 inches) pros and cons
Because they strike a balance between scale and practicality, medium-format tiles (6–12 inches) are the go-to choice for many small bathrooms: you get cleaner lines, fewer grout joints, and visual openness without losing texture or slip resistance. They’re versatile but can feel generic if overused. Choose color and layout wisely.
| Benefit | Feeling |
|---|---|
| Fewer grout lines | Calm |
| Versatile layouts | Confident |
| Practical size | Secure |
Large-format tiles (12“24+ inches) pros and cons
If you want a sleek, roomy look, large-format tiles (12–24+ inches) deliver it by minimizing grout lines and visually expanding the floor; they work especially well in narrow bathrooms where uninterrupted surfaces reduce visual clutter and make the space feel larger. You’ll enjoy fewer grout lines and a modern feel, but watch for tricky cuts and potential lippage.
| Pro | Con |
|---|---|
| Fewer grout lines | Harder to cut |
| Spacious look | Risk of lippage |
| Faster install area-wise | Fewer pattern options |
Long rectangular (plank) tiles and subway tiles layout tips
When you want linear motion and a modern yet timeless look, long rectangular (plank) and subway tiles are a smart choice— they guide the eye along the room and can make a small bathroom feel longer or wider depending on placement.
Lay planks lengthwise toward the door for depth, stagger subway tiles for texture, or use herringbone for visual interest; keep grout thin for continuity.
Layout and Pattern Choices that Make Small Bathrooms Look Bigger
You can use diagonal or offset layouts to visually widen the room—diagonal for more drama, offset (staggered) for subtle elongation.
Choose a continuous grout color or larger tiles to minimize grout lines for a seamless, airy feel, or pick contrasting grout when you want the pattern to pop.
Consider strategic border and field tile placement to guide the eye and make the space read larger.
Diagonal and offset layouts when to use
Although diagonal and offset tile layouts both stretch the visual field, they do it in different ways you can use strategically: diagonal patterns push lines toward the room’s corners to create depth, while offset (brick) layouts guide the eye along staggered joints to suggest length.
Use diagonal for square or oddly shaped baths to soften corners; choose offset to elongate narrow rooms and mask grout irregularities.
Continuous grout color vs. contrasting grout
Pick a grout color that either fades into the tile or frames it sharply—each choice changes how your bathroom reads.
If you want continuous visual flow, match grout to tile so the eye moves uninterrupted, making the space feel larger.
If you prefer defined geometry, contrast grout to highlight pattern and texture, adding deliberate depth without cluttering a small floor.
Using large tiles to reduce grout lines for a seamless look
Matching or contrasting grout sets the floor’s overall rhythm, but tile size controls how much of that rhythm shows.
Choose larger-format tiles to minimize grout lines, creating a calmer, more continuous surface that visually expands your bathroom. Fewer joints mean less visual clutter and easier cleaning.
Balance tile dimensions with room proportions and slip-resistant finishes so the seamless look stays practical and safe.
Visual tricks with border and field tile placement
When you place a narrow border tile around the room or run field tiles diagonally, you steer the eye and make the space feel larger than it is.
Use a thin contrasting border to define edges without boxing the room.
Lay field tiles diagonally or in a staggered brick pattern to elongate sightlines.
Keep grout subtle to maintain continuous flow.
Practical Installation and Maintenance Considerations
Before you pick a tile size, consider the underlayment and subfloor requirements to guarantee a stable, waterproof base.
Think about grout width and how easy it’ll be to clean, plus slip resistance for safety in wet conditions.
Also weigh cost and waste—larger tiles can mean less grout and faster install but more cutting and material waste in small rooms.
Flooring underlayment and subfloor requirements
Because a solid substrate determines how your new tile performs, you should carefully inspect and prepare the subfloor and underlayment before installing tile in a small bathroom.
Verify structural rigidity, repair squeaks, and remove damaged plywood.
Install cement backer board or uncoupling membrane per manufacturer specs, use thinset rated for the system, and guarantee the floor is flat, clean, and dry to prevent cracking and movement.
Grout width and cleaning implications
Once your subfloor and underlayment are solid, pick a grout width that balances appearance, movement accommodation, and cleaning needs.
Narrow joints (1/16″–1/8″) look cleaner and trap less dirt, but require precise tile placement.
Wider grout hides irregularities and allows movement, yet collects grime and needs sealing.
Choose sanded or epoxy grout based on durability and how often you’ll clean.
Slip resistance and safety for bathroom floors
When you pick tile for a small bathroom, prioritize slip resistance as much as style so people don’t take unnecessary risks on wet floors.
Choose tiles with a suitable R-rating or textured surface, test samples when possible, and avoid overly glossy finishes.
Think about underlay heating and mats for added grip.
Maintain floors regularly to prevent soap film and mold that reduce traction.
Cost and waste implications by tile size
If you pick larger tiles for a small bathroom, you’ll usually reduce grout lines and speed up installation, but you may pay more per tile and create higher material waste from cuts around fixtures and walls. You should balance tile cost, labor, and expected waste; smaller tiles can fit oddly shaped areas with less scrap but increase grout time.
| Tile Size | Waste/Cost Image |
|---|---|
| Large | bigger offcuts |
| Medium | moderate scrap |
| Small | many seams |
| Mosaic | precise cuts |
Common Mistakes to Avoid
Don’t pick oversized tiles that overwhelm a tight layout or make cuts impossible.
Pay attention to grout color and pattern scale, and check that door clearances and trim shifts won’t cause problems.
Always order samples and do mockups so you know how everything will look and fit before you buy.
Choosing tiles that are too large for tight layouts
Because large-format tiles can overwhelm cramped bathrooms, you’ll want to avoid sizing that makes the space feel smaller or creates awkward cuts around fixtures.
If you pick oversized slabs, you’ll force many tiny, uneven pieces around toilets, tubs, and vanities.
Choose modest tile sizes so patterns read properly, installation stays neat, and you preserve visual scale and usable floor area.
Overlooking grout color and pattern scale
When you ignore grout color and pattern scale, small bathrooms can quickly look cluttered or disjointed. Grout lines that contrast too sharply will break up floor continuity, while an overly busy pattern can make the room feel chaotic.
Pick a grout that blends with tile to elongate the floor, and choose a restrained pattern so the space reads as cohesive and calm.
Ignoring door clearances and trim transitions
Ever tried fitting new tile only to find the bathroom door won’t close smoothly? You’ll want to check door clearances before laying tile—thicker substrate or large-format tiles can raise the floor and bind the door.
Account for trim changes too: plan thresholds and reveal gaps so baseboards, shoe molding, and adjoining floors meet cleanly. Measure, mock up, and adjust to avoid costly rework.
Failing to order adequate samples and mockups
Ordering too few tile samples or skipping mockups can cost you time and money—so get plenty and test them in place.
Don’t assume online photos match real light, grout, or scale. Lay multiple sizes and grout colors in several spots, including near fixtures and doors.
Mockups reveal pattern issues, slips, and installation quirks, helping you avoid costly changes after the job starts.
Best Practices and Tips for Small Bathroom Tile Selection
Start by following simple rules of thumb for scale and proportion so your tile size feels balanced in a small bathroom.
Think about how floor tile will pair with wall tile and fixtures, and use color and grout choices to stretch the space on a budget.
If your layout is tricky or you want flawless grout lines, don’t hesitate to hire a pro installer.
Rules of thumb for scale and proportion
When you’re choosing tile for a small bathroom, think proportion before pattern: tiles should visually expand the space, not overwhelm it.
Use medium to large-format tiles with minimal grout lines to create continuity. Favor rectangular tiles laid lengthwise to elongate the room.
Keep grout color close to tile color, limit busy patterns, and make sure fixtures don’t break visual flow or clutter sightlines.
Pairing floor tile with wall tile and fixtures
Once you’ve settled on tile size and grout tone to lengthen the room, think about how the floor will talk to the walls and fixtures so the space feels unified.
Choose complementary colors and finishes—matte floors with semi-gloss walls, cohesive accent tones, or a single neutral family.
Match metal finishes on fixtures to tile accents and keep contrast subtle to avoid visual clutter.
Budget-friendly ways to achieve a larger look
Although you’re working with a tight budget, smart tile choices can still make a small bathroom feel noticeably bigger—opt for larger-format tiles to reduce grout lines, stick to a light, cohesive color palette, and choose glossy or satin finishes to bounce light around the room.
Use diagonal or straight-laid layouts, minimal-contrast grout, and fewer trim shifts to create continuity and visual spaciousness without big expense.
When to hire a pro installer
Getting the look and function right on a small bathroom floor often means knowing when to call in a pro installer.
Hire one if you’re dealing with uneven subfloors, complex layouts, heated floors, waterproofing requirements, or patterned mosaics.
A pro saves time, guarantees proper slope and grout lines, and reduces costly mistakes.
Get quotes, check references, and confirm warranties before committing.
Comparison: Best Tile Size Scenarios
You’ll want different tile sizes and layouts depending on whether you’re working with a tiny powder room, a small full bath, or a compact master bath with a shower/tub. Below is a quick visual guide to compare recommended sizes and layout ideas. Use it to match tile scale to room function and traffic.
| Room Type | Recommended Tile Sizes | Layout Ideas |
|---|---|---|
| Tiny powder room (<20 sq ft) | 1×1 to 4×4 in, or small hex | Diagonal or herringbone to widen sightlines |
| Small full bath (20–50 sq ft) | 6×6 to 12×24 in | Straight or staggered planks to elongate floor |
| Small master bath with shower/tub | 12×12 to 12×24 in, mosaic in shower | Larger field tiles on floor, mosaics for wet zones |
Tiny powder room (<20 sq ft) recommended sizes and layouts
In a tiny powder room under 20 sq ft, choosing the right tile size and layout makes the space feel larger and less cramped.
Use small-format tiles like 2×2 or 3×3 mosaics, or elongated 6×24 planks laid lengthwise to stretch sightlines.
Keep grout lines minimal and light-colored, align patterns with the room’s longest dimension, and avoid busy borders that close the space.
Small full bathroom (20“50 sq ft) recommended sizes and layouts
For a small full bathroom between about 20 and 50 sq ft, choosing the right tile size and layout can make the room feel more open and functional without overwhelming it.
Use medium tiles (8×8 to 12×24″) or large-format planks laid diagonally or lengthwise to elongate sightlines.
Keep grout thin and light-colored, and consider mosaic accents only in shower niches or borders to add interest.
Small master bath with shower/tub recommended sizes and layouts
A small master bath with a combined shower/tub (typically 35–60 sq ft) benefits from tile choices that balance spaciousness with durability; pick medium to large tiles—8×8 up to 12×24 or long-format planks—and orient them to lengthen sightlines (horizontal planks along the tub or diagonal layouts across the floor).
Use fewer grout lines, slip-resistant finishes in wet zones, and consistent color to unify the space.
FAQ Small Bathroom Tile Size (3“5 Questions)
You probably have a few quick questions about tiling a small bathroom—like how small you should go, whether large-format tiles will overwhelm the space, or how grout color affects the look.
You might also be wondering if mixing tile sizes works and how many samples to test before committing.
Let’s answer those points so you can pick the best layout with confidence.
What is the absolute smallest tile I should use on a bathroom floor?
Most designers recommend not going smaller than 2 inches for bathroom floor tiles because anything tinier creates too many grout lines, slows installation, and becomes harder to keep clean.
You should generally stick to 2–4 inch mosaics only in shower niches or decorative bands.
For main floors, choose larger tiles to reduce grout, speed installation, and simplify cleaning while maintaining slip resistance.
Are large-format tiles a bad idea for tiny bathrooms?
If tiny mosaics crowd a small bathroom with grout lines, going the other way—using large-format tiles—can actually open the space visually and cut installation time.
You’ll get fewer grout joints, a cleaner look, and easier maintenance. Watch subfloor flatness and tile scale so patterns don’t overwhelm.
Choose lighter tones and minimal grout lines to keep the room feeling spacious and cohesive.
How does grout color change the perception of space?
While grout is a small detail, it has a big impact on how roomy your bathroom feels: choosing grout that matches tile color creates a seamless look, expanding visual space.
High-contrast grout emphasizes joints, breaking up the floor and making it feel busier and smaller.
For a compact bath, pick subtle, tile-toned grout to simplify lines and maximize perceived openness.
Can I mix tile sizes on the same small bathroom floor?
Because mixing tile sizes can add interest without overwhelming a small bathroom, you can absolutely combine different formats—provided you plan patterns and shifts carefully.
Use a dominant tile for most floor area, then accent with smaller tiles in borders or niches to define zones.
Keep grout consistent, align grout lines, and limit contrasting sizes to one or two changes to maintain visual cohesion.
How many samples should I try before deciding?
Mixing tile sizes can give your small bathroom personality, but before committing you’ll want to test options in person.
Try three to five samples: one main field tile, a contrasting accent, and a grout color sample.
Lay them on the floor in natural and artificial light, photograph from standing height, and live with them a day to judge scale, contrast, and maintenance.
Final Recommendation and Quick Checklist
You’ll want a simple takeaway: smaller tiles or long, narrow planks usually make a small bathroom feel larger, while larger tiles can work if grout lines stay minimal.
Use the checklist below to pick tile size based on room dimensions, grout preference, and installation complexity.
Follow those steps and you’ll make a confident, practical choice.
One-paragraph final takeaway
When choosing tile for a small bathroom, favor smaller-format or medium tiles (like 6×6, 8×8, or 12×12) or larger rectified planks laid lengthwise to visually expand the space and minimize grout lines.
Pick matte or low-sheen finishes for slip resistance, light neutral colors to brighten the room, and a grout color that blends with the tile to create a seamless look.
Choose scale, layout, and finish to maximize perceived space and safety.
Short actionable checklist for choosing tile size
Now that you’ve got the basic rules—smaller or medium tiles, light neutrals, blended grout—here’s a short, actionable checklist to help you pick the right tile size fast.
- Measure floor; aim for 12–24 inch tiles for openness
- Mock up layout with paper
- Choose light, matte finish
- Use narrow, matched grout
- Prefer rectangular tiles oriented lengthwise to visually extend space