How to Clean and Seal Ceramic Tile Floors Fast
You can clean and seal ceramic tile floors fast by zoning the room, sweeping and vacuuming, then degreasing trouble spots with dish soap or a concentrated cleaner. Scrub grout quickly with a rotary brush or stiff brush, rinse and squeegee excess water, then dry with fans and a dehumidifier. Apply a thin coat of fast‑dry penetrating sealer with a microfiber pad, wait the recommended cure, and restrict traffic—keep going to learn practical tips and troubleshooting.
Who This Guide Is For and What to Expect
Whether you’re a busy homeowner, a renter trying to keep deposits intact, or a small-business owner maintaining a tiled entryway, this guide will give you clear, practical steps to clean and care for ceramic tile floors. You’ll learn routine cleaning, stain removal, and when to reseal grout without getting lost in jargon.
Expect tips that respect decorative patterns and consider historical significance for older tiles so you won’t damage character-defining features. You’ll get tool and product suggestions, safety notes, and time estimates for each task.
Quick Answer: Clean and Seal Ceramic Tile Floors Fast
You can get tile floors clean and protected quickly by focusing on rapid surface prep, targeted grout cleaning, and a fast sealer application.
Start with a quick sweep and mop to remove loose dirt. Treat grout with a concentrated cleaner and scrub. Then apply a fast-curing sealer following the manufacturer’s instructions.
With the right products and a steady routine, you’ll cut the job time without sacrificing results.
Rapid Surface Prep
When time’s tight, prep your ceramic tile quickly by clearing loose debris, spot-treating stains, and giving the floor a fast mop with a pH-neutral cleaner so sealers will adhere properly.
You’ll move fast but smart: target oily spots, lift grit from grout lines, and ensure surface dryness before sealing.
Consider how sealers interact with color options and grout coloring choices; test a hidden area first.
Follow this quick checklist:
- Sweep and vacuum corners, then tack-mop to remove fine dust.
- Use a citrus or enzyme spot cleaner for stubborn spills.
- Dry thoroughly with microfiber towels before applying sealer.
Fast Grout Cleaning
After prepping the surface, tackle grout fast to keep your sealing timeline on track. Scrub joints with a stiff brush and a pH-neutral cleaner or diluted bleach for mildew; rinse thoroughly and dry.
Use a steam cleaner on stubborn stains to lift dirt without harsh chemicals. Test a small area before using tinted grout cleaners if you’ve got specific color options in mind.
Replace badly damaged grout to preserve material durability and guarantee sealers bond properly. Work in small sections so grout stays spotless and dry when you apply the sealer in the next step.
Quick Sealer Application
Ready to seal the floor quickly and get back to normal? You’ll work systematically: tape edges, choose a sealer that matches your tile’s sheen, and test grout coloring in an inconspicuous spot.
Apply thin, even coats with a microfiber pad, avoiding puddles, and follow drying times on the label.
- Pick a sealer that complements color coordination between tile and grout.
- Use a small brush for corners, then a roller for open areas.
- Do a final inspection for missed spots and recoat if needed.
You’ll finish faster by prepping well and working methodically for durable, uniform protection.
Assess Your Floor Fast: Tile, Grout, and Damage
Because a quick inspection saves time later, scan the room for cracked or loose tiles, stained or crumbling grout, and any areas where the finish has worn away.
Quickly inspect for cracked or loose tiles, stained or crumbling grout, and worn finishes before any repairs.
Note tile type and color options so replacements match, and photograph grout patterns to guide repair.
Test grout firmness with a fingernail or screwdriver tip; soft or powdery grout needs regrouting.
Tap tiles lightly—hollow sounds mean detachment.
Mark damaged spots with painter’s tape and list priority repairs: safety hazards first, cosmetic fixes next.
Measure damaged areas to estimate materials and time before you start cleaning or sealing.
Zone Your Room for Efficient, Room-by-Room Work

When you break the room into manageable zones, you’ll clean faster and avoid redoing areas—start by dividing the floor into sections that match natural boundaries (cabinets, islands, rugs) and work from the farthest corner toward the exit so you don’t track dirt back over cleaned tile.
Plan zones around traffic flow and any decorative patterns or color variations so you treat each area appropriately. Tackle one zone fully before moving on.
Tips:
- Clear and sweep each zone first to remove loose grit.
- Clean tiles and grout systematically in rows.
- Seal one zone at a time for even coverage.
Pre-Clean Checklist to Avoid Rework
Before you start scrubbing a single zone, run through a quick pre-clean checklist so you won’t have to redo work later. Check tile and grout condition, noting grout types and any cracked or missing grout that needs repair first.
Before scrubbing, run a quick pre-clean checklist—inspect tiles and grout, noting any cracks or missing grout to repair first.
Test a small patch with your cleaner to confirm compatibility and color options won’t shift or bleed.
Clear furniture, rugs, and debris so you won’t trap dirt after sealing.
Verify ventilation and drying time expectations for your chosen sealant.
Gather replacement grout and touch-up supplies so fixes happen immediately.
Confirm household traffic patterns to schedule cleaning when floors can stay undisturbed.
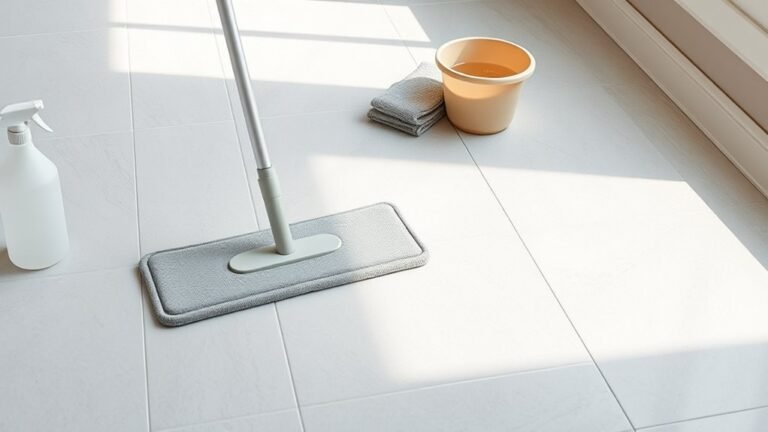
Tools for Quick Ceramic Tile Cleaning
You’ll want a compact kit of essential cleaning tools—microfiber mop, soft-bristle brush, grout brush, bucket, and a spray bottle—to tackle dirt quickly and protect the tile surface.
Don’t forget sealing supplies: a quality sealer, applicator pad, and gloves to lock in results after cleaning.
With the right tools on hand, you’ll finish faster and avoid repeat work.
Essential Cleaning Tools
Want to clean your ceramic tile fast and well? You’ll need a few reliable tools to move quickly and get lasting results. Think practical items that match your routine—like the neat tips you use in gardening tips or the simple order of cooking recipes: plan, prep, execute.
- Microfiber mop: lifts dirt and dries fast without streaks.
- Stiff grout brush: targets grout lines without scratching tile.
- Bucket with wringer and pH-neutral cleaner: controls dilution and protects finish.
Grab these, declutter the area, and you’ll cut cleaning time while keeping tiles pristine.
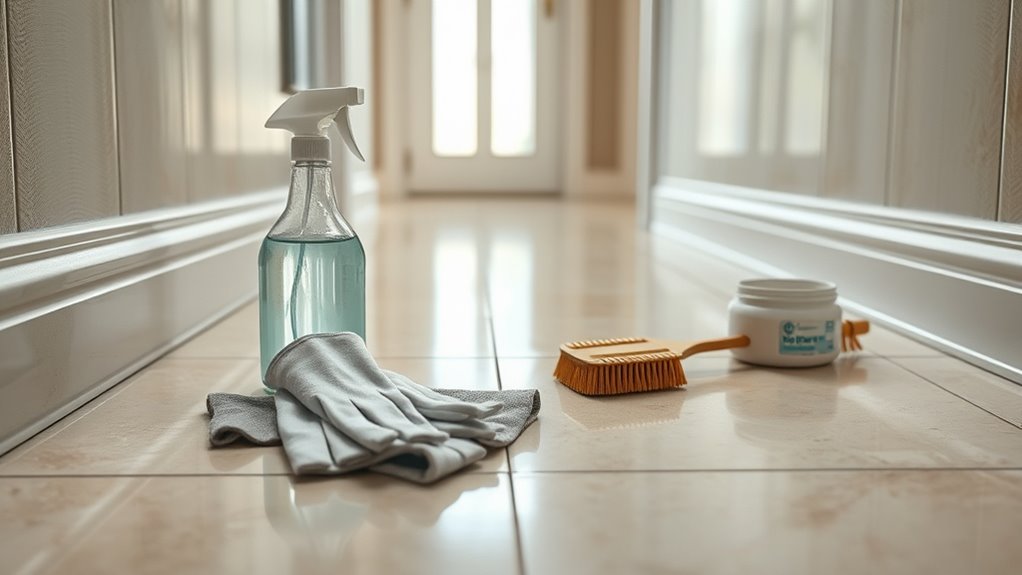
Sealing Supplies Checklist
Since sealed grout and properly treated tiles cut down on stains and scrubbing, you’ll want the right sealing supplies on hand before you start—cleaning-grade sealer, a small foam roller or applicator pad, disposable gloves, a lint-free cloth for wipe-ups, and a tester bottle to check compatibility with your tile and grout.
Add a stiff nylon brush for grout, a bucket, mild cleaner, and painter’s tape to protect trims. Keep extra microfiber mop heads and clear drying time labels.
These items speed work and prevent mistakes, like you’d avoid missteps in cooking tips or gardening advice when prepping ingredients or beds.
Fast Products That Actually Work on Ceramic Tile and Grout
When you need a quick, reliable clean, pick products formulated for ceramic tile and grout so they cut grease without harming the surface. Fast-acting cleaners, steam mops, and targeted grout gels each solve specific messes and save you time.
You’ll choose by finish, color options, and tile patterns to match appearance while maintaining protection. Use products as directed for best results.
- Fast pH-balanced spray cleaner: great for daily spills and maintaining sheen.
- Steam mop with adjustable settings: lifts dirt without chemicals on sealed tile.
- Grout gel with brush applicator: targets stains and restores grout color quickly.
Safety Gear and Surface Protections to Save Time Later
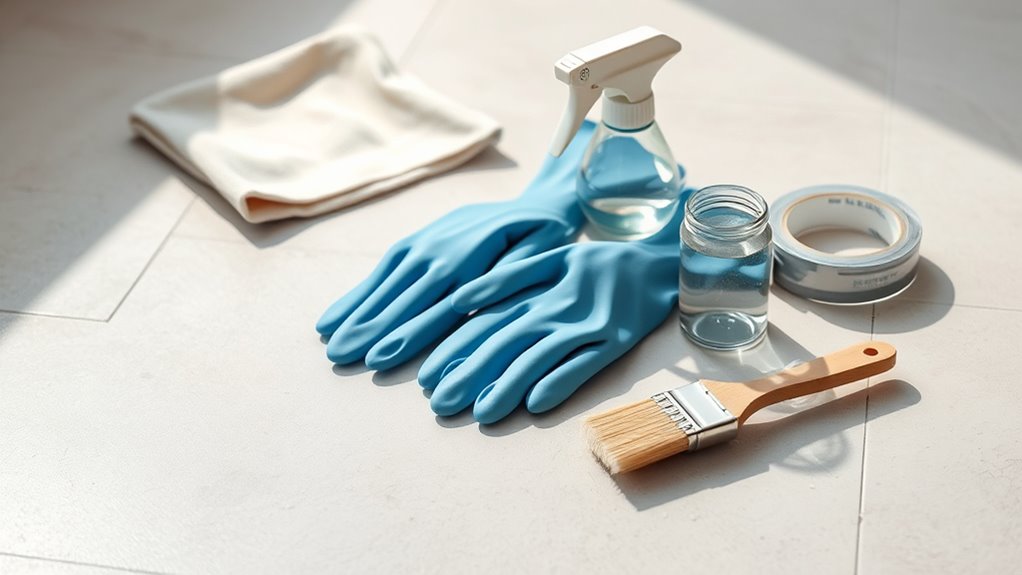
Before you start scrubbing, put on protective gloves so chemicals and grime don’t irritate your skin.
Cover nearby surfaces—baseboards, cabinets, and furniture—with plastic or drop cloths to prevent splashes and staining. These small precautions save time and cleanup later.
Wear Protective Gloves
Why put on gloves? You protect skin from cleaners, sealers, and rough grout while keeping cleanup simple. Choose gloves that fit well and suit the task; they come in different Color options and materials, so pick what works with your tools and Design patterns in mind.
- Nitrile: chemical-resistant, good for sealers and strong cleaners.
- Latex: flexible, comfortable for light scrubbing.
- Heavy-duty rubber: durable for extended work and hot water.
Change gloves if torn or contaminated, and rinse reusable pairs after use. Gloves save time by preventing irritation and reducing stoppages.
Protect Nearby Surfaces
Wondering what to cover first? Protect nearby surfaces before you clean or seal to avoid surface staining and grout discoloration. Lay drop cloths or plastic sheeting over counters, baseboards, and furniture; tape edges securely so no cleaning solution seeps underneath. Remove or cover vents and light fixtures to prevent overspray.
Wear goggles and a mask while handling sealers to protect paint and fabric from fumes that cause staining. If you’re working near wood trim, apply painter’s tape along seams to prevent grout discoloration from acidic cleaners.
Clear the area—you’ll save time fixing accidental damage later.
How to Remove Loose Debris Quickly and Thoroughly
Once you’ve cleared out furniture and rugs, start by sweeping or vacuuming the entire floor to pick up loose dirt, crumbs, and grit that’ll scratch your tiles if left behind.
Next, tackle edges and grout lines with a stiff-bristled broom or crevice tool so debris doesn’t get trapped; this preserves your tile patterns and any finish or color options you’ve chosen.
For thoroughness, follow a quick three-step routine:
- Sweep or vacuum, working outward from the room’s center.
- Use a microfiber dust mop to gather fine particles.
- Inspect and spot-clean corners with a hand brush.
Fast Degreasing Technique for Kitchen Ceramic Tile
Looking for a quick way to cut greasy buildup on kitchen ceramic tile? You’ll mix a mild degreaser (dish soap + warm water) in a spray bottle, mist the floor, let it sit 2–3 minutes, then wipe with a microfiber mop. Rinse with clear water to protect kitchen aesthetics and avoid residue that alters grout color. For stubborn spots, apply straight degreaser briefly and blot.
| Step | Solution | Time |
|---|---|---|
| Spray | Dish soap mix | 2–3 min |
| Wipe | Microfiber mop | 1–2 min |
| Rinse | Clear water | 1 min |
| Spot | Straight degreaser | 30–60 s |
Speed-Cleaning Grout: When to Use a Scrubber vs. a Brush
While a stiff brush gives you control for tight grout lines and stubborn stains, a scrubber—powered or manual—saves time on larger areas and heavily soiled floors. You’ll choose based on scale, grout color, and desired finish.
Use a brush when precision matters; use a scrubber when speed matters. Match tools to the job and consider color coordination if resealing or retouching grout.
- Brush: best for narrow lines and delicate edges.
- Scrubber: ideal for open areas and deep grime.
- Finish: assess grout color after cleaning for any touch-ups.
Work systematically, rinse often, and let grout dry before sealing.
Using a Steam Mop Safely and Fast on Ceramic Tile
If you want quick, chemical-free shine on ceramic tile, a steam mop can cut cleaning time while sanitizing grout and surface dirt. You’ll pre-sweep, test a hidden spot, and use the lowest steam setting to avoid loosening grout or damaging any color options in tile finishes.
Move in slow, overlapping strokes and keep pads clean so grime isn’t redeposited. Don’t over-saturate grout lines; short passes lift soil without lifting grout coloring or sealers.
For sealed tile, steam’s great; unsealed or cracked grout should be repaired before steam cleaning to prevent moisture issues.
How to Use a Rotary Scrubber for Faster Grout Results
When grout’s dull or stained and a mop won’t do, a rotary scrubber gives you faster, more consistent results—just attach a soft-bristle or nylon pad, choose the right speed, and work in short, controlled passes so you don’t damage the grout.
You’ll move systematically across tiles, rinsing frequently and checking progress. Use gentle pressure and keep the tool moving to avoid rounding edges.
Consider protective tape along decorative accents and note color coordination when planning touch-ups.
Tips:
- Test a hidden area first for speed and pad type
- Rinse and vacuum slurry often
- Replace pads when they wear out
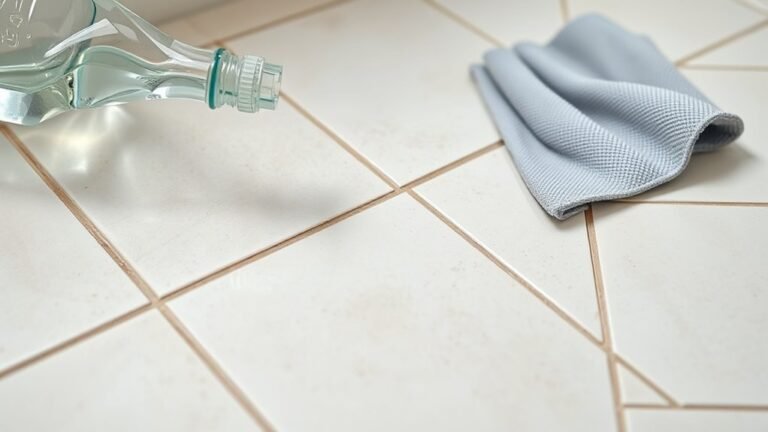
Quick Homemade Cleaners That Are Tile-Safe
Because store-bought cleaners can be harsh or pricey, you can make simple, tile-safe solutions from ingredients you probably already have. Mix warm water with a few drops of mild dish soap for routine cleaning; it preserves glaze and material durability without dulling color options.
Skip harsh cleaners—mix warm water with a few drops of mild dish soap for gentle, tile-safe routine cleaning.
For deeper cleans, combine equal parts water and white vinegar, but test first on a hidden tile—avoid vinegar on natural stone.
Baking soda paste lifts grout stains gently when applied, scrubbed, and rinsed.
Always mop or rinse thoroughly and dry to prevent residue. Label homemade mixes and store safely away from children and pets.
When to Use Commercial Grout Cleaners for Faster Results
Need a faster fix? Use commercial grout cleaners when DIY methods can’t remove stubborn grout discoloration or when you need professional-speed results. Choose products labeled safe for ceramic and follow instructions to safeguard tile and sealant durability.
Consider these scenarios:
- Heavy, set-in stains that resist vinegar or baking soda
- High-traffic areas where quick turnaround matters
- Preparing grout for resealing to ensure sealant bonds well
Wear gloves and ventilate the space. Spot-test first. Apply cleaner only as directed, agitate with a brush, then neutralize per product guidance. Proper use saves time and preserves your floor’s long-term protection.
Rinse and Dry Tricks to Cut Total Turnaround Time
After you’ve neutralized and rinsed away commercial cleaners, speeding up the rinse-and-dry phase will shave hours off your project and protect grout and sealant. Work in small sections, squeegeeing excess water toward a floor drain or mop bucket so moisture doesn’t pool around decorative accents or grout lines.
Use microfiber mops to pick up residue, then follow with high-absorbency towels for drying. Run fans and a dehumidifier, and open windows if weather allows.
For vintage tiles, avoid abrasive heat; let airflow and gentle suction finish the job. Check seams for trapped water before resealing to prevent trapped moisture.
Which Tiles and Grout Types Dry Fastest After Cleaning
When you choose tile and grout that resist absorption, they’ll dry noticeably faster after cleaning. You want low-porosity tiles and sealed grout so moisture evaporates quickly, letting you finish jobs sooner.
Consider surface texture and finish when planning color coordination or decorative accents to keep looks intact.
Consider surface texture and finish when coordinating colors or accents to preserve the intended look.
- Porcelain or glazed ceramic: very low absorption, dries quickly.
- Epoxy or sealed urethane grout: repels water and speeds drying.
- Smooth, glossy finishes: shed water faster than textured surfaces.
Pick materials with performance in mind so you reduce downtime and maintain your aesthetic choices without long drying waits.
Spot Treatment Methods for Stubborn Stains
Though stubborn stains can be frustrating, you can often remove them quickly with targeted spot treatments that match the stain type and tile/grout material.
First, identify stain origin—oil, dye, rust, or mildew—and test any cleaner in an inconspicuous area to preserve color contrast and original tile patterns.
For oil, use a degreaser; for dye, try a diluted bleach solution on glazed tiles only; for rust, use a commercial rust remover safe for ceramic; for mildew, use oxygen bleach.
Apply sparingly, agitate gently with a soft brush, rinse thoroughly, and repeat only if the test area stays unchanged.
Fast Solutions for Efflorescence and Mineral Deposits
If white, powdery deposits are cropping up on your ceramic tile or grout, they’re probably efflorescence or mineral buildup from hard water—and you can remove them quickly with the right approach.
Identify Efflorescence causes: moisture migration, salt-laden substrates, or poor drainage.
For fast mineral deposit removal, try these steps:
- Scrub with a vinegar solution (1:1 water) for light buildup, rinse thoroughly.
- Use a commercial descaler for heavy deposits, following label safety instructions.
- Dry and improve ventilation to prevent recurrence, and fix leaks or drainage issues promptly.
Test cleaners in a hidden spot before full application.
How to Repair Small Chips Before Sealing
Before sealing, you’ll want to assess the size and depth of any chips to determine if they need simple touch-up or a stronger repair.
For small, shallow chips, clean the area thoroughly and fill them with a matching epoxy or tile filler, smoothing it flush with the surface.
Once the epoxy cures, sand lightly if needed and wipe clean before applying your sealer.
Assess Chip Size
How big is the chip and does it sit on the surface or penetrate the glaze? You’ll inspect size, depth, and surrounding tile patterns to decide repair approach. Note color variations—tiny chips may only need matching touch-up, deeper chips could affect grout edges.
- Small surface chips: shallow, limited color loss, easy to mask.
- Medium chips: break glaze, expose body; check for moisture or movement.
- Large chips/cracks: compromise tile integrity; consider replacement if instability shows.
Measure with a ruler or caliper, photograph for reference, and keep notes on pattern location so repairs blend with overall tile design.
Fill With Epoxy
When you’re ready to repair small chips, filling them with a two-part epoxy gives a durable, paintable surface that bonds to the tile’s body and resists moisture.
Clean the chip, remove dust, and roughen edges slightly so the epoxy fill adheres.
Mix per instructions, use a toothpick or small spatula to push epoxy into the void, overfilling slightly.
Let it cure fully, then sand flush with fine-grit paper.
Match color with a tinted epoxy or touch-up paint for a seamless repair.
Seal the tile afterward to protect the repair and guarantee long-lasting results.
When and Why You Should Replace Damaged Grout First
Although you can clean tile without touching grout, you shouldn’t—damaged grout undermines both appearance and function, letting dirt, moisture, and mold get into joints and causing tiles to loosen or fail.
You should replace cracked or crumbling grout before deep cleaning so repairs don’t trap dirt or allow stains to reappear. Regrouting also refreshes grout color and helps tile patterns read clearly.
Look for loose grout, persistent staining, or mold that resists cleaning.
- Replace when grout flakes or gaps appear
- Replace when water soaks joints quickly
- Replace when mold returns after treatment
Do repairs carefully to preserve surrounding tiles.
Pick a Sealer for Quick, Durable Protection
Choose a sealer that matches your tile and traffic level so you get fast, long-lasting protection without extra work. Pick a product labeled for ceramic and the room’s wear; that guarantees sealer longevity and reduces reapplication frequency.
Look for formulations that offer quick dry times so you can finish fast and reopen spaces sooner. If you want a subtle upgrade, choose a sealer with color enhancement to deepen tones without glossing everything over.
Read application instructions, test on a small area, and plan one thin coat if recommended. Proper choice saves time and protects floors effectively.
Penetrating vs. Topical Sealers: Which Seals Faster?
If you want the fastest protection for ceramic tile floors, compare penetrating and topical sealers’ cure times and application steps—penetrating sealers soak in and often let you walk on tiles within a few hours, while topical sealers form a surface film that can take longer to dry and may need multiple thin coats.
For quickest protection, choose penetrating sealers that soak in and cure in hours; topical finishes take longer and may need coats.
You’ll pick based on speed, sheen, and maintenance. Consider these quick facts:
- Penetrating: fast cure, invisible, fewer sealing myths about slipperiness.
- Topical: slower, offers varied color options and finish choices.
Prep matters: clean thoroughly for either to work quickly.
Choosing a Sealer by Room: Kitchen, Bathroom, Entryway
When picking a sealer for specific rooms, think about traffic, moisture, and cleaning habits so you get protection that matches each space’s demands.
In the kitchen, choose a durable, water-resistant topical or penetrating sealer to resist spills and frequent mopping; consider color options that complement grout and cabinets.
For bathrooms, prioritize moisture-blocking sealers that prevent mold while allowing regular tile maintenance with mild cleaners.
In entryways, pick a high-wear sealer with slip resistance and easy-clean properties to handle dirt and grit.
Match sealer type to room use, and stick to recommended reapplication intervals for lasting protection.
How to Test Sealer Compatibility With Your Tile and Grout
Before you apply a sealer across the whole floor, test it on small, inconspicuous areas of both tile and grout to confirm appearance, adhesion, and compatibility. Pick a hidden corner and follow manufacturer directions; wait the recommended cure time before evaluating.
Check for changes in Tile color, texture, or sheen and rub with a damp cloth to assess adhesion. Note effects on grout tone and porosity to predict Sealer longevity.
Test variations:
- Fresh sealer on ceramic tile
- Sealer on grout joint
- Sealer after mild cleaning residue
Record results and choose the product that preserves look and performance.
Preparing the Surface Quickly for Optimal Sealer Adhesion
Before applying sealer, remove all surface contaminants like dust, grease, and residue so the coating can bond evenly. Wipe or mop with a recommended cleaner, then rinse thoroughly to eliminate leftover cleaner films.
Let the tile and grout dry completely—use fans or a dehumidifier if you need to speed things up.
Remove Surface Contaminants
Why skip lingering dust and grime? You want sealer to bond, so remove surface contaminants quickly and efficiently. Start with a dry sweep, then target stubborn spots without soaking the floor.
- Vacuum edges and grout lines for trapped debris and hair.
- Use a pH-neutral cleaner and microfiber mop to lift oils and film.
- Spot-treat stains with a soft brush and diluted cleaner; don’t scrub tile finish.
While you clean, consider color coordination and pattern matching for replacement tiles or grout touch-ups so repairs blend.
Finish removing residues so the sealer adheres evenly and looks professional.
Ensure Complete Drying
Once surface contaminants are gone, make certain the tile and grout are completely dry so the sealer bonds properly. Use a microfiber mop to remove excess moisture, then run fans and open windows to speed evaporation.
For faster results, point a portable heater or dehumidifier at damp areas, but keep temperature within the sealer’s recommended range.
Check grout lines with a cotton swab—if it picks up moisture, wait.
When dry, test a small area with your chosen sealer. Consider eco-friendly options and follow manufacturer instructions, especially when using advanced sealing techniques to ensure lasting adhesion and performance.
Apply Sealer Fast: No Streaks
Because sealers start to level as they dry, you should work quickly and steadily so you don’t leave lap marks or streaks on your ceramic tile.
Prepare by choosing a sealer type that suits your color options and complements grout patterns; test a small area first.
Use a quality applicator and keep a wet edge.
Work in sections no larger than a few square feet, maintaining even pressure and overlap.
- Use a microfiber pad for smooth spreading.
- Keep a slow, steady pace to avoid reworking.
- Feather edges with light strokes before the sealer sets.
How Many Coats Are Really Necessary for Fast Protection
If you want fast, reliable protection for ceramic tile, two thin coats of sealer usually do the job: the first soaks in and bonds to grout and microscopic pores. You’ll add a second thin layer for surface build, abrasion resistance, and even gloss.
One coat can suffice on dense, glazed tiles, but porous grout benefits from the extra pass. Choose sealer type based on wear and color options—matte, satin, or glossy—so the finish matches your room.
Use consistent sealing techniques: thin, even strokes, overlap slightly, and avoid puddles. Test a small area first to confirm coverage.
Realistic Drying and Cure Times
After you’ve applied those two thin, even coats, give the sealer time to dry and fully cure before heavy use—drying means the surface feels no longer tacky, while curing means the protective film has reached its rated hardness.
You’ll usually wait 1–4 hours to walk on and 24–72 hours for light use; full chemical cure can take up to 7 days. Consider room temperature and humidity, and don’t forget how color coordination or Trend analysis of finishes affects perception of cure.
Quick checklist:
- Check tackiness before replacing rugs.
- Keep traffic low for 24–72 hours.
- Avoid wet cleaning until full cure.
Speed Hacks for Faster Curing
When you need grout or sealer to set quickly, choose a fast-set product labeled for ceramic tile and follow the manufacturer’s mix and application instructions.
You can also speed curing by raising the room temperature and lowering humidity with heaters and dehumidifiers, but don’t exceed the product’s recommended range.
Those two steps together’ll shorten wait times without compromising the finish.
Use Fast-Set Sealers
Because you want the job done quickly without sacrificing durability, choose a fast-set sealer designed for ceramic tile—these products cut curing time from days to hours so you can walk on floors and replace furniture sooner.
Fast-set options bond quickly, resist footprints, and let you tailor aesthetics with color options while maintaining guidance on cleaning frequency.
Pick one compatible with glaze and grout, follow dry time, and test in a small area.
- Look for rapid cure labels and recommended recoat windows
- Confirm slip resistance and VOC levels
- Use manufacturer cleaning frequency recommendations to preserve finish
Optimize Temperature And Humidity
If you want sealers to cure faster without risking finish quality, control the room’s temperature and humidity so conditions match the manufacturer’s ideal range. You’ll speed drying by using heaters or fans for temperature regulation and a dehumidifier for humidity management.
Aim for the specified degrees and relative humidity; too hot or too dry can cause cracking, too cold or damp prolongs tackiness. Close windows, seal vents, and run climate gear before and after application to stabilize conditions.
Monitor with a thermometer and hygrometer, adjust gradually, and wait the recommended cure time despite faster surface dryness to ensure durability.
How to Protect Floors During the Sealer Cure Period
While the sealer sets, you’ll want to keep traffic off the floor and maintain stable conditions so the coating cures evenly and reaches full durability. Tape off the area, post signs, and use temporary barriers; color coordination and texture selection of mats help you avoid tripping and visual confusion. Control temperature and humidity per product instructions, and don’t rush drying times.
- Block access with lightweight barricades and clear signage.
- Use soft, non-abrasive walk-off mats for adjacent zones.
- Place felt pads under furniture if you must move items.
Check cure time before resuming normal use to protect the finish.
Quick Maintenance Routine After Sealing to Extend Protection
After sealing, keep your tiles protected with a quick daily light sweep to remove grit that can abrade the finish.
Once a month, walk the floor and spot-check for dull areas or wear, re-coating small patches as needed.
These simple steps will extend the sealer’s life and cut down on major maintenance.
Daily Light Sweeping
Why not make a quick sweep part of your daily routine to keep sealed ceramic tile looking its best? You’ll remove grit that wears the sealer and preserve color options and decorative patterns by preventing scratches.
Spend two to three minutes with a soft broom or microfiber dust mop, focusing on high-traffic zones and grout lines. Try to:
- Sweep toward one exit for efficient debris collection.
- Use a microfiber pad to trap fine dust without scratching.
- Empty dustpan or shake out the mop outdoors to avoid redepositing dirt.
Daily light sweeping keeps sealed surfaces performing well and delays more intensive cleaning.
Monthly Recoat Spot-Check
Ready for a quick monthly check to keep your sealer working its best? Walk the area with a flashlight and a microfiber cloth.
Inspect grout color for fading or dark spots that signal wear or soil build-up. Press a fingertip on grout lines—if water beads, the sealer’s holding; if it soaks in, you’ll need a targeted recoat.
Pay attention to corners and shower thresholds where mold prevention matters most; dry thoroughly after testing.
Clean any residue, let surfaces cure fully, then apply a thin recoat only where needed.
Record date and locations so future maintenance stays efficient and consistent.
Best Quick-Clean Products to Use on Sealed Tile
If you want fast, effective results without stripping the sealant, reach for cleaners formulated for sealed ceramic tile—pH-neutral, non-abrasive sprays or mopping solutions that cut grime but won’t dull the finish. You’ll want products that respect color contrast and reveal tile textures without leaving residue.
Use pH-neutral, non-abrasive cleaners designed for sealed ceramic tile to preserve finish, color contrast, and texture without residue.
Choose one for routine touch-ups and one for stubborn spots.
- pH-neutral floor cleaner: gentle, streak-free for everyday use
- Spray-and-wipe degreaser: targets stuck-on dirt around appliances
- Microfiber mop solution: lifts soil from grout lines and uneven textures
Test any product in a small area before full use.
How Often to Reapply Sealer for Minimal Upkeep
How often you’ll need to reapply sealer depends on the product—penetrating sealers can last several years, while topical sealers may need yearly touch-ups.
Watch for signs like water beading failure, darkening grout, or increased staining to know it’s time to reseal.
I’ll walk you through typical intervals by sealer type and the quick tests to spot wear.
Frequency By Sealer Type
Wondering how often you should reseal your ceramic tile? You’ll base frequency on sealer type and traffic. Penetrating sealers last longest; reapply every 3–5 years. Topical sealers wear faster, so plan on 1–2 years. Epoxy or urethane coatings give heavy-duty protection and often need recoating every 5–7 years.
- Penetrating: subtle finish, preserves color options and grout integrity.
- Topical: enhances shine and highlights texture patterns; more frequent upkeep.
- Epoxy/urethane: industrial strength, less frequent but costlier to redo.
Follow manufacturer guidance and adjust for heavy use or moisture-prone areas.
Signs You Need Reapplying
When your tile starts showing dull spots, grout darkens despite cleaning, or water beads no longer form on the surface, it’s time to think about reapplying sealer. These clear signs mean the protective layer has worn thin and won’t fend off stains or moisture reliably.
Check high-traffic zones, entryways, and areas near indoor plants or mud tracked in from garden design changes. Test grout with a few drops of water: rapid absorption signals resealing.
Reapply before stains set—typically every 1–3 years depending on use. Consider furniture arrangement to reduce wear and prolong the sealer’s life.
7 Time-Wasting Mistakes and How to Avoid Them
Although it may feel like a quicker fix, skipping proper sweeping or using the wrong cleaner just creates extra work. So you’ll want to learn the common time-wasting mistakes and simple fixes that keep your ceramic tile floors clean without doubling your effort.
Skipping sweeping or the wrong cleaner feels faster but just adds work; learn quick fixes.
You might treat floors like afterthoughts while planning garden design or rearranging furniture arrangement, but small habits save time. Common pitfalls and quick corrections:
- Using too much soap: leaves residue; dilute cleaners per label.
- Mopping without sweeping: smears grit; sweep or vacuum first.
- Ignoring grout edges: traps dirt; focus on seams and baseboards.
Troubleshooting: Why Your Sealer Didn’t Bond or Darkened Grout
If your grout darkened or the sealer didn’t bond, you’ll usually find the problem in surface prep, product choice, or application technique.
Check that the tile and grout were fully clean and dry; residues, soaps, or efflorescence block adhesion. Verify sealer compatibility with your grout type—alkyd or silicone-based sealers can react and cause grout darkening.
Apply sealer thinly and evenly; pooling prevents proper cure. Test a small inconspicuous area first to confirm no color change.
If bonding fails, strip the sealer, deep-clean, let dry 48 hours, then reapply a compatible product following manufacturer instructions.
Time-Saving Tools and Gadgets Worth the Investment
Because you want clean floors faster and with less elbow grease, investing in a few smart tools pays off immediately. You’ll cut time and protect surfaces used near garden decor or outdoor-entry zones, and you’ll avoid dragging dirt onto furniture maintenance areas.
Consider these essentials:
- Microfiber flat mop with swivel head — captures grit, speeds drying.
- Steam mop with adjustable settings — sanitizes without harsh chemicals.
- Cordless upright vacuum with tile brush — picks grout debris quickly.
Choose durable brands, keep pads clean, and store tools where they won’t damage upholstery or decor. These gadgets repay their cost in saved time.
DIY vs. Pro: Cost and Time Trade-Offs for Tile Sealing
You can save money by sealing tile yourself with a good sealer and a weekend of work.
However, hiring a pro often costs more upfront while cutting your time investment dramatically.
Factor in the hours for prep, application, and curing versus a contractor’s guaranteed schedule, and weigh that against potential mistakes that could require costly fixes.
Also remember pros may offer warranties that protect your floor in ways DIY work typically won’t.
Cost Comparison Summary
Wondering whether to seal your tile yourself or hire a pro? Weigh direct costs, long-term value, and product choices. DIY saves on labor but needs supplies and learning; pros charge more but guarantee consistent results.
Consider eco friendly options and alternative cleaning methods that reduce maintenance costs over time.
- DIY: lower upfront cost, buy sealers, tools, and test patches.
- Pro: higher upfront fee, faster, includes warranty and surface prep.
- Hybrid: you do prep and cleaning; pro applies the sealer.
Choose based on budget, confidence, and desired longevity of the finished floor.
Time Investment Breakdown
Having compared costs and options, it helps to break down the time each route will steal from your schedule. If you DIY, expect prepping, cleaning, and curing to span a weekend plus waiting hours between coats. You control creative design choices but shoulder all setup and cleanup.
Hiring a pro shortens on-site hours—techs work faster and often deliver better water resistance with fewer mistakes—but you’ll coordinate schedules and downtime.
Factor in tile count, grout condition, and sealant type: small rooms favor DIY, large or intricate patterns justify pros. Choose based on time availability, skill, and desired finish.
Risk And Warranty Considerations
Because DIY sealing leaves you fully responsible for performance and mistakes, weighing risks against warranties is essential. You’ll save money DIY but accept liability for failures, stains, or improper adhesion.
Pros add manufacturer warranties and usually carry insurance, which protects you and may be crucial for historical preservation projects that need approved methods.
Also consider environmental impact: pros often use low-VOC products and dispose of waste properly.
- DIY: lower cost, higher personal risk.
- Pro: higher cost, warranty and insurance coverage.
- Project type: historic tile or eco-sensitive sites may require certified contractors.
Quick Checklist to Finish a Fast Clean-and-Seal Job Right
When you’re down to the last steps of a clean-and-seal, use this quick checklist to confirm you’ve sealed grout lines, removed residue, and left a uniform finish—so the job looks professional and lasts.
Check grout: verify consistent sealant coverage, no gaps or pooling.
Wipe residue: use a microfiber mop and neutral cleaner to remove haze.
Inspect tiles: uniform sheen and no streaks.
Test adhesion: spot-check sealant on an inconspicuous tile.
Note timing: allow proper cure per product instructions.
Record materials and steps; historical trends and cultural influences in maintenance can guide long-term care choices.
Frequently Asked Questions
Can I Seal Ceramic Tile Without Removing Furniture First?
You can, but it’s risky: furniture removal is best. You’ll need careful surface preparation around legs, use drop cloths, and mask off edges. Moving light pieces later still helps guarantee an even, durable seal.
Will Sealing Change Tile Color or Sheen Permanently?
Sealing can cause slight color change or sheen alteration, but it usually won’t permanently transform tiles. You’ll notice subtle deepening or gloss shifts; choose a compatible sealer and test a small area to guarantee results you’ll like.
Is It Safe to Seal Over Existing Sealers?
Yes — you can seal over existing sealers if sealer compatibility checks out. Picture a tape test revealing peeling; you’ll need proper surface preparation, cleaning, and possibly stripping to guarantee new sealer bonds and won’t flake.
Can I Walk on Newly Sealed Tile After Three Hours?
You shouldn’t walk on newly sealed tile after three hours; most sealing techniques need 24–48 hours to cure. Wait to avoid marks, follow manufacturer’s cure times, and maintain tile maintenance routines once fully set.
Do Radiant-Heated Floors Affect Sealer Cure Times?
Yes — radiant heated floors can speed sealer curing; you’ll often see faster drying and crosslinking when heat’s applied, but you should follow manufacturer temps and avoid excessive heat that could cause bubbling or uneven cure.
Conclusion
You’ve done the sensible thing: assessed, prepped, and moved through the zones with purpose. Now, give the floor a respectful seal—one that politely keeps out spills and wear—so your tiles can keep looking composed with minimal fuss. If something misbehaved, treat it like a minor faux pas: correct it, learn the nuance, and carry on. With the right tools and a tidy checklist, you’ll have a polished, well-mannered floor in no time.