What Is Laminate Flooring? A Clear Guide to How It Works and Who It’s For
You’ll get a multi-layer synthetic floor that looks like wood or stone but costs less and demands less upkeep. It’s built with a tough wear layer, a printed decorative layer, an HDF or MDF core, and a backing for stability. It’s scratch-resistant and DIY-friendly, though not ideal for very wet areas. Great for living rooms, bedrooms, and busy homes on a budget—keep going to learn how types, installation, and care differ.
What Laminate Flooring Is Quick Answer
Laminate flooring is a multi-layer synthetic product that mimics wood or stone, offering durable, scratch-resistant planks you can install quickly.
This quick answer is for homeowners, renters, and DIYers who want an affordable, low-maintenance alternative to hardwood.
If you’re shopping or planning a project, this guide will help you pick the right type and installation method.
Direct answer in one paragraph
Although it looks like real wood, laminate flooring is a multi-layer synthetic product that fuses a high-resolution photographic layer and a protective wear layer over a core of compressed fiberboard.
This construction gives you the appearance of hardwood or tile at lower cost and with greater scratch and moisture resistance.
When you ask what’re laminate flooring, know they’re durable, easy to install, and low-maintenance.
Who this guide is for
If you want the look of hardwood or tile without the price and maintenance, this guide is for you: homeowners, renters, DIY installers, and small contractors who need a durable, cost-effective floor that’s easy to install and maintain.
- You want budget-friendly style with low upkeep.
- You’ll install or oversee quick, straightforward projects.
- You need resilient flooring for busy households or rentals.
Basic Understanding What Laminate Flooring Is and How It Works
Think of laminate as a layered floor system: a high-density fiberboard core, a printed design layer, and a transparent wear layer that locks everything together.
You’ll learn how manufacturers press materials like melamine and resin to create realistic wood, stone, or tile visuals and protective surfaces.
These printed patterns plus the clear wear layer are what let laminate mimic real materials while standing up to daily use.
Definition and construction (layers explained)
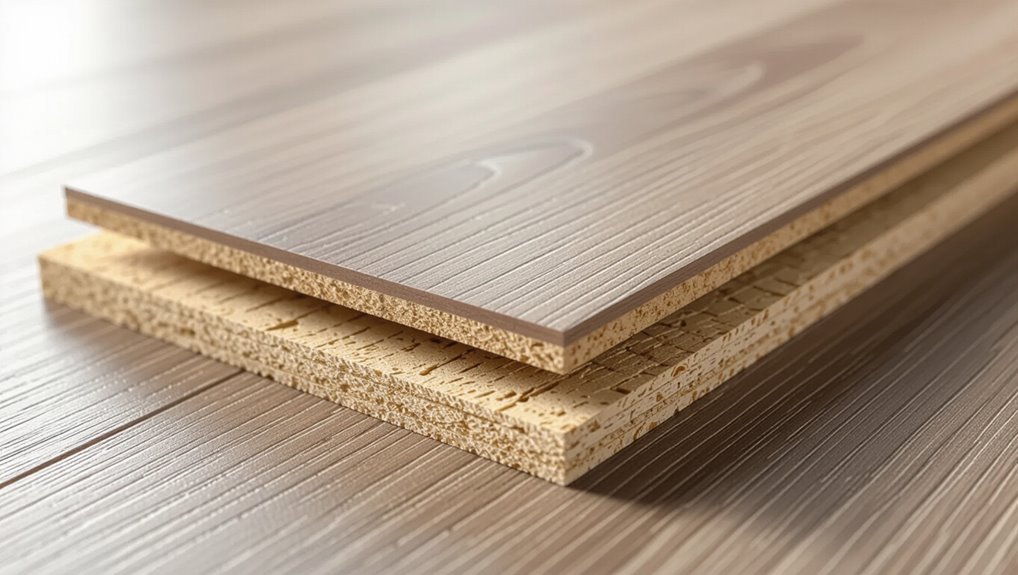
Laminate flooring is a multi-layered synthetic product designed to mimic wood or stone while offering durability and easy installation.
You’ll find four main layers: a protective wear layer, a decorative printed layer, a rigid core that resists impact and moisture, and a backing layer for stability.
Together they lock into place, resist scratches, and provide consistent appearance without solid wood maintenance.
Common materials and manufacturing process
Construction matters: the core of most laminate boards is made from high-density fiberboard (HDF) or medium-density fiberboard (MDF) bonded with resins.
A printed decorative layer replicates wood or stone, and a clear wear layer of aluminum oxide protects against scratches and stains.
Manufacturers press layers under heat and pressure, add moisture-resistant coatings, trim profiles, and apply locking edges so you can install floating floors quickly and reliably.
How laminate mimics real wood, stone, and tile (printing + wear layer)
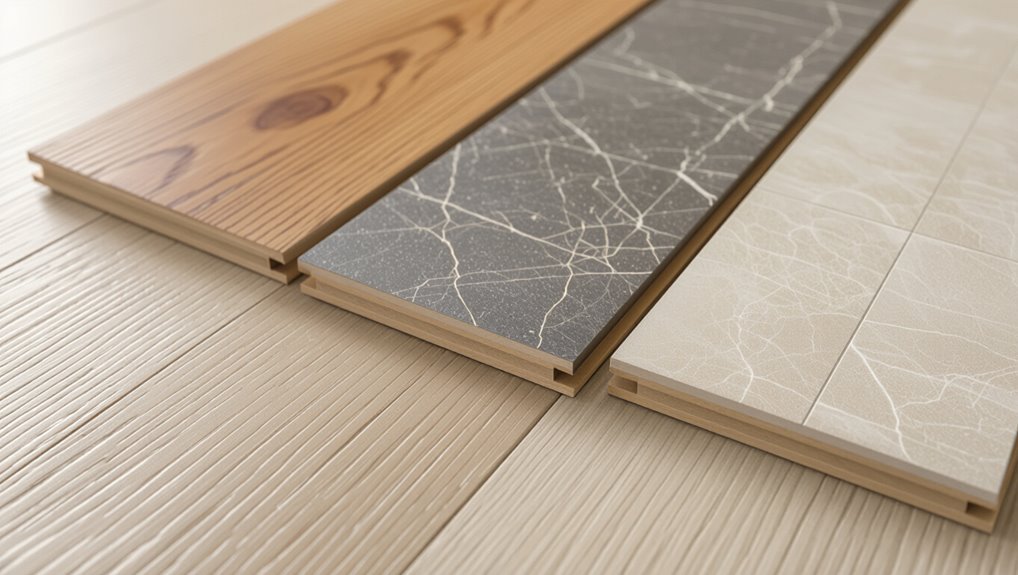
Appearance matters: manufacturers print high-resolution images of wood, stone, or tile onto a decorative paper layer, then seal it beneath a transparent wear layer so you get the look of natural materials without their maintenance needs.
You’ll see realistic grains, veins, and grout lines; the wear layer protects against scratches, stains, and fading, keeping appearance consistent while reducing upkeep compared to real materials.
Key Types and Styles of Laminate Flooring
You’ll notice laminate comes in many looks—wood-, stone-, and tile-style surfaces that mimic real materials.
You’ll also choose based on construction, like HDF versus MDF cores and AC wear ratings for durability.
Finally, compare edge profiles and plank sizes—beveled, micro-bevel, or square—which affect the floor’s final appearance.
By appearance: wood-look, stone-look, tile-look
Style matters when you pick laminate flooring, because its printed layer can convincingly mimic wood, stone, or ceramic tile so you can match your room’s look without the weight or cost of natural materials.
- Wood-look: gives warm grain and plank sizes for halls or living rooms.
- Stone-look: offers slate or marble visuals with easier upkeep.
- Tile-look: mimics ceramic grids, great for kitchens and bathrooms.
By construction: HDF vs MDF cores, AC wear ratings
While the printed surface gives laminate its look, the core and wear layer determine how it performs—so you should weigh HDF versus MDF cores and check AC wear ratings before buying. HDF is denser and more water-resistant; MDF is cheaper. Higher AC numbers mean tougher wear for traffic. Compare options:
| Core | Durability | Cost |
|---|---|---|
| HDF | High | Mid |
| MDF | Moderate | Low |
Edge profiles and plank sizes (beveled, micro-bevel, square)
Edges and plank size affect both the look and installation of laminate, so pick profiles and dimensions that match your room and habits.
Beveled edges create visible seams and suit traditional styles; micro-bevels offer subtle definition without gaps; square edges give a smooth, continuous surface.
Wider planks make small rooms feel larger, while narrower planks hide irregular subfloors and ease installation.
Benefits and Limitations Is Laminate Right for You?
Laminate gives you big benefits—low cost, fast DIY-friendly installation, and strong scratch resistance—making it a practical choice for busy households.
But it’s sensitive to standing moisture, can be hard to repair, and won’t perfectly mimic real wood or stone.
Think about where you’ll install it: living rooms and bedrooms are ideal, while bathrooms, basements with humidity, and areas prone to spills may not be suitable.
Main advantages (cost, installation speed, durability)
Because it delivers big benefits for a modest price, you’ll often find laminate is the smart choice when cost, quick installation, and long-term wear matter most.
You get attractive looks without high expense, fast DIY or pro fitting, and a top wear layer that resists scratches and traffic.
- Affordability
- Speedy installation
- Durable surface
Main drawbacks (moisture sensitivity, repairability, authenticity)
While laminate gives you value and durability, it also has clear limits you should weigh before choosing it: it’s vulnerable to moisture, hard to repair when damaged, and can fall short of the authentic look and feel of real wood or stone.
You’ll need to manage spills quickly, accept that deep scratches or warped boards often require replacement, and know it won’t fully mimic natural materials.
Ideal use cases and unsuitable locations
Think about where traffic, moisture, and authenticity matter most: laminate works best in living rooms, bedrooms, home offices, and low-traffic kitchens where you want a durable, attractive floor on a budget.
You should avoid bathrooms, laundry rooms, basements prone to dampness, and high-humidity areas. Also skip heavy commercial spaces and places needing frequent refinishing or authentic hardwood appeal.
Laminate fits many everyday rooms.
Comparison Laminate vs Alternatives
Now let’s compare laminate to other common floors so you can see where it wins and where it compromises.
You’ll look at cost, durability, water resistance, and appearance versus hardwood, engineered wood, LVP/WPC vinyl, and tile.
That way you can match the right material to each room and budget.
Laminate vs Hardwood
When choosing between laminate and hardwood, you’ll weigh cost, durability, and appearance to match your lifestyle and budget. Laminate is cheaper, scratch-resistant, and low-maintenance; hardwood offers timeless beauty, can be refinished, and adds resale value but costs more and needs care. Choose laminate for active homes or tight budgets; pick hardwood for long-term investment and authentic warmth.
| Feature | Quick comparison |
|---|---|
| Cost | Laminate lower |
| Durability | Laminate resists scratches |
Laminate vs Engineered Wood
Although both mimic real wood, laminate and engineered wood differ in construction, feel, and longevity, so you’ll want to weigh those factors against your budget and lifestyle.
Laminate uses a printed image layer over fiberboard with a hard wear layer—it’s durable, affordable, and low maintenance.
Engineered wood has a real wood veneer over plywood, offers authentic texture and refinishability, but costs more.
Laminate vs Vinyl (LVP/WPC)
Having compared laminate to engineered wood, you’ll also want to evaluate vinyl options like LVP and WPC, which compete directly with laminate on price and durability but differ in materials and performance.
You’ll find vinyl is typically more water-resistant, softer underfoot, and better for wet areas, while laminate offers a firmer feel and often more realistic wood visuals; installation and maintenance needs vary.
Laminate vs Tile
Curious how laminate stacks up against tile for your floors?
Laminate is warmer, softer underfoot, easier and quicker to install, and generally less expensive.
Tile wins on durability, water and heat resistance, and long-term resale appeal.
Choose laminate for budget-friendly, comfortable living areas; choose tile for wet rooms, high-traffic zones, or when you want a luxurious, hard-wearing surface.
How Laminate Flooring Is Installed
Before you start, acclimate the planks, check and prepare the subfloor, and do a moisture test so the installation will last.
Gather the right tools and materials, then roll out underlayment and plan your layout.
You’ll use the floating click‑lock method, cutting and fitting boards as you go and installing thresholds at doorways.
Preparation steps (acclimation, subfloor, moisture testing)
Three key preparation steps — acclimating the planks, ensuring a flat, clean subfloor, and conducting moisture tests — set the stage for a durable, gap-free laminate installation.
- Let boxes sit 48–72 hours in the room so boards stabilize.
- Remove debris, level high or low spots, and repair or replace damaged underlayers.
- Use a moisture meter and address excess moisture before you lay the flooring.
Tools and materials needed
You’ll need a handful of basic tools and a few specific materials to install laminate correctly: a tape measure, spacers, a tapping block, pull bar, rubber mallet, saw (miter or circular), utility knife, and a quality underlayment plus vapor barrier where required.
Also gather threshold strips, trim/molding, adhesive for trims, matching floor cleaner, safety gear (glasses, ear protection, knee pads), and extra planks for cuts and waste.
Step 1: Underlayment and layout planning
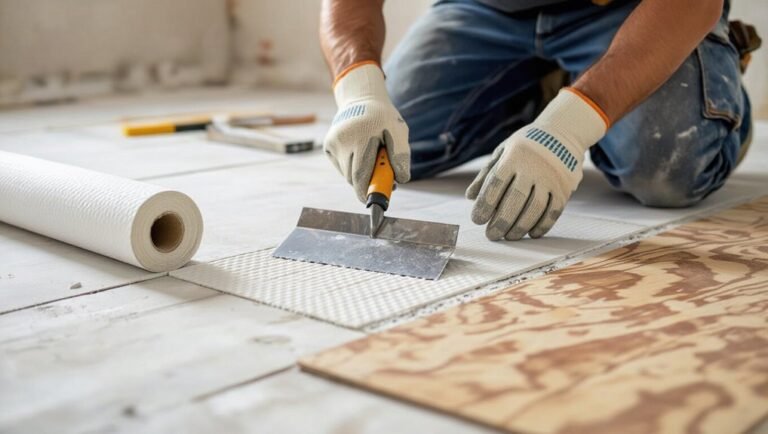
With your tools and materials staged, lay out the underlayment to create a flat, insulated base and plan the board pattern so installation goes smoothly.
Roll and trim underlayment, tape seams per manufacturer instructions, and check for level.
Measure room width, stagger end joints for strength and appearance, and mark starter lines.
Account for expansion gaps at walls before you begin laying panels.
Step 2: Floating installation technique (click-lock)
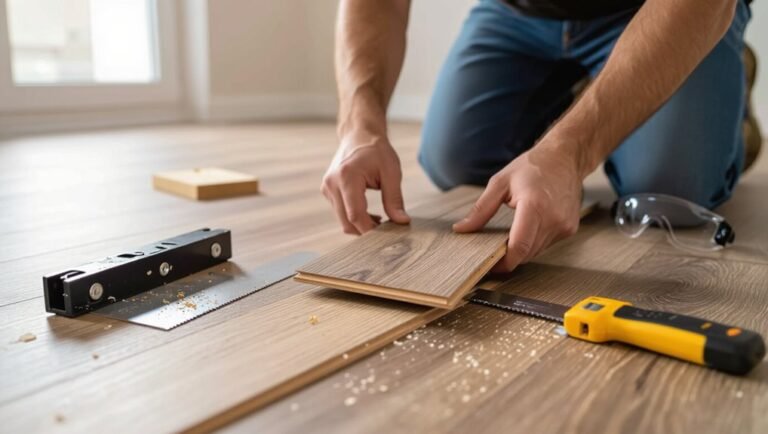
Start by placing the first row with the groove side facing the wall, keeping the required expansion gap and using spacers to maintain it.
Then click each plank into the previous one at a slight angle and press down to lock the joint, working row by row and tapping gently with a mallet and tapping block where needed to guarantee tight seams.
Continue aligning seams, check rows stay straight, and remove debris.
Step 3: Cutting, fitting, and transitions
Measure each end plank and mark precise cut lines before you cut, accounting for the expansion gap and any irregular walls. Use a carpenter’s square for straight cuts and a jigsaw or miter saw for notches and angled trims.
Fit planks snugly, stagger end joints per manufacturer guidelines, and trim door jambs for clearance. Install connectors at thresholds and room changes, securing them per system type.
Step 4: Finishing touches and cleanup
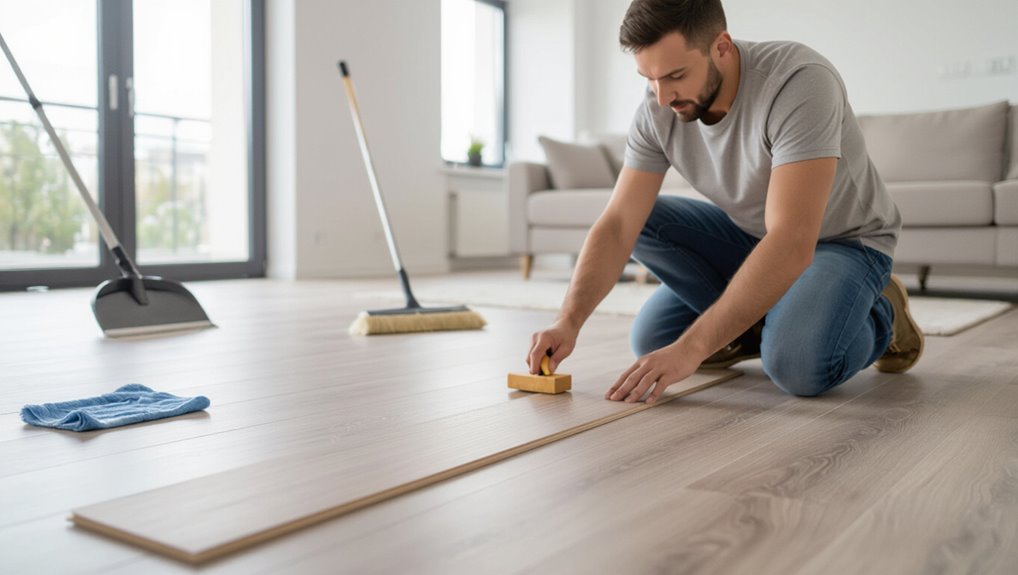
After the last plank’s tongue clicks into place and thresholds are secured, focus on finalizing gaps, trims, and cleanup so the floor looks professional and performs well.
Install molding and quarter round, guarantee expansion gaps remain clear, fill minor blemishes with matching putty, and remove spacers.
Clean thoroughly, letting adhesive cure if used, then reinstall furniture with felt pads to protect your new laminate.
Common Problems and Installation Mistakes
You’ll often spot problems like gapping, buckling, and cupping and need to know whether they’re caused by moisture, improper acclimation, or poor installation.
If you skip the right underlayment or ignore moisture barriers, the floor can fail quickly.
Also watch for visible seams, mismatched planks, and pattern errors when laying out and installing.
Gapping, buckling, and cupping causes
When laminate starts to gap, buckle, or cup, it’s usually because the flooring, subfloor, or environment wasn’t prepared or managed properly; common culprits include humidity swings, inadequate acclimation, improper underlayment, and incorrect expansion gaps or fastening methods.
You should monitor moisture and temperature, acclimate boards properly, leave correct perimeter gaps, avoid tight fastenings, and guarantee the subfloor is flat and stable to prevent movement.
Improper underlayment and moisture-related failures
Mistakes with underlayment and moisture control often show up after you’ve handled acclimation and gaps—because even well-laid boards will fail if the layer beneath them or the site’s moisture isn’t right.
If you skip vapor barriers, use wrong foam, or ignore subfloor moisture, joints swell, glue loosens, and planks lift.
Test moisture, choose compatible underlayment, and seal connections to prevent deterioration.
Visible seams, mismatched planks, and pattern issues
If planks don’t align or seams show, the floor looks amateur no matter how sound the installation is. That flaw usually comes from poor layout, inconsistent plank selection, or rushed cuts.
You should stagger joints, match plank batches for color and pattern, and plan cuts to keep repeats natural.
Take time measuring, dry-laying, and swapping mismatched pieces before locking them in.
Maintenance, Repair, and Longevity
To keep your laminate looking its best, you’ll learn simple routine cleaning and stain-removal techniques that won’t damage the wear layer.
If scratches, chips, or water issues occur, you’ll see which repair options work for minor fixes versus when replacement is smarter.
Finally, we’ll cover expected lifespan and the key factors—traffic, moisture, and maintenance—that determine how long your floor will last.
Routine cleaning and stain removal best practices
Because laminate holds up best when you stick to simple routines, regular sweeping, vacuuming with a hard-floor setting, and damp mopping with a manufacturer-approved cleaner will keep your floors looking like new and prevent grime from embedding in seams.
For stains, blot spills immediately, use a gentle cleaner or a diluted vinegar solution sparingly, and avoid abrasive pads or excessive water to prevent surface damage.
Repair options for scratches, chips, and water damage
Keeping up with simple cleaning habits also makes repairs easier when damage does occur, since grime and moisture can hide or worsen scratches, chips, and water intrusion.
For light scratches, use a repair kit or colored wax. Replace damaged planks for deep chips or swelling.
Dry promptly, lift boards to dry subfloor if water penetrates, and consult pros for widespread moisture issues.
Expected lifespan and factors that affect durability
Although laminate can last a decade or more, its actual lifespan depends on how it’s made and how you care for it. You can extend wear by choosing quality AC ratings, managing moisture, and preventing scratches.
Consider these factors:
- AC rating and core density determine baseline durability.
- Moisture exposure and installation quality affect longevity.
- Maintenance, traffic, and pet care influence wear and tear.
Buying Guide How to Choose the Right Laminate Flooring
When you’re ready to buy laminate, start by checking AC ratings and warranty terms so the floor matches your traffic and lasts as promised.
Pick color, texture, and plank size that suit the room’s light and scale, and compare material vs. labor costs to fit your budget.
Also look for certified standards and eco-friendly options if sustainability and indoor air quality matter to you.
Evaluating AC ratings and warranty terms
Start by checking the AC rating and the warranty side-by-side so you can match performance to expectations:
AC ratings show abrasion resistance—AC3 for homes, AC4/AC5 for heavy use—so pick based on traffic.
Then read warranty specifics: coverage length, residential vs. commercial, water and fade exclusions, and labor.
Confirm installation requirements to keep the warranty valid.
Choosing color, texture, and plank size for your space
After you’ve matched performance and warranty, shift attention to how the floor will look and feel in the room.
Pick color to set mood—light for openness, dark for warmth.
Match texture to use: smooth for easy cleaning, embossed for realism and slip resistance.
Choose plank width and length to complement room size and style; wider planks make spaces feel larger, narrower add detail.
Budgeting and cost breakdown (materials vs labor)
Budgeting for laminate means splitting your estimate into two clear parts: materials and labor. You’ll weigh plank quality, underlayment, and trim against installer time, complexity, and removal. Plan a contingency for surprises.
| Item | Typical cost |
|---|---|
| Materials | $1–$5 / sq ft |
| Labor | $1–$3 / sq ft |
Certified standards and eco-friendly options
You’ve already balanced material and labor costs, so next look at certified standards and eco-friendly options to protect your investment and the environment.
Check AC ratings for durability, FSC or PEFC for responsible wood sourcing, and FloorScore or GREENGUARD for low VOC emissions.
Choose boards with recycled content or formaldehyde-free core materials.
These certifications reduce health risks and improve resale appeal.
Tips and Best Practices
Before you start, get a few DIY installation tips to avoid common pitfalls like improper underlayment or uneven subfloors.
Watch seasonal and moisture factors—leave expansion gaps, acclimate planks, and use moisture barriers where needed.
Finish by planning how the flooring will sit with baseboards, rugs, and furniture to keep seams neat and changes smooth.
Installation tips for DIYers to avoid common pitfalls
Because mistakes can turn a straightforward laminate project into a costly redo, it pays to plan each step and follow proven techniques. Measure accurately, acclimate planks per manufacturer, and inspect for defects before installation.
Use proper underlayment, maintain expansion gaps, stagger end joints, and cut cleanly. Work slowly, test-fit rows, and keep tools sharp to avoid damage and wasted material.
Seasonal and moisture management tips
After nailing the basics of measurement, acclimation, and clean cuts, you’ll also need a plan for how seasonal changes and moisture affect your laminate.
Store and acclimate boards indoors before installing, leave expansion gaps, use proper underlayment and moisture barrier in damp areas, wipe spills immediately, maintain consistent indoor humidity (35–55%), and avoid wet-mopping to prevent warping and cupping.
Styling and pairing with baseboards, rugs, and furniture
Style choices make your laminate flooring look intentional—match baseboard height and profile to the floor’s thickness and trim style, pick rug sizes that show enough plank around the edges, and choose furniture finishes that complement the floor tone.
Balance contrast: light floors suit darker rugs and metals; warm tones pair with wood or brass.
Leave expansion gaps, protect high-traffic zones, and layer textiles for depth.
FAQs
You probably have questions about laminate, like whether it can handle moisture or be used in bathrooms and if it can be refinished or sanded.
You’ll also want to know how long it lasts, whether it’s pet-friendly, and if it can go over your existing flooring.
Below are clear answers to each of these common FAQs.
Can laminate flooring get wet or be used in bathrooms?
1 clear answer: traditional laminate isn’t waterproof and isn’t a great choice for bathrooms where standing water and high humidity are common.
You can use water-resistant or waterproof laminate options, seal joints, and maintain good ventilation, but avoid soaking.
Clean spills quickly and use bath mats.
For full wet areas, consider true waterproof flooring like vinyl or tile for long-term durability and peace of mind.
Can you refinish or sand laminate flooring?
Curious whether laminate can be refinished? You can’t sand or refinish traditional laminate because its decorative wear layer is a printed image sealed with a thin protective coating.
Instead, replace damaged planks or use repair kits for scratches.
For engineered products with real-wood top layers, light sanding and refinishing may work—check manufacturer guidelines before attempting any refinishing.
How long does laminate flooring last?
If your flooring can’t be refinished, you’ll naturally wonder how long it’ll hold up before replacement.
Laminate typically lasts 10–25 years depending on quality, installation, and care. Higher AC-rated planks and proper underlayment extend life.
Avoid moisture, heavy impacts, and neglect; clean regularly and use protectors.
Watch for wear layers thinning—then plan replacement rather than refinishing.
Is laminate flooring good for pets?
Wondering whether laminate flooring suits a pet-filled home? It often does. Durable wear layers resist scratches, clean easily, and won’t trap pet hair.
Choose water-resistant or waterproof AC-rated planks and soft rugs for high-traffic zones. Promptly wipe accidents to protect joints.
Keep nails trimmed and use protective pads under furniture to minimize damage and extend flooring life.
Can laminate be installed over existing flooring?
Can you install laminate over existing flooring? Yes—if the surface is level, dry, and secure.
You can lay laminate over vinyl, ceramic (with underlayment), or well-adhered hardwood.
Avoid cushioned vinyl, loose tiles, or uneven subfloors.
Remove carpet and trim thresholds.
Check manufacturer guidelines for height and warranty limits, and use proper underlayment and moisture barrier where recommended.